When your PC doesn’t respond to standard power controls, you’ll need a reliable external button that connects directly to your motherboard. You’ve got several solid options available, from basic wired switches to wireless remotes, each with specific features that address different setups. Before you pick one, though, you should understand which models actually deliver dependable performance and how to install them properly—which brings us to your first choice.
| PC Power Button with LED Extension Switch |

| Budget Essential | Cable Length: 1.7 meters | Connector Type: ATX (POWER LED+/-, POWER SW) | Housing Material: Plastic | VIEW LATEST PRICE | Read Our Analysis |
| PC Power Button with 118″ Cable & LED Indicator |

| Best Cable Length | Cable Length: 3 meters (118 inches) | Connector Type: 4-pin ATX (POWER SW+/LED+/-) | Housing Material: ABS plastic | VIEW LATEST PRICE | Read Our Analysis |
| XMSJSIY Metal Chassis Power Button Switch for PC |

| Premium Metal Build | Cable Length: 0.6 meters (60 centimeters) | Connector Type: ATX standard motherboard connectors | Housing Material: Stainless steel shell with nickel-plated aluminum alloy | VIEW LATEST PRICE | Read Our Analysis |
| OwlTree Desktop Computer External Power Button Switch |

| Most Versatile | Cable Length: 1.6 meters | Connector Type: Plug-in connector (4-way circuit) | Housing Material: Acrylic | VIEW LATEST PRICE | Read Our Analysis |
| OwlTree Remote PC Power Switch Wireless Desktop Button |
| Wireless Innovation | Cable Length: 0.4 meters (40 centimeters) | Connector Type: PCIe slot receiver with PWR-SW header cable | Housing Material: Full aluminum (wireless) | VIEW LATEST PRICE | Read Our Analysis |
More Details on Our Top Picks
PC Power Button with LED Extension Switch
The OwlTree PC036a serves as a budget essential solution—why struggle with a damaged chassis power button when you can install an external switch in minutes? Connect the POWER LED+, POWER LED-, and POWER SW connectors directly to your motherboard. Route the 1.7-meter cable through your optical drive position, back panel fan window, or expansion slot. The included 1-to-2 splitter enables compatibility with your existing power supply. Mount the switch using the adhesive stickers on any convenient surface. This normally open push-button switch features copper contacts and an IP65 rating, supporting reliable operation across various setups. The two-year warranty covers manufacturing defects.
- Cable Length:1.7 meters
- Connector Type:ATX (POWER LED+/-, POWER SW)
- Housing Material:Plastic
- Installation Method:Adhesive stickers (no drilling)
- Included Accessories:1-to-2 splitter, adhesive stickers, installation manual
- IP Rating:IP65
- Additional Feature:1 to 2 splitter included
- Additional Feature:2-year warranty coverage
- Additional Feature:Normally Open operation
PC Power Button with 118″ Cable & LED Indicator
Need to control your desktop PC from across the room or test multiple systems without crawling behind your case? The PC Power Button with 118″ Cable & LED Indicator solves this problem with a standard 4-pin ATX connector compatible with ~90% motherboards. Install the cable through your optical bay or rear vents using included 3M adhesive stickers—no drilling required. Connect POWER SW to SW_PW and match LED polarity to PLED+/–. The included splitter lets your original chassis button and extended switch work simultaneously. This 16 AWG copper cable handles 0.01 A at 5V, making it ideal for desk setups, server racks, or motherboard testing.
- Cable Length:3 meters (118 inches)
- Connector Type:4-pin ATX (POWER SW+/LED+/-)
- Housing Material:ABS plastic
- Installation Method:3M adhesive stickers (no drilling)
- Included Accessories:1-to-2 splitter, adhesive stickers, illustrated guide
- IP Rating:IP rating noted (rugged use)
- Additional Feature:1-to-2 splitter functionality
- Additional Feature:90% ATX motherboard compatible
- Additional Feature:LED polarity matching ensured
XMSJSIY Metal Chassis Power Button Switch for PC
Building a custom PC requires reliable hardware controls, and XMSJSIY’s premium metal build delivers durability for frequent use. The 12mm stainless steel button features a nickel-plated aluminum body with a 60cm cable that connects directly to your motherboard’s power header. You’ll get dual functionality: a power button for startup and shutdown, plus a reset button for system restarts. The integrated LED indicator operates at 3-6V and draws minimal current. Installation takes minutes—simply insert one cable end into your motherboard’s POWER/RESET jack and route the button through your chassis panel. The switch handles up to 3A at 220V AC/DC, making it fully compatible with standard ATX power supplies.
- Cable Length:0.6 meters (60 centimeters)
- Connector Type:ATX standard motherboard connectors
- Housing Material:Stainless steel shell with nickel-plated aluminum alloy
- Installation Method:Panel-mount push button (12mm diameter)
- Included Accessories:Computer host switch cable only
- IP Rating:IP65
- Additional Feature:Stainless steel/nickel-plated construction
- Additional Feature:High-brightness LED indicator
- Additional Feature:Max 3A current rating
OwlTree Desktop Computer External Power Button Switch
If your PC’s built-in power button is broken or unreachable, OwlTree’s most versatile external switch solves the problem with flexible wiring options. This acrylic push-button unit includes four circuits for power, restart, and two indicator lights. You can route the 1.6-meter cable through your optical drive bay, rear fan window, or expansion slot—giving you placement freedom for awkward chassis designs. The normally open contact type handles 120 watts, making it compatible with standard desktops. With its 4.7-star rating from 525 reviews, users confirm it delivers reliable performance. Simply connect the appropriate pins on your motherboard’s front panel header, position the button where you need it, and power on your system without reaching inside your case.
- Cable Length:1.6 meters
- Connector Type:Plug-in connector (4-way circuit)
- Housing Material:Acrylic
- Installation Method:Panel mount with adhesive stickers
- Included Accessories:1.6m cable only
- IP Rating:IP65
- Additional Feature:4-way circuit configuration
- Additional Feature:Dual boot/restart buttons
- Additional Feature:120 watts wattage capacity
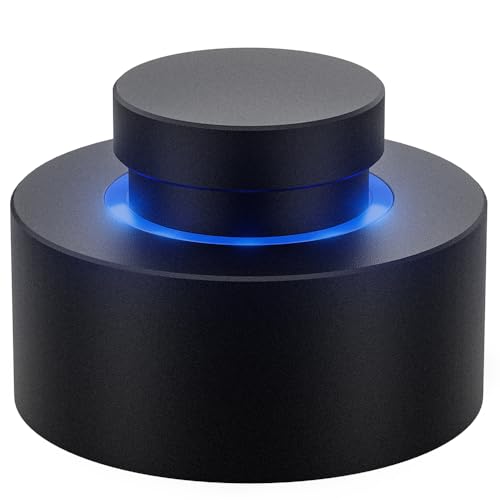
OwlTree Remote PC Power Switch Wireless Desktop Button
The OwlTree Remote PC Power Switch delivers wireless innovation for anyone whose desktop sits in an inconvenient location—under a desk, inside a cabinet, or within a confined space where reaching the motherboard power button proves difficult. This full-aluminum wireless switch pairs a desktop button with a PCIe-compatible receiver, letting you relocate your power control to wherever you need it. The receiver fits x1, x4, x8, or x16 slots, and installation requires connecting the included 40cm PWR-SW header cable to your motherboard. Charge the button via USB-C, which lasts up to 30 days per charge. You’ll appreciate the durable aluminum construction for both longevity and reliable wireless signal transmission.
- Cable Length:0.4 meters (40 centimeters)
- Connector Type:PCIe slot receiver with PWR-SW header cable
- Housing Material:Full aluminum (wireless)
- Installation Method:Wireless receiver (PCIe slot compatible)
- Included Accessories:Signal receiver, splitter, PWR-SW header cable, USB-C rechargeable
- IP Rating:Not specified
- Additional Feature:Wireless remote control functionality
- Additional Feature:USB-C rechargeable (30 days)
- Additional Feature:PCIe slot compatibility
Factors to Consider When Choosing an External PC Power Button
When you’re selecting an external PC power button, you’ll need to examine five key factors that directly impact performance and usability: cable length and reach, motherboard compatibility standards, installation and mounting options, build quality and materials, and LED indicator functionality. Each factor serves a specific purpose—cable length determines whether you can position the button conveniently on your desk, compatibility standards ensure the button connects properly to your motherboard’s power pins, and mounting options affect how securely you can install it. Build quality and materials protect your investment from wear, while LED indicators provide visual feedback that your PC is responding to your commands.
Cable Length and Reach
How far do you need your external power button to reach from your PC’s motherboard? Cable length directly determines placement flexibility. Options typically range from 60 centimeters (about 24 inches) to 118 inches (3 meters). Measure the distance between your motherboard and your desired button location before purchasing.
Longer cables let you mount the button on your desk or external panel, away from cramped case interiors or server racks. You’ll gain convenient access for frequent power cycling without reaching into tight spaces.
Select cables with quality materials like 16 AWG copper, which minimize voltage drop and signal interference over extended runs. Verify that extension cables include splitters, allowing your extended button to work alongside the original chassis switch. Confirm 4-pin ATX-compatible connectors and proper LED polarity match your motherboard’s specifications.
Motherboard Compatibility Standards
Most external PC power buttons rely on standard ATX motherboard connectors—specifically the 4-pin JFP1 or F_PANEL header—to communicate power and LED signals with your system. Before purchasing an external button, ensure your motherboard supports ON-OFF control via the POWER SW and LED lines. Check your motherboard manual for the front-panel header pinout and confirm pin spacing matches your external button’s connector. Pay attention to polarity requirements for LED indicators; incorrect connections won’t damage hardware but will leave lights non-functional. Some motherboards use normally open configurations while others use normally closed, so match your button type accordingly. Finally, ensure your motherboard can supply the low current demands—typically 0.01–3A—that external switches require during operation.
Installation and Mounting Options
Once you’ve confirmed your motherboard supports the standard ATX power switch header, you’ll need to decide how to physically position your external button and route its cables to the motherboard. You have two primary mounting methods: panel-mount installation, which requires drilling a hole into your case or desk, and adhesive mounting using 3M stickers for damage-free placement. Panel-mount options offer permanent, secure positioning. Adhesive options work well on flat surfaces without modification. Next, measure the distance from your motherboard to the intended button location to select appropriate cable length—options typically range from 60 centimeters to 118 inches. Finally, connect the wiring to your motherboard’s JFP1/F_PANEL header using a 1-to-2 splitter if you’re keeping your original chassis button functional.
Build Quality and Materials
What materials’ll actually hold up in your setup? Check the housing first—acrylic, aluminum alloy, and stainless steel resist damage and corrosion in desktop environments. Next, examine the contact materials, typically copper, and verify the contact resistance measures at or below 50 mΩ for dependable switching performance. Inspect the LED components and confirm the rated LED current stays at or under 20 mA to prevent circuit overload and maintain consistent illumination. Review the cable and connector quality, looking for 3- or 4-pin ATX-compatible connectors with lengths ranging from 60 cm to 118 inches. If your setup involves exposure to dust or moisture, confirm an IP65 rating or better. These specifications directly determine how long your external power button functions reliably.
LED Indicator Functionality
Beyond the physical durability you’ve verified, your external power button’s LED indicator determines whether you’ll actually see your PC’s power state at a glance. Check that the LED operates within 3V to 6V with current draw limited to 20 mA or less. Verify the indicator matches your motherboard’s PLED+ and PLED− headers directly, or confirm built-in drivers support extended cabling without polarity issues. Color-coded LEDs communicate status clearly—red typically signals restart, blue indicates power on. If you’re installing in exposed environments, select IP65-rated enclosures that protect the LED and circuitry from dust and moisture. Test the indicator after connection to confirm it accurately reflects your PC’s current power state before relying on it daily.
Final Thoughts
You’ve reviewed five external PC power button options. Choose based on your needs: pick the OwlTree PC036a for standard wiring, the 118″ cable model if you need extended reach, or the XMSJSIY for dual power/reset control. Verify motherboard header compatibility, check LED polarity, test connections before final installation, and secure your chosen unit with appropriate mounting. These steps ensure reliable operation.
Meet Ry, “TechGuru,” a 36-year-old technology enthusiast with a deep passion for tech innovations. With extensive experience, he specializes in gaming hardware and software, and has expertise in gadgets, custom PCs, and audio.
Besides writing about tech and reviewing new products, he enjoys traveling, hiking, and photography. Committed to keeping up with the latest industry trends, he aims to guide readers in making informed tech decisions.