Any digital artist will be familiar with Wacom products. Ever since the company’s inception, their drawing tablets have become the standard for digital art. It might seem like a simple concept, but Wacom has developed advanced sensing features that allow their tablets to go far beyond your typical “stylus and pad” system. The tablet can sense the pens direction, pressure, and speed to accurately model an equivalent brush stroke. Although these tablets were revolutionary several years ago, they’ve become pretty commonplace these days. We can’t say that we’ve seen a particularly exciting release from Wacom in several years. But with the release of the Intuos 3D, they’ve once again gone back to their roots. Let’s take a look and see how easy it is to model 3d objects with a tablet.
First Looks
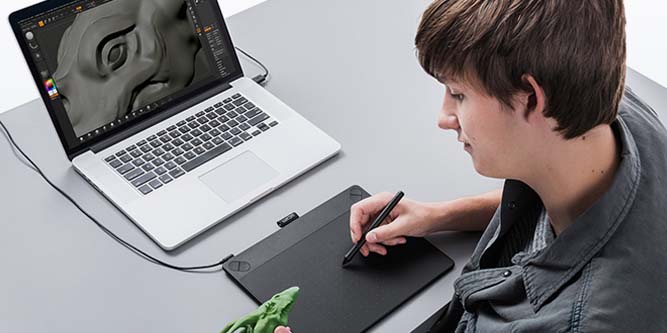
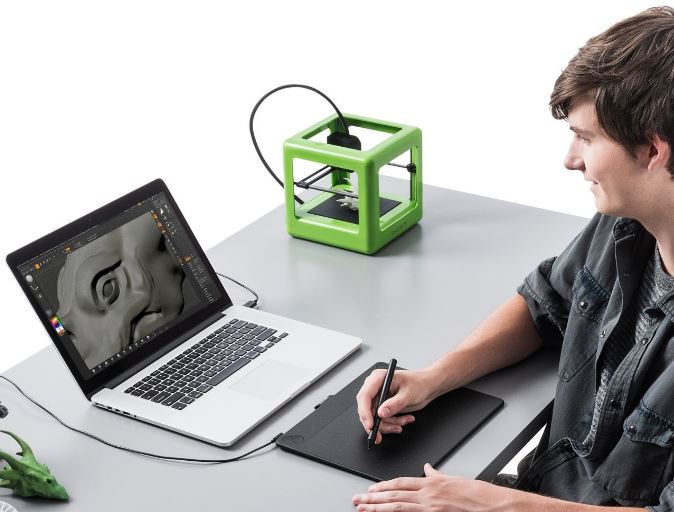
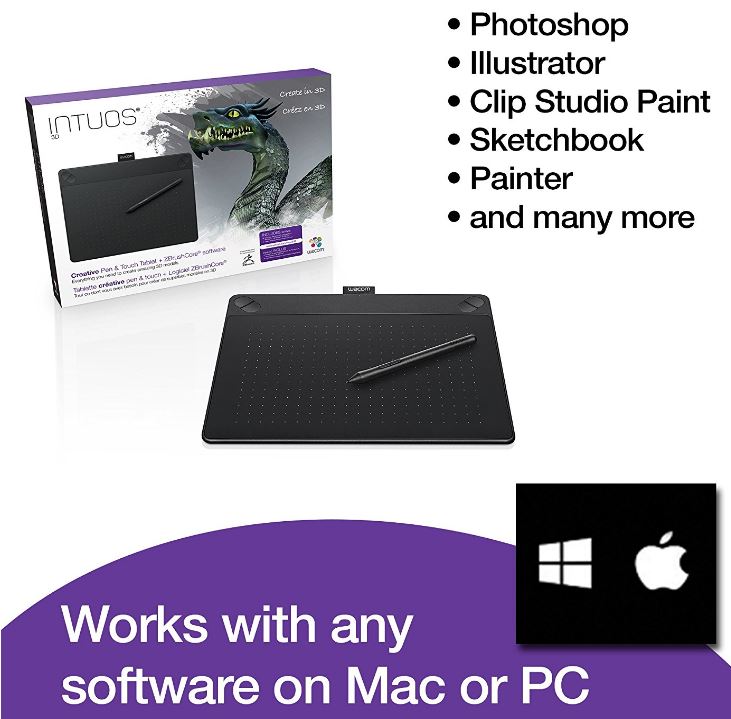
Once you bring the Wacom Intuos 3D Pen and Touch Tablet home, you’ll realize that it’s actually two products in one. The “Intuos” line has been on the market for a while, but only as a standard drawing tablet. Despite all of the additional features in the Intuos 3D, the hardware looks virtually identical to the older model. Aside from a few internal tweaks, the 3D modelling capability actually comes from Pixologic’s ZBrushCore 3D design software. Although this program is available individually, the standard version only has rudimentary support for tablets. This version has been totally revamped to work with Intuos pen, so let’s take a look and see how it performs.
Set Up
The Wacom Intuos 3D is a pretty specialized piece of equipment, so there’s a bit of a setup procedure to get everything working. Before you plug anything in, you have to install the driver first. There is a CD included that has the drivers on it, but disc drives are becoming less and less common these days.
Instead, you might as well head to the Wacom website and download the latest drivers. Simply click on the driver installation program, wait for the software to install, and you’ll be prompted to connect your tablet to a free USB port. There’s no indication that the tablet is working, so simply move the pen to any corner of the draw-space. If the mouse moves, then you’ll know it’s working. You may want to open the Wacom configuration software located in the control panel. This allows you to adjust sensitivity, switch the tablet to left handed mode, activate touch control, and several other pages of options. If you’re a complete beginner, you’ll want to leave this be. But experienced users are able to get the tablet working exactly the way they want it.
Installing the software is much easier than the drivers. There’s a disc included, but the printed manual tells you where to find a direct download from the internet. Once the ZBrushCore program is installed, you’re up and running!
Design
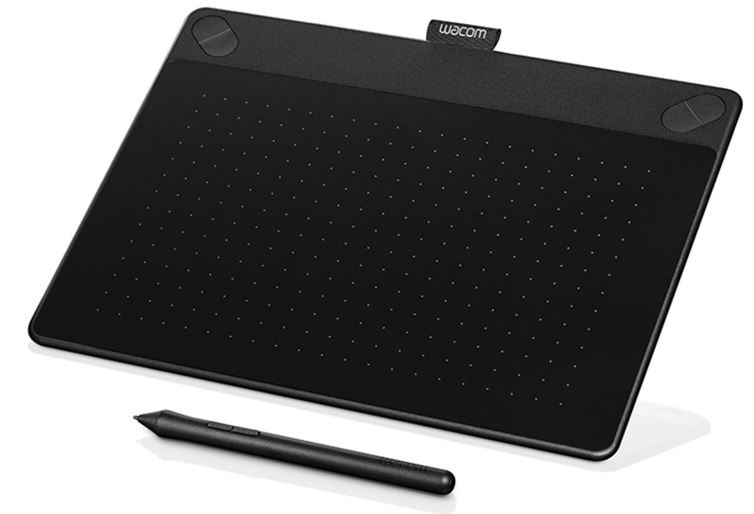
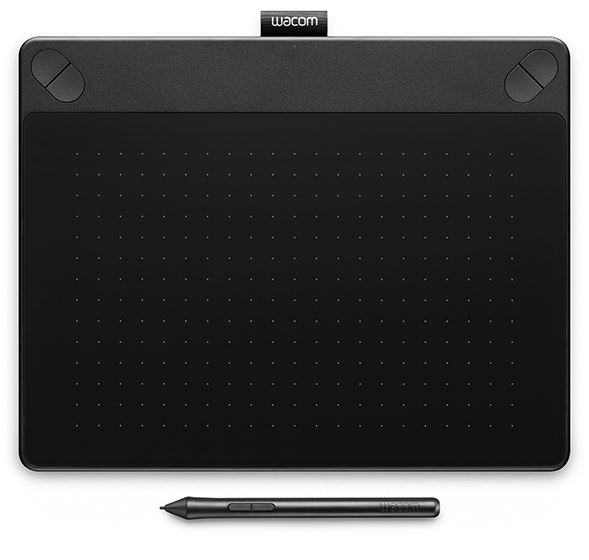
Because most of the tablet surface area is covered with the sensing pad, the design options are quite limited. Fortunately, the Intuos 3D looks a little sleeker than competing tablets. It’s got a subdued matte black design, ensuring that it won’t clash with your other electronic equipment. For those of you who want to make a statement, the tablet will eventually be released in Mint Blue. Unless you purchase a special wireless adapter, you’ll have to physically connect the tablet to your computer.
For most users, this won’t be a problem. The cable is intelligently shaped to tuck in behind the tablet. Because this is not really something that you’ll be picking up and moving all the time, we found that the cord never really bothered us. As for the size, it’s a little on the compact side where tablets are concerned. The sensing area is 8.5″ by 5.3″, comparable to a sheet of paper folder in half. If all you’re doing is 3D work and the occasional drawing, this should be perfect. But if you’re looking to digitize large art prints, you might want to go with a dedicated drawing tablet.
3D Modelling
How exactly does 3D modelling work with the Wacom Intuos 3D? If visions of magically drawing 3D objects in real space came to mind, you might be a little disappointed. But we believe that Wacom has come up with an even more brilliant system.
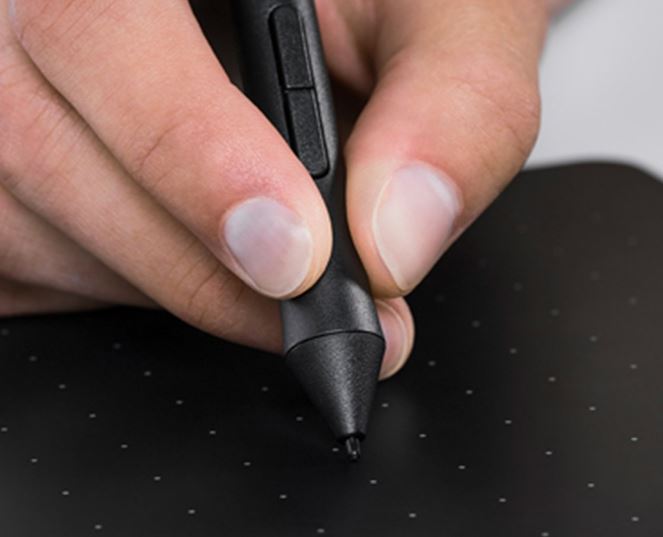
The pen still interacts with the tablet as usual, but you have more than just the X and Y axes to play with. The pen is also capable of sensing pressure and distance from the tablet, giving you a third axis with a tactile response.
If you’ve never used 3D modelling software before, ZBrushCore operates a lot like Adobe Photoshop. There are a huge number of tools, functions, and macros that can be used to create your 3D models. It definitely feels a little intimidating at first, but there are plenty of free tutorials online that explain how to use the program. We had no experience with 3D modelling when we pick up our pen, but we became pretty proficient at it in a matter of hours.
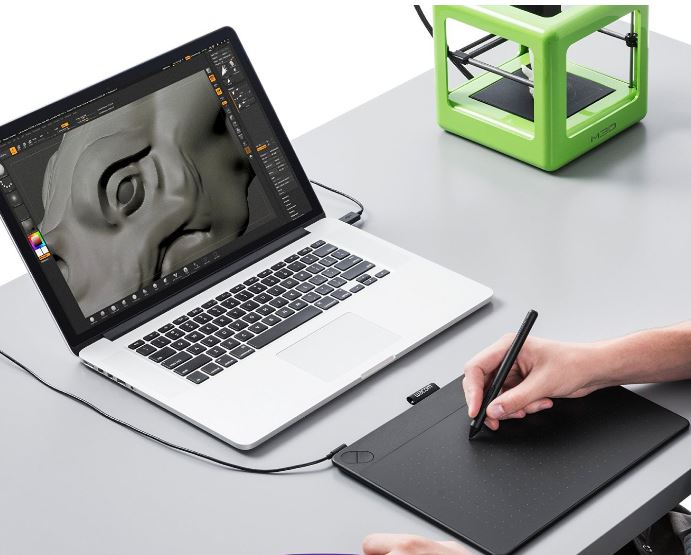
Despite how complicated the interface looks at first, it’s actually incredibly intuitive. You start with a basic shape. Perhaps a cylinder, a cube, or anything you want. This will be the foundation of your model. You then select one of the tools that you will use to manipulate your model. You have complete control over the size and shape of your tool. You can have large flat ones, tiny precise ones, or even shaped scoops. These tools work on your 3D model the same way that your hands would work on clay. Moving the pen around the tablet will move the tool around your model. Touching the pen to the surface of the tablet causes your tool to make contact with your model. You can then push, pull, scrape, or cut the material the same way you would playdough. The harder you press the pen into the tablet, the deeper your tool will go into your model. It sounds complicated, but the system is very intuitive.
Spatial Design
Apple created one of the first graphical operating systems. They weren’t the first to market, but Apple’s interface was successful because it used spatial design. Programs were represented by icons that illustrated their function. By taking unknown concepts and representing them in a way that anyone could understand, the software was easy to learn. This is exactly what the Intuos 3D does. You don’t need to understand polygon structure, nurb placement, or subdivision surfaces. If you’ve ever used a pen and played with Play-Dough, then you already have the skills necessary to start creating your own 3D models. Likely, you’ll have it figured out the same day you pick it up.
Additional Features
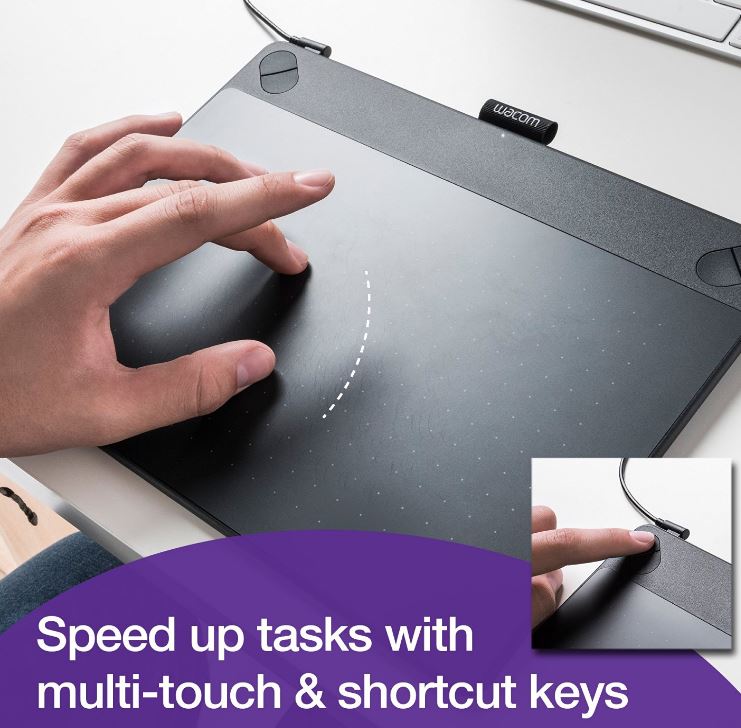
This is much more than just a 3D modelling tablet. You also have access to all of the other features that come along with Wacom’s product lines. If you’re a fan of trackpads, you may be surprised to learn that the Intuos doubles as one of the best trackpads on the market. There’s a small switch right by the charging port. Flipping it will switch the tablet into touch mode. Now you can just use your fingers on the surface the same way you would use a trackpad. Because of the large surface area, the Intuos is more sensitive and accurate than any other trackpad. This is especially evident when using multi-touch gestures.
You can also use the Intuos 3D for all the same applications as the standard Intuos. If you’re looking to create art, the tablet is natively compatible with the entire range of Adobe products, most notably Photoshop and Illustrator.
ZBrushCore is perfect for learning the principles of 3D modelling, and creating your own unique art. But once you get the hang of it, you might want to work with some advances software that has more real-world applications. AutoDesk Maya is one of the industry standard modelling programs if you are working with video games or animation. The program is not included, but it’s already natively optimized for use with Wacom tablets.
So, Should I Get the Wacom Intuos 3D?
If you’re interested in breaking into 3D modelling, the Wacom Intuos 3D Pen and Touch Tablet is easily the most accessible option. Not only is ZbrushCore the easiest modelling software to grasp, but the fact that it’s included with the tablet makes it a great deal. If you were to purchase a standard Wacom Intuos with the software separately, you’d wind up paying quite a bit more for the package. For an affordable price, you’ll be able to create your own digital 3D art, make simple animations, and even work your way up to using industry standard modelling software.
There are two types of people who wouldn’t be able to benefit from the Intuos 3D. If you’re already working as a 3D designer or animator, you may find that this tablet is a little simplistic for your needs. Typically, 3D professionals use a pen display – a combination tablet and monitor. But if you’re a hobbyist or haven’t yet broken into the industry, then the Intuos 3D is the cheapest and easiest way to get into 3D modelling.
Meet Derek, “TechGuru,” a 34-year-old technology enthusiast with a deep passion for tech innovations. With extensive experience, he specializes in gaming hardware and software, and has expertise in gadgets, custom PCs, and audio.
Besides writing about tech and reviewing new products, Derek enjoys traveling, hiking, and photography. Committed to keeping up with the latest industry trends, he aims to guide readers in making informed tech decisions.
What’s the surface like? Is it rough? Smooth? Will it wear out the nib quickly? Also, wouldn’t it be cheaper to use Blender and an Intuos Draw?
Also, what advantages does this have vs ZBrushCore with an Intuos Draw? I wouldn’t like to buy another wacom just for the software.
I am aiming to a good intuos draw pad with a budget of 200 or a few more € to do 2d sketchs with a higher definition and the 3d version seems to have more resolution (regarding to preassure points) my qwestion is, firstly , should I buy this draw pad if i want to do 2d drawing with a greater definition? ealse which one should I buy?
I am really confused about this !please help me!