
If you’ve run out of USB ports on your motherboard and need to connect multiple devices inside your case, you’ll want an internal USB hub. These hubs expand your available connections by connecting to your motherboard’s USB headers. They offer different port counts, power options, and mounting styles. Understanding your specific needs will help you pick the right hub for your setup—but which features matter most?
| NZXT Internal USB Hub 3 – 4 USB 2.0 Ports |

| Most Reliable Choice | USB 2.0 Ports: 4 ports | Power Connection: SATA power connection | Mounting Method: Magnetic body with 3M dual lock tape | VIEW LATEST PRICE | Read Our Analysis |
| Corsair Internal 4-Port USB 2.0 Hub |

| Best for Mini Builds | USB 2.0 Ports: 4 ports | Power Connection: SATA power connection | Mounting Method: Magnetic attachment | VIEW LATEST PRICE | Read Our Analysis |
| Hyte Powered Internal USB Hub 4-Port Expansion |
| Best Design & Features | USB 2.0 Ports: 4 ports | Power Connection: Built-in powered (no external power specified) | Mounting Method: Built-in magnets with adhesive strip | VIEW LATEST PRICE | Read Our Analysis |
| Thermalright Internal USB 2.0 Hub X5 with Magnetic Mount |
| Most Ports Available | USB 2.0 Ports: 5 ports | Power Connection: SATA power connection | Mounting Method: Magnetic mounting | VIEW LATEST PRICE | Read Our Analysis |
| Multi Port Internal USB Hub 9Pin Splitter |

| Best Value | USB 2.0 Ports: 5 ports | Power Connection: SATA auxiliary power connector | Mounting Method: Double-sided tape adhesion | VIEW LATEST PRICE | Read Our Analysis |
More Details on Our Top Picks
NZXT Internal USB Hub 3 – 4 USB 2.0 Ports
Are you running out of internal USB 2.0 ports on your motherboard? The NZXT Internal USB Hub 3 solves this problem by expanding your connectivity to four additional USB 2.0 ports. Install it by mounting the compact plastic hub using the included 3M dual lock tapes or magnetic body inside your case. Connect the motherboard header to your system’s USB header, then attach your SATA power cable for stable operation. Once installed, you can connect up to four USB 2.0 devices simultaneously, including all-in-one liquid coolers, fan controllers, and lighting accessories. The plug-and-play design requires no software installation. With a 4.7-star rating from over 2,600 reviews, this hub delivers reliable performance for expanding your PC’s internal connectivity needs efficiently.
- USB 2.0 Ports:4 ports
- Power Connection:SATA power connection
- Mounting Method:Magnetic body with 3M dual lock tape
- Data Transfer Rate:Not specified
- Installation Type:Plug and play
- Color:Black
- Additional Feature:Magnetic body with dual-lock tapes
- Additional Feature:Compact hidden mounting design
- Additional Feature:Compatible with liquid coolers/controllers
Corsair Internal 4-Port USB 2.0 Hub
If you’ve maxed out your motherboard’s USB 2.0 ports and need to connect internal devices like RGB controllers, AIO pump headers, or fan hubs, the Corsair Internal 4-Port USB 2.0 Hub expands your connectivity without requiring case modifications. You’ll connect the hub to your motherboard’s USB 2.0 header and attach a SATA power cable for operation. The magnetic enclosure lets you position it on any metal surface inside your case, making it ideal for tight spaces and Mini-ITX builds. It supports up to 480Mbps bandwidth across four devices simultaneously and works with Intel and AMD systems. Installation takes minutes and requires no additional software or drivers.
- USB 2.0 Ports:4 ports
- Power Connection:SATA power connection
- Mounting Method:Magnetic attachment
- Data Transfer Rate:480 Mbps
- Installation Type:Plug and play
- Color:Black
- Additional Feature:Fits Mini-ITX cases
- Additional Feature:Magnetic surface attachment
- Additional Feature:2-year manufacturer warranty
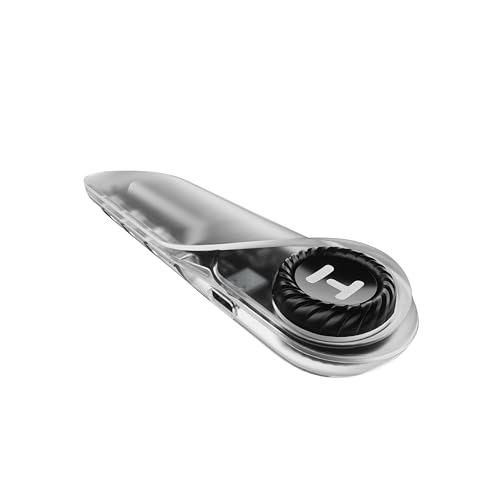
Hyte Powered Internal USB Hub 4-Port Expansion
The Hyte Powered Internal USB Hub works best for PC builders and enthusiasts who need to expand their motherboard’s USB 2.0 header capacity without adding external devices. This hub transforms one USB 2.0 header into four powered outputs, supporting 480 Mbps data transfer rates. You’ll attach it inside your case using built-in magnets or the included adhesive strip. The metal enclosure features recessed ports for clean cable management, and a rotary power switch lets you troubleshoot easily. An illumination indicator shows when power’s active. The hub supports Windows, macOS, and Linux, offering plug-and-play installation with a three-year manufacturer warranty.
- USB 2.0 Ports:4 ports
- Power Connection:Built-in powered (no external power specified)
- Mounting Method:Built-in magnets with adhesive strip
- Data Transfer Rate:480 Mbps
- Installation Type:Plug and play
- Color:Crystal
- Additional Feature:Rotary power switch included
- Additional Feature:Power-on illumination indicator
- Additional Feature:Recessed unidirectional ports design
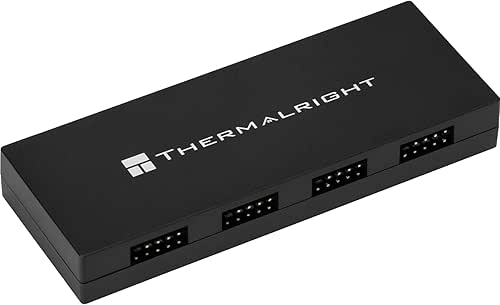
Thermalright Internal USB 2.0 Hub X5 with Magnetic Mount
Looking to expand your PC’s internal USB connectivity without cluttering your case with cables and brackets? The Thermalright Internal USB 2.0 Hub X5 delivers five USB 2.0 ports through 9-pin connectors on your motherboard. You’ll connect SATA power directly to the hub for stable, reliable operation across all ports. The magnetic mounting system lets you attach it to your case interior without tools or adhesive, saving installation time. This compact design measures 4.13″ x 1.57″ x 0.59″, fitting easily in tight spaces. Use it to connect RGB controllers, fan hubs, and other internal devices that need USB headers.
- USB 2.0 Ports:5 ports
- Power Connection:SATA power connection
- Mounting Method:Magnetic mounting
- Data Transfer Rate:Not specified
- Installation Type:Tool-free setup
- Color:Black
- Additional Feature:5 USB 2.0 ports
- Additional Feature:Tool-free magnetic mounting
- Additional Feature:Compact 4.13″ x 1.57″ form factor
Multi Port Internal USB Hub 9Pin Splitter
Need to expand your motherboard’s USB header capacity without adding external hubs? This 9pin splitter gives you five internal USB 2.0 ports from a single motherboard connection. You’ll get three 9pin headers, one Type-E port, and one regular USB port for internal devices. Connect the 11.8-inch upstream cable to your motherboard’s USB header. Attach the SATA power connector to your power supply for high-power devices. Install the hub inside your chassis using the included double-sided tape or mounting hardware. All ports operate at USB 2.0 speeds, so they’re compatible with keyboards, mice, and other standard peripherals that don’t require USB 3.x performance.
- USB 2.0 Ports:5 ports
- Power Connection:SATA auxiliary power connector
- Mounting Method:Double-sided tape adhesion
- Data Transfer Rate:USB 2.0 rates (480 Mbps implied)
- Installation Type:Plug and play
- Color:Not specified
- Additional Feature:Expands 5 total ports
- Additional Feature:11.8-inch upstream cable length
- Additional Feature:Type-E port included
Factors to Consider When Choosing Internal USB Hubs
When you’re selecting an internal USB hub for your PC setup, you need to evaluate several key factors: the number of ports you require, the power delivery method that supports your devices, and the mounting options that fit your case layout. First, determine your port count by listing all internal USB devices you’ll connect, then choose a hub configuration that matches or exceeds that need. Second, decide whether you need a hub with independent power delivery or one that draws power from your motherboard’s internal connector, based on the power demands of your connected devices and your power supply’s capacity.
Best Internal USB Hubs
What should you evaluate before selecting an internal USB hub for your PC? First, check your motherboard’s USB 2.0 header type—most use standard 9-pin connectors. Next, determine how many ports you need; internal hubs typically expand 4–5 ports from a single header. Consider your case’s available space and whether you’ll use magnetic or adhesive mounting for clean installation. Verify power requirements: many hubs draw power via SATA connections for stable operation. Check your operating system compatibility, though most models support Windows, Linux, and macOS. Remember that all USB 2.0 hubs max out at 480 Mbps regardless of port count. Finally, evaluate convenience features like built-in power switches or recessed ports that improve cable management inside your chassis.
Factors to Consider When Choosing Internal USB Hubs
Selecting the right internal USB hub requires you to evaluate several specific factors before making your purchase. First, check your motherboard’s available USB 2.0 headers to confirm compatibility. Next, determine how many ports you need—most hubs provide 4–5 ports per device. Consider your power requirements: if you’re connecting multiple high-power devices, choose a hub with SATA power connection for stable delivery. Evaluate mounting options based on your case layout; magnetic mounting, adhesive strips, and tool-free installation each suit different setups. Review the upstream interface type, whether it’s a 9-pin header or direct motherboard connection. Finally, verify broad OS support for your system, ensuring Windows, macOS, or Linux compatibility. These steps guarantee you’ll select a hub matching your specific PC configuration and device needs.
Port Count And Configuration
How many internal ports do you actually need? Count your devices first—front panel connectors, wireless modules, and RGB headers all require USB 2.0 connections. Most users find 4-port hubs sufficient, though 5 or 6-port models offer flexibility for future expansion.
Next, examine your motherboard layout. Check how many 9-pin USB headers you have available. Some splitter designs use multiple headers to achieve larger port counts, so verify compatibility before purchasing.
Finally, consider power requirements. Basic 4-port hubs operate from motherboard power alone. However, models with five or more ports typically need SATA power connectors to maintain stable operation. Calculate your total power draw and confirm your PSU can handle the additional load. This step prevents unexpected shutdowns or device failures.
Power Delivery Method
Since you’re connecting multiple devices to a single hub, you’ll need to decide between motherboard power alone and supplemental SATA power based on your device count and power requirements. Motherboard headers provide basic power for low-demand devices like keyboards and mice. However, when you’re running multiple high-power devices simultaneously, SATA power connections prevent under-voltage issues and ensure stable delivery across all ports. Some hubs feature built-in switches and LED indicators that show power status, helping you monitor delivery reliability. Magnetic mounting hubs maintain compact designs while delivering consistent internal power. Evaluate your specific devices first—count how many need simultaneous power and their individual requirements. Then select a hub with appropriate power sourcing to prevent performance drops or device disconnections during operation.
Mounting And Installation Options
Where you position your internal USB hub inside your case matters just as much as the hub itself. You’ll find three primary mounting methods to choose from. Magnetic bases let you attach the hub directly to metal chassis walls without tools or adhesive, offering the quickest installation. Adhesive strips or double-sided tape provide a permanent solution for positioning hubs in tight spaces where magnetic mounting won’t work. Some hubs feature integrated magnets for secure attachment to ferrous surfaces. For optimal cable management, tuck the hub away against the case interior to keep wires concealed and maintain airflow. Select hubs with recessed ports or compact dimensions if you’re building with Mini-ITX cases, where space is limited. Match your installation method to your case type and airflow requirements.
Compatibility With Motherboards
What’ll determine whether your internal USB hub works with your system is motherboard header compatibility, which you’ll need to check before purchasing. Review your motherboard’s manual to identify available USB headers—most boards feature 9-pin USB 2.0 headers. Count how many headers your motherboard has and their locations, as space constraints may affect hub placement. Match your hub’s connector type to your motherboard’s available headers; incompatible connectors won’t fit. Some hubs require SATA power connections for stable operation, so verify your power supply supports this. Check your case dimensions against the hub’s form factor to ensure it fits in tight spaces. Once you’ve confirmed header availability and power requirements, installation becomes straightforward. This compatibility check prevents purchasing incompatible equipment.
Final Thoughts
You’ll maximize your PC setup by selecting an internal USB hub that matches your specific needs. Count your required ports, check your motherboard’s available headers, and decide between magnetic or adhesive mounting. If you need powered expansion, choose the Hyte model. For standard applications, the NZXT or Corsair options work well. Install your chosen hub securely, connect it to your motherboard header, and organize cables for optimal airflow.
Meet Ry, “TechGuru,” a 36-year-old technology enthusiast with a deep passion for tech innovations. With extensive experience, he specializes in gaming hardware and software, and has expertise in gadgets, custom PCs, and audio.
Besides writing about tech and reviewing new products, he enjoys traveling, hiking, and photography. Committed to keeping up with the latest industry trends, he aims to guide readers in making informed tech decisions.