You’re drowning in desk clutter, and your mini PC’s taking up valuable workspace. A quality mini PC stand solves this problem by mounting your device vertically on your monitor, wall, or under your desk. You’ll reclaim surface space, improve airflow around your PC, and organize cables more effectively. But choosing the right stand means understanding VESA compatibility, weight capacity, and installation requirements—and we’ve got eight proven options that’ll transform your setup.
| VIVO Adjustable Thin Client Mini PC Mount Bracket |

| Most Versatile | Mounting Options: Monitor rear, monitor pole clamp, under-desk | VESA Compatibility: 75x75mm, 100x100mm | Weight Capacity: Up to 5 kg | VIEW LATEST PRICE | Read Our Analysis |
| Mini PC Wall Mount for Dell OptiPlex Micro |

| Dell OptiPlex Specialist | Mounting Options: Wall mount, monitor back (VESA), under-desk | VESA Compatibility: 75x75mm, 100x100mm | Weight Capacity: Not specified | VIEW LATEST PRICE | Read Our Analysis |
| Universal Mini PC Desk Stand for Dell HP Lenovo |
| Multi-Brand Compatible | Mounting Options: Desk stand (no mounting required) | VESA Compatibility: Not specified | Weight Capacity: Not specified | VIEW LATEST PRICE | Read Our Analysis |
| Mini PC Mount Compatible with Dell OptiPlex Micro |
| Best Overall | Mounting Options: Monitor back (VESA), monitor stand, wall, under-desk | VESA Compatibility: 75x75mm, 100x100mm | Weight Capacity: Not specified | VIEW LATEST PRICE | Read Our Analysis |
| 2 Pack Mini PC Mount for Dell Micro Form Factor |

| Best Value Pack | Mounting Options: Monitor back (VESA), wall, under-desk | VESA Compatibility: 75x75mm, 100x100mm | Weight Capacity: Not specified | VIEW LATEST PRICE | Read Our Analysis |
| Universal Wall and VESA Mount for Micro PC |
| Universal Solution | Mounting Options: Wall mount, monitor back (VESA) | VESA Compatibility: Not specified (wall and VESA mount capable) | Weight Capacity: Not specified | VIEW LATEST PRICE | Read Our Analysis |
| HumanCentric Mounting Bracket for Intel NUC |
| Intel NUC Expert | Mounting Options: VESA monitor arm or wall mount (requires Intel NUC bracket) | VESA Compatibility: 75x75mm, 100x100mm | Weight Capacity: Not specified | VIEW LATEST PRICE | Read Our Analysis |
| Adjustable Thin Client Mount Bracket for Mini PC |
| Heavy-Duty Pick | Mounting Options: Monitor arm, stand pole, under-desk | VESA Compatibility: 75x75mm, 100x100mm | Weight Capacity: Up to 11 lbs (5 kg) | VIEW LATEST PRICE | Read Our Analysis |
More Details on Our Top Picks
VIVO Adjustable Thin Client Mini PC Mount Bracket
The VIVO Adjustable Thin Client Mini PC Mount Bracket is the most versatile choice for anyone managing multiple mini PC devices. You’ll secure your Intel NUC, Chromebox, Mac Mini, or Dell OptiPlex Micro using one of three mounting methods: behind your monitor, on a monitor pole, or underneath your desk. The bracket adjusts from 1.8 cm to 7.1 cm wide, fitting VESA 75x75mm and 100x100mm standards. Its solid steel construction supports up to 5 kg, while rubber pads and adjustable straps prevent damage and sliding. The open-frame design ensures unrestricted access and optimal ventilation. Installation requires all included hardware, and you’ll benefit from a three-year limited warranty with dedicated tech support.
- Mounting Options:Monitor rear, monitor pole clamp, under-desk
- VESA Compatibility:75x75mm, 100x100mm
- Weight Capacity:Up to 5 kg
- Cable/Power Management:Adjustable straps prevent sliding
- Installation Complexity:Simple; all hardware included
- Material Construction:Solid steel with powder-coated finish
- Additional Feature:Rubber pads prevent scratches
- Additional Feature:Adjustable straps prevent sliding
- Additional Feature:Open-frame optimal ventilation design
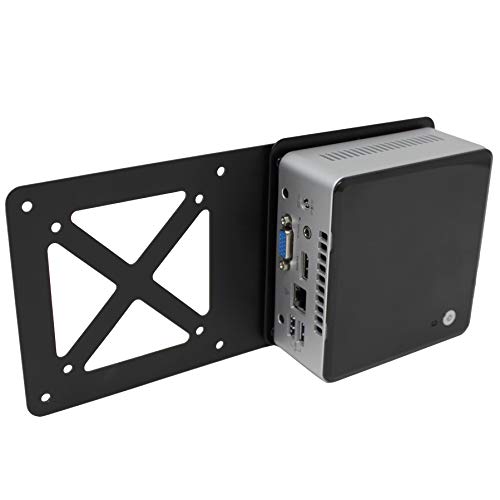
Mini PC Wall Mount for Dell OptiPlex Micro
Are you managing multiple cables and limited desk space? This wall mount fits Dell OptiPlex Micro models from the 3000–7090 series, offering three mounting options: wall, monitor back, or under-desk placement. Installation takes about ten minutes and requires only the included screws. The bracket includes two Velcro straps that secure your power adapter to the top, organizing cables neatly. Confirm your monitor has a four-hole VESA pattern (75 x 75 mm or 100 x 100 mm) before mounting to its back. Note that VESA back-mounting prevents simultaneous monitor arm use. This solution saves desk space and protects your device from damage while keeping your work area organized and functional.
- Mounting Options:Wall mount, monitor back (VESA), under-desk
- VESA Compatibility:75x75mm, 100x100mm
- Weight Capacity:Not specified
- Cable/Power Management:Two Velcro straps for power adapter; cable organization straps
- Installation Complexity:Three steps; approximately 10 minutes
- Material Construction:Not specified
- Additional Feature:Power adapter Velcro straps included
- Additional Feature:Three-step 10-minute installation
- Additional Feature:Four-hole VESA pattern requirement
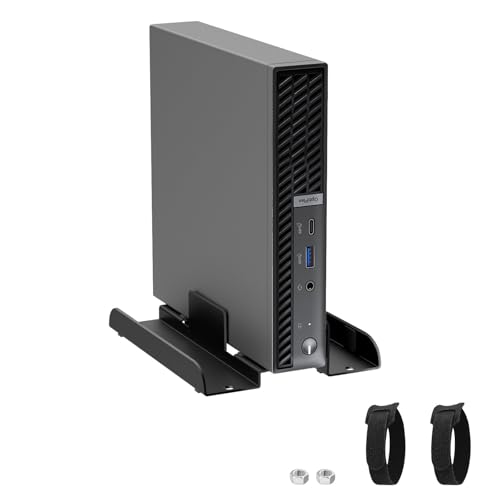
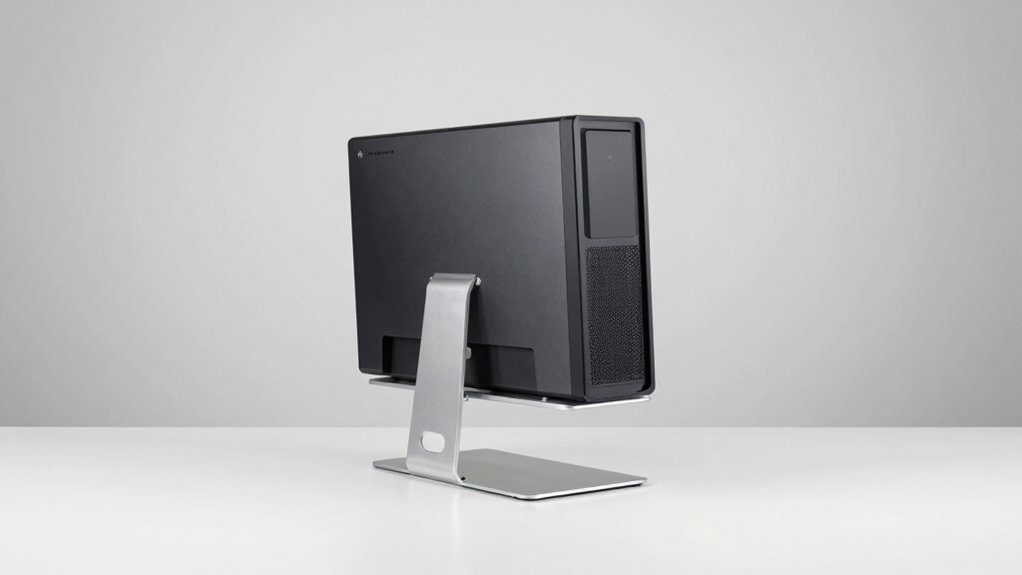
Universal Mini PC Desk Stand for Dell HP Lenovo
If you’ve got Dell, HP, or Lenovo mini PCs cluttering your desk, this multi-brand compatible stand solves that problem. The adjustable slot width accommodates computers from 3.7 cm to 6.2 cm, fitting most mini models across all three brands. Position your PC vertically to free up valuable desk space. Use the included Velcro strap to bundle power cords and eliminate cable mess. The anti-slip bottom pads prevent sliding, while interior scratch-resistant padding protects your equipment. You can reposition the stand anytime without leaving installation marks. This approach keeps your workspace organized and your mini PC accessible for daily use.
- Mounting Options:Desk stand (no mounting required)
- VESA Compatibility:Not specified
- Weight Capacity:Not specified
- Cable/Power Management:Velcro strap for power cord organization
- Installation Complexity:No installation; adjustable positioning anytime
- Material Construction:Not specified
- Additional Feature:Anti-slip bottom pads
- Additional Feature:Scratch-resistant interior pad
- Additional Feature:Moveable without fixed installation
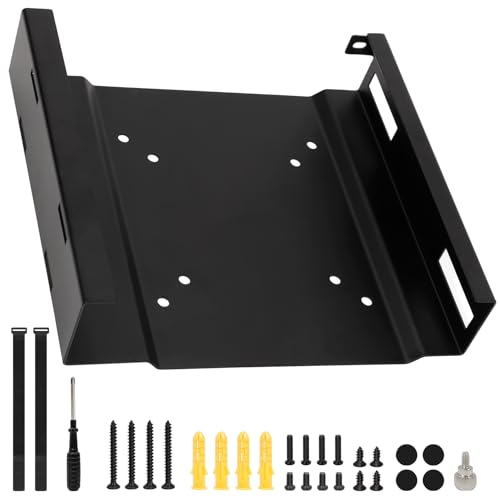
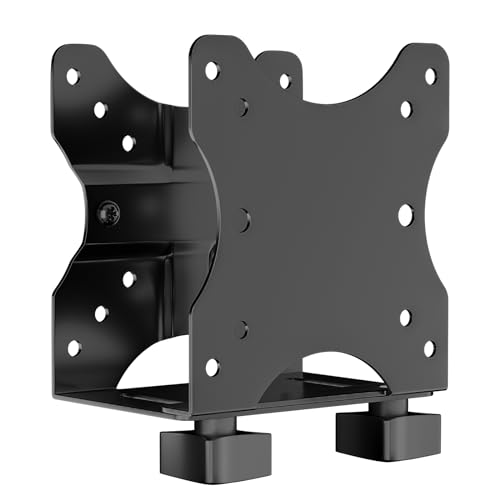
Mini PC Mount Compatible with Dell OptiPlex Micro
Looking for a mount that handles multiple Dell OptiPlex MFF models across your entire desk setup? This bracket fits all OptiPlex micro units measuring 1.4 x 7 x 7.2 cm, supporting 3000, 3020, 3050, 5060, 7080, and 9020 models. You’ll choose between three mounting scenarios: wall mounting, VESA mounting to your monitor’s 75 x 75 mm or 100 x 100 mm pattern, or under-desk installation. The included power adapter bracket with two Velcro straps keeps your cables organized. Installation takes approximately ten minutes using the provided screwdriver, screw kits, and zip ties for cable management.
- Mounting Options:Monitor back (VESA), monitor stand, wall, under-desk
- VESA Compatibility:75x75mm, 100x100mm
- Weight Capacity:Not specified
- Cable/Power Management:Two Velcro straps for power adapter; two zip ties for cables
- Installation Complexity:Three methods; approximately 10 minutes
- Material Construction:Not specified
- Additional Feature:Two Velcro power adapter straps
- Additional Feature:Two cable management zip ties
- Additional Feature:Small screwdriver tool included
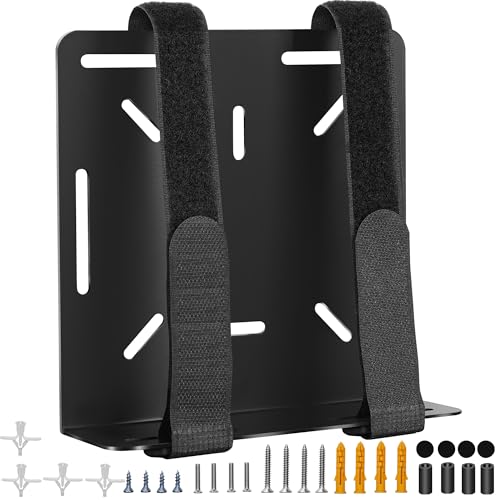
2 Pack Mini PC Mount for Dell Micro Form Factor
Dell OptiPlex Micro users who want to reclaim desk space need this two-pack mount solution. You can install these brackets on your monitor’s back using VESA 75x75mm or 100x100mm hole patterns, on a wall, or under your desk. The package includes all necessary screws, a screwdriver, and zip ties for cable management. You’ll secure your power adapter using two included Velcro straps on the bracket’s top. Installation takes approximately ten minutes. Verify your monitor has the required four-hole VESA pattern before mounting. These brackets fit OptiPlex Micro models 3000 through 7090 and Pro Micro Plus versions.
- Mounting Options:Monitor back (VESA), wall, under-desk
- VESA Compatibility:75x75mm, 100x100mm
- Weight Capacity:Not specified
- Cable/Power Management:Two Velcro straps for power adapter; two zip ties for cables
- Installation Complexity:Easy; approximately 10 minutes
- Material Construction:Not specified
- Additional Feature:Two-pack quantity value
- Additional Feature:Two Velcro adapter straps
- Additional Feature:Two cable zip ties included
Universal Wall and VESA Mount for Micro PC
The Freejia Universal Wall and VESA Mount serves as a universal solution for anyone running multiple small devices on a single desk. This mount accommodates Dell OptiPlex, Lenovo ThinkCentre, and HP mini PCs with maximum perimeters up to 17 inches. You’ll install it in roughly 10 minutes using either wall or VESA mounting methods. The metal bracket includes four adhesive protective stickers that prevent scratches on your device’s surface. Installation requires the included screwdriver and screw kit. This approach eliminates desk clutter by positioning equipment behind monitors or on walls, freeing workspace for productivity while keeping cables organized and devices secure.
- Mounting Options:Wall mount, monitor back (VESA)
- VESA Compatibility:Not specified (wall and VESA mount capable)
- Weight Capacity:Not specified
- Cable/Power Management:Not specified
- Installation Complexity:Two methods; approximately 10 minutes
- Material Construction:Metal
- Additional Feature:Four adhesive protective stickers
- Additional Feature:Supports multiple device brands
- Additional Feature:Compatible with routers/modems too
HumanCentric Mounting Bracket for Intel NUC
Want to mount your Intel NUC directly behind your monitor? This extension plate from HumanCentric connects your NUC to a VESA monitor arm or wall mount. You’ll need your NUC’s original mounting bracket to use this adapter. The plate supports 75x75mm and 100x100mm VESA patterns, so verify your monitor arm compatibility first. Installation takes minutes with a screwdriver and included hardware. Note that this adapter doesn’t work with Hades Canyon or Skull Canyon models. The aluminum construction weighs just 0.31kg. Check product images for proper alignment before installing. HumanCentric offers support if you encounter fit issues, and you’re covered by a 30-day return guarantee.
- Mounting Options:VESA monitor arm or wall mount (requires Intel NUC bracket)
- VESA Compatibility:75x75mm, 100x100mm
- Weight Capacity:Not specified
- Cable/Power Management:Not specified
- Installation Complexity:Fast; minutes with screwdriver
- Material Construction:Aluminum with painted finish
- Additional Feature:Aluminum construction extension plate
- Additional Feature:Minutes-fast installation process
- Additional Feature:30-day voluntary return guarantee
Adjustable Thin Client Mount Bracket for Mini PC
Need a heavy-duty pick that mounts your Mini PC virtually anywhere? This alloy steel bracket supports devices up to 11 lbs and adjusts from 0.67 to 2.8 inches wide, fitting most Mini PCs and thin clients. You can mount it under your desk, behind a monitor, or clip it to a pole using standard VESA 75x75mm or 100x100mm patterns. The open frame design keeps your ports accessible while the attached back strap provides stability. Installation’s straightforward—you’ll receive all necessary components and manuals. Choose this bracket when you need reliable mounting flexibility without sacrificing workspace.
- Mounting Options:Monitor arm, stand pole, under-desk
- VESA Compatibility:75x75mm, 100x100mm
- Weight Capacity:Up to 11 lbs (5 kg)
- Cable/Power Management:Attached back strap for stability
- Installation Complexity:Easy; all components and manuals included
- Material Construction:Alloy steel
- Additional Feature:Heavy duty alloy steel
- Additional Feature:Open frame ventilation design
- Additional Feature:Articulating movement type bracket
Factors to Consider When Choosing Mini PC Stands and Mounts
When you’re selecting a mini PC stand or mount, you need to verify compatibility with your specific device model, compare the available mounting options (such as VESA, clamp, or adhesive methods), and confirm the weight capacity matches your PC’s actual weight plus any peripherals. Check whether the stand includes cable management features like clips or channels to organize your power cords and connectors, and assess how much time and tools the installation requires before you commit to a purchase. Stability matters significantly, so you should prioritize stands with rubber feet or weighted bases that won’t shift during regular desk use.
Compatibility With Your Device
How do you know if a mini PC stand’ll actually work with your equipment? Start by identifying your device’s form factor—whether it’s a Dell OptiPlex Micro or Lenovo ThinkCentre mini. Next, verify VESA compatibility by checking if your monitor or mount plate uses 75×75 mm or 100×100 mm standards. Measure your mini PC’s dimensions and width range to confirm the bracket accommodates your unit. Check the mount’s weight rating against your device’s weight, typically up to 5 kg for safety. Finally, evaluate mounting locations available in your workspace: back of monitor, wall, under-desk, or pole stands. Match these options with your ventilation requirements and desk layout. This systematic approach ensures secure, functional placement before purchasing.
Available Mounting Options
Where’ll you actually place your mini PC in your workspace? You have several mounting options to choose from. Back-of-monitor VESA mounting attaches your device directly to your display using 75×75 mm or 100×100 mm patterns. Wall mounting secures your mini PC to any wall surface, freeing up desk space entirely. Under-desk mounting positions your device beneath your work surface, keeping it out of sight. Monitor stand attachment places your mini PC on the stand itself. Some brackets combine multiple mounting methods in one unit, supporting under-desk, monitor rear, and monitor pole placement simultaneously. Verify that your chosen mount’s adjustable width range (typically 3.7–6.2 cm) accommodates your specific mini PC model. Check that your monitor has the required four-hole VESA pattern before committing to back-of-monitor installation.
Weight Capacity And Stability
What’ll your mini PC actually weigh on the mount you choose? Check your device’s weight first, then match it against the mount’s capacity. Most quality mounts support up to 5 kg (11 lbs), which covers most mini PCs. Material matters substantially—solid steel or alloy steel frames provide superior stability compared to plastic alternatives. Next, verify the adjustable width range fits your device’s footprint, typically between 3.7 cm and 7 cm. This secure fit prevents shifting during operation. Finally, examine the anti-slip features. Rubber pads and adjustable straps reduce movement under load and prevent slipping. Open-frame designs offer ventilation benefits while maintaining rigidity. Combining these elements—adequate weight capacity, strong materials, proper fit, and anti-slip features—ensures your mini PC stays stable and secure.
Cable Management Features
Since cable clutter can undermine your desk organization, you’ll want to prioritize stands with built-in cable management systems. Look for Velcro straps, zip ties, or dedicated channels that secure power adapters and contain cords effectively. Check whether the mount includes adjustable straps or fasteners to prevent power bricks and cables from sliding or pulling loose during use. Verify that the design supports multiple mounting scenarios—back of monitor, under-desk, or wall—without exposing cables. Ensure sufficient attachment points or clips accommodate varying cable counts and connector types for your mini PC. Finally, consider the bracket’s open-frame or enclosed design, as this affects ventilation and cable routing. Proper heat dissipation depends on balancing cable organization with airflow requirements.
Installation Ease And Hardware
Once you’ve secured your cables and confirmed proper airflow, the actual setup process becomes your next focus. Most mini PC mounts come with complete hardware kits and straightforward instructions that you’ll finish in about 10 minutes. You’ll receive all necessary components—brackets, screws, and fasteners—ready for installation.
Check your device’s dimensions and VESA pattern compatibility first. Common patterns are 75 x 75 mm or 100 x 100 mm. Match these specifications to your chosen mount style: back-of-monitor VESA attachment, wall mounting, under-desk installation, or monitor pole attachment.
Open-frame and adjustable designs give you easier access to ports during setup. Follow the instruction sequence step-by-step, securing each component before moving forward. Verify all connections are tight before powering on your system.
Final Thoughts
You’ll find the right mini PC stand by matching your setup’s VESA pattern and weight capacity first. Measure your desk space and decide between vertical, wall, or under-desk mounting. Check that hardware’s included and installation takes ten minutes or less. Select a stand with steel construction, cable management, and anti-slip features. Install your choice following manufacturer instructions, then arrange cables using the Velcro straps provided.
Meet Ry, “TechGuru,” a 36-year-old technology enthusiast with a deep passion for tech innovations. With extensive experience, he specializes in gaming hardware and software, and has expertise in gadgets, custom PCs, and audio.
Besides writing about tech and reviewing new products, he enjoys traveling, hiking, and photography. Committed to keeping up with the latest industry trends, he aims to guide readers in making informed tech decisions.