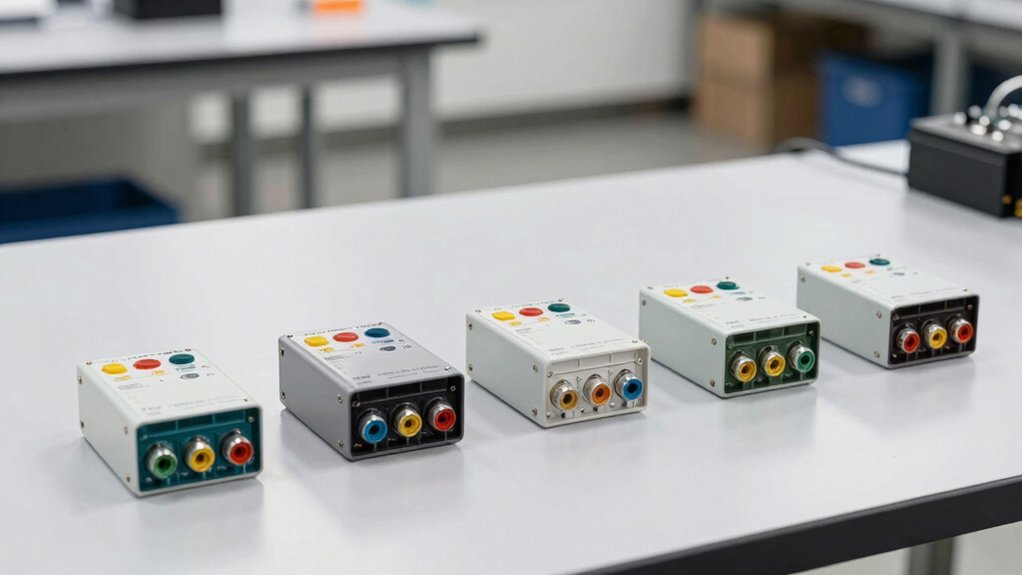
You’re selecting a safety relay setup, so start with the six solid options: DC 12V with optocoupler isolation, a 24V ShillehTek module, a 1-channel 5V Arduino-friendly option, a DC 5V optocoupler module (1 channel), a 6-channel optocoupler module, and a 1-channel optocoupler module, all with NC/COM/NO contacts and secure screw terminals. Compare coil voltages, isolation, channel count, and load ratings, then plan wiring and trigger mode first. Decide your path and proceed with concrete steps to protect your controller.
| DC 12V Relay Module with Optocoupler Isolation |

| Best General-Purpose | Channel Count: 1 channel | Optocoupler/Isolation: Optocoupler isolation | Trigger Type: High/Low selectable | VIEW LATEST PRICE | Read Our Analysis |
| ShillehTek 24V Relay Module for Arduino/DIY Control |

| Industrial-Grade Flex | Channel Count: 1 channel | Optocoupler/Isolation: Optical isolation | Trigger Type: High/Low trigger | VIEW LATEST PRICE | Read Our Analysis |
| ShillehTek 1-Channel 5V Relay Module for Arduino |
| Arduino-Centric | Channel Count: 1 channel | Optocoupler/Isolation: Optical isolation | Trigger Type: High/Low trigger | VIEW LATEST PRICE | Read Our Analysis |
| DC 5V Relay Module with Optocoupler Isolation (1 Channel) |

| Classic Opto-Isolation | Channel Count: 1 channel | Optocoupler/Isolation: Optocoupler isolation | Trigger Type: High/Low level trigger | VIEW LATEST PRICE | Read Our Analysis |
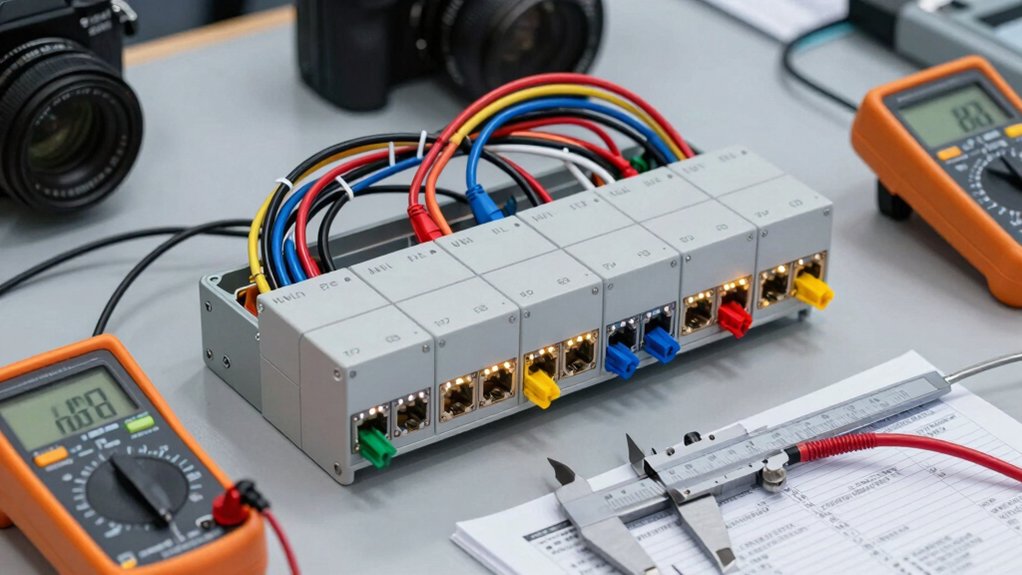
| 6-Channel Optocoupler Relay Module for Arduino (5V) |

| Six-Channel Robust | Channel Count: 6 channels (6-channel module) | Optocoupler/Isolation: Optocoupler isolation | Trigger Type: High/Low trigger selectable | VIEW LATEST PRICE | Read Our Analysis |
| 1-Channel Optocoupler Relay Module for Arduino (5V) |

| Simple 5V Convenience | Channel Count: 1 channel | Optocoupler/Isolation: Optocoupler isolation | Trigger Type: High/Low trigger | VIEW LATEST PRICE | Read Our Analysis |
More Details on Our Top Picks
DC 12V Relay Module with Optocoupler Isolation
If you’re evaluating safety relay modules for robust control in projects like robotics or automation, the DC 12V Relay Module with Optocoupler Isolation stands out for strong I/O isolation.
You connect 12V DC to Coil + and Coil -, then wire the trigger line through the optocoupler input, which requires about 5mA. Use the NC, C, NO terminals to set your switching behavior, and secure connections with the screw terminals. The module supports AC loads up to 250V/10A or DC 30V/10A. Ensure isolation is maintained by keeping input and output paths separate and verify jumper settings for high or low state.
- Channel Count:1 channel
- Optocoupler/Isolation:Optocoupler isolation
- Trigger Type:High/Low selectable
- Load Rating:AC 250V/10A, DC 30V/10A
- Coil Voltage:12V
- Interface Type:Terminal screw/wire-in
- Additional Feature:Fault-tolerant design
- Additional Feature:Terminal-wired interfaces
- Additional Feature:Coil voltage 12V
ShillehTek 24V Relay Module for Arduino/DIY Control
The ShillehTek 24V Relay Module stands out for its 1-channel, 24V DC operation, making it a straightforward option for Arduino, Raspberry Pi, PLCs, and other DIY control systems that require robust industrial compatibility. You connect the 24V supply to the screw terminals, then wire the signal input from your controller. Choose high level or low level triggering based on your setup, and test with the status LED to confirm operation. Optical isolation protects inputs, while voltage spike protection guards the system. Use the pre-soldered board for quick integration, and monitor the relay via the indicator as you run your project.
- Channel Count:1 channel
- Optocoupler/Isolation:Optical isolation
- Trigger Type:High/Low trigger
- Load Rating:Not stated; 24V coil, general purpose
- Coil Voltage:24V
- Interface Type:Screw terminals
- Additional Feature:Pre-soldered board
- Additional Feature:Status LED indicator
- Additional Feature:24V DC operation
ShillehTek 1-Channel 5V Relay Module for Arduino
ShillehTek’s 1-Channel 5V Relay Module stands out for its built-in optocoupler and clear status LED, making it a reliable pick for teams that need solid control isolation and real-time feedback. You connect the 5V supply and the Arduino or Raspberry Pi to the screw terminals, then wire the signal line. Use the high level trigger or low level trigger option, depending on your setup. The module provides optical isolation and protection from voltage spikes, ensuring safe operation. Set up quickly, verify the LED lights during activation, and test with a small load before scaling.
- Channel Count:1 channel
- Optocoupler/Isolation:Optical isolation
- Trigger Type:High/Low trigger
- Load Rating:Not stated; 5V coil
- Coil Voltage:5V
- Interface Type:Screw terminals
- Additional Feature:Pre-soldered board
- Additional Feature:Status LED indicator
- Additional Feature:5V DC operation
DC 5V Relay Module with Optocoupler Isolation (1 Channel)
This DC 5V Relay Module with Optocoupler Isolation (1 Channel) is ideal when you need strong I/O protection and easy control from a variety of microcontrollers. You wire the coil terminals and trigger input, then choose high or low trigger via the jumper. The board uses optocoupler isolation for stable performance, preventing relay current from affecting your I/O port. If the control line breaks, the fault-tolerant design prevents accidental activation. Connect the NC, C, and NO terminals to your load, and set the isolation to protect sensitive circuits. Compatible with ARM, PIC, AVR, Raspberry Pi, and more.
- Channel Count:1 channel
- Optocoupler/Isolation:Optocoupler isolation
- Trigger Type:High/Low level trigger
- Load Rating:AC 250V/10A, DC 30V/10A
- Coil Voltage:5V
- Interface Type:Screw terminals
- Additional Feature:High/low trigger jumper
- Additional Feature:Direct terminal wiring
- Additional Feature:Coil current 5mA
6-Channel Optocoupler Relay Module for Arduino (5V)
Opt for the Channel Optocoupler Relay Module for Arduino (5V) when you need reliable isolation and straightforward control for a 6-channel setup. This module uses optocouplers for each relay and offers a 6 Channel Isolated 5V 10A relay design. It supports high/low level trigger selection via a jumper, so you can match your control scheme. Interfaces are standard and directly connectable to Arduino, AVR, PIC, ARM, DSP, and similar microcontrollers. Each relay has opto-isolated inputs with individual switch control, improving fault tolerance. Install with the screwed terminal plate and fixed bolt holes for solid mounting.
- Channel Count:6 channels (6-channel module)
- Optocoupler/Isolation:Optocoupler isolation
- Trigger Type:High/Low trigger selectable
- Load Rating:AC 250V/10A, DC 30V/10A
- Coil Voltage:5V
- Interface Type:Screwed terminal plate
- Additional Feature:6-channel configuration
- Additional Feature:Screw terminals
- Additional Feature:Fault-tolerant design
1-Channel Optocoupler Relay Module for Arduino (5V)
For the Channel Optocoupler Relay Module for Arduino (5V), consider its key advantage: optocoupler isolation that separates the control loop from the load, reducing interference and enhancing safety in robotics projects. You connect the 5V logic to the control input, then drive the input through a microcontroller pin. The relay supports AC 250V/10A and DC 30V/10A, so verify your load type before wiring. Use the power indicator to confirm supply presence and the relay action indicator to verify switching. Ensure a smooth ground and proper insulation, then test with a small load before full deployment.
- Channel Count:1 channel
- Optocoupler/Isolation:Optocoupler isolation
- Trigger Type:High/Low trigger
- Load Rating:AC 250V/10A, DC 30V/10A
- Coil Voltage:5V
- Interface Type:Screw terminals
- Additional Feature:Power indicator
- Additional Feature:Relay action indicator
- Additional Feature:5V operation
Factors to Consider When Choosing Robotics Safety Relay Modules
Consider voltage compatibility first, verify your system’s supply and coil voltages match the module’s ratings, and include any optional adapters if needed. Next, assess isolation effectiveness and trigger flexibility by checking input-output separation, clearance/creep distances, and whether you need opto-isolated or relay-only signaling with configurable trigger types. Finally, review load ratings and protection features, compare current/voltage limits, surge and short-circuit protection, and choose modules that offer clear documentation and practical examples for real-world wiring and safety assurance.
Voltage Compatibility
Voltage compatibility is essential to ensure reliable operation and safe switching. You must match the relay module’s operating voltage to your control circuitry, such as 5V, 12V, or 24V, to prevent improper activation or failure to trigger. Check the maximum load rating (AC or DC) to confirm it can safely switch connected motors, pumps, or actuators without overheating or contact welding. Verify the isolation type and rating (optocoupler isolation) to reduce control-side damage from load-switching transients or voltage spikes. Confirm the trigger current requirement (for example, 4–5 mA) aligns with your microcontroller’s drive capability or driver transistor. Match voltage compatibility between control signals and the relay coil with your supply rails to avoid overvoltage or undervoltage conditions that could impair reliability.
Isolation Effectiveness
Do you know how isolation keeps control signals safe from switching transients? You separate the control input from the relay switching current with optocoupler isolation, protecting your I/O port from coil transients. This helps prevent voltage spikes from damaging the system and improves reliability. Look for fault-tolerant designs that ensure the relay won’t operate if the control line fails, preserving isolation integrity. Note that the isolation level stays high even if you drive the coil with higher trigger currents, around 5 mA for optocouplers. Independent input isolation lets multiple channels share a common load without signal cross-talk. Verify each channel maintains isolation when wiring multiple boards, and test under load to confirm stable performance. Choose modules that advertise strong, verifiable isolation margins.
Trigger Flexibility
Trigger flexibility matters because different controllers use different logic levels. You choose a module that supports high-level, low-level, or both triggering modes, often via a jumper setting. First, verify if the module offers high-level triggering, which activates the relay with a strong input signal. Then check low-level triggering, which activates when the control input is driven low. If unsure, select a configurable trigger mode to fit your microcontroller family. Look for optocoupler isolation, which decouples the control signal from the relay coil, improving stability and protecting your controller. Note the trigger current for the optocoupler, typically around 4–5 mA, to ensure your controller can drive it. Use these steps to match input requirements to your system’s drive capability.
Load Ratings
Start by checking the relay’s maximum load ratings and compare them to your system’s needs. Verify the voltage and current limits, typically AC 250V/10A or DC 30V/10A, to ensure they cover your actual load. Do not exceed the rated current, or you risk overheating or contact welding. Confirm whether the load is AC or DC, and match the module’s ratings to that type, since switching behavior differs. Check for peak or surge tolerances, and determine if the rating accounts for inrush currents from motors or power supplies. For inductive loads, expect kickback; select relays with higher surge handling or plan to add snubbers. Compare options side by side, noting how each rating aligns with your application’s worst-case scenario.
Protection Features
Opt for modules with solid isolation and fault tolerance, then verify how these features protect your system during operation. You’ll confirm optocoupler isolation separates control input from the relay coil, reducing voltage spikes that could affect your control circuitry. Check that fault-tolerant design keeps the relay inactive if the control signal is lost or the control line breaks. Ensure optical isolation shields I/O ports from relay-switch current and transients during switching events. Look for explicit protection against voltage spikes, safeguarding your controllers and power electronics. Review screw-terminal interfaces and clearly separated input (coil/trigger) and relay contacts to support secure wiring and reduce miswiring risks. Compare modules by these criteria and select those offering robust isolation, fault tolerance, and clean, labeled wiring paths.
Installation Ease
When selecting robotics safety relay modules, prioritize installation simplicity by focusing on wiring clarity, triggering options, and power compatibility. Use screw terminals for straightforward wiring and secure connections during installation. Look for optocoupler isolation to protect control I/O from relay switch surges and voltage spikes. Check if the module supports both high and low level triggering via a jumper to fit your control signal type. Verify fault-tolerant designs so the relay stays inactive if the control line is broken or signal is lost. Ensure the board lists compatible coil voltage (5V, 12V, or 24V) to match your control system’s supply and minimize wiring complexity. These elements streamline setup and reduce miswiring risk during deployment.
Final Thoughts
To pick a safe relay, compare coil voltage, contact ratings, and isolation. If your system runs on 12V, choose the DC 12V option with optocoupler isolation for better cross-talk protection. For Arduino projects, use the 5V options with NC/NO/COM as needed. For multiple channels, select the 6-channel module to minimize wiring and ensure independent isolation. Verify screw terminals are secure, test with a low-load signal first, then scale up to real loads.
Meet Ry, “TechGuru,” a 36-year-old technology enthusiast with a deep passion for tech innovations. With extensive experience, he specializes in gaming hardware and software, and has expertise in gadgets, custom PCs, and audio.
Besides writing about tech and reviewing new products, he enjoys traveling, hiking, and photography. Committed to keeping up with the latest industry trends, he aims to guide readers in making informed tech decisions.