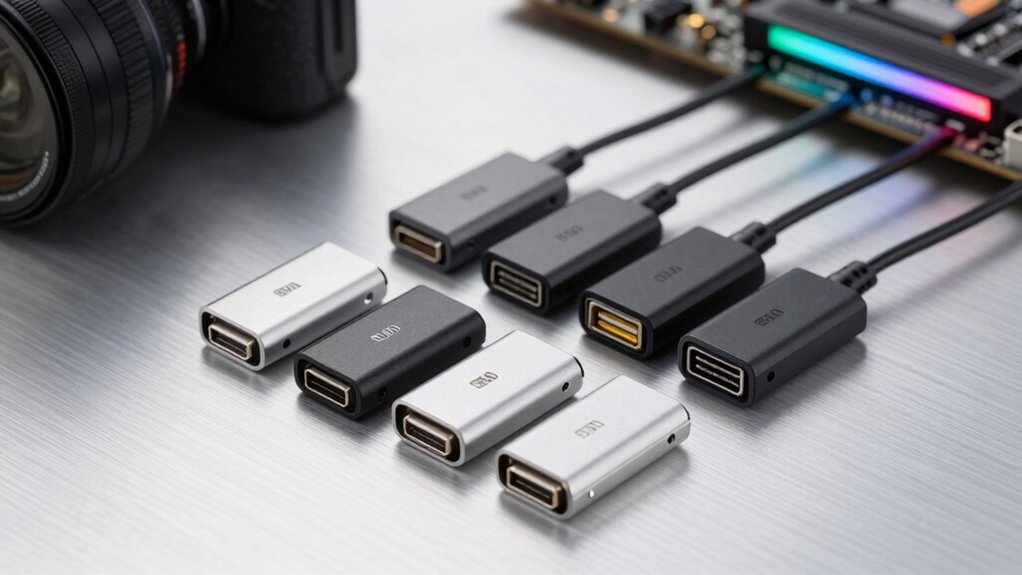
You’ll upgrade any build by picking a USB-C motherboard adapter that matches your headers and case. Start with USB 2.0 to USB-C for basic front-panel needs, then consider USB 3.x or 3.2 options for faster speeds, or the IDC20 19-pin link for full compatibility. Compare prices, count adapters (some come in packs), and measure cable length to avoid bulk. Each option includes plug-and-play setup and power guidelines, then decide which path fits your case and budget while keeping a clear path forward.
| USB 2.0 to USB-C Front Panel Header Adapter |

| Best Compatibility | Type Compatibility: USB 2.0 9-pin to Type-C (front-panel) | Front Panel USB-C: Yes (front-panel Type-C) | Speed/Transfer Rate: USB 2.0 speed (480 Mbps) | VIEW LATEST PRICE | Read Our Analysis |
| USB 2.0 Type-C Front Panel Cable Adapter |
| Entry-Level USB-C | Type Compatibility: USB 2.0 9-pin to Type-C front panel | Front Panel USB-C: Yes (front-panel Type-C) | Speed/Transfer Rate: USB 2.0 speed (480 Mbps) | VIEW LATEST PRICE | Read Our Analysis |
| LINKUP USB-C Front Panel Adapter (IDC20 19-Pin) |

| High-Performance USB-C | Type Compatibility: USB 3.0/3.1 IDC20 (19-pin) to Type-C | Front Panel USB-C: Yes (front/back panel Type-C) | Speed/Transfer Rate: USB 3.0/3.1 speed (up to 5 Gbps) | VIEW LATEST PRICE | Read Our Analysis |
| USB 3.2 Gen 1 Header Adapter (2 Pack) |

| Budget Dual Pack | Type Compatibility: USB 2.0 9-pin to USB 3.2 Gen 1 Type-E (A-key) | Front Panel USB-C: Yes (front-panel Type-C via 20-pin) | Speed/Transfer Rate: USB 2.0 to USB 3.2 Gen 1 header (limited by USB 2.0) | VIEW LATEST PRICE | Read Our Analysis |
| USB Type-C Front Panel Adapter for USB 3.0 Header |

| USB-C Front-Panel Simplicity | Type Compatibility: USB 3.1 Type-E 20-pin to USB-C front panel | Front Panel USB-C: Yes (front-panel USB-C) | Speed/Transfer Rate: Up to 5 Gb/s (USB 3.0/3.1 header support; not 10 Gb/s) | VIEW LATEST PRICE | Read Our Analysis |
| EZDIY-FAB USB2.0 to USB3.1/3.2 Front Panel Adapter |

| Easy Fit, No-Driver | Type Compatibility: USB 2.0 9-pin to USB 3.1/3.2 Type-C (20-pin) front panel | Front Panel USB-C: Yes (front-panel USB-C) | Speed/Transfer Rate: USB 2.0 speed (480 Mbps) | VIEW LATEST PRICE | Read Our Analysis |
More Details on Our Top Picks
USB 2.0 to USB-C Front Panel Header Adapter
If you’re upgrading a build with limited USB-C access, this USB 2.0 to USB-C Front Panel Header Adapter is the best choice for you. You can convert a USB 2.0 9-pin header to a Type-C front-panel port. The adapter plugs into the motherboard’s USB 2.0 interface without extra cables or drivers. It acts as a front-panel USB-C hub, extending accessibility from the header. The USB C port handles USB 2.0 transfer rates, same as the motherboard header. Install by inserting into the USB 2.0 header, then use Type-C or Type-A devices. Note: streamlined performance remains USB 2.0 (Gen 1).
- Type Compatibility:USB 2.0 9-pin to Type-C (front-panel)
- Front Panel USB-C:Yes (front-panel Type-C)
- Speed/Transfer Rate:USB 2.0 speed (480 Mbps)
- Power/Current Capabilities:No external power required; driver-free
- Installation Type:Plug-and-play; insert into USB 2.0 header
- Form Factor/Physical Interface:20-pin Type-E A-key to USB-C
- Additional Feature:Front-panel hub enablement
- Additional Feature:Type-E/Type-C compatibility
- Additional Feature:Plug-and-play, no drivers
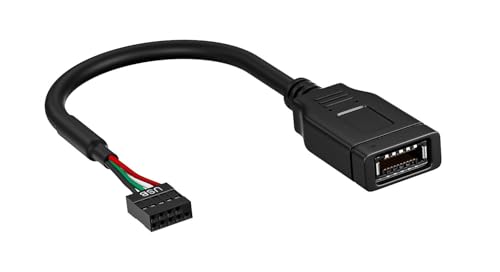
USB 2.0 Type-C Front Panel Cable Adapter
Consider who benefits most from the USB 2.0 Type-C Front Panel Cable Adapter: users with older motherboards that lack a native USB-C header. You install this adapter on a 9-pin USB 2.0 header to add USB-C front panel support. It runs at USB 2.0 speed, up to 480 Mbps, and requires no drivers. Measure your case front panel space, connect the 9-pin header, and route the 17 cm cable to the USB-C port. Note it does not fit 19-pin USB 3.0 headers, and it isn’t USB 3.0 compatible. Use this when you need basic USB-C access without upgrading motherboard.
- Type Compatibility:USB 2.0 9-pin to Type-C front panel
- Front Panel USB-C:Yes (front-panel Type-C)
- Speed/Transfer Rate:USB 2.0 speed (480 Mbps)
- Power/Current Capabilities:No drivers; (no specific power note)
- Installation Type:Plug-and-play; no drivers
- Form Factor/Physical Interface:17 cm cable/adapter
- Additional Feature:17 cm length
- Additional Feature:USB-C front-panel cable
- Additional Feature:No USB 3.0 speed
LINKUP USB-C Front Panel Adapter (IDC20 19-Pin)
The LINKUP USB-C Front Panel Adapter (IDC20 19-Pin) is ideal for ITX and mini-ITX builds that lack a Type-E A-key USB-C header, because it converts a motherboard USB 3.0/3.1 IDC20 (19-pin) header into a Type-C front panel port. You install it by aligning the IDC20 header with the adapter, then secure the unit to the front panel. It adds a USB-C port for easy access to devices, but it remains USB 3.0 at 5 Gbps. Do not exceed 4.5W power; power down before installation and follow safety notes. Warranty is 1 year.
- Type Compatibility:USB 3.0/3.1 IDC20 (19-pin) to Type-C
- Front Panel USB-C:Yes (front/back panel Type-C)
- Speed/Transfer Rate:USB 3.0/3.1 speed (up to 5 Gbps)
- Power/Current Capabilities:Power limit 4.5W (0.9A @ 5V)
- Installation Type:Install with IDC20 header; 19-pin
- Form Factor/Physical Interface:IDC20 (19-pin) to Type-C
- Additional Feature:ITX/mini-ITX friendly
- Additional Feature:4.5W power limit
- Additional Feature:240W device protection note
USB 3.2 Gen 1 Header Adapter (2 Pack)
This 2-pack USB 3.2 Gen 1 Header Adapter is ideal for upgrading front-panel USB-C ports on cases that don’t have a Type-E header. You install it to convert a USB 2.0 header to a USB 3.1/3.2 Type-C (A-key) female connection. It is plug-and-play, no drivers needed, and works with Windows and Linux. The ultra-slim 8 mm profile and 13 × 24 × 8 mm size fit tight spaces and avoid interference with motherboard connectors. The pack includes two adapters for immediate replacement or dual-front-panel use, compatible with mainstream brands lacking Type-E headers.
- Type Compatibility:USB 2.0 9-pin to USB 3.2 Gen 1 Type-E (A-key)
- Front Panel USB-C:Yes (front-panel Type-C via 20-pin)
- Speed/Transfer Rate:USB 2.0 to USB 3.2 Gen 1 header (limited by USB 2.0)
- Power/Current Capabilities:Motherboard header power limit: 4.5W (0.9A @ 5V)
- Installation Type:Ultra-slim 8 mm; 2-pack; plug-and-play
- Form Factor/Physical Interface:9-pin to 20-pin Type-E/A-key
- Additional Feature:2-pack set included
- Additional Feature:Ultra-slim 8 mm profile
- Additional Feature:20-pin Type-E compatibility
USB Type-C Front Panel Adapter for USB 3.0 Header
If you need USB-C access from a standard USB 3.0 header, this front panel adapter is a practical choice, converting a 19-pin USB 3.0/3.1 IDC header to a 20-pin USB-C front panel connection. You install it on the PCI bracket for convenient USB-C device access. It preserves speeds up to 5 Gb/s and works with cases using USB 3.1 connectors. Note it does not convert 5 Gb/s to 10 Gb/s and isn’t compatible with USB 2.0 IDC sockets. Consider power limits: motherboard header max is 4.5 W, so avoid high-power devices. Ensure header type matches your motherboard.
- Type Compatibility:USB 3.1 Type-E 20-pin to USB-C front panel
- Front Panel USB-C:Yes (front-panel USB-C)
- Speed/Transfer Rate:Up to 5 Gb/s (USB 3.0/3.1 header support; not 10 Gb/s)
- Power/Current Capabilities:Power caution: may exceed 4.5W; power limit noted
- Installation Type:Front-panel installation; PCI bracket option
- Form Factor/Physical Interface:20-pin front-panel USB-C header
- Additional Feature:Vertical USB-CHeader design
- Additional Feature:5 Gb/s speed maintenance
- Additional Feature:Power-shutdown protection note
EZDIY-FAB USB2.0 to USB3.1/3.2 Front Panel Adapter
EZDIY-FAB USB2.0 to USB3.1/3.2 Front Panel Adapter is ideal if you need to upgrade an older motherboard without sacrificing USB-C compatibility. You connect the 9-pin USB2.0 header to the adapter’s 20-pin A-key front panel, then route a USB3.1 cable or hub to your case front. This adapter uses a 180-degree connector to avoid interference with the motherboard or chassis. It only transfers USB2.0 speed, so plan for basic devices. It’s plug-and-play, no drivers required. Power off before installation, and ensure compatibility with any USB 2.0 header and Windows or Linux systems.
- Type Compatibility:USB 2.0 9-pin to USB 3.1/3.2 Type-C (20-pin) front panel
- Front Panel USB-C:Yes (front-panel USB-C)
- Speed/Transfer Rate:USB 2.0 speed (480 Mbps)
- Power/Current Capabilities:Plug-and-play; no driver; general power not specified beyond header limits
- Installation Type:180-degree connector option; plug-and-play
- Form Factor/Physical Interface:20-pin Type-C front-panel adapter
- Additional Feature:180-degree connector interface
- Additional Feature:9-pin USB2.0 to 20-pin
- Additional Feature:Plug-and-play, driverless
Factors to Consider When Choosing USB-C Motherboard Adapters

First, check compatibility with your motherboard headers to ensure the adapter will mount properly and connect securely. Next, compare USB speed limits, power requirements, and whether the product delivers the needed power for connected devices; choose alternatives that meet or exceed your current specs. Finally, verify installation ease and form factor fit by reviewing included brackets, screws, and the exact size to ensure it sits flush with your case and aligns with available bays.
Compatibility With Headers
When choosing USB-C motherboard adapters, start by matching the header type to the adapter’s interface. Check whether your motherboard uses a 9-pin USB 2.0 header, a 19-pin USB 3.0/3.1 header, or a Type-E header. If you have a 9-pin header, select an adapter that converts USB 2.0 to USB-C and preserves basic speeds. For 19-pin headers, choose adapters that support USB 3.x speeds, and verify the pin layout matches your board. Note that not all adapters fit every 19-pin design; confirm pin count and header layout before purchase. Look for an A-key or Type-E designation to ensure correct front-panel connection. Also consider power delivery limits, as some boards constrain high-power USB-C devices even with proper header compatibility.
USB Speed Limits
Because the speed you get from a USB-C front panel depends on the underlying header, you must assess speed limits before buying. Start by identifying if the adapter uses a USB 2.0 header. If it does, expect USB 2.0 speeds up to 480 Mbps, not USB 3.x. Next, check if the header maps to USB-C with USB 3.x capable signaling. If the motherboard header is USB 2.0, the port remains at USB 2.0 speeds, even on a USB-C connector. Look for adapters that explicitly state USB 3.0/3.1/3.2 compatibility only when the motherboard header supports those rates. Do not assume higher speeds. Measure practical data limits by the header’s capability, not the connector. Understand power limits separate from speed; the 4.5 W budget can further constrain performance.
Power Requirements
Power availability matters as much as speed when choosing USB-C motherboard adapters. Start by checking the motherboard header power rating, typically about 4.5 W (0.9 A at 5 V). If you plan high-power USB‑C devices, verify whether the adapter notes power limits or triggers protections, and choose models that tolerate lower current without shutdowns. Evaluate whether the adapter uses a 9-pin USB 2.0 header or a 19-pin USB 3.x header, as this affects available current. For devices up to 100 W, look for adapters with an external power source or dedicated power rails indicated by the manufacturer. Confirm documented limits, and avoid adapters that lack explicit current guidance. Choose accordingly to prevent system instability and ensure reliable operation.
Installation Ease
Installation ease starts with knowing how you’ll connect the USB‑C header to your case. Many adapters are plug-and-play, requiring no drivers, which speeds setup on boards with USB 2.0 headers. Look for a 9-pin USB 2.0 option if you only have that header, or verify compatibility with 19‑pin USB 3.0 if needed. Some designs are 180-degree or slim (about 8 mm tall) to reduce interference with case fronts and motherboard components during installation. Installation typically means connecting the 9-pin USB 2.0 header to a Type‑E/Type‑C front-panel port without external power. For ITX/mini‑ITX builds, choose adapters tailored to boards lacking Type‑E A‑key to simplify space‑limited installs.
Form Factor Fit
To choose the right USB-C motherboard adapter, start by matching the adapter’s physical interface to your motherboard header. Ensure the adapter’s header type aligns with your board: 9-pin USB 2.0 headers to USB 3.x Type-E or 19-pin IDC headers are common configurations. Check the connector orientation and profile, noting if the design is 8 mm ultra-slim or 180-degree to fit around motherboard and case layouts. Verify front-panel port type compatibility; Type-C front-panel ports may require an A-key (19-pin) or specific 20-pin headers for proper mapping. Confirm edge compatibility with case PCI brackets and internal clearance to avoid interference with components. Ensure the form factor supports plug-and-play operation without drivers, maintaining compatibility with older motherboards.
Cable Length Variants
Cable length matters for fit and performance. You should evaluate cable length options before purchase. Standard front-panel adapters run about 17 cm (6.5 inches), with some compact 8–13 mm profiles to avoid clearance issues. Longer cables can reach distant front-panel ports, but they may add case clutter and risk USB 2.0 signal degradation if the run is too long. Look for 180-degree or ultra-slim designs to fit behind trays and minimize interference, which can effectively limit usable length. Understand that 20-pin (19-pin) IDC to Type-C adapters keep the header-to-Port distance within a fixed range, limiting true extension. When choosing length, check case depth, and plan routing to avoid kinking or stressing connectors.
Driver Necessity
Most USB-C motherboard adapters are plug-and-play and don’t need drivers. Start by confirming your motherboard header type, such as 9-pin USB2.0 or 19-pin USB3.0/3.1, to ensure compatibility. If a device states driver-free operation, rely on that claim for immediate use after connection. Check the speed goal: USB 3.x is possible only if the header supports it; USB 2.0 headers cap performance and may limit driver needs indirectly. For high-power or feature-rich adapters, verify power handling needs, but expect no extra drivers for basic operation. If in doubt, test with a known-good header and system, then compare results to your motherboard manual. When compatibility is uncertain, choose adapters explicitly labeled as driver-free.
Thermal & Longevity
Start by evaluating how heat flows during use. You should choose adapters that stay within official speed and power specs to avoid thermal throttling or shutdowns. Prefer low-power USB 2.0 designs, which limit current to about 0.9 A at 5 V, reducing heat generation compared to faster headers. Look for plug-and-play, no-driver designs to minimize ongoing heat from active electronics and to reduce wear. Check power delivery caps, such as 4.5 W max on some USB 3.0 header adapters, to cap peak draw and prevent spikes. Favor 180-degree or slim-profile PCBs to improve airflow around the adapter and case interior. Verify longevity by sticking to USB 2.0 or USB 3.0 header limits in your build.
Final Thoughts
To finish, pick the adapter that matches your header type, measure the cable length, and install it per the included steps. If you have USB 2.0 headers, use a USB 2.0 to USB-C adapter; for USB 3.x, choose the USB 3.2 Gen 1 or USB 3.0 header options. Use the IDC20 19-pin when needed, and verify speeds to ensure compatibility. Test front-panel access after installation and adjust cable routing for clearance.
Meet Ry, “TechGuru,” a 36-year-old technology enthusiast with a deep passion for tech innovations. With extensive experience, he specializes in gaming hardware and software, and has expertise in gadgets, custom PCs, and audio.
Besides writing about tech and reviewing new products, he enjoys traveling, hiking, and photography. Committed to keeping up with the latest industry trends, he aims to guide readers in making informed tech decisions.