You’re choosing a compact, wall-mitable setup, so evaluate these 6 Mini PC VESA kits by pattern, weight, and install steps. Compare the Intel NUC VESA bracket, ASUS MKT02, and HumanCentric extension plate for quick adds, then check 75×75 and 100×100 options for your monitor size. Note screw types, wall or desk mounting, and cable management. Follow step-by-step install guides, test with your exact PC model, and confirm clearance before finalizing. The right kit keeps your workspace neat and ready for what comes next.
| VESA Mounting Kit for Intel NUC Mini PC |

| Best Compatibility | Purpose: VESA mounting kit for Intel NUC mini PCs | Mount Pattern (VESA): 85mm or 94mm back-hole spacing | Inclusion/Hardware: Includes screws, spacers, cable strap | VIEW LATEST PRICE | Read Our Analysis |
| ASUS MKT02 Mini PC Mounting Kit – VESA 100x100mm Compatible BLACK |

| Sleek Aesthetic Pick | Purpose: MKT02 mini PC mounting kit | Mount Pattern (VESA): VESA 100x100mm | Inclusion/Hardware: Mounting kit components plus cable/LED features (note: kit details emphasize mount/safety features) | VIEW LATEST PRICE | Read Our Analysis |
| HumanCentric NUC VESA Mounting Bracket Extension Plate |
| Quick-Install Extension | Purpose: NUC VESA mounting extension plate | Mount Pattern (VESA): 75×75 mm and 100×100 mm | Inclusion/Hardware: Extension plate only; requires existing NUC mounting bracket | VIEW LATEST PRICE | Read Our Analysis |
| Intel NUC VESA Mount Bracket with Screws (Pro/12/13) |

| All-in-One Solution | Purpose: Intel NUC VESA mounting bracket | Mount Pattern (VESA): 85mm or 94mm | Inclusion/Hardware: All-in-One design with mounting hardware included | VIEW LATEST PRICE | Read Our Analysis |
| Adjustable Mini PC Mounts for NUC Dell HP Mac mini |

| Flexible Mounting | Purpose: Adjustable mini PC wall/under-desk/behind-monitor mounts | Mount Pattern (VESA): 75×75 mm to 100×100 mm compatible (implied by adjustable fit) | Inclusion/Hardware: Mounts and cable management features; hardware unspecified | VIEW LATEST PRICE | Read Our Analysis |
| Dell Micro Mount Wall/Under Desk VESA Stand for OptiPlex Micro |

| Dell-Optimized Option | Purpose: Dell OptiPlex Micro MFF mounting bracket | Mount Pattern (VESA): 75×75 mm or 100×100 mm | Inclusion/Hardware: Includes screws set and mounting hardware | VIEW LATEST PRICE | Read Our Analysis |
More Details on Our Top Picks
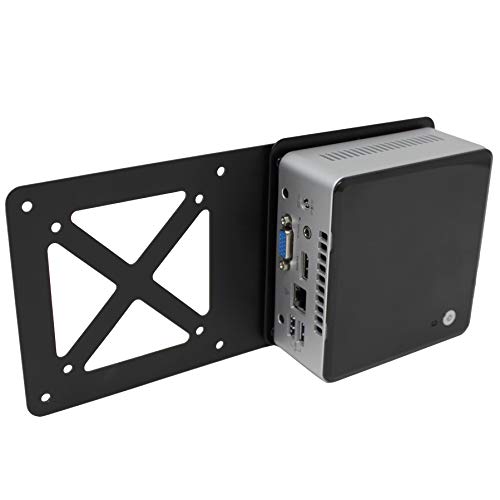
VESA Mounting Kit for Intel NUC Mini PC
If you need a reliable, plug‑and‑play way to mount a NUC mini PC behind a monitor, this VESA Mounting Kit for Intel NUC Mini PC is the clear choice. You receive two packs of mounting kits that fit 85mm or 94mm back-hole spacing. Check your NUC model—13th, 12th, 11th, 10th, 8th, 7th, or 5th Gen listed—before buying. The kit includes a rubber spacer, a cable strap, screws, and a durable VESA plate. Follow the step‑by‑step instructions for a five‑minute install, then manage cables and verify stability, ensuring the NUC sits flush behind the monitor.
- Purpose:VESA mounting kit for Intel NUC mini PCs
- Mount Pattern (VESA):85mm or 94mm back-hole spacing
- Inclusion/Hardware:Includes screws, spacers, cable strap
- Usage Location:Behind monitor
- Target Device Range:Intel NUC generations (10–13, various SKUs listed)
- Special Features:Rubber spacer for gap; simple 5-minute setup
- Additional Feature:Rubber spacer included
- Additional Feature:Cable strap included
- Additional Feature:5-minute setup
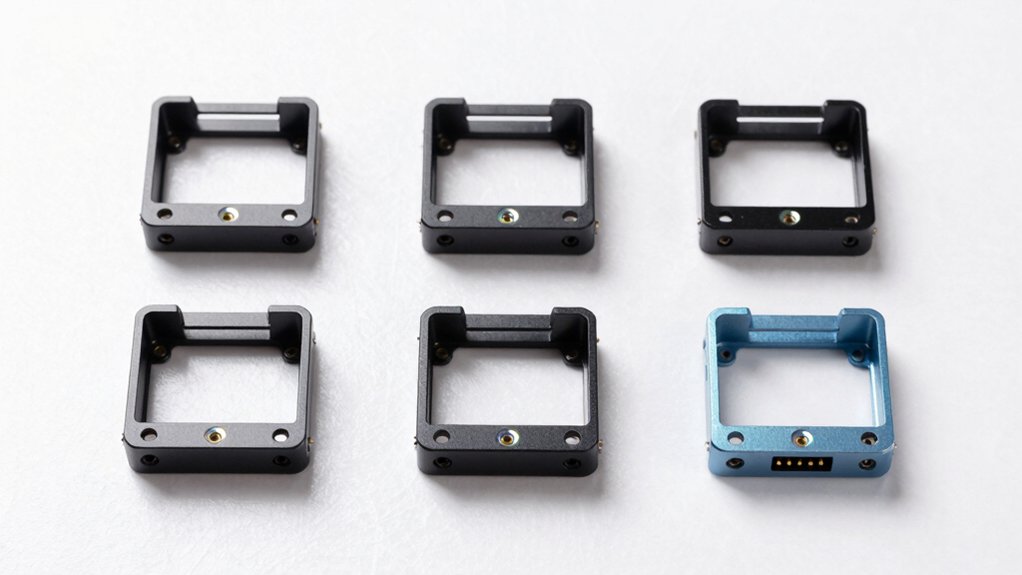
ASUS MKT02 Mini PC Mounting Kit – VESA 100x100mm Compatible BLACK
The ASUS MKT02 Mini PC Mounting Kit is the best choice if you need a compact, high‑compatibility VESA solution that keeps your setup clean and organized. You install it on a VESA 100x100mm pattern and attach the mini PC using the kit’s safe, sturdy mounting points. The kit weighs 293 g and fits models such as BE24EQSK, BE279QSK, PA247CV, PA279CV, PA278CV, VA24DQSB, and VA27DQSB. Follow the steps: align, secure with provided hardware, and verify the M.2 Q-Latch and PCIe 5.0 Safeslot remain accessible. Use Aura Sync if you want synchronized RGB effects.
- Purpose:MKT02 mini PC mounting kit
- Mount Pattern (VESA):VESA 100x100mm
- Inclusion/Hardware:Mounting kit components plus cable/LED features (note: kit details emphasize mount/safety features)
- Usage Location:Behind monitor / compatible monitor stands
- Target Device Range:Bezel/PCs including BE24/BEs and PA/VA series (mini PCs)
- Special Features:Aura Sync compatible aesthetics and AI audio features
- Additional Feature:Bezel-free mounting look
- Additional Feature:Aura Sync LED integration
- Additional Feature:Pre-mount I/O shield
HumanCentric NUC VESA Mounting Bracket Extension Plate
For a straightforward way to mount an Intel NUC behind your monitor, the HumanCentric NUC VESA Mounting Bracket Extension Plate stands out if you already own a NUC with a compatible VESA pattern and need a simple extension. You’ll mount the plate to the existing NUC bracket, using 75 x 75 mm or 100 x 100 mm patterns. Then attach the NUC to the extension plate, and secure it to the back of your monitor with the standard VESA screws. Note that it requires the NUC’s original mounting bracket and does not fit Hades Canyon or Skull Canyon models.
- Purpose:NUC VESA mounting extension plate
- Mount Pattern (VESA):75×75 mm and 100×100 mm
- Inclusion/Hardware:Extension plate only; requires existing NUC mounting bracket
- Usage Location:Behind mounted monitor
- Target Device Range:Intel NUC variants (requires compatible NUC)
- Special Features:Extension plate enables compatibility with supported NUCs
- Additional Feature:Extension plate only
- Additional Feature:Requires original NUC bracket
- Additional Feature:Easy screwdriver setup
Intel NUC VESA Mount Bracket with Screws (Pro/12/13)
Choose the Intel NUC VESA Mount Bracket with Screws (Pro/12/13) when you need a dedicated, all-in-one mounting solution for compatible NUC models. This bracket supports back-hole spacings of 85mm or 94mm, covering 12 Pro, 11 Pro, 10 Gen, 8 Gen, 7 Gen, 5 Gen, and many Pro variants listed. It installs without extra adapters, so you can mount directly to a monitor wall or arm. Use included cable strap to organize wires, keeping the setup tidy. Durable, high-quality materials protect your mini PC while saving desk space with a compact design. Follow the model compatibility and spacing options for correct fit.
- Purpose:Intel NUC VESA mounting bracket
- Mount Pattern (VESA):85mm or 94mm
- Inclusion/Hardware:All-in-One design with mounting hardware included
- Usage Location:Behind monitor or monitor arm
- Target Device Range:Intel NUC models (10–13 Gen listed)
- Special Features:All-in-One design to eliminate extra VESA adapter
- Additional Feature:All-in-One design
- Additional Feature:Cable management strap
- Additional Feature:Wide model compatibility list
Adjustable Mini PC Mounts for NUC Dell HP Mac mini
If you need a mounting solution that fits a wide range of compact PCs, this adjustable kit stands out because it supports devices from 0.63 to 2.8 inches in width and up to 12 pounds, covering NUCs, Mac minis, Dell and HP mini PCs, and similar small systems. You mount it where you need. Choose wall, under-desk, behind monitor, or monitor-arm attachment. Ensure the load stays under 12 pounds. Use the durable metal construction for long-term stability. Route cables with the built-in management features. Verify ports aren’t blocked, then install and adjust for ventilation. Confirm fit before final placement.
- Purpose:Adjustable mini PC wall/under-desk/behind-monitor mounts
- Mount Pattern (VESA):75×75 mm to 100×100 mm compatible (implied by adjustable fit)
- Inclusion/Hardware:Mounts and cable management features; hardware unspecified
- Usage Location:Wall, under-desk, behind monitor, or monitor arm
- Target Device Range:NUC, Mac Mini, mini PCs, etc. (broadly)
- Special Features:Open design for heat dissipation; pen holder
- Additional Feature:Pen holder included
- Additional Feature:Open heat-dissipation design
- Additional Feature:12 lb max load
Dell Micro Mount Wall/Under Desk VESA Stand for OptiPlex Micro
This Dell Micro Mount Wall/Under Desk VESA Stand is ideal for anyone using Dell OptiPlex Micro PCs who needs a compact, secure mounting option. You install the VESA mount on 75 x 75 mm or 100 x 100 mm patterns, then attach the Micro PC to the bracket. It fits OptiPlex MFF models across 3000–7090 MFF and all Micro sizes 1.4 x 7 x 7.2 cm, but it does not fit towers, small form factor, or Wyse units. Choose wall or under-desk mounting, and use the included Velcro straps to secure the power adapter. Verify four-hole VESA pattern before mounting.
- Purpose:Dell OptiPlex Micro MFF mounting bracket
- Mount Pattern (VESA):75×75 mm or 100×100 mm
- Inclusion/Hardware:Includes screws set and mounting hardware
- Usage Location:Behind monitor or wall/under-desk
- Target Device Range:Dell OptiPlex Micro MFF family
- Special Features:Cable straps; protection and organization
- Additional Feature:Velcro power straps
- Additional Feature:Multiple mounting options
- Additional Feature:10-minute installation
Factors to Consider When Choosing Mini PC VESA Mounting Kits

Start by checking Compatibility Back-Hole Spacing to ensure the mounting plate aligns with your mini PC’s mounting pattern, and verify available hole layouts match your case. Next, evaluate Mounting Options Flexibility and Weight Capacity, choosing kits that offer VESA sizes you need and can support your device plus accessories, then confirm wall or desk mounting methods suit your space. Finally, review Cable Management Ease and Installation Simplicity, selecting kits with built-in channels or clips and clear, step-by-step instructions for a quick setup.
Compatibility Back-Hole Spacing
First, verify the back-hole spacing of your mini PC or NUC model—common spacings are 75×75 mm, 100×100 mm, 85×85 mm, and 94×94 mm—and check the kit’s listed compatibility to ensure a proper fit. Then identify your device’s exact spacing from the manufacturer specs or user manual. Compare it to the kit’s back-hole options; some kits support dual-spacing like 85×85 and 94×94, which covers multiple generations in one product line. If there’s a mismatch, look for a different kit or model with the matching spacing. Always confirm that the back-hole spacing matches the monitor’s VESA pattern when mounting behind a screen. Verify compatibility for your exact NUC model and SKUs before purchasing to avoid misfit.
Mounting Options Flexibility
When choosing a mounting kit, evaluate the mounting options it supports and match them to your setup. Check if the kit uses standard VESA patterns, such as 75×75 mm or 100×100 mm, which enables mounting behind monitors, on monitor arms, or on walls or under desks. Look for back-hole spacing compatibility, like 85 mm or 94 mm, to fit specific NUC models and ensure you can attach without adapters. Consider All-in-One designs that eliminate extra brackets, speeding installation and reducing parts to manage. Review cable management features, such as included straps or clips, for a tidy end result. Confirm weight and device width support, noting ranges up to 12 lbs and 0.63–2.8 inches width, to ensure secure placement.
Stability and Weight Capacity
To ensure stability and avoid wobble, verify each mounting kit’s weight capacity and build quality before installation. Weight capacity varies by kit, with many products designed to support mini PCs up to about 12 pounds (5.4 kg) in total load. Check the specified limit and confirm your unit’s weight fits, including any accessories. Stability is enhanced by solid metal construction and proper VESA mounting patterns, such as 75×75 mm or 100×100 mm, or 85mm/94mm back-hole spacings in some NUC kits. Ensure a secure fit by aligning holes precisely and tightening fasteners evenly. Some kits include cable management and additional straps to prevent movement that could affect stability. Replacement or extension plates may be needed for certain generations to ensure a wobble-free fit.
Cable Management Ease
Cable management matters for a clean, safe install, so start by checking what each kit includes for wires and devices. Look for a cable strap to organize wires and keep the workspace tidy. Note if the kit supports routing power and data cables behind the monitor for a clean look. Some kits explicitly note space-saving benefits by concealing cables along the bracket or monitor edge. Check if open designs or accessible ports keep cable plugs reachable after mounting. Verify whether rubber spacers or grommets are included to create a small gap for cable routing and airflow. Consider how these features affect maintenance, future upgrades, and cable length needs. Choose a kit that balances concealment with accessibility and airflow.
Installation Simplicity
Installation simplicity hinges on choosing a kit that fits your mini PC and installs without hassle. Start by checking included screws and instructions, as most kits claim a five-minute setup. Verify compatibility notes for back-hole spacing (85mm vs 94mm) and VESA patterns (75×75, 100×100, or multiple 100×100 options) to ensure a proper fit for your NUC or mini PC. Consider all-in-one designs that omit extra brackets for a straightforward install behind a monitor or on a monitor arm. Look for cable management accessories, straps, and spacers that tidy cables after mounting. Ease of use depends on your hardware familiarity; some guides assume screwdriver-based installation and quick hole alignment. Follow the steps in order, align holes, insert screws, secure firmly, and test stability.
Final Thoughts
To wrap up, choose the kit that fits your mount pattern and PC model first. If you have an Intel NUC, start with the NUC-specific brackets or the extension plate for extra reach. For a 100×100 setup, pick the ASUS MKT02 or a compatible 100×100 kit. For flexibility across brands, consider adjustable mounts and Dell/OptiPlex options. Verify screw sizes, weight capacity, and cable management, then install in clear, stepwise actions.
Meet Ry, “TechGuru,” a 36-year-old technology enthusiast with a deep passion for tech innovations. With extensive experience, he specializes in gaming hardware and software, and has expertise in gadgets, custom PCs, and audio.
Besides writing about tech and reviewing new products, he enjoys traveling, hiking, and photography. Committed to keeping up with the latest industry trends, he aims to guide readers in making informed tech decisions.