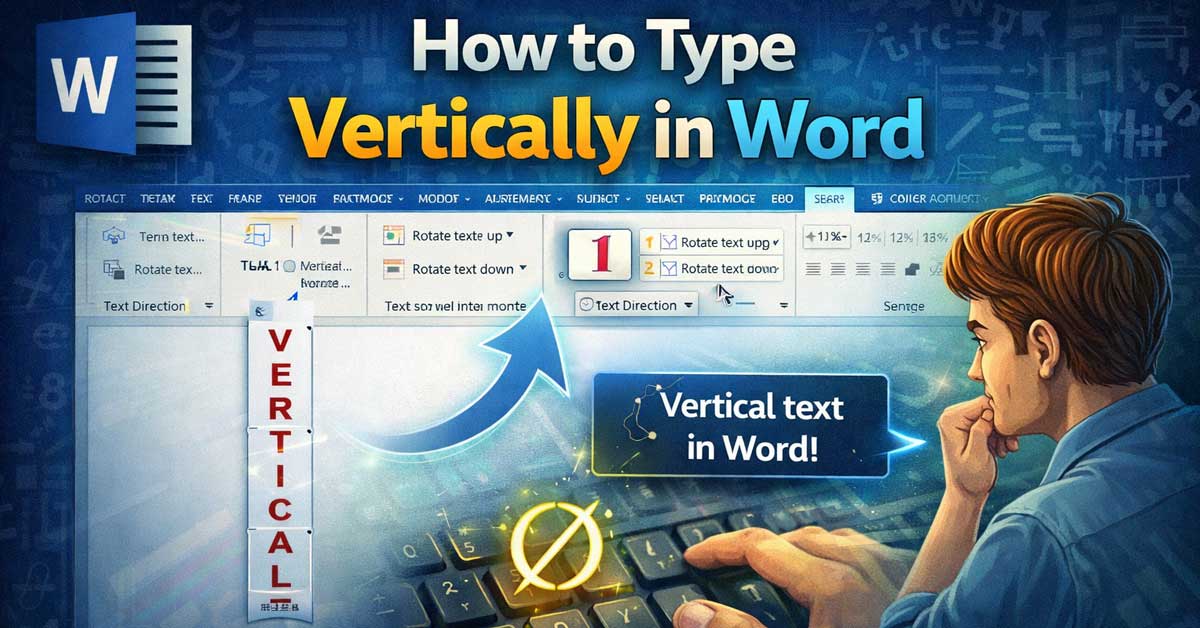
A few different methods depending on what you actually need — here’s how each works
“Typing vertically in Word” means different things depending on what you’re trying to achieve — text running down the side of a page, individual letters stacked on top of each other, or text rotated 90 degrees in a table cell or text box.
Word supports all of these but through different features.
Here’s how to accomplish each one.
Vertical Text in a Text Box (Rotated 90 Degrees)
This is what most people mean when they want vertical text — text that reads top to bottom running along a margin, a sidebar, or a design element. The text itself is normal horizontal text that’s been rotated.
Method 1: Insert a Text Box and Rotate It
Go to Insert → Text Box → Draw Text Box. Click and drag to draw a text box anywhere on the page. Type your text inside it.
With the text box selected, go to Format → Text Direction in the Shape Format tab. Select Rotate All Text 90° or Rotate All Text 270° depending on which direction you want. The text rotates within the box.
Alternatively, right-click the text box border and select Format Shape → Text Options → Text Box → Text Direction for the same options.
Method 2: Use the Layout Options
With a text box selected, look for the Text Direction button in the Shape Format tab → Text group. Click it to cycle through horizontal, rotated 90 degrees clockwise, and rotated 90 degrees counterclockwise.

Dimensions: 11 x 1.7 x 25 Frame, 10 x 1.5 x 24 Canvas Art

Dimensions: 11 x 1.7 x 25 Frame, 10 x 1.5 x 24 Canvas Art

Personalize Your Own keychain. Four Sides of the Pendant can be engraved, 30 characters per side. Fonts style as the picture shows. Please check the engraving content carefully before placing an order. If the Self-Customize Service can not satisfy your r
Vertical Text in a Table Cell
Word tables support vertical text natively — useful for column headers in narrow tables where horizontal text would require very wide columns.
Click inside the table cell where you want vertical text. Go to the Layout tab (the Table Layout tab, not the Page Layout tab) and click Text Direction in the Alignment group. Each click cycles through the available text directions:
- Horizontal (default)
- Rotated 90° (reading bottom to top)
- Rotated 270° (reading top to bottom)
The cell height adjusts to accommodate the rotated text. You can resize the cell manually to control how much space the vertical text takes up.

Used Book in Good Condition
Stacked Vertical Text (Letters on Top of Each Other)
If you want each letter on its own line rather than rotated text — spelling a word downward with one letter per line — this is simply a formatting choice rather than a Word feature.
Type each letter followed by Enter to put them on separate lines. To keep them properly spaced and aligned, format the paragraph spacing to remove extra space between lines:
Select all the stacked letters. Go to Home → Line and Paragraph Spacing → Remove Space Before Paragraph and Remove Space After Paragraph. Also set line spacing to Single or Exactly with a specific point size matching your font size.
For a cleaner result, put the stacked letters in a text box so they can be positioned independently of the main document text.

STANDARD COLOR & THICK - Black and white plastic letter set is our standard color, thick and sturdy, perfect look against for our felt letter boards.
Officially Licensed Marvel Apparel

Officially Licensed Marvel Apparel
Vertical Text in a Header or Footer
For text running vertically in a margin — like a confidentiality notice or document label along the side of a page — a text box placed in the header or footer area persists across pages and doesn’t interfere with the main document flow.
Double-click in the header area to enter header editing mode. Go to Insert → Text Box → Draw Text Box and draw a box in the margin area. Type your text, then apply rotation via Format → Text Direction as described above. Position the text box in the margin using drag or the Position settings in the Shape Format tab.
Vertical Text Using WordArt
WordArt provides additional text direction options including vertical stacking with individual letters upright rather than rotated.
Go to Insert → WordArt and select a style. Type your text. With the WordArt selected, go to Shape Format → Text Direction and look for Vertical as one of the options. This stacks letters vertically while keeping each letter upright — useful for spine text on book designs and similar decorative applications.
Changing Page Orientation for a Section
If you need an entire page or section to run vertically — essentially rotating the page to landscape for a specific section — this is a section break and orientation change rather than vertical text.
Go to the page where you want the change. Go to Layout → Breaks → Next Page to insert a section break. Then go to Layout → Orientation → Landscape while the cursor is in that section. Page setup changes apply only to the current section when section breaks are in place.
A Quick Reference by Use Case
| What You Want | How to Do It |
|---|---|
| Text rotated sideways in a text box | Insert Text Box → Format → Text Direction |
| Vertical text in a table column header | Click table cell → Layout tab → Text Direction |
| Letters stacked vertically, one per line | Type each letter + Enter, remove paragraph spacing |
| Decorative vertical text | Insert → WordArt → Text Direction → Vertical |
| Vertical margin label across all pages | Text box in header area with rotation applied |
| Entire page turned sideways | Section break + Orientation change to Landscape |
The Bottom Line
The most common need — text running vertically along a side or in a design element — is handled through a text box with Text Direction applied. Insert the text box, type your content, and rotate it through the Format tab.
For table column headers, the Layout tab’s Text Direction button does it directly without needing a text box at all.
Stacked letters one per line is purely a line break approach — no special feature needed, just Enter between each character with tight paragraph spacing.
Word doesn’t type vertically by default — you tell it to rotate or stack through text boxes, table settings, or WordArt, depending on the effect you need.
![NIV Real-Life Devotional Bible for Women, Compact: Insights for E (Box Lea Cp) (2014-10-08) [Imitation Leather]](https://m.media-amazon.com/images/I/01RmK+J4pJL._SL500_.gif)

Dimensions: 14 x 1.7 x 31 Frame, 13 x 1.5 x 30 Canvas Art
Special & Unique: 4 Sides of the Pendant can be Laser Engraved. Custom Design You Own Necklace by engraving Name, Messages, Special Date, Location, Promise Words, or Logo on the Pendant to make it Special and Meaningful.
Meet Ry, “TechGuru,” a 36-year-old technology enthusiast with a deep passion for tech innovations. With extensive experience, he specializes in gaming hardware and software, and has expertise in gadgets, custom PCs, and audio.
Besides writing about tech and reviewing new products, he enjoys traveling, hiking, and photography. Committed to keeping up with the latest industry trends, he aims to guide readers in making informed tech decisions.