
Snapchat, the dynamic social media platform adored by millions, has long been a hub for friends to connect, share experiences, and engage with the world in a refreshingly different way. Primarily designed for mobile devices, Snapchat has nonetheless captured the imagination of users eager to extend its colorful, creative features to their personal computers. Whether you’re operating a PC or Mac, as long as you’re equipped with a webcam, the world of Snapchat is within your grasp.
If you’ve been toying with the idea of catapulting your Snapchat experience onto the wider canvas of your computer screen, then you’re in the right place. We’ve curated a comprehensive guide that will walk you through each step, ensuring a smooth transition from mobile to desktop.
What Is Snapchat and Why Should You Use It on PC or Mac?
Being the dynamic communication app that it is, Snapchat lets you connect with friends, share your experiences, and engage with the world around you. It offers a range of exciting features like live messaging, group stories, special lenses, filters, and even video chats with up to 16 friends at once!
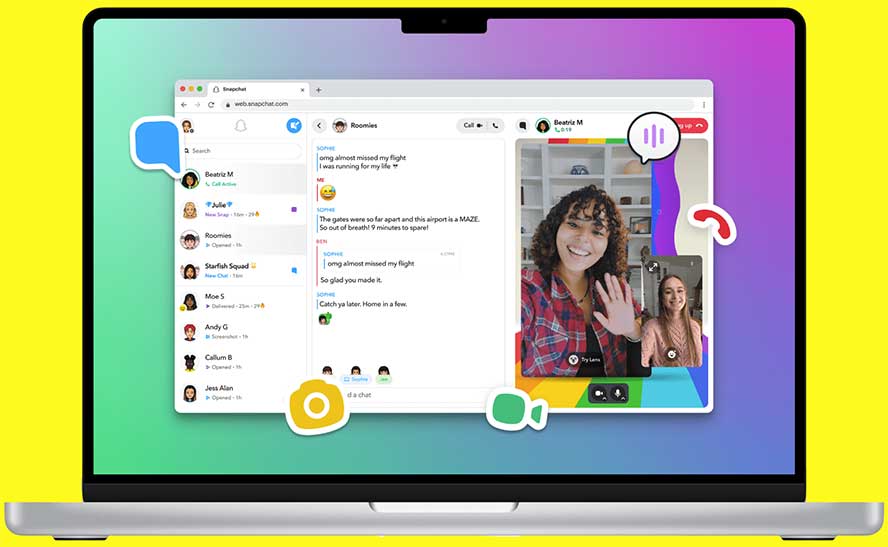
So why would you want to run Snapchat on your PC or Mac? Well, for starters, it offers the benefit of a larger and more immersive display. By using Snapchat on your computer, you can comfortably view stories, chat with friends, and even manage your snaps on a bigger screen. Plus, it makes multitasking easier if you’re someone who likes to stay connected while working or studying.
What Is BlueStacks and How Does It Work?
BlueStacks is a robust Android emulator that allows you to run Android apps on your PC or Mac. With BlueStacks, you can access Snapchat and thousands of other apps without needing a mobile device. The software is compatible with both Windows and Mac operating systems, so no matter which platform you’re using, you can enjoy the convenience of running your favorite apps on a larger screen.
BlueStacks also comes packed with a range of user-friendly features, like Advanced Keymapping, Macros, and Multiple Instances, designed to optimize your user experience. The latest version, BlueStacks 5, is faster, lighter, and more streamlined than ever, making it the ideal solution for running Snapchat on your computer.
How to Download and Install Snapchat on Your PC or Mac?
Before you can enjoy Snapchat on your computer, you’ll need to go through a straightforward process of downloading and installing the application. To make this process as easy as possible, we’ve created a detailed step-by-step guide that will lead you through every action.
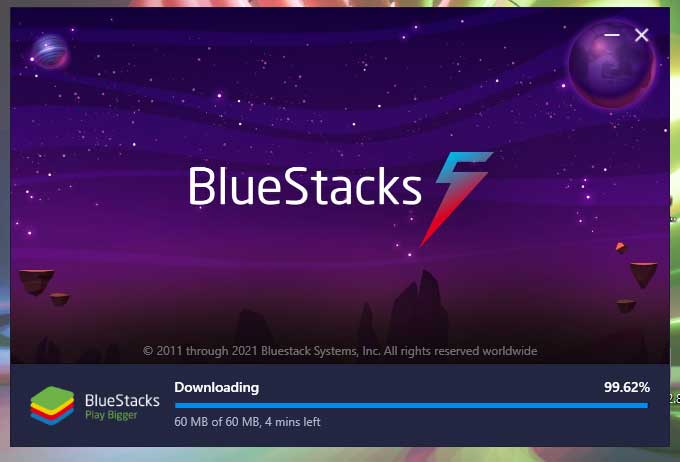
Step 1: Download and Install BlueStacks on Your PC or Mac – The first thing you’ll need to do is download the BlueStacks Android emulator. You can download BlueStacks directly from the official website. Once you’re there, you’ll see a “Download BlueStacks” button. Click on it to start the download process.
After the download is complete, locate the BlueStacks installer in your Downloads folder (or wherever you chose to save it). Double-click on the installer to start the installation process.
During installation, you’ll be guided through a series of prompts. Follow the instructions provided, and in a few minutes, BlueStacks will be ready for use on your computer.
Step 2: Complete Google Sign-In – After installing BlueStacks, you’ll need to sign in to your Google account. This step is necessary because BlueStacks needs to access the Google Play Store to download apps, and for that, it needs your Google credentials.
On the BlueStacks home screen, you’ll see a “Sign in to Google” prompt. Click on it and enter your Google username and password. If you don’t have a Google account, you can create one during this step.
Step 3: Search for Snapchat – Now that you’re signed in to Google, you can access the Play Store. At the top right corner of the BlueStacks home screen, you’ll see a search bar. Type “Snapchat” into the search bar and hit enter. The Play Store will then present you with a list of apps related to your search.
Step 4: Install Snapchat – In the search results, locate the official Snapchat app (it should be at the top of the list). Click on the Snapchat icon, which will lead you to the app’s Play Store page. Here, you’ll see an “Install” button. Click on it to start the installation process.
Step 5: Open Snapchat – After the installation is complete, you can open Snapchat directly from the BlueStacks home screen. Look for the Snapchat icon and click on it to launch the app. Now, you can sign in to your Snapchat account and start using the app on your computer!
What Are the System Requirements for Running Snapchat on BlueStacks?
To ensure a smooth and seamless experience, it’s essential to make sure your computer meets the minimum system requirements for running BlueStacks. Here are the specifications your system should have:
Operating System
BlueStacks requires Microsoft Windows 7 or above. Although it’s compatible with Windows 7, for the best performance, it’s recommended to use a more recent version of Windows, such as Windows 10. In order to check your operating system, press the Windows key + R on your keyboard. This will open up the Run dialog box. From there, type in “winver” and then press enter. A window will pop up, showing you the version of your operating system.
If you’re using a Mac, you will need to have macOS 10.12 or later (64-bit). Virtualization should also be enabled. In addition, make sure your graphics drivers are current. Ideally, BlueStacks works best with OpenGL 2.1 or later. And as for Mac graphics, an Intel HD 5200 or greater will do the trick.
Processor
BlueStacks works with both Intel and AMD processors. However, keep in mind that a faster processor will provide a more responsive and fluid experience when running apps on BlueStacks.
RAM
Your system should have at least 4GB of RAM. This amount of memory allows BlueStacks to run smoothly while leaving enough resources for other tasks on your computer. To check your processor and RAM, press Ctrl + Shift + Esc on your keyboard to open the Task Manager. Click on the “Performance” tab. Here, you’ll see details about your processor and memory.
HDD
Make sure you have at least 5GB of free disk space on your computer. This space is needed for BlueStacks to install and run apps, including Snapchat. To check your disk space, open File Explorer by pressing Windows key + E on your keyboard. Click on “This PC” in the left-hand column. Under “Devices and drives,” you’ll see your hard drive(s) listed with the amount of free space available.
Administrator Access and Graphics Drivers
You should have Administrator access on your PC to download and install BlueStacks. This access is needed to allow BlueStacks to make the necessary changes to your system during the installation process.
Moreover, it’s vital to ensure that your graphics drivers are up-to-date. Outdated graphics drivers can cause performance issues when running apps on BlueStacks. The graphics drivers can usually be updated via the manufacturer’s official website, whether that’s NVIDIA, AMD, or Intel.

If you need to verify whether you’re an Administrator, press the Windows key + R on your keyboard to open the Run dialog box. In it, you need to type “netplwiz” and enter. A window will open, showing the user accounts on your computer. If “Administrators” is listed under the “Group” column for your account, then you have Administrator access.
By ensuring your system meets these requirements, you’re setting yourself up for a successful and enjoyable Snapchat experience on your PC or Mac. Now that you’re armed with this information, you’re ready to download and install Snapchat on your computer.
Can I Use Snapchat’s Filters and Lenses on BlueStacks?
Snapchat’s fun and creative filters and lenses are fully functional when using the app on BlueStacks. However, you’ll need a webcam for your PC or Mac to fully utilize this feature. Once you have a webcam set up, you can take snaps, apply filters and lenses, and share them with your friends just like you would on your phone.
How to Keep My Snapchat Account Safe on BlueStacks?
Using Snapchat on BlueStacks is as safe as using it on your phone. However, just like with any online platform, it’s important to follow some safety guidelines. Always use a strong, unique password for your Snapchat account, and be careful not to share your login information with anyone. Also, be sure to update BlueStacks and Snapchat regularly to benefit from the latest security updates and features.
Can I Sync My Snapchat Account Between My Phone and BlueStacks?
Since Snapchat is linked to your account and not a specific device, you can access your Snapchat account from multiple devices, including your phone and a PC or Mac running BlueStacks. Just remember to sign in with the same account information.
Final Thoughts
Running Snapchat on your PC or Mac provides a more immersive and flexible user experience. With the help of the BlueStacks Android emulator, you can easily install and use Snapchat on your computer, enjoying its features on a larger, more comfortable display.
Meet Ry, “TechGuru,” a 36-year-old technology enthusiast with a deep passion for tech innovations. With extensive experience, he specializes in gaming hardware and software, and has expertise in gadgets, custom PCs, and audio.
Besides writing about tech and reviewing new products, he enjoys traveling, hiking, and photography. Committed to keeping up with the latest industry trends, he aims to guide readers in making informed tech decisions.