Business and home security is an incredibly important these days. Whether you have a home or workspace, making sure criminals and unwanted guests don’t trespass should be a top priority. The problem is, security cameras can be expensive and also quite difficult to install. Additionally, if you’re not tech-savvy, figuring out which specifications you need can be cumbersome.
Enter the Soliom Bird S60 – a seemingly powerful, fully wireless IP camera that seems to provide a perfect blend of performance and affordability. It’s stripped down of unnecessary clutter and ideal for those needing an inexpensive, reliable and effective security camera solution. We were lucky enough to receive a few of these cameras to test out for ourselves. Today we’re here to go over all the specifications, limitations and features that make it stand out or fall short from the competition. (Use Amazon coupon code 20OFFCAM for 20% Off the Soliom Bird!)
First Look
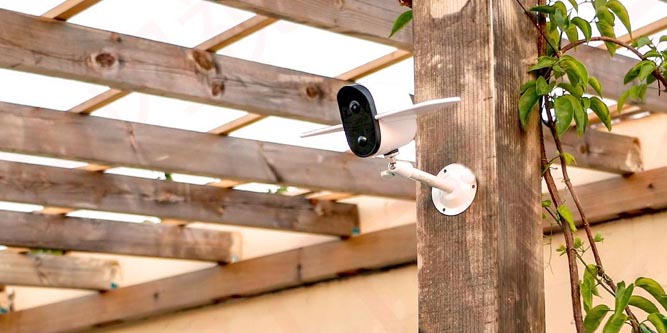
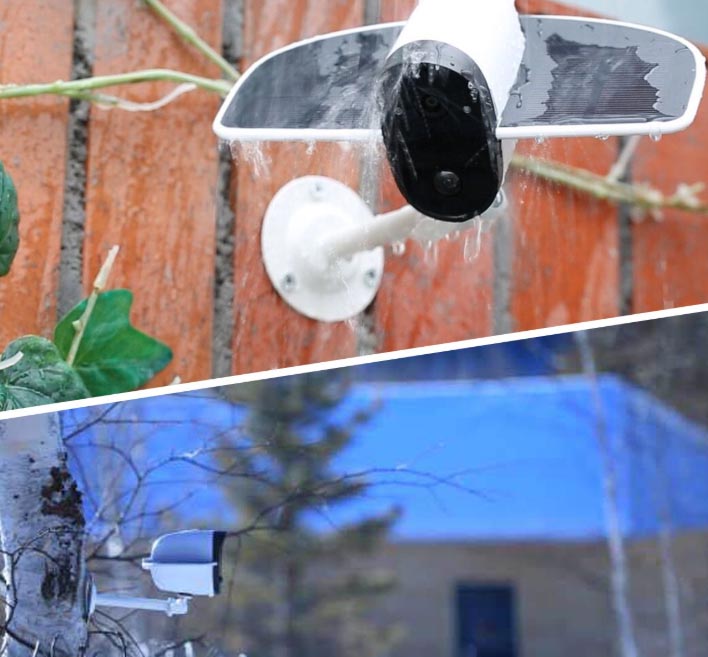
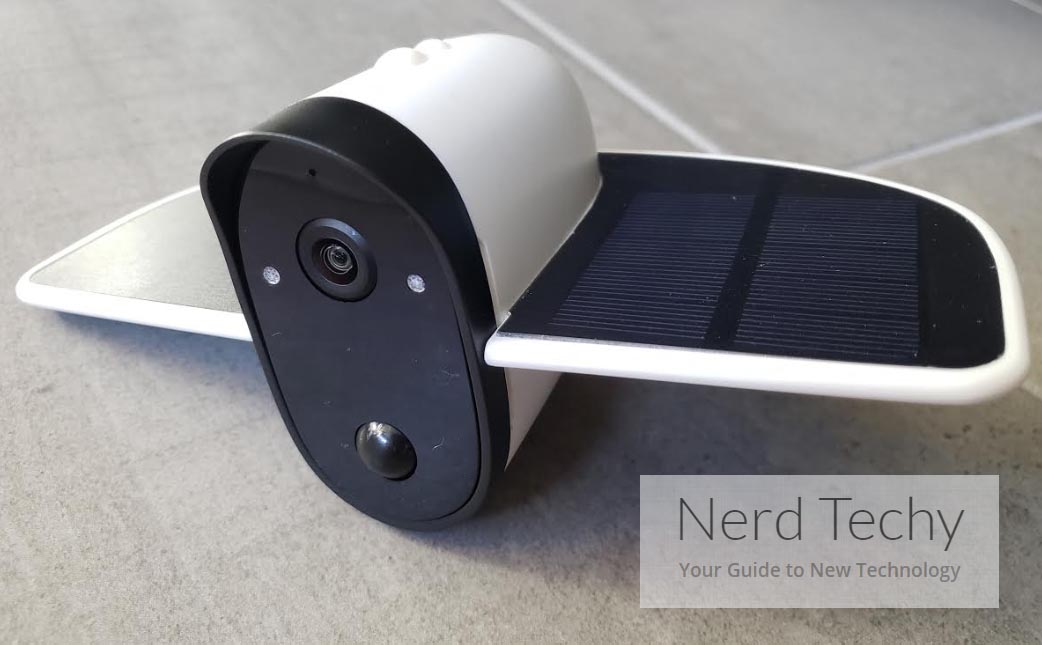
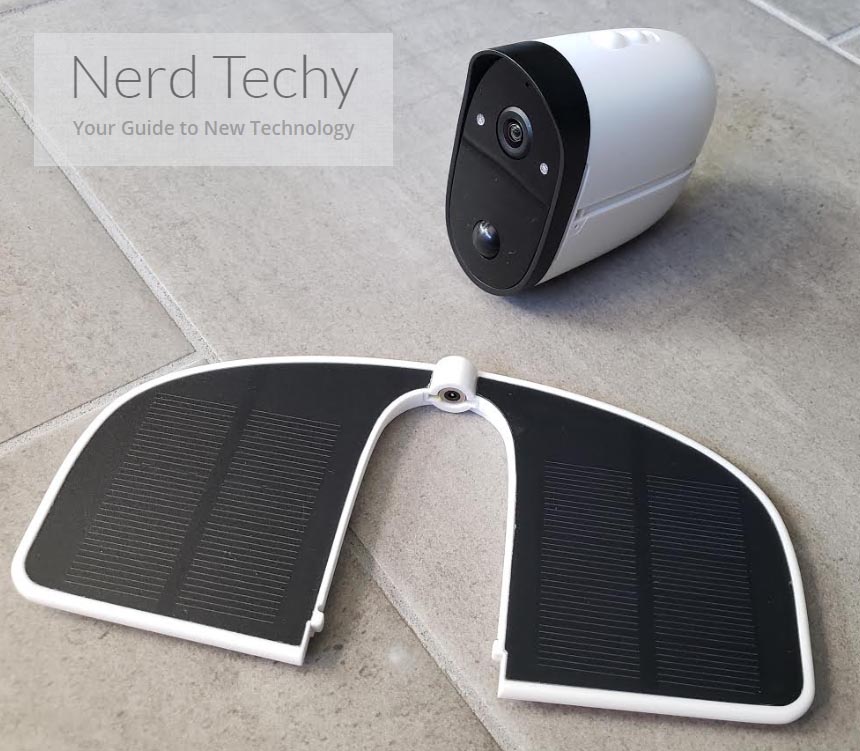
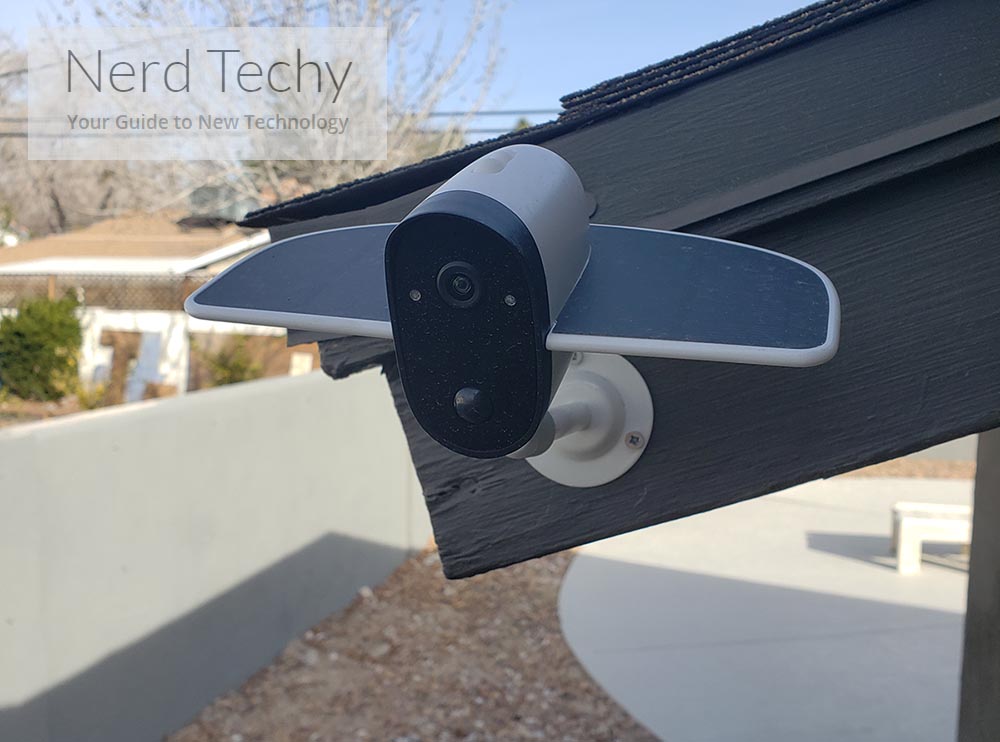
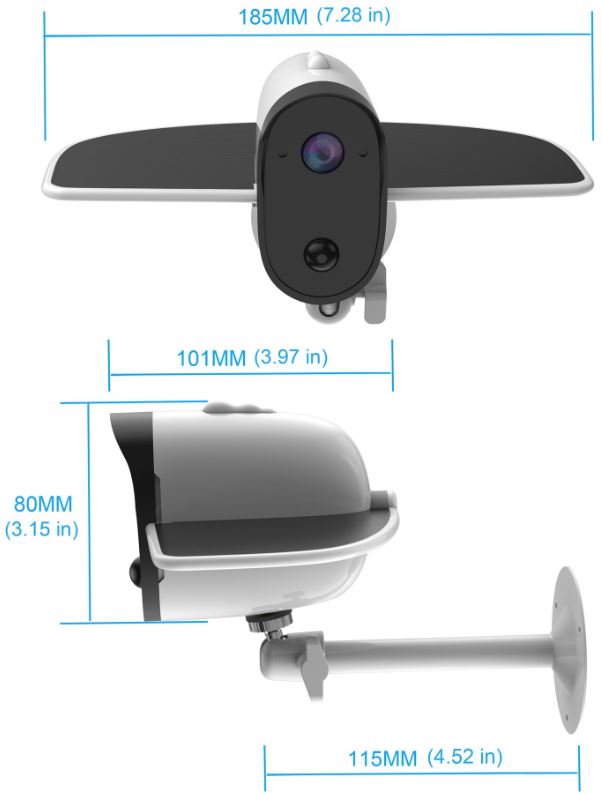
From first glance, you’ll immediately notice that the Soliom Bird S60 doesn’t look like you’re average IP security camera. Everything looks fairly normal except for the “wing” solar panel design. It’s a unique look that boasts one of the best features – total wireless freedom.
With the solar panel in place, these cameras don’t require a single wire to be functional. Each camera is independently powered by an internal 4,000 mAh battery that’s constantly being charged by the “wing”. During the day, the solar panel takes up as much energy from the sun as possible so it can operate continuously throughout the night or during overcast days.
It’s a simple concept, but Soliom seems to be one of the first to put it all in one package. Sure, you have other camera manufacturers combining solar panels with wireless cameras, but hardly any integrate the panel into the actual design. Most often, you’ll see security cameras like the Ring Spotlight or Reolink Argus 2 that support external solar chargers, but they require you to wire the solar panel from the camera to a specific location. Having the solar panel integrated into the wing of the S60 may look a little funny, but the design is well worth the capabilities it brings.
Getting Started
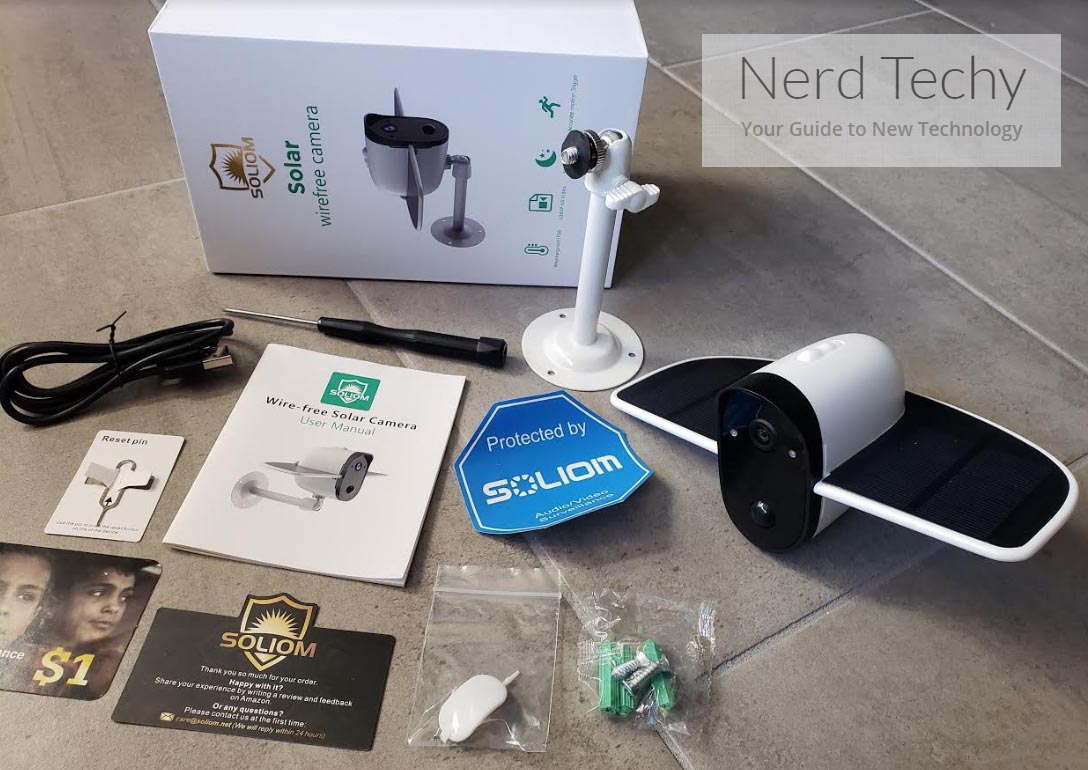
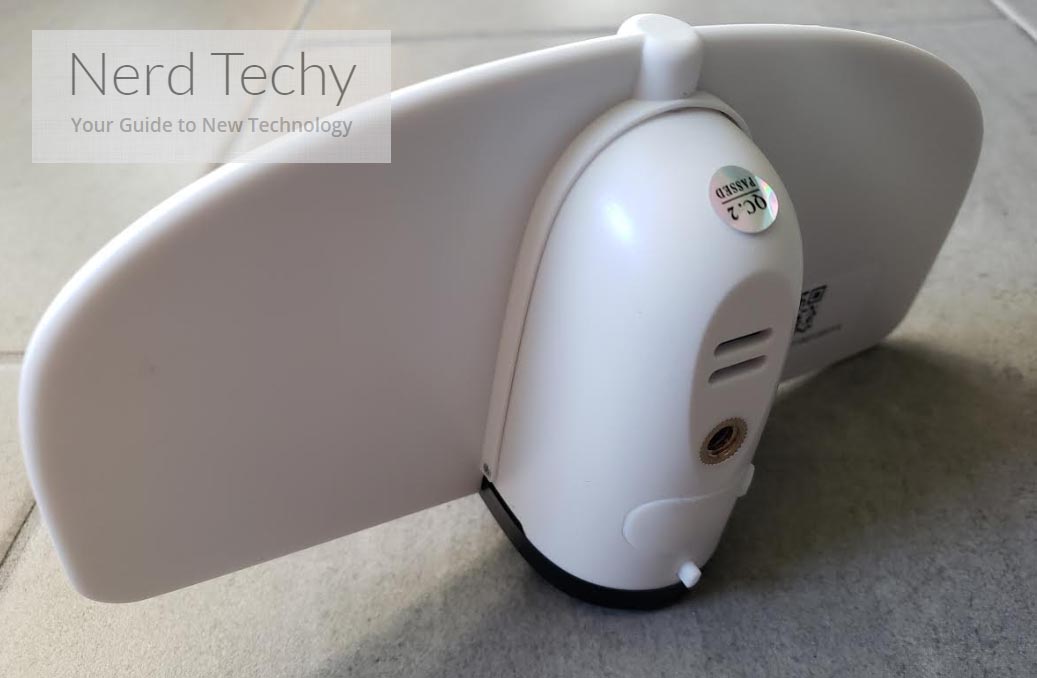
When the Soliom Bird S60 first arrives, you’ll see that it comes included with a plethora of accessories. In the box, you’ll find the mount with screws (and drywall anchors), reset pin, USB charging cable, a tiny philips screwdriver, security sticker, user manual, extra silicone flap (with tiny screws), the solar panel wing, and of course – the camera itself. At first, you’ll need to manually attach the solar wing by using the included screwdriver to attach it to the back in a matter of seconds. It’s very straightforward.
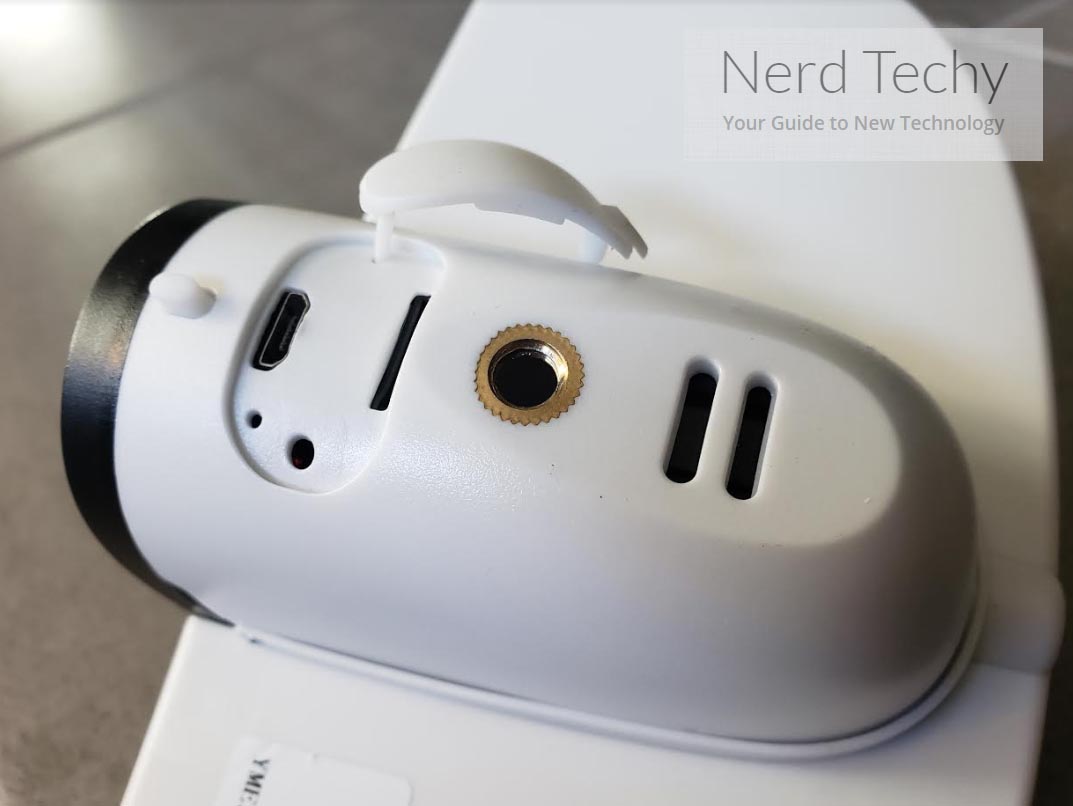
One thing you may notice that confuses some people is the USB charging cable. Why would they include a charging cable if the solar panel is fully capable of providing the power to the internal battery? It’s meant for first-time use and indoor applications if you decide you’d like to keep the camera indoors (where sunlight isn’t) and manually plug it into an outlet. While this isn’t likely how most users will set it up, it’s nice to know it’s an option.
Upon taking the Soliom Bird S60 out of the box for the first time, you’ll want to connect the USB charging cable for approximately 4 to 5 hours before you begin setting it up. Typically, the camera will arrive with around 80% battery level, but Soliom strongly recommends fully charging it before configuration.
Taking a closer look, open the silicone flap on the base and you’ll have a spot to slip-in a MicroSD card. Doing this will provide you with localized storage for saving footage and still photos. While this isn’t a requirement, it’s definitely a good idea to utilize this feature. Do keep in mind, however, that Class 10 MicroSD cards formatted to FAT32, between 8 GB and 64 GB capacities are the only ones supported.
Setting Up Software
Once you’re ready to configure the software and wireless network for the Soliom Bird S60, be sure to download the “Soliom” app from either the Google Play store or the iTunes App store. Once downloaded and installed, ensure that the camera, your smartphone/tablet and your WiFi router are all close together (within 5 feet of each other) for the initial setup.
Turn on the camera by pressing the small power button on the base, near where the mounting bracket attaches. You should hear a “click” as you press the button inward and after a few seconds, you’ll see the LED next to the lens begin to flash blue. At this time, an audible notice stating “the camera is ready to be paired” will sound. Next, open up the Soliom app and select “add a device”. Then choose “setup device” and select “yes”.
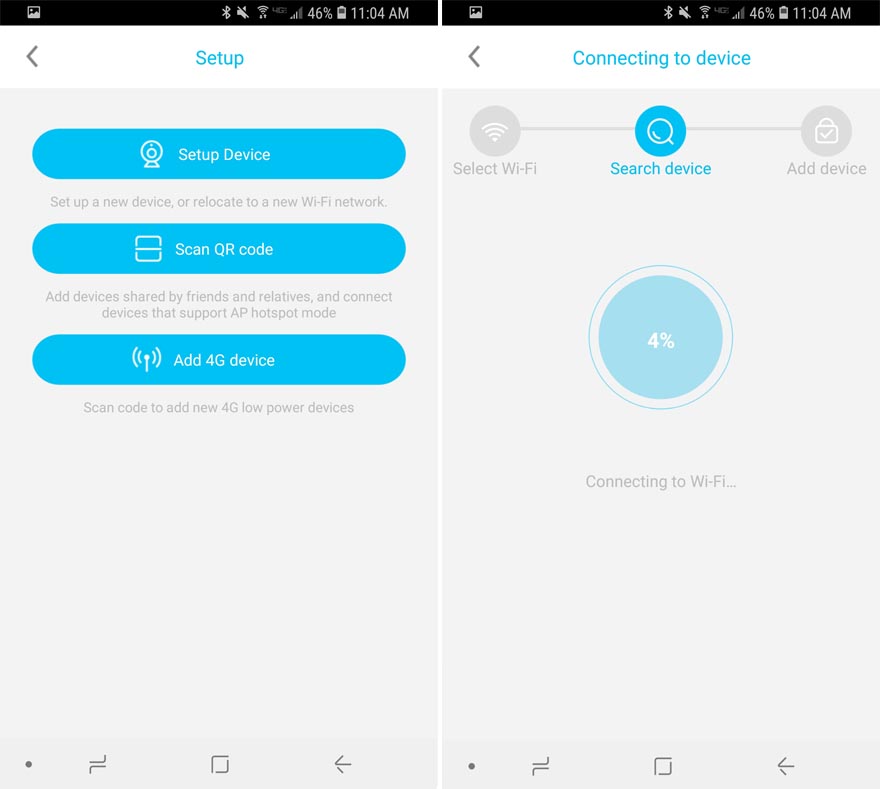
The following screen will ask for your network’s WiFi credentials. Enter your network name/password and hit next. The app will then enter into the “search device” page, where in approximately 1-2 minutes you should hear “pairing information received”, clearly indicating that the camera has been found. Lastly, the app will ask you to setup your very own password for the camera where you’ll be able to enter your own secure password.
If you encounter issues with using the app for the first time, don’t be alarmed, we did too. Make sure that your iOS/Android device is literally within 2 feet of the camera. We tried configuring the app from 10 feet away (even though we were in the same room) and it had trouble finding the camera. After many attempts, we moved them closer together and everything configured flawlessly.
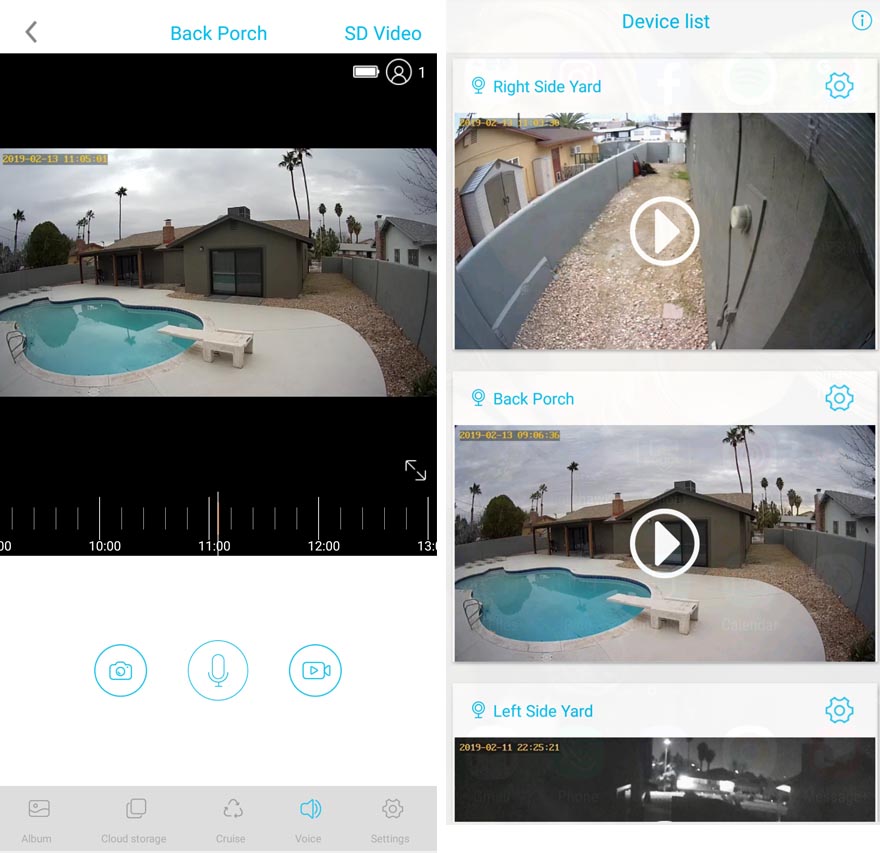
Once you’ve gone through the setup procedures, you’ll be able to click on the camera through the app and see a live view. From the camera viewing portal, you’ll be able to speak directly into the camera, record video, snap still photos, access settings, see saved videos/photos and much more. Taking a few minutes, you’ll likely figure everything out as it’s fairly self-explanatory.
Want to share the camera with family members or co-workers? It’s pretty simply. Just have them install the Soliom app. Then, open up your app and click the settings icon next to each camera you’ve already configured. From here, select “share QR code” and let them scan-in the camera. In just 20-30 seconds, they’ll have a live view and total access, just like you.
Physical Installation
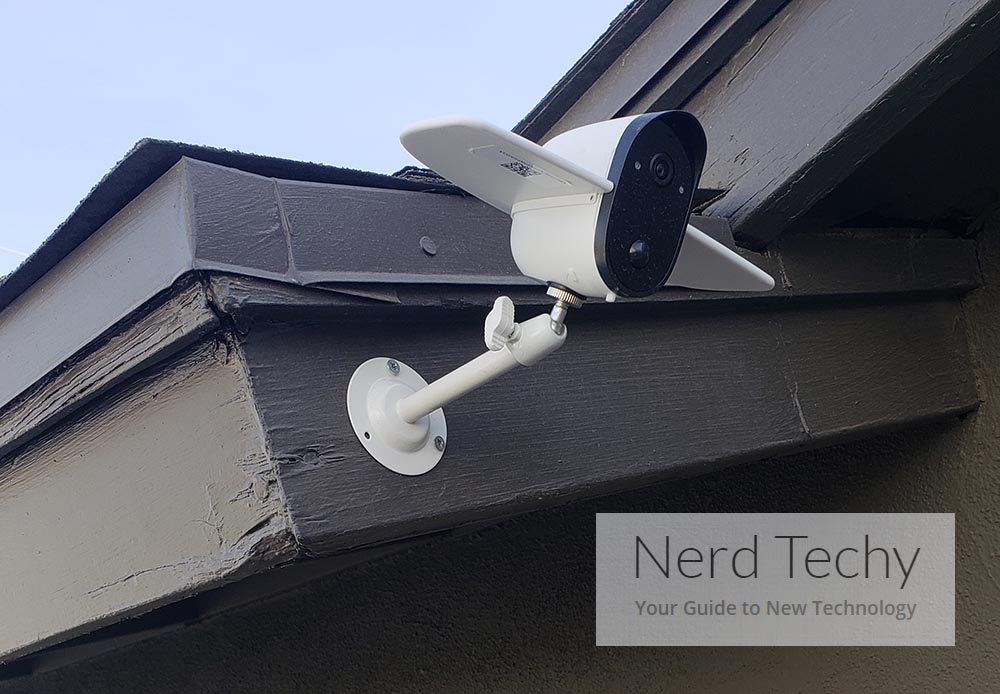
Once the camera is configured with your smartphone or tablet, it’s time to physically attach the camera to your preferred location. With this, there are a few things to keep in mind.
- Select an area that receives at least 6-8 hours of direct sunlight each day. This will ensure that the battery is able to stay charged everyday and you won’t have to manually charge it.
- Don’t install too far from your WiFi router. Keep a close eye on the signal strength that you can see from the live-view screen.
- Install at a height of approximately 8 feet. This is recommended since you don’t want people to be able to grab it, but you’ll also want a good view.
Attaching the camera to the exterior of your home or business is very straightforward. Simply place the bracket on the wall, mark 3 holes and drill/screw the hardware into position. Once you’ve done that, simply twist the camera body onto it and you’re good to go!
Day/Night Video Quality
With any security camera, the video quality is one of the most important factors. The Soliom Bird S60 states that it’s capable of producing 1080p high definition video. While it may be true that technically speaking the video files are 1920 x 1080 pixels, we never felt like it was true high definition. The videos tend to be on the blurrier side of things, although they’re still reasonably clear. We’d compare them to the same quality that the Ring Spotlight cameras. Since the video files are transmitted wirelessly, some loss in quality is to be expected.
Into the night, you might not notice the same kind of clarity as daytime, but it’s pretty good! Equipped with infrared night vision, the Soliom Bird S60 sees into the darkness without onlookers noticing anything more than a few dimly lit red lights that appear on the front, near the lens. The infrared LEDs shine approximately 40 feet in ideal conditions but it could be better or worse depending on specific conditions. Since our cameras are nearby city lights, the added ambient light helps create a better scenario for the infrared night vision to work well.
File Storage
The Soliom Bird S60 gives you two different options for saving video clips and still photos that have been captured by the camera. By default, it’ll save to an internal micro SD card (not included) between 8 and 64 GB. As we mentioned earlier, installing the memory card is super simple. Simply remove the small silicone flap on the base and press-it in. There’s really only one obvious issue with saving all of the video/photo content to an SD card. If someone were to physically steal the camera, they’re going to have all of your footage. This is where cloud recording comes into play.
Although optional, Soliom lets you save up to 20 video files per camera to the cloud. The clips are saved and uploaded wirelessly to a remote server for cloud-based viewing. This means that if someone were to steal your security camera, the footage will still be intact. It sounds pretty great, but the truth is, 20 video clips really isn’t all that much storage. We’re talking probably less than 500 MB of footage. In addition, it seems that accessing the cloud storage can only be done through the app, once the camera is loaded. The problem is, once you disconnect the camera, there’s no obvious way to access the cloud storage. So in the event that your camera is gone, we’re not certain that it’s possible to access the cloud storage any other way than through the app. In the end, making the cloud storage feature a bit problematic.
Viewing live video through your phone, if you want to start recording or take a snapshot, just press one of the 3 main buttons on the interface; the camera icon or video recorder icon. Once you’re recording, it’ll save locally to your smartphone without any issue. It’s pretty cool to have the video clip saved locally, but this is only the case if you manually enter the view of the camera and press the record button. When it triggers an auto record via PIR motion detection, it’ll save to the cloud or integrated SD card – the choice is yours.
Two Way Audio
One thing we really like about the Soliom Bird S60 is the two way audio feature. It lets you speak through the camera via the app and talk to anyone near the camera. Doing so is simple – just press the giant microphone icon when you open the live view of the camera. It’s a great way to communicate remotely or scare off potential thieves once you have an established connection to the camera. While the audio that emits from the camera is definitely on the quiet side, it’s nice that two way audio is supported and could really come in handy.
From watching any video clip that the S60 captures, it’s immediately apparent that the built-in mic is super sensitive. It seems to pick up every tiny detail including someone whispering from 50 feet away. It’s so sensitive that windy conditions seem to be its downfall. With high winds, we encountered quite a bit of interference, although you could still hear what it records. You’ll likely hear it with a bit of distortion and crackling. Not a big deal for most days, but if you live in a notoriously windy location, it’s definitely something to consider.
Motion Detection
Directly below the lens on the front of the Soliom Bird, you’ll see a convex sphere on the bottom center of the black face. This is the PIR (passive infrared) sensor. It’s designed to trigger recording and motion events when people, animals or objects move into frame. While the sensitivity can easily be adjusted via the Soliom app, it’s pretty sensitive by default. In some cases, even too sensitive that it’ll pickup false alerts when branches, water glare or insects fly in front of the lens. Depending on your specific environment, you’ll want to manually adjust the PIR sensitivity within the app to best fit your scenario.
Durability
One thing we can truly appreciate about the Soliom S60 is the weatherproofing. Built to IP66 standards, it’s meant for outdoor conditions and any sort of weather that comes its way. IP66 tells us that it’s sealed to repel any dust, water, snow, ice, oil or debris that it may be exposed to. It even boasts an operating temperature range from -4 to 140 degree Fahrenheit (-20 – +60 Celsius), so you can rest assured knowing that virtually any elements aren’t going to be a problem. While an IP66 rating is impressive, it’s a good idea to make sure that you don’t drop the camera or expose it to weather when the silicone flap is open.
Final Thoughts
The Soliom Bird S60 provides just about everything it promises to. Right out of the box, setting it up and configuring it to your liking is a breeze. The app walks you through everything in detail and seems to be pretty stable. We never had it crash on us or bring upon a frustrating experience. Since it’s completely wire-free, installation is also just as simple.
When it comes to the footage and video quality, we’d say it’s acceptable. We’re talking about video files wirelessly transmitted, so there is a tiny bit of loss in quality when viewing. However in our opinion, the quality seems to be good enough to point out clear details and minor nuances that can come in handy in the event of a crime or trespassing incident.
The cloud storage option is nice to have, but we don’t think it was very well executed by Soliom. It’s quite limited and doesn’t seem to work quite as well as local micro SD card storage. What’s more is that accessing the cloud can be troublesome if the camera gets stolen. Not a good design, to put it bluntly, but there are other options for saving footage that seem to work well.
Overall, we’re very impressed with the high end features and overall quality of the Soliom Bird S60 security cameras. They deliver almost everything they promise and excel in many regards. We’re putting these cameras through further testing in the coming weeks so we’ll be sure to update this review if we find any updates or issues that arise.
Are you considering an S60 Bird camera? We’d give it a solid 8 out of 10 and wouldn’t hesitate to recommend it to anyone looking for an easy to install wire-free security camera that works well. Have any questions or concerns? (Use Amazon coupon code 20OFFCAM for 20% Off the Soliom Bird!) Drop a comment below to get in touch – we’d love to hear from you!
Meet Ry, “TechGuru,” a 36-year-old technology enthusiast with a deep passion for tech innovations. With extensive experience, he specializes in gaming hardware and software, and has expertise in gadgets, custom PCs, and audio.
Besides writing about tech and reviewing new products, he enjoys traveling, hiking, and photography. Committed to keeping up with the latest industry trends, he aims to guide readers in making informed tech decisions.
excited to read it and can’t wait to buy one,no, buy 4 for all my house!!!
Thanks I been looking for a cheap camera for my house
I have 1 and it is not working properly. The image is good but live video lags about 1min. I have great signal strength. PiR disables on it’s in. So def not good for me as a security camera.
all soliom products have a help center for any query just goes thruogh soliom-support.com/