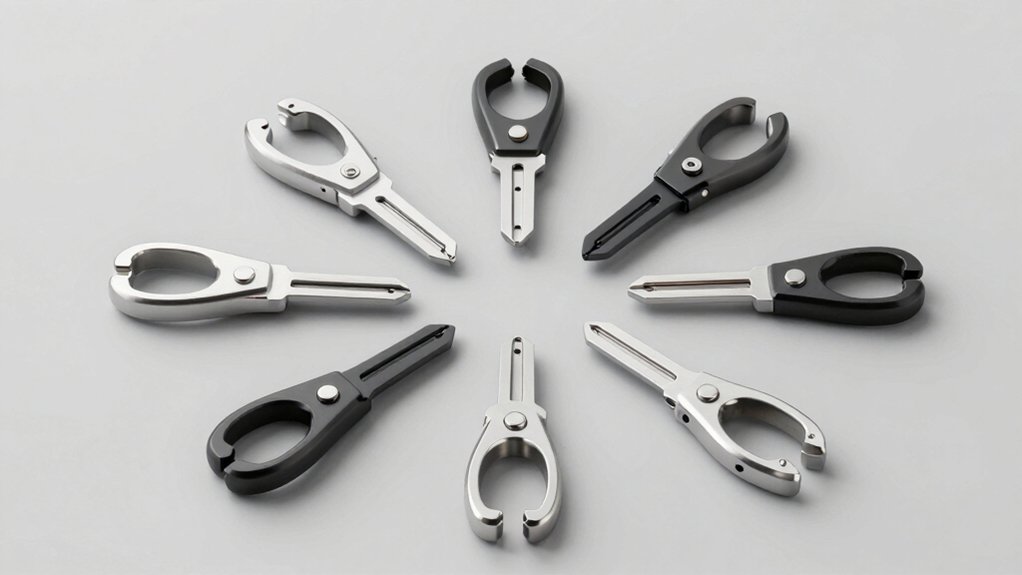
When you customize your mechanical keyboard, you need the right tools to remove keycaps and switches safely without damaging them. A quality keycap switch puller makes this job faster and easier on your hands. You’ll find several reliable options available, each with different features like stainless steel construction, ergonomic designs, and dual-function capabilities. Understanding what separates the best pullers from basic ones will help you choose the right tool—and we’ll break down nine top options that deserve your attention.
| Keycap Puller Stainless Steel Key Removal Tool |
| Most Popular | Dual Functionality: Keycap puller and switch puller | Primary Material: Stainless steel and plastic | Switch Compatibility: Cherry MX, Alps, Topre (not scissor-type) | VIEW LATEST PRICE | Read Our Analysis |
| Keycap Puller and Switch Removal Tool for Mechanical Keyboards |
| Best Value | Dual Functionality: Keycap puller and switch puller | Primary Material: Stainless steel and plastic | Switch Compatibility: Cherry MX, Alps, Topre (not scissor-type) | VIEW LATEST PRICE | Read Our Analysis |
| GATERON Twins Switch Puller for Mechanical Keyboards |

| Best For Beginners | Dual Functionality: Switch puller and keycap puller | Primary Material: Polycarbonate (PC) | Switch Compatibility: Mechanical keyboard switches | VIEW LATEST PRICE | Read Our Analysis |
| 2-in-1 Switch and Keycap Puller for Gaming Keyboards |

| Best Overall | Dual Functionality: Switch puller and keycap puller | Primary Material: Metal and plastic | Switch Compatibility: Hot-swappable mechanical or magnetic switches | VIEW LATEST PRICE | Read Our Analysis |
| ATTACK SHARK KS01 2-in-1 Switch Puller for Mechanical Keyboard |

| Premium Choice | Dual Functionality: Switch puller and keycap puller | Primary Material: 304 stainless steel | Switch Compatibility: Mechanical keyboard switches | VIEW LATEST PRICE | Read Our Analysis |
| BAROCCOMiSTEL MP01 Keycap & Switch Puller |

| Professional Grade | Dual Functionality: Keycap puller and switch puller | Primary Material: Plastic with metal components | Switch Compatibility: MX-style hot-swappable switches | VIEW LATEST PRICE | Read Our Analysis |
| Keymatic 2-in-1 Switch Puller for Mechanical Keyboard (Pink) |

| Best Design | Dual Functionality: Switch puller and keycap puller | Primary Material: Metal and plastic | Switch Compatibility: Hot-swappable mechanical or magnetic switches | VIEW LATEST PRICE | Read Our Analysis |
| OHY 2-in-1 Keycap & Switch Puller for Mechanical Keyboards |

| Most Versatile | Dual Functionality: Keycap puller and switch puller | Primary Material: ABS plastic | Switch Compatibility: Cherry MX, Gateron, Kailh, Outemu, and similar | VIEW LATEST PRICE | Read Our Analysis |
| FunHub 2-in-1 Switch Puller for Mechanical Keyboards |

| Best Compatibility | Dual Functionality: Switch puller and keycap puller | Primary Material: Stainless steel and plastic | Switch Compatibility: Gateron, Akko, Cherry MX, Kailh, Epomaker, and similar | VIEW LATEST PRICE | Read Our Analysis |
More Details on Our Top Picks
Keycap Puller Stainless Steel Key Removal Tool
Why should you choose the Keycap Puller Stainless Steel Key Removal Tool if you’re customizing a mechanical keyboard? This 2-in-1 tool features stainless steel loops with an adjustable plastic handle, letting you remove keycaps and switches from most mechanical keyboards, including Cherry MX, Alps, and Topre models. Position the steel wires under your keycap, then pull straight up to extract it cleanly. The dual-purpose design also handles switch removal for deeper maintenance. Weighing just 0.317 ounces, it’s portable and easy to store. With 4.5 stars across 7,941 reviews, users consistently praise its reliability for keyboard cleaning and repairs. Note that it doesn’t work with scissor-type switches.
- Dual Functionality:Keycap puller and switch puller
- Primary Material:Stainless steel and plastic
- Switch Compatibility:Cherry MX, Alps, Topre (not scissor-type)
- Keycap Removal Design:Adjustable wire loops
- Portability/Form Factor:Compact handheld tool
- Included Accessories:None specified
- Additional Feature:Adjustable wire fitting system
- Additional Feature:Discontinued by manufacturer
- Additional Feature:Dual axle pull capability
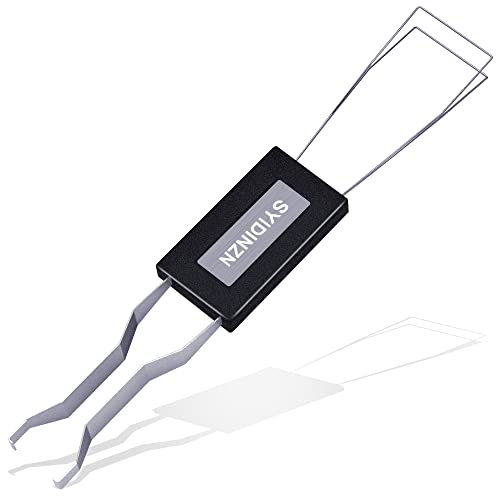
Keycap Puller and Switch Removal Tool for Mechanical Keyboards
If you’re customizing a mechanical keyboard with Cherry MX, Alps, or Topre switches, you’ll want a reliable keycap puller that won’t damage your keys during removal. This stainless steel tool from New Fashion Kingdom bends outward to grip keycaps securely. You can pull up to three keys at once to speed up the process. The set includes two anti-static cleaning brushes for maintaining your keyboard after customization. Simply position the wires under your keycaps and pull straight up. Avoid using this puller on scissor-type switches, as it’ll cause damage. The compact design fits easily in your desk drawer for whenever you need it.
- Dual Functionality:Keycap puller and switch puller
- Primary Material:Stainless steel and plastic
- Switch Compatibility:Cherry MX, Alps, Topre (not scissor-type)
- Keycap Removal Design:Bendable wire design
- Portability/Form Factor:Compact handheld tool
- Included Accessories:2 keyboard cleaning brushes
- Additional Feature:Holds up to 3 keys
- Additional Feature:Anti-static cleaning brushes included
- Additional Feature:6-month warranty coverage
GATERON Twins Switch Puller for Mechanical Keyboards
The GATERON Twins Switch Puller serves keyboard enthusiasts who need one compact tool for both switch and keycap removal. You’ll grip the rectangular PC housing and position it over your keycap or switch. Press down gently to engage the puller’s dual functions—one end removes keycaps while the other extracts switches from your mechanical keyboard. The tool holds components securely after removal, preventing loss during customization. Its ergonomic design allows you to release captured parts with minimal effort. This integrated approach eliminates carrying multiple tools, making keyboard maintenance and customization straightforward and efficient for users of all experience levels.
- Dual Functionality:Switch puller and keycap puller
- Primary Material:Polycarbonate (PC)
- Switch Compatibility:Mechanical keyboard switches
- Keycap Removal Design:Press-type mechanism
- Portability/Form Factor:Rectangular handheld design
- Included Accessories:None specified
- Additional Feature:Retains components after removal
- Additional Feature:Polycarbonate housing construction
- Additional Feature:Gentle press release mechanism
2-in-1 Switch and Keycap Puller for Gaming Keyboards
For keyboard enthusiasts who want to customize, clean, or repair their hot-swappable mechanical keyboards without investing in separate tools, a 2-in-1 switch and keycap puller combines both functions into one efficient device. The tool’s innovative 4-claw press-type gripping mechanism secures switches from multiple contact points, preventing damage during removal. You’ll activate the one-press ejection system to quickly extract components, which streamlines your workflow compared to traditional methods. The ergonomic design reduces finger fatigue during extended building sessions, providing comfortable pressure areas for sustained use. This universal tool works with hot-swappable keyboards and magnetic switches, making it essential for customization without soldering. You’ll efficiently perform maintenance tasks, switch modifications, and cleaning with a single reliable instrument.
- Dual Functionality:Switch puller and keycap puller
- Primary Material:Metal and plastic
- Switch Compatibility:Hot-swappable mechanical or magnetic switches
- Keycap Removal Design:4-claw press-type gripping
- Portability/Form Factor:Single integrated tool
- Included Accessories:None specified
- Additional Feature:4-claw press-type gripping
- Additional Feature:One-press ejection system
- Additional Feature:Reduces finger pain/fatigue
ATTACK SHARK KS01 2-in-1 Switch Puller for Mechanical Keyboard
Keyboard enthusiasts who regularly swap switches and keycaps benefit most from the ATTACK SHARK KS01’s 2-in-1 design, which eliminates the need to carry two separate tools. This stainless steel puller handles both switch and keycap removal with its engineered structure, minimizing damage to your keyboard components. The compact, foldable design fits easily in drawers or keyboard cases, making it ideal for frequent customization. You’ll appreciate the secure grip during removal operations and the durable construction that withstands repeated use. Whether you’re troubleshooting, replacing switches, or experimenting with new keycap sets, this tool streamlines your DIY maintenance workflow efficiently.
- Dual Functionality:Switch puller and keycap puller
- Primary Material:304 stainless steel
- Switch Compatibility:Mechanical keyboard switches
- Keycap Removal Design:Pull-out engineered structure
- Portability/Form Factor:Foldable/retractable, compact
- Included Accessories:None specified
- Additional Feature:304 stainless steel durability
- Additional Feature:Foldable/retractable compact design
- Additional Feature:Blue transparent color option
BAROCCOMiSTEL MP01 Keycap & Switch Puller
MiSTEL’s 2-in-1 puller works best if you’re swapping keycaps and switches regularly during extended customization sessions. The tool features a steel wire keycap puller on one end and a four-prong switch puller on the other. Its smoked translucent black PC housing with metal components resists wear and maintains a low-profile professional appearance. The ambidextrous design accommodates both left and right-handed users. Compatible with MX-style hot-swappable switches, this portable puller eliminates the need for separate tools. The non-slip grip reduces hand fatigue during long maintenance work. With a 4.0/5 rating from nine customer reviews, users report effective, efficient customization without excess effort.
- Dual Functionality:Keycap puller and switch puller
- Primary Material:Plastic with metal components
- Switch Compatibility:MX-style hot-swappable switches
- Keycap Removal Design:Steel wire keycap puller
- Portability/Form Factor:Low-profile portable design
- Included Accessories:None specified
- Additional Feature:Four-prong switch puller end
- Additional Feature:Smoked translucent black housing
- Additional Feature:Steel wire keycap puller
Keymatic 2-in-1 Switch Puller for Mechanical Keyboard (Pink)
This tool’s 4-claw grip and one-press eject design make it an excellent choice if you’re customizing a hot-swappable keyboard without soldering experience. The four-jaw mechanism grasps your switch securely from multiple points, preventing damage during removal. You’ll press the button once to eject the switch quickly, reducing customization time by 15-20 minutes. The tool works universally with most hot-swappable mechanical and magnetic switches. Its dual function lets you extract both switches and keycaps using one compact pink tool. The metal and plastic construction supports repeated use during cleaning, repair, or customization tasks.
- Dual Functionality:Switch puller and keycap puller
- Primary Material:Metal and plastic
- Switch Compatibility:Hot-swappable mechanical or magnetic switches
- Keycap Removal Design:4-claw press-type mechanism
- Portability/Form Factor:Single integrated tool
- Included Accessories:None specified
- Additional Feature:360° grip around switch
- Additional Feature:15-20 minute time savings
- Additional Feature:Pink color aesthetic option
OHY 2-in-1 Keycap & Switch Puller for Mechanical Keyboards
For those who want a single tool that handles both keycap removal and switch extraction, the OHY 2-in-1 puller delivers dual functionality in one compact device. The ergonomic, non-slip handle ensures comfortable grip during extended use. Its claw-style design secures keycaps tightly, while the switch hook removes switches without bending pins. Made from durable ABS plastic, it won’t scratch your keycaps or surfaces. The tool works with most mechanical keyboards, including Cherry MX, Gateron, Kailh, and Outemu switches across OEM, Cherry, MDA, and MOA keycap heights. You’ll also receive a bonus mini cleaning brush with soft bristles for reaching dust in keyboard gaps and keycap details, making maintenance thorough and convenient.
- Dual Functionality:Keycap puller and switch puller
- Primary Material:ABS plastic
- Switch Compatibility:Cherry MX, Gateron, Kailh, Outemu, and similar
- Keycap Removal Design:Claw-style keycap design
- Portability/Form Factor:Compact, lightweight tool
- Included Accessories:Bonus mini cleaning brush
- Additional Feature:Mini cleaning brush included
- Additional Feature:Claw-style keycap design
- Additional Feature:ABS plastic protective finish
FunHub 2-in-1 Switch Puller for Mechanical Keyboards
The FunHub Translucent 2-in-1 Switch Puller combines keycap and switch removal in one tool, making it ideal if you’re customizing your mechanical keyboard without purchasing separate pullers. The stainless steel and plastic construction resists rust and corrosion, ensuring long-lasting performance. You’ll adjust the puller to fit keycaps ranging from 1U to 6.25U and longer sizes. It’s compatible with Gateron, Akko, CHERRY MX, Kailh, and most similar latch switches across 99% of hot-swappable keyboards. The ergonomic design provides a secure grip during removal. You’ll save 15–20 minutes on cleaning or customization tasks. The compact, lightweight tool fits easily in your bag for use anywhere.
- Dual Functionality:Switch puller and keycap puller
- Primary Material:Stainless steel and plastic
- Switch Compatibility:Gateron, Akko, Cherry MX, Kailh, Epomaker, and similar
- Keycap Removal Design:Adjustable for 1U to 6.25U+ keycaps
- Portability/Form Factor:Compact, lightweight, portable
- Included Accessories:None specified
- Additional Feature:Adjustable 1U to 6.25U
- Additional Feature:Rust and corrosion resistant
- Additional Feature:Translucent design aesthetic
Factors to Consider When Choosing a Keycap Switch Puller
Before you select a keycap switch puller, you’ll need to evaluate material quality and durability to ensure it withstands repeated use, check compatibility with your specific switch types (mechanical, linear, tactile, or clicky), and assess ergonomic design features that reduce hand fatigue during customization sessions. Next, you can consider whether a dual-function puller that removes both keycaps and switches offers the versatility you need for your keyboard projects. Finally, examine portability and storage needs by determining whether you’ll carry your puller in a keyboard bag or keep it stationary at your desk.
Material Quality & Durability
Material choice directly affects how long your keycap switch puller lasts and how well it protects your keyboard during use. Stainless steel construction offers superior durability and rigidity compared to plastic-only designs. If you prefer lighter handling, choose a hybrid tool combining PC or ABS housing with metal components—this reduces wear on your keyboard surfaces. Consider a 2-in-1 design that combines keycap and switch pullers, minimizing the risk of dropping parts during removal. For extended tool life, select anti-corrosion materials like 304 stainless steel, which withstand oils, sweat, and cleaning solutions during maintenance. Foldable or retractable designs also enhance longevity by reducing stress on joints and grips during repeated use.
Compatibility & Switch Types
Which switch type does your keyboard use? Most pullers work with MX-style switches, including Cherry MX, Gateron, and Kailh variants. However, scissor-type switches require different tools, so verify your switch type before purchasing.
Check whether your keyboard is hot-swappable or non-hot-swappable. Hot-swappable keyboards allow switch removal without soldering, while non-hot-swappable boards require additional equipment. Many pullers specify compatibility with hot-swappable models only.
Consider multi-claw or 4-claw grip designs. These secure switches from multiple points, reducing damage risk during removal. Adjustable or bendable wires adapt to various keycap sizes and switch stems, increasing versatility across different keyboard models.
Verify the specific puller’s compatibility list before buying. Match your keyboard’s switch type and hot-swap capability to the tool’s specifications for optimal performance.
Ergonomic Design Features
An ergonomic keycap switch puller reduces strain on your hands and fingers during extended maintenance sessions, making it easier to customize your keyboard without fatigue or discomfort. Look for tools with 4-claw or multi-point gripping mechanisms that secure switches firmly while minimizing slippage. Choose pullers with non-slip handles made from plastic or composite materials to enhance grip stability during precise extractions. Select ambidextrous or symmetric designs that support both left and right-handed users equally. Consider 2-in-1 designs that combine keycap and switch pullers, reducing hand movement between tasks. Evaluate models with ergonomic press or eject mechanisms for one-handed operation, which lessens removal effort. Test the tool’s weight and balance before purchasing to ensure comfortable handling during longer customization sessions.
Dual-Function Capability
Why settle for separate tools when you can get both keycap and switch removal in one puller? Dual-function pullers combine both capabilities in a single housing, eliminating the need to swap implements during maintenance. You’ll find two main designs: reversible models with different ends for each function, and integrated designs using one mechanism to handle both tasks. A four-claw grip or retractable hook secures keycaps and switches equally well, reducing removal damage. This 2-in-1 approach cuts your workflow time considerably by keeping one tool in hand throughout your session. Choose dual-function pullers with optimized handles that provide stable control in tight keyboard spaces, ensuring you maintain precision whether removing keycaps or switches.
Portability & Storage Needs
Once you’ve settled on a dual-function puller that handles both keycaps and switches, you’ll want to contemplate how you’ll carry and store it. Examine the tool’s overall length and handle design first. Shorter handles under three inches fit easily into pockets or small bags, while longer ones require dedicated storage space. Check if the puller features a foldable or compact design that collapses for transport. Review the materials used—lightweight plastic housings with metal components reduce bulk without sacrificing durability. If the tool includes accessories like cleaning brushes, determine whether you’ll actually use them on-the-go. Store unused items separately at home to keep your portable kit minimal. These practical choices ensure your puller remains accessible whenever you need to customize your keyboard.
Final Thoughts
You’ve reviewed nine keycap switch pullers designed to streamline keyboard customization. To select the right tool, evaluate material durability, grip design, and compatibility with your switch type. Consider portability needs and whether you prefer 2-in-1 functionality. Test your chosen puller on a practice key first to ensure proper technique. Regular maintenance of your tool extends its lifespan and keeps your keyboard in optimal condition.
Meet Ry, “TechGuru,” a 36-year-old technology enthusiast with a deep passion for tech innovations. With extensive experience, he specializes in gaming hardware and software, and has expertise in gadgets, custom PCs, and audio.
Besides writing about tech and reviewing new products, he enjoys traveling, hiking, and photography. Committed to keeping up with the latest industry trends, he aims to guide readers in making informed tech decisions.