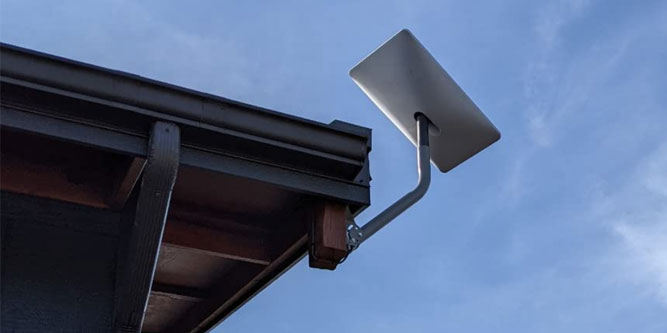
If you’re one of the lucky ones, you might already have your hands on a Starlink satellite internet kit in 2022. Inside the box is everything you need, pre-connected for simplicity.
However, there’s only a small, four-leg base included. While it may work well for first-time use or testing purposes, many Starlink users are looking for DIY (do-it-yourself) options for mounting the new rectangular “dishy” in a precise location.
Check for Obstructions
The first step for a successful Starlink install is to find a precise location without obstructions. By using the Starlink app on your smartphone, you can select “Check for Obstructions”. In 3-easy steps, you’re able to figure out an ideal location for mounting.
First, stand outside where you intend to setup your Starlink. Next, using the app, scan the entire sky above you with your phone’s camera. This will explore Starlink’s entire field of view. While doing this, be sure to stand still for the most amount of accuracy. If you move around too much, the test won’t provide realistic results.
An obstruction is considered to be anything that blocks the sky-view of Starlink’s dishy. This can be as small as a utility wire or as large as an entire canopy of trees. Regardless, the less blocking the dish’s field of view, the better speeds, latency and uptime you’ll be able to experience. Simply put, it’s worth spending some effort to get the install correct.
Trial-Run Using the Included Four-Legged Dish Mount
Before you choose which Starlink mount is best for your scenario, if possible, do a trial-run using the included four-legged dish stand. By placing the dish in the stand, and setting up Starlink in a test-location, you can get a good idea of a suitable spot without permanently committing to a specific mount.
Letting Starlink operate in this location for at least 12 hours will give you some hard-data to work with. In fact, the app will continuously monitor uptime, speeds and latency and give you some much needed feedback. Basically, there are three different conclusions that the app will come to:
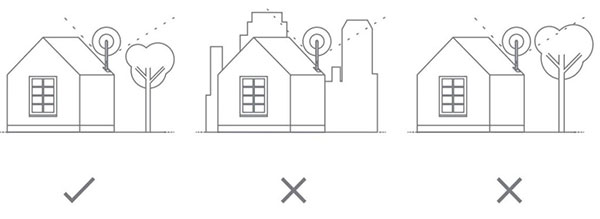
No Obstructions After 12 Hours – This is excellent news. As the best result you can get, you’ve clearly picked a great location. Now you’ll need to pick the specific type of mount that will work best for that spot.
Some Obstruction Time After 12 Hours – You may want to find a better location. Simply put, the dish will either need to be mounted higher or above any potential obstructions. For better results, we recommend trying at the highest point of your roof or at the top of your chimney. That said, make sure it’s away from any tall objects that are nearby.
A Lot of Obstruction Time After 12 Hours – This location won’t work well – at all. If you get this notification, the install-location must be higher or in an area with better visibility to the sky. You may need to opt for a extension pole mount or a tower for the dish.
What are the Best Starlink Dish Mounts?
Today, we’re going to outline some of the best third-party mounts that we have found to work well with the newest, 2nd-generation, square Starlink dish. In general, the best Starlink dish mount is one that will work correctly for your specific scenario. Once you have run a trial-run or a few tests at a specific location, you’ll then have a better idea of the kind of mount you’ll need.
The structure you’ll be mounting your Starlink dish should be a main factor when selecting which mount to use. Simply put, not all mounts are created equal. Most have specific requirements for proper install; some are roof mounts, others are dedicated poles/towers.
Additionally, some are temporary while others are permanent. Regardless, we’ll go over the specifics of each one to help you determine which options are worthwhile considerations for your exact scenario.
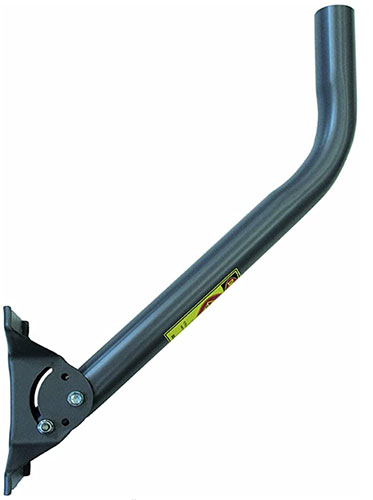
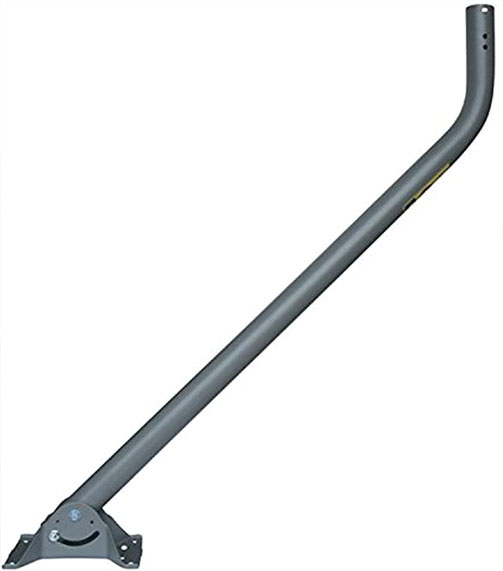
Best J-Mount: Winegard DS2000A
As an affordable yet highly versatile option, the Winegard DS2000A offers a simple yet effective way to mount your Starlink dish. Available in either 22-inch or 38-inch varieties, it lets you mount dishy on the side of a building, roof, or even on a tall wooden post or beam. In fact, they even include two U-bolts in the kit for attaching the mount to a metal pole.
Both the old round dish and the new rectangular dish work universally-well with this J-Style mount. Just slide the short pole attached to the Starlink dish into the Winegard mount. While it provides an easy-fit, the diameter of the Starlink dish pole is slightly smaller and may rotate in high winds.
To fix this, a minor modification is necessary. First, we recommend wrapping a small piece of duct tape around the Starlink dish pole. This will make the dish wedge tightly into position so there’s no wiggle or movement. For added security, you could also drill a single hole and bolt the dish with a nut, in a fixed position, onto the Winegard mount. While drilling and bolting it is arguably unnecessary, we think it’s a good idea to permanently fix the dish into the mount using this method.
As far as build quality goes, the Winegard DS2000A is top-notch. It’s made in the USA from high-quality steel. The extra-wide base has a built-in swivel mechanism that allows multiple mounting angles.
Ideal for: Exterior walls, eaves/fascia, shingled roofs.
May not be suitable for: Areas with tall objects or obstructions nearby. Since the Winegard mount is only available at a maximum length of 38 inches, it may not extend far enough to reach above some obstructions.
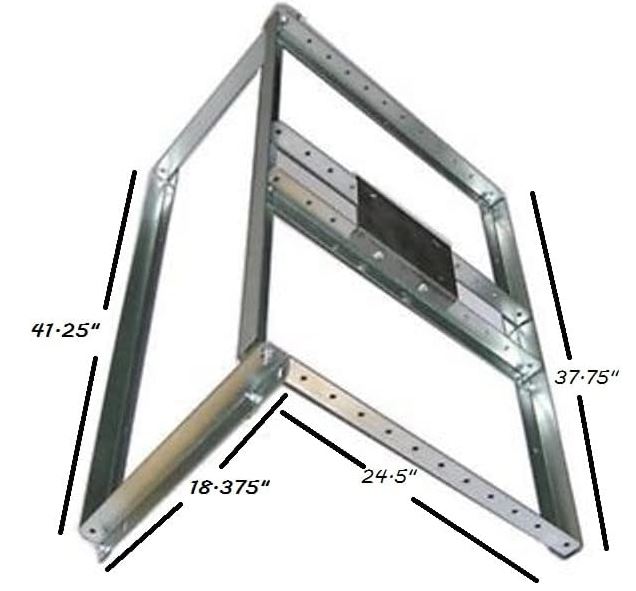
Best for Roof Peaks: EZ PNP Non-Penetrating Peak Roof Mount
The EZ PNP Non-Penetrating Peak Roof Mount offers a unique way to mount your Starlink dish on the very-top of your roof. Rather than drilling into your shingles or roofing material, it rests on the peak, with each side folding downward in opposite directions. The result is a stable, unobtrusive solution that rests on the highest point of your house.
The EZ PNP is comprised of pre-galvanized steel with a hinge mechanism in the center. One side has a 9 by 6-inch base plate footprint that must be used with whichever actual mount you choose. That said, the Winegard DS2000A is a great choice to use together with it.
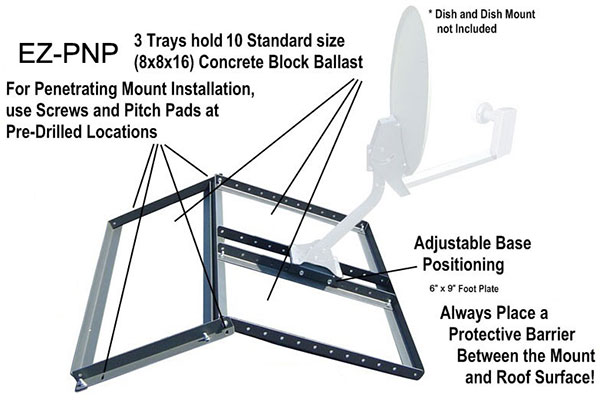
Measuring roughly 40-inches on each side and weighing in at 28 lbs, it’s proudly made in the USA and designed very well. Each rectangular section of the EZ PNP has slightly elevated walls in order to accommodate the use of concrete blocks. By placing several concrete blocks on the base, it acts as a ballast to keep the dish stable at all times, even in high winds.
Ideal for: Angled roof peaks where you don’t want to permanently attach anything. Once it’s setup, you can still move it around or place it somewhere else if desired.
May not be suitable for: Those who desire a clean-looking solution. It’s a bit bulky and somewhat ugly. You’ll need to purchase an additional mount to actually attach the Starlink dish to it.
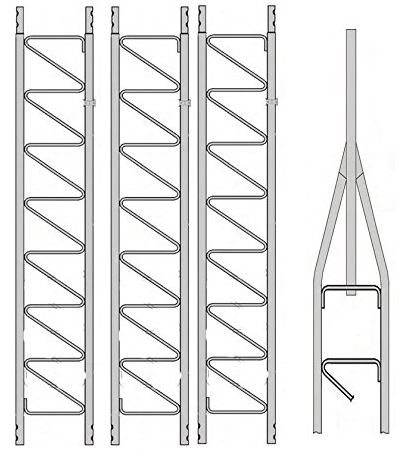
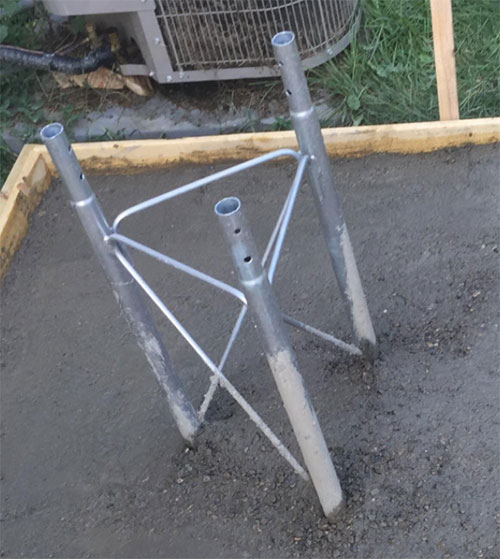
Best Pole and Tower Mount: Rohn 25 Series 40′ Tower
For those who need an extended reach above nearby obstructions, look no further than the Rohn 25 Series Basic Tower. It’s a multi-piece, 40-foot tower that includes three individual 10-foot sections that assemble with a single 9-foot, 9-inch top-section.
The result is a 40-foot tower that can be cemented permanently into the ground. However, keep in mind that it’ll require about 3 to 5′ of insertion into concrete, depending on your needs, which will slightly shorten the overall height.
Although this tower-kit is a bit pricey, it’s incredibly well-engineered. The Rohn 25 series is comprised of heavy-duty steel with added bracing. Each section is hot-dipped galvanized after fabrication in order to offer long-lasting reliability. In addition, each section bolts together with included hardware. Ultimately, once the tower is assembled, you have a very-sturdy solution that’s perfect for gaining a clear view of the sky, above most obstructions.
The top of the tower offers the perfect-sized pole for attaching the Starlink dish. It slides right into position with little effort. Like the Winegard mount, it’s recommended that you drill and bolt the dish onto the top-pole. Using a bit of tape as a shim is also a good idea, if needed.
Ideal for: Areas with a lot of nearby obstructions where you cannot mount to a tall structure. The Rohn 25 series is designed to be a standalone tower that’s perfectly sturdy when properly fixed into the ground using concrete.
May not be suitable for: Those who do not want the extra labor involved in setting it up. It’s a heavy, large kit that’s a permanent, more-complex solution than other mounting options.
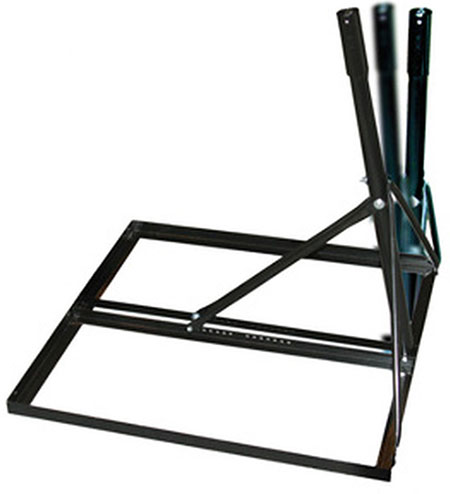
Best Flat Roof Mount: Non-Penetrating Roof Mount
For those who have a flat roof or surface to use, this generic Non-Penetrating Roof Mount is an excellent solution. Although it could be seen as a permanent solution, it doesn’t require any drilling or commitment on placement since it can freely move around when sturdily placed on any flat roof.
The base measures 35-inches by 36.35-inches in order to provide a wide and stable foundation. It’s extra-wide to accommodate the use of up to eight concrete blocks as a ballast. Once weighted down, the mount is incredibly sturdy. While it doesn’t include a mast or pole, you can locally pick whatever length, 2-inch diameter pole you require and insert it into the top of the mount. This will extend the Starlink dish as far as you’d reasonably like.
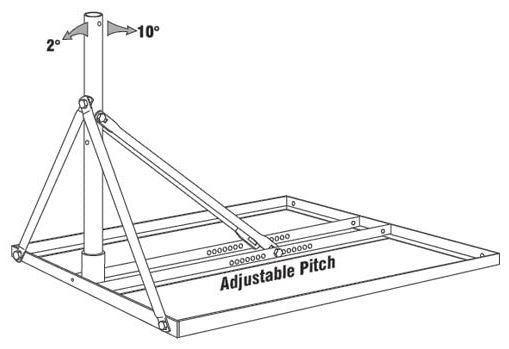
Built into the base is a unique mechanism that allows for an adjustable pitch. There are several bolt holes and removable hardware that allows the pole to be mounted 2 degrees forward or 10 degrees backwards. Realistically, most people will likely leave the angle straight, but it’s nice to have a bit of adjustability so you can have it work around your exact situation.
This non-penetrating roof mount is comprised of high-quality 1.5-inch angled steel. It’s powder-coated black from the factory in order to increase longevity and overall finish quality. In addition, all of the bolts and hardware are zinc-coated for added rust and corrosion protection.
Ideal for: Flat roofs, surfaces or decks. Using concrete blocks with the base offers a stable and unobtrusive way to extend their dish to a variety of heights.
May not be suitable for: Those who may not be able to get a mast/pole locally or those who do not have a flat roof or surface to set it on.
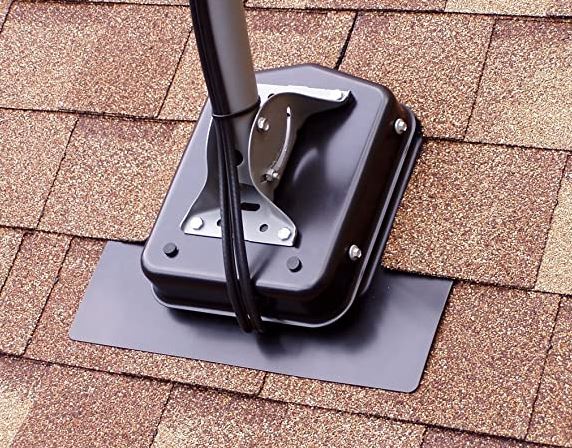
Best for Shingled Roofs: Commdeck Satellite Dish Mounting System
If your home has an angled roof with shingles, you may want to try something like the Commdeck Satellite Dish Mounting System. It’s designed to permanently attach to your roof, in-between shingles, using an effective flashing system that keeps it leak-free.
The kit includes everything you need for the flashing mount itself, but you’ll still need to use it in conjunction with a dish mount, such as the Winegard DS2000A.
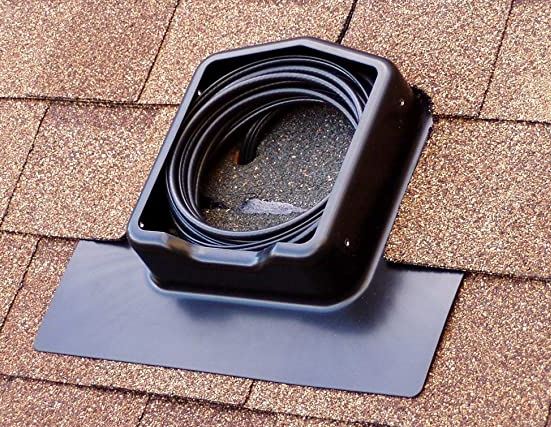
Installation of the Commdeck requires a bit of know-how in regards to roofing. While you don’t necessarily need roofing experience to set it up, we recommend measuring twice and drilling once. It’s designed to provide a clean, water-tight install while simultaneously hiding any exposed wiring, routed directly through the base of the mount and into your attic.
Ideal for: Angled, shingled roofs. Those who want a clean-looking and water-tight permanent mount.
May not be suitable for: Those who don’t want to drill into their roofing. You’ll need to purchase an additional mount to actually attach the Starlink dish to it.

Best Tripod Mount: Skywalker Heavy-Duty Tripod Base
For those who have a flat surface to work with, you may want to consider a mount like the Skywalker Heavy-Duty Tripod Base. It’s an all-in-one solution that includes the actual tripod and a mast/pole as well. Although the mast is only 3-feet long, it accepts any mast up to 2-inches in diameter, so you can opt to use your own pole if desired.
The mast that’s included works decently well for the square Starlink dish. However, you may need to make some very-minor modifications if you find it to be loose-fitting. Simply adding some duct tape to use as a shim, in addition to using pole clamps or a nut and bolt after you pre-drill a single hole.
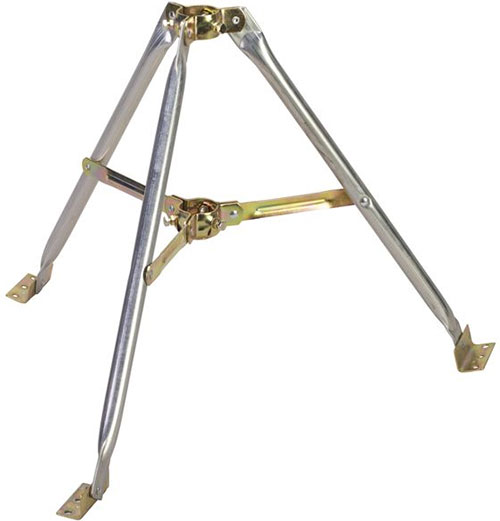
The Skywalker tripod base is well-made and nicely designed. Comprised mostly of stainless steel and zinc hardware, it should hold-up well over the course of time. With an overall weight of just 10 lbs, it’s relatively easy to manuever around, even if you’re climbing it up a ladder. While you can freely set it on any flat surface, each leg is terminated with three bolt-holes. This makes permanent mounting possible.
Ideal for: Flat surfaces that offer either a temporary or permanent install. It’s a non-committing solution that can easily be moved around.
May not be suitable for: Small areas or uneven ground. It may get tippy if you don’t permanently fix it to the ground, which could ultimately result in falling over during high winds.

Best for Chimneys: Winegard CM-2012 Chimney Mount
For those that need to extend their Starlink dish beyond the height of their roof, a chimney mount like the Winegard CM-2012 is a great solution. While it doesn’t include an actual mast, it contains all of the necessary hardware in order to securely fasten a pole to a blocky structure or chimney.
The materials are made from galvanized steel, which is necessary for proper resistance against rust and corrosion. Inside the kit are multiple U-bolts, steel straps and all the necessary hardware.
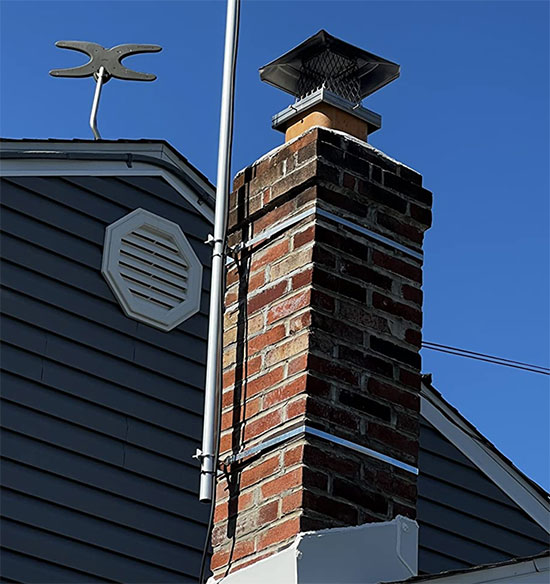
In short, you simply wrap each of the 12-foot straps around your chimney and fasten them tightly. The result is a secure, form-fitting attachment that works universally well with all chimneys, regardless of their specific shape.
Ideal for:Chimneys of all materials, shapes and sizes. A perfect solution for achieving added height that may otherwise be impossible.
May not be suitable for: Those who don’t want to acquire their own mast/pole locally. Depending on your specific chimney, installation can be a bit cumbersome.
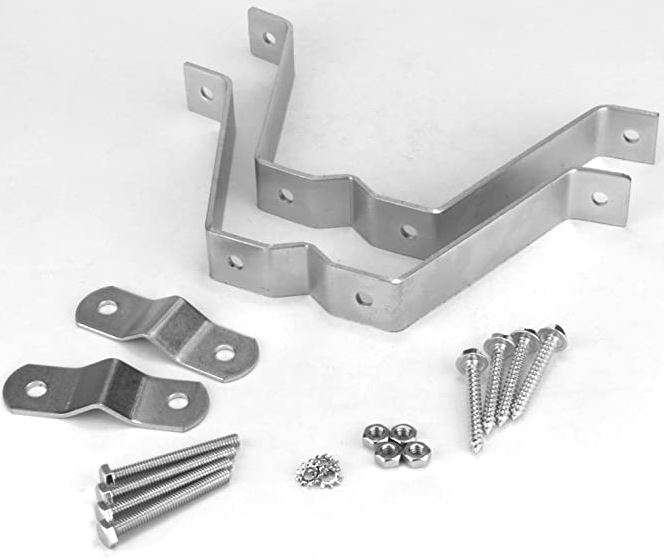
Best Flat-Wall Mount: Skywalker SKY32812
If you’d simply like to mount a pole/mast against a flat exterior surface, the Skywalker SKY32812 Double Wall Mounts are a great pick. The kit includes two individual brackets that screw into a wall and clamp a pole of up to 1.5-inches in diameter. While you’ll need to provide your own pole, the maximum diameter of 1.5-inches is the perfect size for mounting the square Strlink dish.
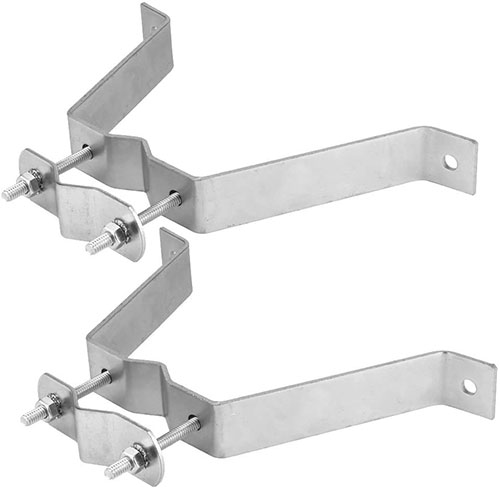
Both brackets include all of the necessary hardware, including 4 wood screws and 4 lag bolts with nuts. Theoretically they can be placed on any flat surface, although the exterior walls of your home (without an eave/fascia above it) are the ideal location. With the ability to choose any length of mast you desire, you’re able to extend it well-beyond the roof.
Ideal for: Flat exterior walls without an eave/fascia.
May not be suitable for: Areas with minimal clearance. Or, those who don’t want to acquire their own mast/pole locally.
Other Solutions for Mounting the Starlink Dish
The options we’ve outlined in this article are all aftermarket, made by third-party manufacturers. While the Starlink Store has their own set of mounts to choose from, you cannot order from or even access their store until your Starlink kit ships. Also, it’s always nice to have extra choices. That said, the official Starlink mounting accessories may not always work well, depending on your specific scenario.
Most of these mounting solutions are ideal for folks who have a DIY-ambition. Keep in mind that some require minor modifications. However, all of the options we’ve outlined are compatible with Starlink’s latest square dishy. Regardless, we’ve outlined several top-rated options that are all currently available. Which method of install will you go with?
Meet Ry, “TechGuru,” a 36-year-old technology enthusiast with a deep passion for tech innovations. With extensive experience, he specializes in gaming hardware and software, and has expertise in gadgets, custom PCs, and audio.
Besides writing about tech and reviewing new products, he enjoys traveling, hiking, and photography. Committed to keeping up with the latest industry trends, he aims to guide readers in making informed tech decisions.