
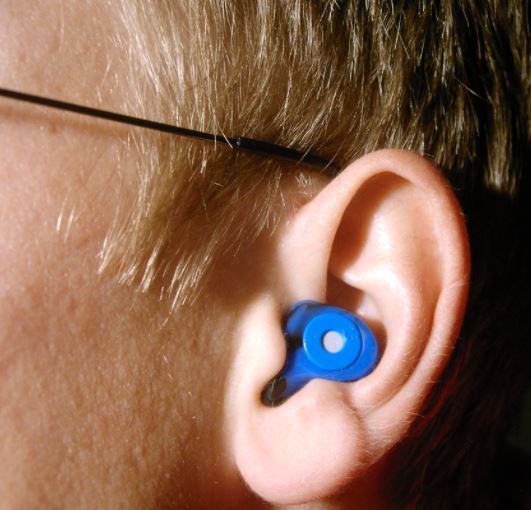
Over the past few years, wireless earbuds have taken over the market. It’s becoming more and more unusual to see someone walking around with a pair of wired buds. But while wireless earbuds might be more convenient, they’re also a bit pricier. You probably want to hold on to your buds for awhile, which means they’re going to get dirty. And when they do, it’s time to do some cleaning. The easy part is cleaning the outer earbud shell. Unless you’re doing something way out of the ordinary, this shell is probably just covered in skin oil and fingerprints. Cleaning the shell is the easy part.
The harder part is cleaning the ear tips and that area of the housing. Let’s be honest. We’re just a bunch of apes who walk upright, and our bodies do gross things. This includes production of earwax. To be fair, earwax gets a bad rap. It’s not just an annoyance. In fact, it’s essential to protect the ear canal, as well as to flush out dust that works its way into the ear. It even provides protection from fungus! Unfortunately, when you put earbuds into your ear, your ears get warm. This makes the wax runnier than normal, and it works its way out of your ear.
Unfortunately, a bunch of it ends up congealing on your ear tips – or even inside them. When this happens, you need to clean out your silicone ear tips. Not only will this eliminate all the grossness, it will also keep the ear tip clear, improving sound quality. So, how do you clean your shells and your ear tips? There are a few different methods, each with its own benefits and drawbacks. Let’s take a look at each method, and see how they compare.
Cleaning Methods
So, how do you get your favorite wireless earbuds squeaky clean? The first step is to take off the ear tips. We’ll deal with those in a minute. For now, we’ll be talking about a few different ways of cleaning the earbud shells. Here they are, in no particular order.
Soap and Water
The simplest way of cleaning your earbuds is to use soap and water. It’s quick, it’s affordable, and you don’t need any unusual products. Any dish soap or antibacterial hand soap will do the job just fine. Use a microfiber cloth, shop towel, or lint-free cotton cloth to dab your earbuds clean. Do this with a damp rag, not a soaking wet one.
We should mention at this point that you should never, ever submerge a set of earbuds in soap and water. Some earbuds are rated for submersion, but even then, we’d still avoid it. The action of cleaning might force water into an otherwise secure earbud shell. A damp, soapy cloth should work just fine. Similarly, don’t wipe down the grille on earbuds without ear tips. There are other ways to clean these grilles, which we’ll talk about in a second.
When you’re done cleaning your buds, set them aside to dry. Make sure to position them so water will not drain inside of the shells. That’s about all there is to it. If you see spotting or streaking, you can always rinse your buds after washing, but it shouldn’t normally be necessary.
Rubbing Alcohol
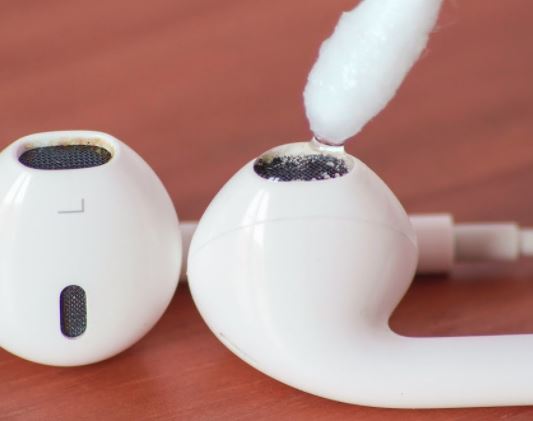
Rubbing alcohol is a bit pricier than soap and water. However, it’s also more effective, and safer for electronics. To use it, dip a cotton swab into the bottle. Don’t use a rag or shop towel. You don’t want to be soaking up that much alcohol at once. Use the cotton swab to clean down all solid parts of the earbud shell. The alcohol will evaporate away in seconds, leaving your earbuds squeaky clean. It will evaporate faster if it’s 91 percent isopropyl alcohol rather than 70 percent, but that’s not required.
Keep in mind, though, that a 91 percent alcohol solution is still 9 percent water. As a result, you don’t want it getting inside your earbuds. Avoid cleaning your grilles with alcohol. This is doubly true on metal grilles. Tiny cotton fibers from your swab can get trapped in the grilles over time, diminishing sound quality.
A Soft, Damp Cloth
Some earbuds are made of sensitive plastic that can be damaged or faded by soap or alcohol. These include the new AirPod Pros and other earbuds with special cleaning instructions. Rather than ruin your buds, your best bet is simply to use a soft, damp cloth. This can be either a shop towel or a cotton cloth, as long as it’s lint-free. Wipe the buds down carefully, and avoid the grilles as always. Instead, you can gently clean the grilles with a dry cotton swab. As with soap and water, leave your earbuds to dry before using or storing them.
A Toothbrush
We’ve already established that soft mesh grilles should be cleaned with a dry cotton swab. But what about more durable plastic or metal grilles? In that case, you can simply use a toothbrush. You’ll want to use a medium bristle brush with nylon bristles, since these won’t damage your grilles. Thankfully, this includes just about every cheap dollar store toothbrush out there. Grab your brush, grab your earbuds, and scrub away.
Just make sure to keep your brush dry so you don’t damage your earbuds’ electronics. When you’re done, you can clean the brush in your dishwasher and reuse it later.
Putty Adhesive
Some grilles are virtually impossible to get clean with a brush. In that case, a ball of putty adhesive, the stuff you use for posters, can be very helpful. Use a rolling motion to roll the putty back and forth over your grille. Don’t drag it or press it too hard, since this can leave tiny bits of adhesive trapped in your grille. Just roll it gently, but firmly, back and forth. After a minute, you’ll have collected all the gunk in your grille.
Combining Different Methods
Not all earbuds fall easily into one category. For example, you might have earbuds with no tips and large silicone ear hooks. In that case, you’d want to clean the ear hooks with soap and water, and the grilles with a toothbrush. The earbud shells could be cleaned with soap and water, alcohol, or a damp cloth as needed.
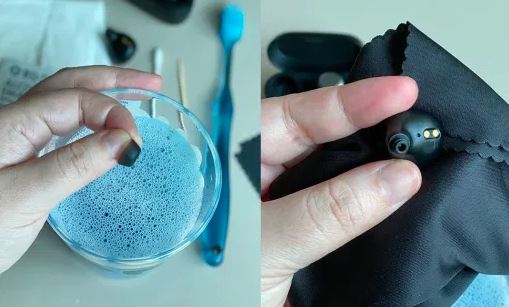
Cleaning Your Ear Tips
If you have foam or silicone ear tips, now comes the fun part: cleaning off your ear tips. The downside is that it’s gross, since you’re dealing with earwax. The upside is that you don’t have to worry about damaging anything. You aren’t handling electronic parts here, so immersing your tips in water is no problem. In fact, that’s probably the easiest way to clean silicone ear tips. Simply mix up a bowl of warm, soapy water, drop your ear tips in, and wipe them out with a cloth until they’re clean. If there’s gunk in the center holes, a cotton swab can make quick work of it. Leave your tips out to dry for a couple hours, and you’re good to go.
Some earbuds include a set of foam tips. Some people find these tips more comfortable, and they tend to be more secure. In general, these tips are considered disposable, and aren’t designed for cleaning. The problem is that earwax works its way into the pores in the foam. No matter how hard you try to clean it, it’s still going to be dirty. Unfortunately, foam tips don’t last forever. Thankfully, they’re also cheap. If you prefer foam tips to silicone, just throw on a new pair every few months.
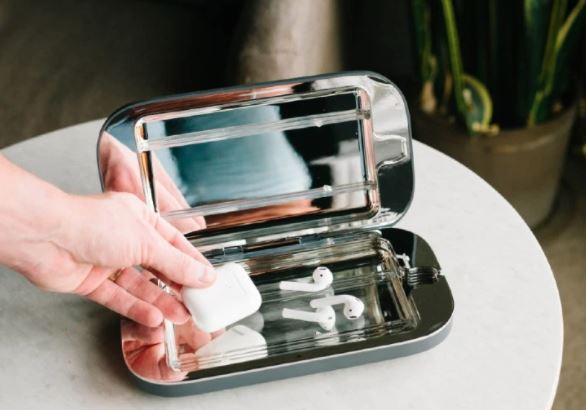
Ultraviolet Cleaning
Ultraviolet cleaning is different than the other methods we’ve listed. Instead of being meant to remove earwax and fingerprints, it’s intended to kill viruses and bacteria. Let’s say you wear your earbuds during a workout. Do you really want to put those same sweaty buds back in your ears after your shower? A UV sterilizing wand or UV-C sanitation box is a great way to kill all those nasty microbes. Ultraviolet sterilization is a good choice primarily because it’s quick and convenient. It just isn’t practical to wash your buds with soap and water seven days a week. On the other hand, it can take only 30 seconds to sterilize your earbuds with ultraviolet light. This makes UV best for everyday cleaning.
UV sterilization relies on a special type of high-energy light waves called Ultraviolet Type-C, or UV-C for short. UV-C light is not visible to the human eye. However, it carries a lot of energy. It’s so energetic that when it hits a living cell, it breaks apart DNA inside the cell’s nucleus. This means the cell is no longer able to reproduce, or even make basic repairs. Soon, the cell will die.
This is bad news if you shine a UV-C light on your skin. It can burn you, or even cause skin cancer. However, when used in a controlled way, it’s a great method for killing germs. Depending on the brightness of the light, the amount of exposure needed to sterilize a surface will vary. A sanitation box will handle this automatically and let you know when it’s finished. If you’re using a handheld wand, read the manufacturer’s instructions. At most, you’ll be holding the wand over your earbuds for about a minute.
Final Verdict
As you can see, there are plenty of ways to clean your earbuds. The message here is clear; use the cleaning method that’s best for your pair of buds. For more durable buds, soap and water or alcohol will get the job done. For more delicate buds, a damp cloth is a better choice. Grilles require special attention, whether from putty or from a toothbrush. And if you have silicone or foam tips, you need to handle them separately.
UV cleaning is a standalone, oddball choice. It won’t get the gunk off your earbuds, so it’s not useful for long-term maintenance. That said, it will kill pretty much every germ on your earbuds. For quick, everyday cleaning, a UV sanitizer is a valuable tool to have in your kit.
Meet Ry, “TechGuru,” a 36-year-old technology enthusiast with a deep passion for tech innovations. With extensive experience, he specializes in gaming hardware and software, and has expertise in gadgets, custom PCs, and audio.
Besides writing about tech and reviewing new products, he enjoys traveling, hiking, and photography. Committed to keeping up with the latest industry trends, he aims to guide readers in making informed tech decisions.