
Quick Answer:
Google Maps might show you in the wrong location due to a range of issues, including an out-of-sync GPS, the use of mock location apps, an outdated Google Maps version, or simply because your device needs a reboot.
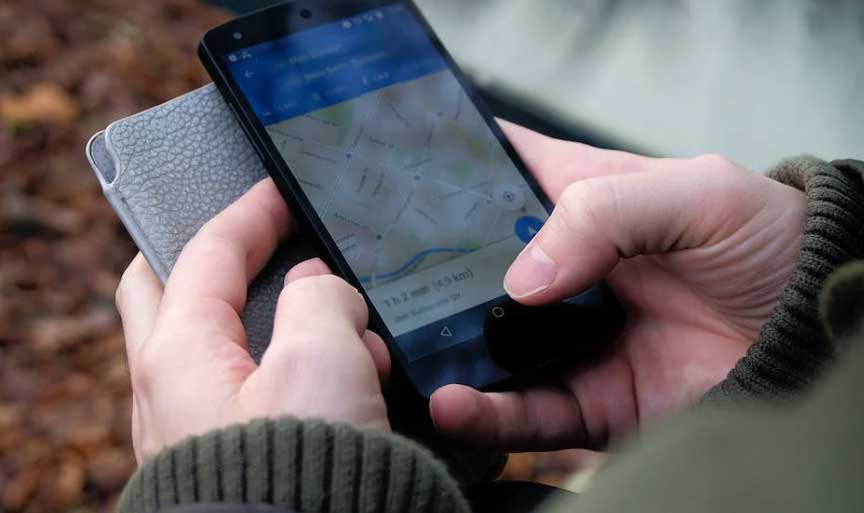
We’ve all been there. You’re relying on Google Maps to guide you through a labyrinth of streets, and suddenly, the app decides you’re three blocks away from your actual location.
What gives? Let’s cut through the chaos and get to the bottom of why Google Maps might be misplacing you on the digital grid.
1. Your GPS Needs Reset
We can’t emphasize enough how integral the GPS system is for location-based services like Google Maps.
If there’s a mix-up in this system, rest assured, your mapping experience will reflect that chaos. Here’s how to recalibrate your GPS on Android and iPhone devices to get Google Maps back on track.

DISCREET, HIDDEN TRACKER FOR VEHICLES: Keep your vehicle secure with the Lightning GPS GL300 Car Tracker. With its compact design and magnetic case, this tracker can be hidden discreetly for maximum vehicle security—perfect for cars, trucks, trailers, and more.

Most accurate laser range finder on the market within 10” of the flag, up to 450 yards
1. With a metal casing and sealed design, it is dustproof, waterproof, and oil-resistant, making it suitable for use in complex environments such as factory floors and outdoor equipment. It has a long service life, reducing the frequency of replacement.
For Android Users
Getting your GPS to work correctly on an Android device isn’t rocket science, but it does require a bit of your own navigation through your device. Here’s what to do:
- Access Quick Settings: Swipe down from the top of your screen to open the quick settings panel. Here, you’ll find a variety of shortcuts, one of which will be your GPS or “Location” toggle.
- Turn Off GPS: Tap on the GPS icon to disable it. This action essentially cleans the slate and gives your GPS a moment to catch its breath.
- Turn On GPS: After waiting for a few seconds, tap on the GPS icon again to enable it. This re-initialization prompts your device to make a fresh connection to nearby satellites.
- Enable High-Accuracy Mode: For the pièce de résistance, ensure that your device is set to “High-Accuracy Mode.” You’ll find this option in the “Location” settings under “Mode.” High-Accuracy mode uses a combination of GPS, Wi-Fi, and mobile networks to pinpoint your exact location, making it the gold standard for GPS accuracy.
For iPhone Users
If you’re an iPhone user, the steps are a little different but equally effective.
- Open Settings: Navigate to the Settings app and tap on “Privacy.” Within this, you’ll find the “Location Services” option.
- Toggle Off Location Services: Turn off “Location Services” by sliding the toggle. This step will sever all current location ties, effectively giving your GPS a brief hiatus.
- Turn Location Services Back On: After a pause, slide the toggle back on to re-enable Location Services. This refreshes the system, allowing your iPhone to re-establish a more accurate location fix.
- Activate Precise Location: Last but not least, while you’re still in “Location Services,” make sure to turn on “Precise Location.” This feature enhances your GPS’s tracking ability, making sure Google Maps can pinpoint you with laser-like accuracy.
And that should be it. Resetting the GPS may seem like a rudimentary step, but it’s often the first line of defense in resolving any geolocation inconsistencies.

2. You’re Using Mock Location or Fake GPS Apps
In the digital age, the ability to “spoof” your location has become increasingly easy. With a few taps, you can virtually transport yourself to Paris while sitting in your living room.
While that might be entertaining, it’s a recipe for disaster when you’re trying to use Google Maps for actual navigation. So, how do we ensure that our devices are not living in a fantasy world of their own? Let’s dig in.

[Seamless Adaptation to Android Ecosystem]: This wireless tag, specially designed for Google Find My Device, can achieve stable wireless interconnection with Android phones. It deeply integrates into Google's positioning ecosystem, enabling easy device positioning and searching operations, thus providing Android users with a convenient tracking experience.

【No Subscription Cost】 Unlike traditional gps tracker for vehicles, it is designed to work seamlessly with Android devices(Android Only). Works exclusively with Official Authorized Google Find Hub app, No SIM card, no subscription, and no monthly fees ever! Without any hidden expenses

Difference from Traditional GPS Device: Traditional GPS locators require data or connection to the car's wiring, require monthly rental fees. Our working principle is the same as android tag locator, which enjoy precise positioning and real-time location updates directly on your phone via Google Find My network. Because thousands of android devices help you accurately locate item in this network. Stay informed about your device’s exact whereabouts, ensuring peace of mind wherevever you are
Bypassing Mock Locations on Android
If you’re rolling with an Android device, you’ll want to get familiar with the Developer Options – a space that can be both powerful and perilous if you don’t know what you’re doing. To ensure you follow the correct path, utilize these steps:
- Access Settings: Open your device’s “Settings” menu and scroll down to look for “Developer Options.”
- Become a Developer: If you don’t see “Developer Options,” don’t worry. Just go to “About Phone” and find “Build Number.” Keep tapping it until you see a prompt saying, “You are now a developer!” Congratulations, you’ve unlocked Developer Options.
- Navigate to Developer Options: Return to the main “Settings” screen and scroll down. You should now see “Developer Options” as an available selection.
- Disable Mock Locations: Within Developer Options, look for “Mock GPS setting” or “Allow mock locations,” and make sure it’s toggled off.
Bypassing Mock Locations on iPhone
If you’re using an iPhone, disabling mock locations takes a few steps, but it’s pretty straightforward, all things considered. We’ve outlined them below for your convenience.
- Access Settings and Navigate to iTunes: Open the “Settings” app on your iPhone and scroll down to the “iTunes and App Stores” option. This is where you’ll be able to view your Apple ID details.
- View Apple ID: Tap on your Apple ID at the top of the screen, followed by “View Apple ID.” You may need to enter your password or use Face ID to proceed.
- Address Your Country or Region: Once you’re inside your Apple ID profile, scroll down until you find the “Country/Region” setting. Tap on it to proceed.
- Align Your Country: Check to ensure that the country or region displayed aligns with your actual location. If it doesn’t, you’ll need to update it. Misalignment here can often lead to complications, including Google Maps showing you in the wrong location.
By following these steps specific to your operating system, you’ll be closing the door on mock locations and opening up the pathway for Google Maps to operate more efficiently and accurately. Keeping mock locations at bay is essential for ensuring your Google Maps app can do its job correctly.
3. Google Maps Needs an Update
Keeping your Google Maps app updated is akin to ensuring your car receives regular maintenance; it’s essential for a smooth ride.
Outdated apps can result in inaccuracies and performance lags, and may even miss out on new features that can enhance your navigation experience. So, how do we make sure we’re driving in the fast lane when it comes to Google Maps? Buckle up.


How to Update Google Maps on Your iPhone
You don’t have to be an Android user to take advantage of Google Maps. But that also doesn’t mean you won’t run into the same problems as Android users. If your iOS version of Google Maps is showing you’re in the wrong location, it might be time for an update. Here’s how to do just that.
- Open the App Store: Tap the App Store icon on your home screen to get into the world of Apple software.
- Search for Google Maps: In the App Store, use the search bar to look for the Google Maps app. You’ll likely see it in the results before you finish typing.
- Press Update if Necessary: When you land on the Google Maps page, if you see an “Update” button next to the app, tap it. If you see “Open” instead, you’re already cruising with the latest version.
Updating Google Maps the Google Way
Android users, you’re up! Remember, Google Maps is essentially a homegrown product for you. You can help keep it in top shape by regularly updating it as needed. Here are your steps to follow:
- Navigate to the Play Store: Tap the Play Store icon from your app drawer or home screen. This is your gateway to Android’s software universe.
- Find Google Maps: Use the search bar at the top to type in “Google Maps.” It should show up quite quickly in your search results.
- Update or Confirm: Once you’re on the Google Maps app page, look for an “Update” button. If it’s there, tap to initiate the update process. If you see an “Open” button instead, you’re already rocking the latest version.
Keeping your Google Maps app updated isn’t just about keeping glitches and bugs at bay. Updated versions often come with new features that can make your navigation experience more efficient and user-friendly. We’re talking traffic pattern awareness, better offline maps, or enhanced 3D views.

4. Your Device Needs Rebooted
You might think it’s too simple, but the age-old wisdom of rebooting your device can be a game-changer in resolving Google Maps inaccuracies. Let’s go step-by-step through the process for both iPhone and Android users.
How to Reboot Your iPhone
Restarting your iPhone might not be an everyday activity, but when troubleshooting Google Maps, it’s a solid move. Here’s how:
- Hold the Right Buttons: Press and hold the side button along with either of the volume buttons. Hold until the power-off slider appears on the screen.
- Slide to Power Off: Once the slider appears, swipe it to turn off your phone. Your screen will go black, signifying the phone is off.
- Be Patient: Wait for about 30 seconds. This is a good time to take a deep breath and think about all the places you’ll go once Google Maps is back on track.
- Power Back On: Hold down the side button again until you see the Apple logo. Release the button and let the phone complete its startup process.
How to Reboot Your Android
If you’re a fan of the Android ecosystem, rebooting your device is an effortless endeavor.
- Hold Down Power Button: Press and hold the power button on your device. In a few seconds, a menu will appear with several options.
- Choose to Restart: In the menu that pops up, you’ll see options like “Power off” and “Restart” or “Reboot.” Tap on “Restart” or “Reboot” to initiate the process.
- Wait a Moment: The device will power down briefly before restarting. You’ll see the brand logo and, after a few seconds, your home screen.
Once the phone has rebooted, check Google Maps to see if the issue has been resolved. If not, you might want to revisit previous steps or consider other troubleshooting options.
Final Thoughts
The next time Google Maps shows you’re in the wrong location, let this guide be your roadmap for addressing those frustrating glitches. Thankfully, there are viable solutions at your disposal. So the next time you find yourself digitally misplaced, don’t panic; just remember that the fix could be just a few taps away.

🔹 28DB HIGH GAIN ACTIVE GPS ANTENNA – SUPERIOR SIGNAL RECEPTION Built with a high-performance 28dB integrated Low Noise Amplifier (LNA) and ceramic patch technology, this active GPS antenna delivers exceptional signal reception even in challenging environments. The built-in SAW filter effectively filters out out-of-band interference, ensuring clean and stable GPS signal output. Whether you‘re in an ‘urban canyon’ or under light tree cover, this antenna picks up weak satellite signals that passive antennas miss.

REAL-TIME CONTROL. ZERO GUESSWORK. Konnect GPS is a vehicle GPS tracker built for drivers, parents, and businesses who need answers now. Plug it in. Open the app. Start tracking.

Brand / K4 Switches
Meet Ry, “TechGuru,” a 36-year-old technology enthusiast with a deep passion for tech innovations. With extensive experience, he specializes in gaming hardware and software, and has expertise in gadgets, custom PCs, and audio.
Besides writing about tech and reviewing new products, he enjoys traveling, hiking, and photography. Committed to keeping up with the latest industry trends, he aims to guide readers in making informed tech decisions.