If you’re an avid gamer, it’s inevitable that your thumbsticks are going to wear out at some point. This isn’t because there’s anything wrong with them. It’s simply the natural consequence of rubbing your thumbs on the same piece of rubber for hundreds of hours. Of course, this can leave you in a bind. A new controller can get pricey. Do you really want to replace the whole thing just because of a little worn-out plastic? Thankfully, several vendors have come to the rescue with affordable replacement thumbsticks. Best of all, the PlayStation 4 and Xbox One use the same type of thumbstick and the same installation tools. As a result, replacement kits for both systems are more or less identical.
That said, let’s point out two things. First off, if your controller is still under warranty, attempting your own repair will void that warranty. Better to let Sony or Microsoft fix the problem. Secondly, these are thumbstick caps, not complete assemblies. They’ll fix wear and tear, but they won’t fix drift. If your thumbsticks are drifting, you’ll need to solder in a new control box. And that’s a whole different can of worms.
Today, we’re going to look at three different replacement thumbstick options for your console. First, we’ll review the TOMSIN Replacement Thumbsticks. These are rubberized thumbsticks that come in a four-pack, so you can refurbish two controllers at once. Next, we’ll check out the TOMSIN Metal Thumbsticks. These thumbsticks come in a two-pack, but they’re metal, and they come in several color options. Finally, we’ll look at the E-MODS GAMING Replacement Thumbsticks. These are another rubberized four-pack, but they include a Phillips screwdriver. Which set is the best? Let’s take a closer look!
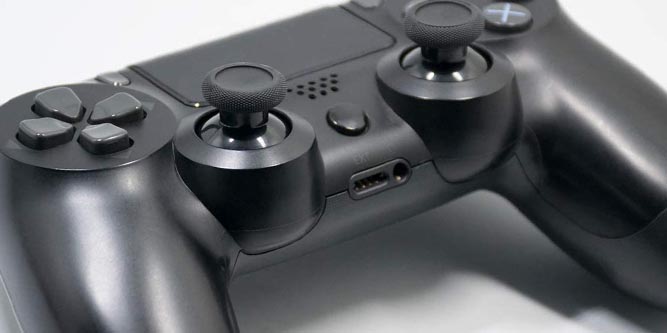
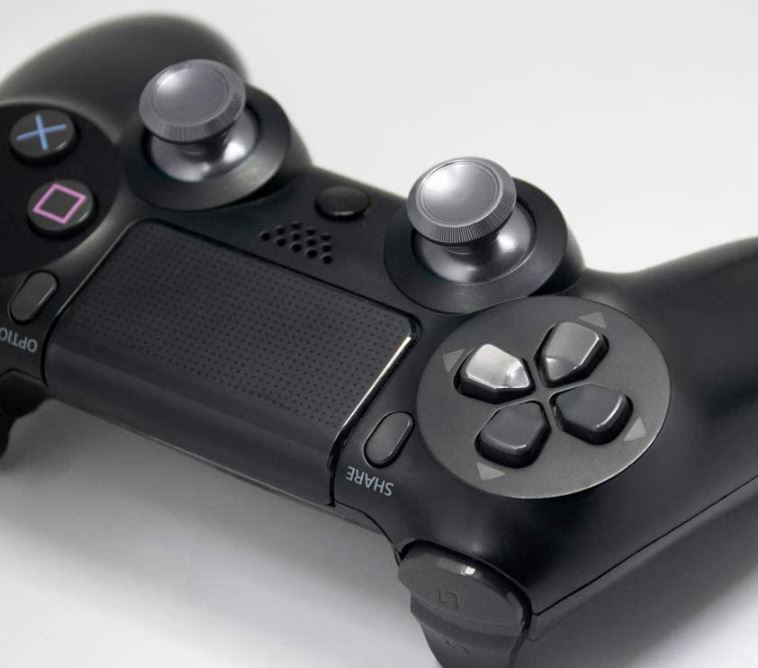
How to Replace PS4 Thumbsticks
Disassembling the PlayStation 4 DualShock thumbstick can be a bit complex. Thankfully, the tools aren’t that complex. You just need a #2 Phillips screwdriver, a plastic pick, and a nylon spudger. In a pinch, you can use a small standard screwdriver instead of a spudger, but it’s not recommended. One slip, and you can permanently damage your whole controller.
To begin with, remove all four Phillips screwdrivers from the bottom of your controller. Next, separate the top half of the controller from the bottom. The top half is a glossy black, while the bottom has a textured feel. Squeeze the top half along the hand grips, and you’ll hear the clips release. Pull the two sides apart, and you’re ready to go to work. Be careful, though. The two sides will still remain connected at the shoulder buttons. So you’ll have to fold the controller open like a book.
At this point, the triggers will still be connected to the bottom half of the controller. This is a problem, because they’re housed in the top half of the controller. To disconnect the two halves completely, you’ll need to unplug the ribbon cable. The easiest way to remove this cable is by unplugging it with a pair of tweezers or needle-nosed pliers. You can also pry it loose with a spludger, but be careful not to damage the circuitry. Next, you’ll need to pull out the battery. The connection is a simple friction fit, without any complications. Pry it out gently, and set it aside along with the top half of the controller. In the bottom half of the controller, remove the rubber reset button from the battery housing. Once that’s gone, you’ll see a single screw that holds the blue motherboard in place. Remove the screw, but don’t remove the motherboard yet.
Here’s where things get complicated. At this point, you’ve revealed the PS4 controller’s buttons, and most of them are free-floating. If you don’t want to meticulously replace all the buttons, keep the controller flat and level. Inside the front of the controller, you’ll see a blue tab on the back of a ribbon cable connector. Using tweezers or pliers, unplug the cable. This will free up the motherboard for removal. The motherboard should swing right out, along with the thumbsticks. Be careful not to scratch the board or tug the cables during removal. Another risk at this point is that you may dislodge the Share or Options button. In this case, make sure the curve is properly matched up to the housing when you re-insert them.
Once the motherboard is free, replacing the thumbsticks is a simple matter. It’s a basic friction fit, so replacement is very easy. Just pull off the old thumbsticks, slide the new ones on, and you’re ready for reassembly.
Replace the motherboard, and screw it back into place. Make sure to reconnect the ribbon cable in the front of the controller. Replace the reset button just as you found it, with the pointed end towards the battery housing. Hopefully, at this point, the triggers are still intact. If not, you’ll need to replace the tension springs. Put the spring loops over the post inside the trigger. Then, put the ends on the inside of the trigger and the slot in the housing respectively. Give it a little squeeze to make sure the spring is installed correctly. One all of that is back in place, re-install the battery. Reconnect the ribbon cable between the top and bottom plates. Snap the two halves back together, screw them together, and you’re done.
How to Replace Xbox One Thumbsticks
Replacing Xbox One thumbsticks is similar to replacing PlayStation 4 thumbsticks in one important respect. You have to take apart the entire controller. On the other hand, you’ll be using a T8 Torx driver, not a Phillips driver. To begin with, take out the battery pack. Inside, under the label, you’ll find a Torx screw. Remove it. Next, pop off the bottom covers from the side handles. A plastic pick can be helpful here to avoid damaging your controller. Be careful, here. There are small gaps inside the side handles that provide access to internal wiring. If you use a screwdriver instead of a pick, you can permanently damage the wiring.
Behind the side plates, you’ll find an additional pair of T8 screws on either side. Remove both of these, and you’re ready to remove the back plate. Provided you’ve removed all five screws, you’ll find that the back plate comes off easily. The face plate will also come right off. The good news is that from here, the process is much simpler than it is for a PS4 controller. Simply lift out the thumbsticks and replace them. At that point, simply reassemble the controller. Just be careful not to pinch any wires in the process, and you’re good to go!
TOMSIN Replacement Thumbsticks
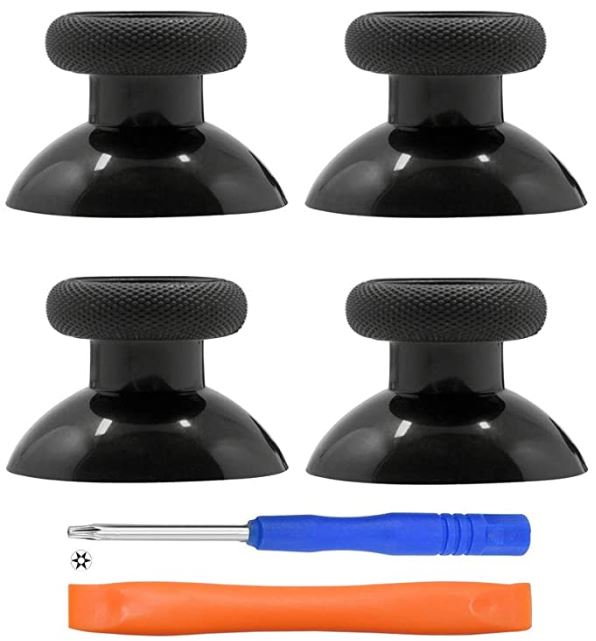
The TOMSIN Replacement Thumbsticks are a four-pack of thumbsticks that are designed for easy replacement. Each thumbstick has a textured finish, which makes them easy to grip and unlikely to slip. And because they come in a four-pack, you can fix two controllers with the same kit. They have a plain black finish, just like the original Xbox One and PlayStation 4 thumbsticks.
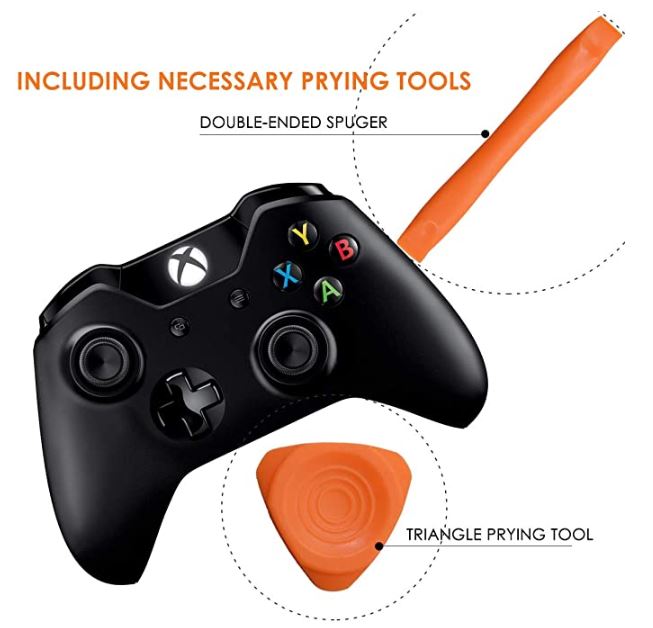
The kit includes a T8 Torx driver for disassembling the Xbox One controller. This driver is relatively basic, with a slim blue rubberized grip. You also get a double-ended nylon spudger, and a small plastic prying pick. You don’t get a Phillips driver for a PlayStation 4 controller. However, since you probably already own one, this shouldn’t be a major concern.
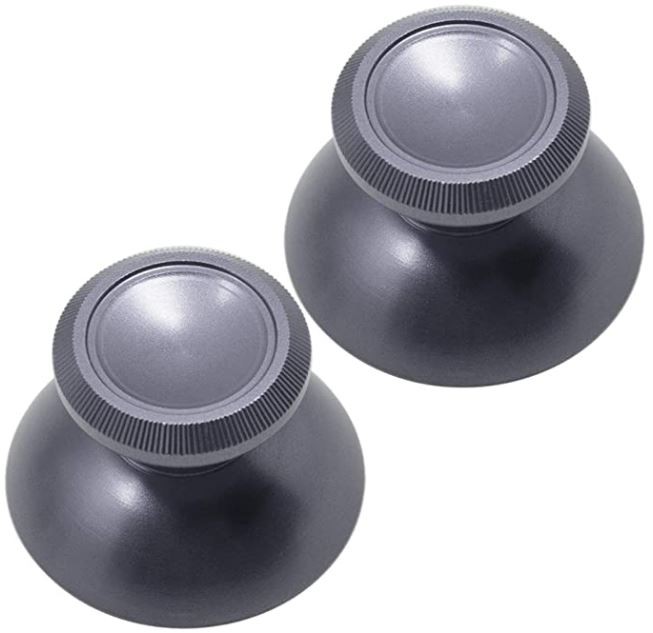
TOMSIN Metal Thumbsticks
The TOMSIN Metal Thumbsticks have a similar design to the TOMSIN thumbsticks we just looked at. However, there’s one important distinction. Instead of being constructed from plastic, they’re made of anodized aluminum. This makes them exceptionally durable, so you’ll never need a new set of thumbsticks. Even when you buy a new controller, you’re going to want to save the thumbsticks from your old one. Even better, they’re available in five different colors. In addition to black, you can buy them in gold, silver, red, or electric blue. All finishes have a shiny, attractive finish that adds plenty of flair to your controller.
In addition to the thumbsticks, you get all the accessories that come with the other TOMSIN kit. You get a T8 Torx driver, a nylon spudger, and plastic prying pick. If you’re a PlayStation owner, get yourself a Phillips screwdriver and you’re good to go.
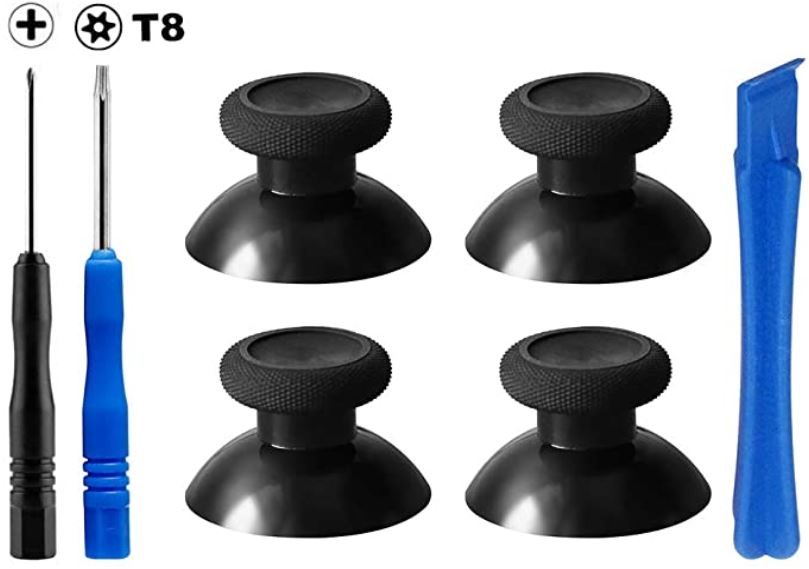
E-MODS GAMING Replacement Thumbsticks
In most respects, the E-MODS GAMING Replacement Thumbsticks are comparable to the TOMSIN Replacement Thumbsticks. They have a rubberized design, with a textured top. This makes them easy to operate, even if you’ve got sweaty thumbs. In addition, they come in a four-pack. This means you get enough thumbsticks to fix two controllers.
The kit includes three tools to help you get the installation process done. First off, you get both T8 Torx and PH2 Phillips drivers. These will allow you to work on both the PlayStation 4 and Xbox One controllers. The drivers are basic, with slim plastic handles. Still, they’re good enough to do the job. The spudger is highly functional. While there’s no plastic pick in the kit, the spudger end can double as a pick in a pinch.
Final Verdict
Undoubtedly, each of these kits is well worth considering. To begin with, the TOMSIN Replacement Thumbsticks are a solid choice for fixing two controllers. They sport a high-quality rubber finish that’s nice and grippy. If you’re looking for a straight-up replacement set, they’re an excellent choice.
The TOMSIN Metal Thumbsticks, on the other hand, are a bit more robust. Because they’re constructed from aluminum, not plastic, they’re exceedingly durable. The metal construction may or may not be a good thing for performance, depending on your preferences. But if you enjoy the feel and durability, this set is a great choice. As an added bonus, you get your choice of colors. Pretty sweet!
The E-MODS GAMING Replacement Thumbsticks are similar to the first TOMSIN set in most respects. They’re rubberized, they’re textured, and they’re a great one-for-one replacement. They even come in a four-pack, so you can fix two different controllers. Moreover, you get a Phillips screwdriver. Admittedly, this is a small added bonus, but it’s a nice touch.
Meet Ry, “TechGuru,” a 36-year-old technology enthusiast with a deep passion for tech innovations. With extensive experience, he specializes in gaming hardware and software, and has expertise in gadgets, custom PCs, and audio.
Besides writing about tech and reviewing new products, he enjoys traveling, hiking, and photography. Committed to keeping up with the latest industry trends, he aims to guide readers in making informed tech decisions.