The Nintendo Wii is one of the most popular game consoles ever made. With over 101 million total units sold, it’s sold the sixth-most of all game consoles in history. For most people, the Wii’s appeal came down to the motion controls. There had never been anything like it, and it was an easy sell for many nontraditional gamers. The Wii Sports package alone remains the fourth best-selling game in history. The top three, Minecraft, Grand Theft Auto V, and Tetris, are all multiplatform titles. There’s really nothing else like it, before or since.
For this reason, it’s understandable that many people have held onto their old Wii consoles. But as consoles age, parts inevitably age out and need to be replaced. The fastest-wearing parts are mechanical ones, such as the DVD drive. And since you can’t play Wii games without the drive, a dead drive is a serious emergency. Thankfully, there’s a healthy aftermarket for Wii U parts, including third-party parts. And for something as simple as a DVD drive, it’s not as if Nintendo used custom, in-house hardware. As a result, there are any number of replacements readily available for purchase.
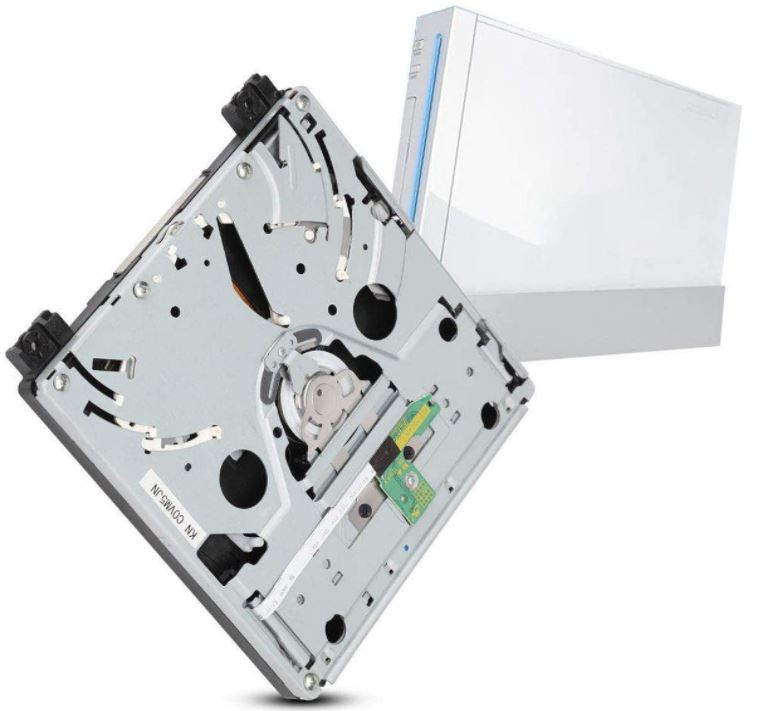
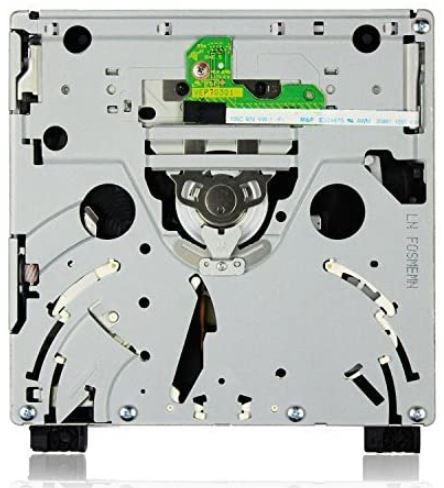
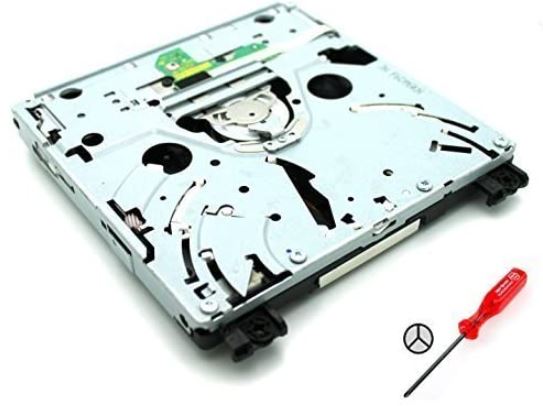
Today, we’ll be reviewing three of the best replacement Nintendo Wii drives that we could find. We’ll start out by reviewing the abcGoodefg Nintendo Wii DVD Drive. This is a simple drop-in replacement that’s meant for Wii consoles manufactured from 2011 and later. However, it still works with older Wii consoles. The HongLei Original DVD Drive Replacement is next on our list. It works well with all Wii consoles and ships with a tri-wing screwdriver for disassembling the Wii console. Last but not least, we’ll look at the Sonicer DVD Drive Replacement. This is a universal replacement drive with the same form factor as the other two. Let’s look a little closer, and see how the three stack up!
Tools Required for Replacing a Wii DVD Drive
Before you buy a new drive, you’ll also want to make sure you’ve got all the right tools. If not, you’ll want to buy them along with your drive so you’re ready to get the job done. If you’re short in the tool department, a Nintendo Switch screwdriver kit will have most of what you need. Here’s a quick list.
- PH00 Phillips driver
- PH0000 Phillips driver
- Y00 tri-wing driver
- Spudger (or flathead screwdriver)
- Tweezers (optional)
How to Replace a Nintendo Wii DVD Drive
The other thing you’ll want to think about before you get a new Wii drive is whether you want to deal with the replacement process. It’s not incredibly complicated. It’s certainly not like you have to solder or anything like that. But you should have at least a passing familiarity with the basics of electronics. You’ll also need to set aside an hour or two if you want to get the job done properly. Here’s how to replace the drive.
First, you’ll need to remove the screws on the bottom of the case, towards the front of the Wii. These are concealed beneath a couple of plastic screw covers, so you’ll need to pry the covers out. Set them aside, remove the screws, and move on to the faceplate. There, you’ll find a tiny Phillips screw in a corner near the fourth GameCube controller port. Remove it. Finally, there’s screw beneath the rubber foot closest to the DVD drive. Remove the foot, remove the screw, and you’re ready to pry the faceplate off.
When you take off the faceplate, you don’t want to take it off all the way. Let it down carefully, and you’ll notice that it’s still connected by a cable. Using your tweezers, disconnect this from the motherboard. Now you can take the faceplate off all the way and set it aside. At the same time, you’re going to want to remove the controller port and memory card port covers. To do this, open each cover until it’s at a 90-degree angle to the front of the case. Then, they will simply lift out. Remove the two Phillips screws still remaining in the grey controller port faceplate, and remove the plate.
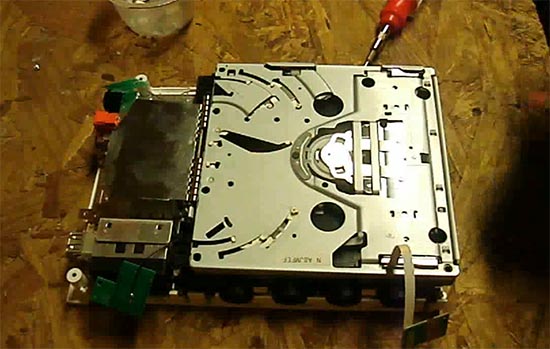
Now it’s time to remove the outer case. To do this, you’ll need to remove the screws along the edges. There are seven of these in total. Two are located near the controller ports, where you removed the faceplate. Three more are located on the side of the Wii, under a set of screw covers. The last two are located on the bottom of the Wii, beneath the rubber feet. When all these screws have been removed, the Wii case should lift off easily without any resistance.
Next, you’ll have to take off the small battery door near the bottom of the drive. This is secured by a Phillips screw that’s retained in the door at all times. Remove the door, and set it aside. You may want to take this opportunity to change your Wii’s CR2032 battery, but you don’t have to. Beneath the door, you’ll find another tri-wing screw. Remove it. Near the controller ports, you’ll see two remaining tri-wing screws. Remove them, and the DVD drive’s aluminum shield will be loose. You can now lift it up and set it to the side.
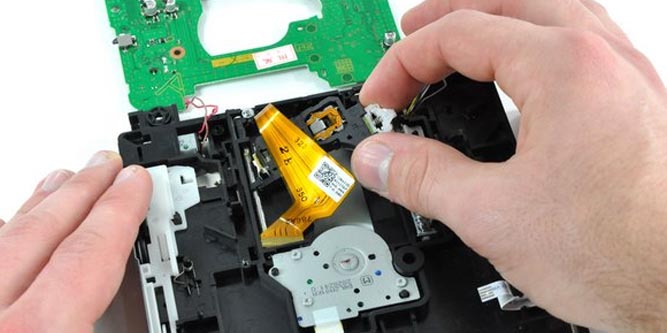
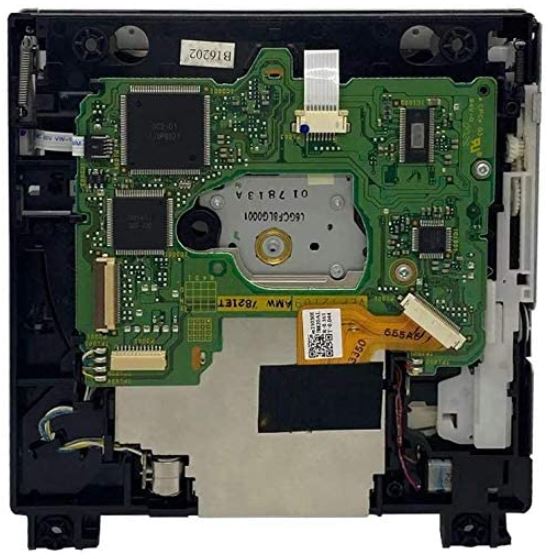
Now you’ll see the DVD drive fully exposed, with four large Phillips screws in the corners. Remove these, and you’ll be able to lift the drive. Don’t take it out all the way yet! It’s still attached by a few cables. With the drive lifted from one side, you’ll find a white set of cables that’s tucked under a plastic shroud. Those are the power cables. Pull them out from under the shroud to get a bit more clearance. Then, carefully pull sideways to remove them from the drive.
To remove the remaining ribbon cable, flip up the flap on the drive connection. Pull the cable out carefully, and the drive will be fully disconnected. At that point, you’re ready to reverse all of the steps and install the new DVD drive.
If you’re using one of our choices of drive, that’s all there is to it. However, some replacement drives don’t come with the rubber grommets inside the plastic drive housing. If yours doesn’t, you’ll need to remove the grommets from the original drive and reuse them.
To remove the grommets on the rear, insert a small screwdriver or pick and pull to the side. The key is to move gently without stretching the grommet out too much. It can be helpful to wiggle a bit if they’re sticking.
To remove the grommets on the front, set the drive on its side so you can see the grommets clearly. Put your tool into the lower grommet, and pull up just as you pulled the other grommets. It should slide up into a wider part of the grommet hole, where you can simply pull it out. Flip the drive over and repeat the process for the other grommet, and you’re all set. Pop them into your new drive and proceed with reassembly.
abcGoodefg Nintendo Wii DVD Drive
The abcGoodefg Nintendo Wii DVD Drive is designed as a drop-in replacement for the original. This means it’s easy to install and you won’t run into any issues. Well, at least it’s as easy as possible given the lengthy install process. Regardless, it works with all Wii models, and has the same form factor as the original.
That said, this drive does have one major limitation: it won’t work with GameCube games. This may or may not be problematic, depending on which version of the Wii you own. Some Wii models aren’t compatible with GameCube games anyway, and you can’t connect the controllers. On the other hand, if you want to play your classic games on your Wii, you’ll be out of luck.
HongLei Original DVD Drive Replacement
The HongLei Original DVD Drive Replacement is another drop-in replacement that’s easy to install. If you were to put it next to the abcGoodefg drive, you wouldn’t be able to see any difference. As a result, you won’t have any different experience in terms of getting it set up and working.
That said, there are a couple of things that set it apart, and make it a bit of a better value. To begin with, it’s compatible with all Wii consoles, and supports GameCube games. As a result, it’s more versatile than the abcGoodefg drive. Not only that, but the kit includes the triwing screwdriver. Most of the other tools you need for Wii disassembly are common, and you might own them all. But odds are good you’ve never even seen a triwing driver before. It’s just an inexpensive screwdriver with a transparent plastic handle, but it could save you from buying a whole kit.
Sonicer DVD Drive Replacement
The Sonicer DVD Drive Replacement is identical to the last two in most respects. It works with all Wii consoles except for the Wii U, including the RVL-001 and RVL-101. So whatever model number is on the back of your system, you won’t have trouble with installation. Moreover, the Sonicer drive allows you to play GameCube games, much like the HongLei drive. This gives you the flexibility to play your entire game library on one console.
Final Verdict
These drives have an identical form factor, but there are a few differences worth noting. The abcGoodefg Nintendo Wii DVD Drive is probably worth avoiding. It doesn’t play GameCube games. So unless you own a Wii with the Model number RVL-101, you won’t get full functionality. And even if you don’t own that model number, there’s no savings.
The HongLei Original DVD Drive Replacement and the Sonicer DVD Drive Replacement are both perfectly serviceable for all Wii owners. You follow the installation process, and they’ll both work without any issues. If you’re going to buy one in particular, though, the HongLei has a slight edge. It comes with a tri-wing screwdriver, so you may not need to buy any other tools. If you already own all the other tools, you’ll appreciate not needing to buy a separate screwdriver kit.
Meet Ry, “TechGuru,” a 36-year-old technology enthusiast with a deep passion for tech innovations. With extensive experience, he specializes in gaming hardware and software, and has expertise in gadgets, custom PCs, and audio.
Besides writing about tech and reviewing new products, he enjoys traveling, hiking, and photography. Committed to keeping up with the latest industry trends, he aims to guide readers in making informed tech decisions.