The Snapmaker is one of the most funded 3D printer devices of any device in Kickstarter history. With the original Snapmaker being so successful, so why’d they make a second one? Did they manage to find a way to make their machine even better?
Well, in a lot of ways, the new version is actually a fairly big improvement over the first. It takes what people likes, make them a little more likeable, and then patches up some of the weaker points of the earlier version of the Snapmaker. It didn’t discard what people already liked about it. For instance, Snapmaker 2.0 is still a modular device. But now it’s more than just that.
Meeting the Snapmaker 2.0
First and foremost, it’s a formidable 3D printer. Though the printer is pretty impressive, it’s actually aimed at hobbyists and beginners more than anything. Does it have the level of customization needed for more professional use, for designers and engineers who need outstanding accuracy? That’s tough to say without getting into more detail.
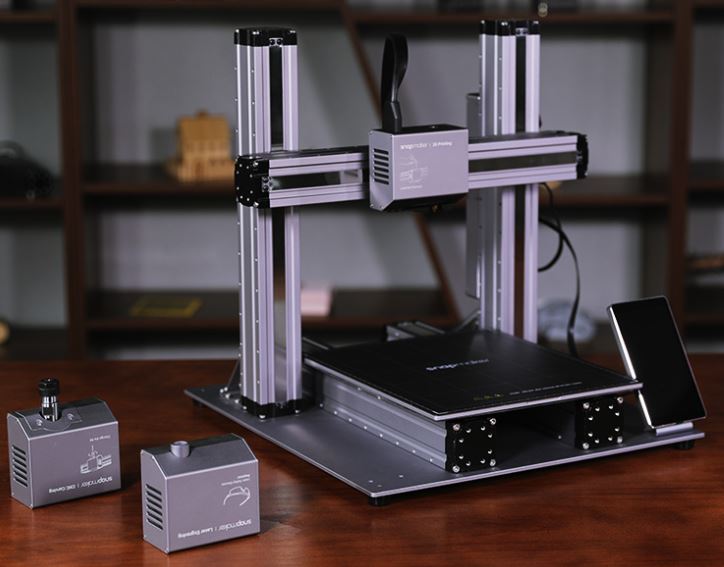
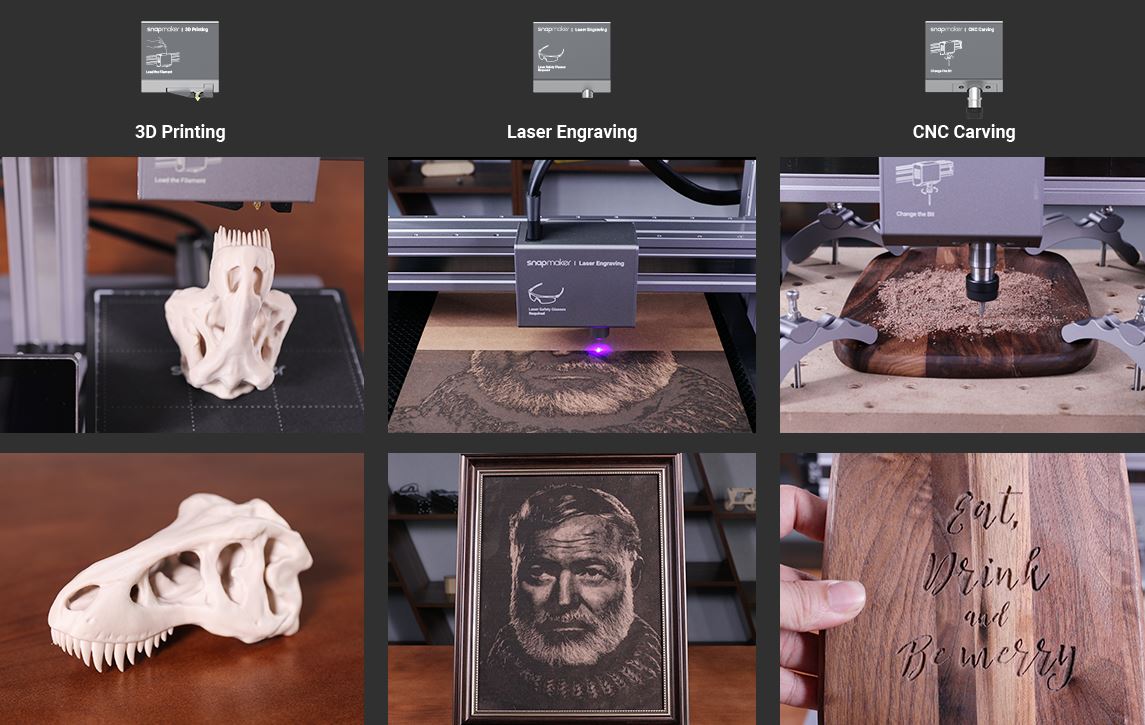
In addition to being a printer, the Snapmaker 2.0 is also a laser engraving and cutting device. Unlike a regular 3D printer, it can be equipped with a variety of different interchangeable modules, helping to rapidly and dramatically change the form and function of the entire device. Similar to swapping out a camera lens, or changing the game inside of a console, you can make a dramatic change to what your machine can do for you.
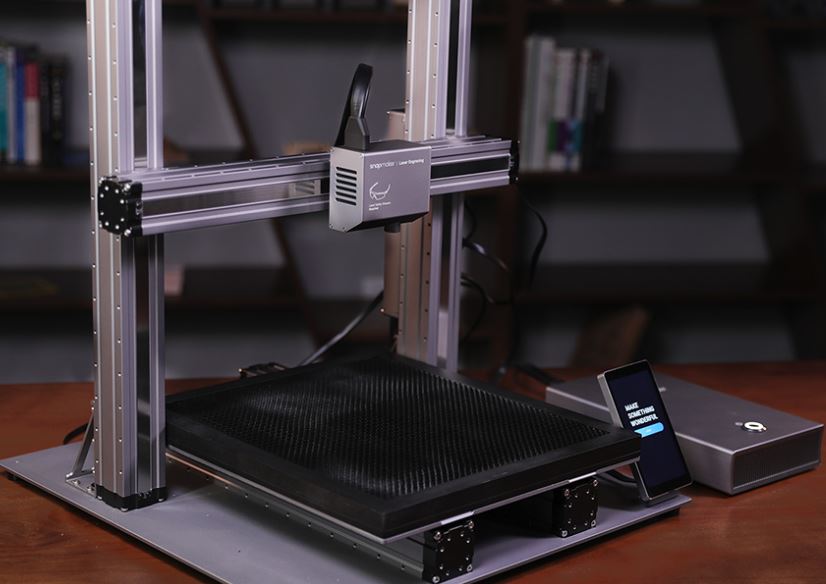
For instance, the laser enables you to make a variety of beautiful artistic creations with stylistic cutting and engraving. And the CNC carving portion of the device allows you to make highly precise 2.5D and 3D objects. Both can work quite quickly.
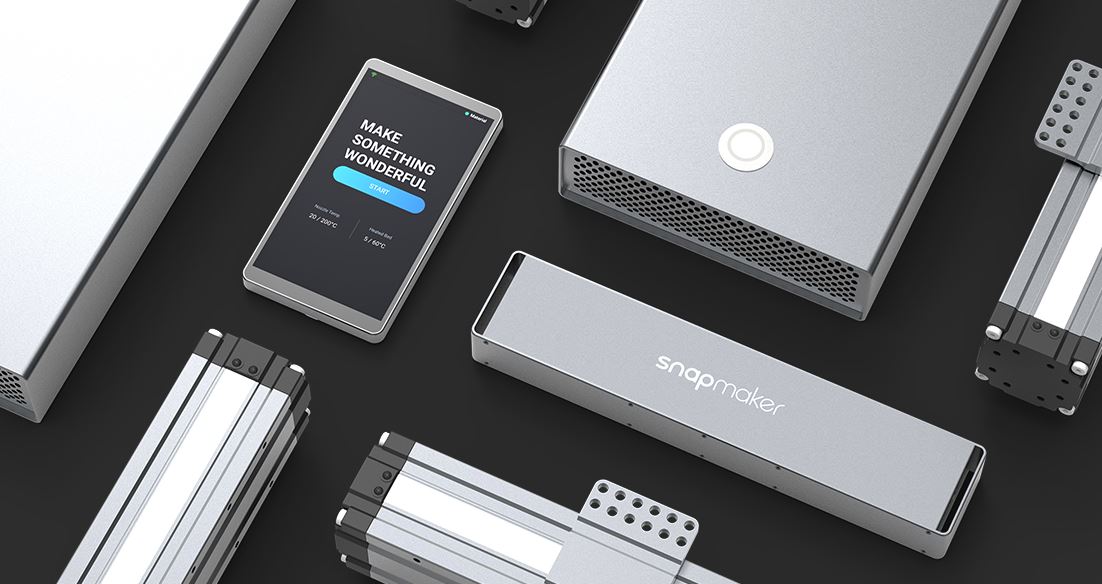
The Snapmaker 2.0 uses a modular design, which allowing users to customize or upgrade the unit as needed. But rather than being just a collection of machines, it’s more like an ecosystem of separate modules that can be used together for a greater creative capacity. Plenty of 3D printers are made with expansion potential, but not many are designed with this sheer degree of adaptability in mind.
Types of Snapmaker
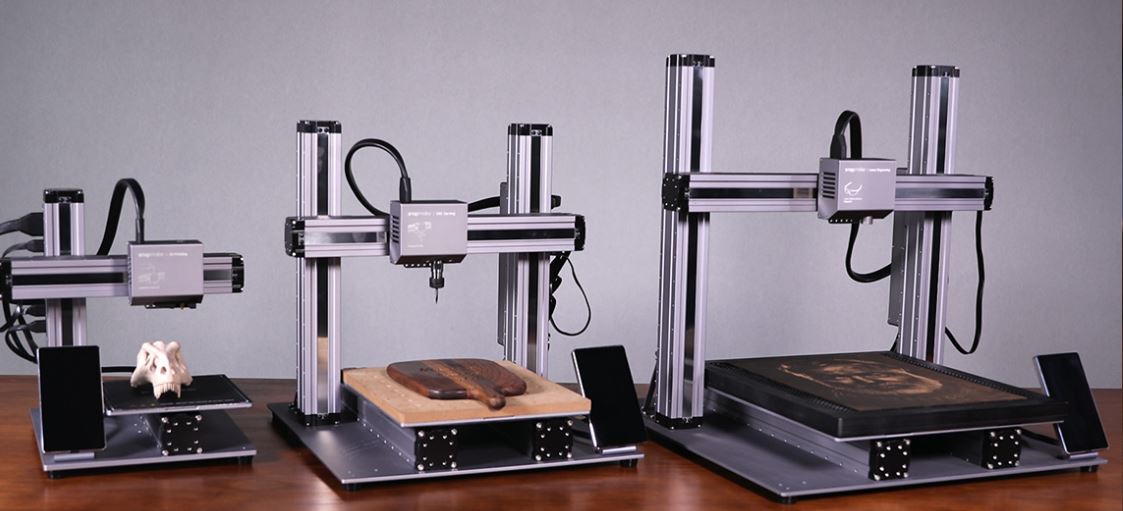
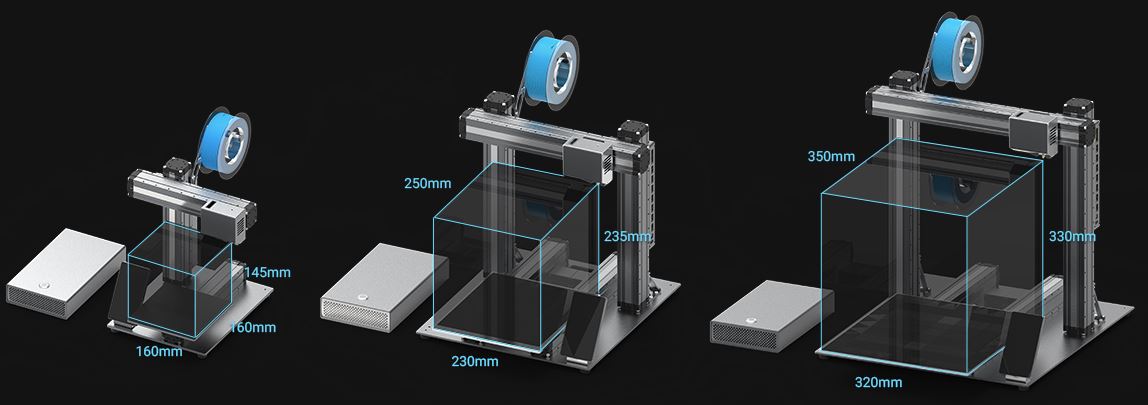
There are actually three types of Snapmaker 2.0: The A150, A250, and the A350. They’re essentially the same machine, with their main difference being the size of the workspace supported. The smallest workspace measures about 6.2” squared, while the medium workspace measures 9” squares, and the largest workspace is about 12.9” squared.
Between them, you can have a variety of enclosures, lights, hand wheels, and of course an emergency stop button. Most of that is managed through the included controller, which also lets you access an IP camera across the Wi-Fi connection.
Construction Quality
From a glance, you can tell this unit was clearly built to last. It’s quite easy to assemble the machine itself, unlike furniture. But it will need some assembly. Luckily, the all-metal design will hold up while it’s moved around. Because each module and major component is made from the same high strength metals.
For instance, both control boards and the power adapter are made from aluminum alloy housing. That’s not only great for weight and durability, but also for heat dissipation. Even the POM rollers have been upgraded to metallic steel rollers, which allows them to provide a higher load-bearing capacity.
This is all possible because of aerospace grade aluminum alloys which were crafted into precision. Because stability is part of what allows for the manufacturing process to remain very controllable, and each part you make to be meticulously crafted. The Snapmaker 2.0 doesn’t just look really cool, the sturdiness is actually essential to delivering performance that’s every bit as professional as the unit looks.
Ports & Inputs
The backside of the Snapmaker 2.0 has a number of intuitive inputs, including USB-C inputs. Basically it doesn’t take a degree to figure out how to setup this machine. You can start running wires and finishing the process in about 15 seconds. At least, unless you’re planning on doing something particularly complicated. Because as noted, this system can support a variety of add-ons, linear modular, and tool heads.
The infrastructure is based on controller area network (CAN) technologies, which is actually a preferred tech for automating the production of motor vehicles. Instead of just making more and more ports on the side of the device, and leaving users with a bunch of tangled cables, they’ve made the controller expand with the inclusion of universal ports, and the ability to use multi-port adapters. That means you can add additional types of ports and controls in the future, including ones you don’t necessarily know that you need at the moment.
User Software
The Snapmaker 2.0 control software is surprisingly powerful. This is actually the 18th version of the software, during that time a number of different features have been added. These days, the latest iteration of their software can be used for relief carving, SVG editing, printing, and about a dozen more unique things.
Moreover, new features are being added as time goes by. Because the Snapmaker firmware is open source, allowing the community itself to develop their own unique API, and then share them with others. People can make their own customized modules and create their own totally unique 3D printing station. Very cool.

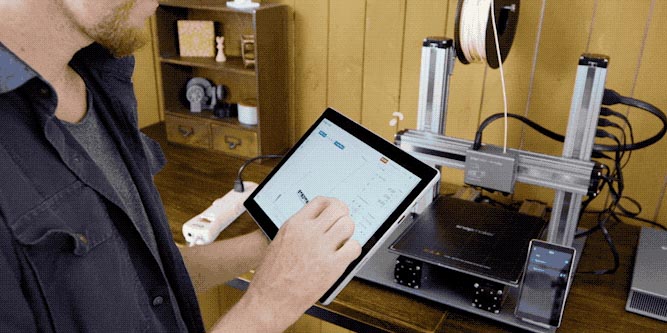
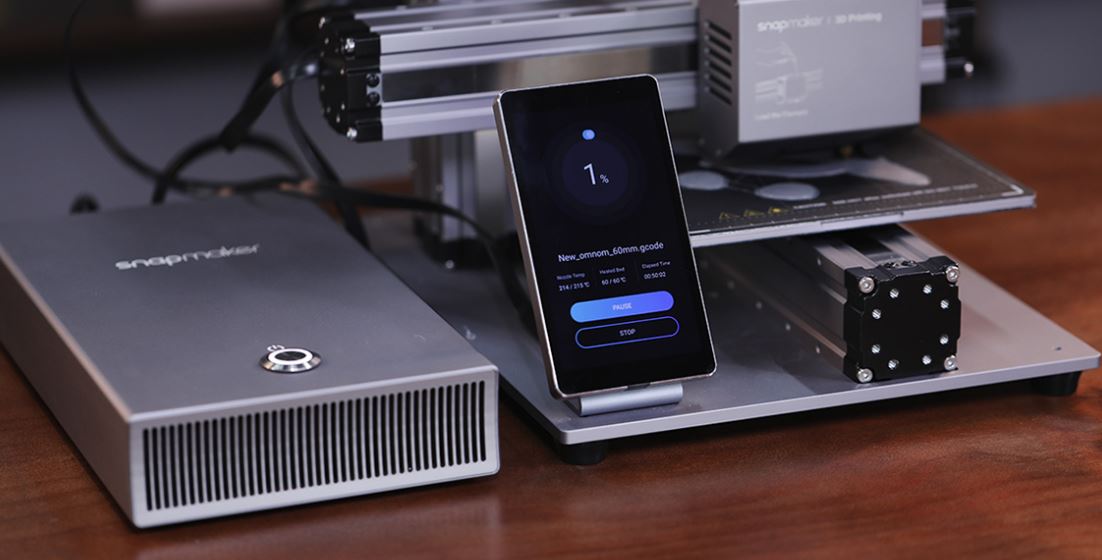
Touchscreen Interface
The human interface is actually one of the better features of this device. The Snapmaker includes its own smart touchscreen, measuring about 5” and covering a 720p resolution. It lets you connect with your machine and manage your workflow in real time. The design is pretty intuitive; you can see your most-used tasks right from the home screen.
Moreover, the display is equipped with its own A7 CPU, operating a 1.1GHz quad core. It’s basically like a small smartphone dedicated to your Snapmaker 2.0. It’s even powered by an Android OS, so the interface should be pretty approachable for people who have already used Android devices in the past.
Wireless Connectivity
The Wi-Fi and USB port on the backside of this unit work together to help provide wireless connectivity for the Snapmaker 2. Once connected, you can print with basically the touch of a single button. That includes the ability to update your firmware through the Wi-Fi, or otherwise start a print job.
Noteworthy Features
Among the many unique and semi-unique things which the Snapmaker can do, some are more impressive than others. For instance, power outages are automatically detected, and the Snapmaker 2.0 will pick up where it left off when power is restored. That allows you to recover any interrupted project without having to toss it, or without having to undergo terrible effort to restore it.
It has auto-leveling, which is a great feature for inexperienced users and experienced users alike. The induction sensor can probe the bed and apply compensation to help ensure you’re always printing on a level area, without requiring you undergo some kind of complex calibration process.
Snapmaker 2.0 is equipped with a filament runout sensor, that so it can print larger objects with ease, and without running out of materials. Once you are air-printing because you’re out of materials, the touchscreen will let you know that a new filament needs to be placed into the machine.
You can head over, resupply the filament, and it will resume printing without further instruction. And then there’s the upgraded cooling system, which doesn’t just help the longevity of the machine, it actually helps you get a smother finished surface on your prints. Cooling is far more efficient than in the previous iteration of the Snapmaker, to be certain.
Ease of Use
The printing platform is quite flexible, allowing you to just pick up prints on the plate, and flex the bottom of the plate to remove your print. And the magnetic design of the heated bed allows you to replace and remove the print sheet quite easily.
The aluminum grid table was made specifically to prevent damage to the bed, and to help the laser beam focus while cutting. Like basically every component of this device, you’ll find it’s both removable and quite firm in your hands. And laser cutting is pretty much as straightforward as drawing. You can use an image and create vectors on it for engraving or cutting, and edit those converted images in the Snapmaker software to better match your project.
Maintaining not only the integrity of the machine, but its integrity, can be tough. The Snapmaker 2.0 was made to be easier to maintain with some fairly impressive dust resistance. The laser resolution runs between 50 and 300 microns, which really allows you to unlock your creative potential with 3D printing, laser engraving, and of course CNC carving and cutting.
Other Considerations
The upgrade d CNC module uses a standardized ER11 collet, guaranteeing greater connectivity for carving speed, saving you quite a bit of time. Meanwhile, the MDF waste board is removable to protect the bed from damage, and lets you work with a smooth and leveled surface during carving. Clamping kits let you keep your materials firmly in place for more reliable and repeatable cuts.
The A150 model includes three linear modules, the printing and cutting modules, a controller,5” smart touchscreen, magnetic heated bed, aluminum grid table, waste board and clamp sets, the controlling software, and a 1kg spool of PLA filament to help you get started with your prints. The A250 and similar versions may come with more linear modules, or larger modules, but are otherwise the same machines at heart.

Who Should Pick Snapmaker 2.0?
The high precision nature of this instrument ensures you can use it to print, engrave, cut and carve in high res as needed. Its combination of abilities allows the Snapmaker to handle PLA, ABS, wood, and flexible substrates as well. It’s also able to work with highly repeatable accuracy, measuring as small as 0.005mm with homing repeatability at 0.01mm.
Whether you’re an engineer or a casual fan of this type of creative outlet, the Snapmaker clearly has a lot of potential. Its open-source nature really sweetens the deal, too. Which makes this the right choice for someone who really needs a machine that can handle more than just printing.
Meet Ry, “TechGuru,” a 36-year-old technology enthusiast with a deep passion for tech innovations. With extensive experience, he specializes in gaming hardware and software, and has expertise in gadgets, custom PCs, and audio.
Besides writing about tech and reviewing new products, he enjoys traveling, hiking, and photography. Committed to keeping up with the latest industry trends, he aims to guide readers in making informed tech decisions.
Hi i found your article and would like to ask you more questions about 3d laser printers and cutters and 3d printers and so on. If you have time one day please send me an email.
Thank You,
April
Hey, I’m looking to pre-order the Snapmaker 2.0, as i’m new into 3d printing ,lazer, and cutters. Viewed some reviews of the 1.0 not real impressed with the 3d print quaulty, poor support creation , birds nest was a mess, adding new spool material into feeder seems difficult. Any feedback on these or other issues on the Snapmaker 2.0. I will be using all 3 features, and a lot of $$ to put up!
As far as filament feeding goes take a look at this : https://youtu.be/2anRrb_R63o