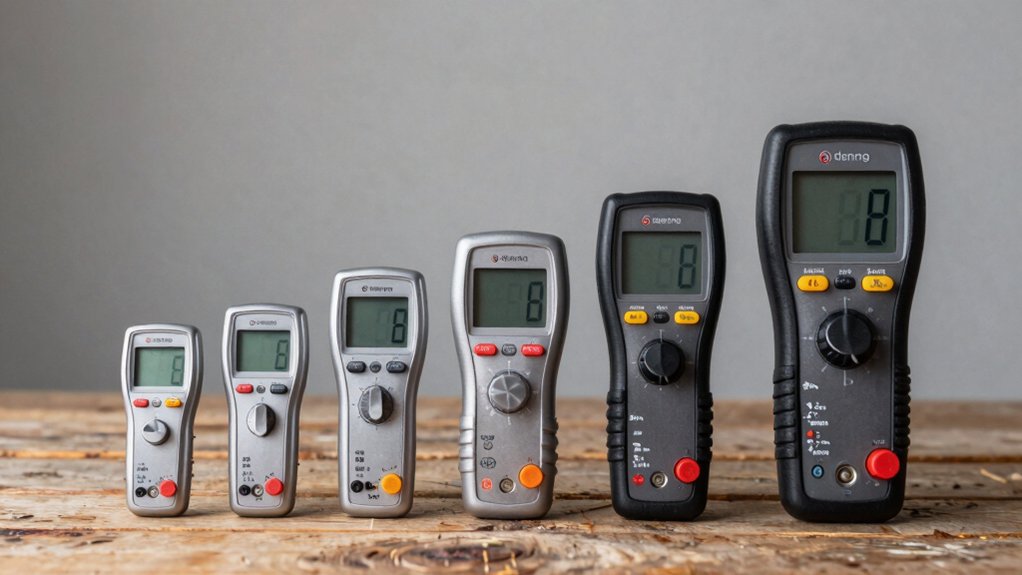
When you’re maintaining an electric fence system, you need a reliable voltage tester to identify problems quickly. You’ve got several solid options available, each with different voltage ratings, display types, and features. Some models work without batteries, while others offer digital readouts for precise measurements. The right choice depends on your property size and the specific issues you’re troubleshooting. Here’s what sets each tester apart.
| Electric Fence Voltage Tester 12KV Portable Fault Finder |

| Most Portable | Maximum Voltage Range: 12 kV (2-12 kV) | Display Type: Neon indicator lights (8 LEDs) | Fault Detection Method: Neon light indicators corresponding to voltage levels | VIEW LATEST PRICE | Read Our Analysis |
| Allsun Digital Electric Fence Voltage Tester and Fault Finder |

| Best Value | Maximum Voltage Range: 9.9 kV (300V-9.9 kV) | Display Type: LCD display | Fault Detection Method: Precise kV reading at test point | VIEW LATEST PRICE | Read Our Analysis |
| Electric Fence Tester and Voltage Finder (15KV Digital) |

| Highest Voltage Range | Maximum Voltage Range: 15 kV (200V-15,000V) | Display Type: LCD display with backlight | Fault Detection Method: Quick fault location via button press and metal contact | VIEW LATEST PRICE | Read Our Analysis |
| FenceMate Digital Volt Meter for Electric Fence |

| Best Battery Life | Maximum Voltage Range: 15 kV (up to 15,000V) | Display Type: Large LCD display | Fault Detection Method: Automatic On/Off function | VIEW LATEST PRICE | Read Our Analysis |
| Electric Fence Tester Voltmeter 20,000V – Product of Korea |
| Most Durable | Maximum Voltage Range: 20 kV (150V-20,000V) | Display Type: LED display with sunlight visibility | Fault Detection Method: Beeper and flashing LED signals | VIEW LATEST PRICE | Read Our Analysis |
More Details on Our Top Picks
Electric Fence Voltage Tester 12KV Portable Fault Finder
Why settle for a voltage tester that requires batteries or offers limited measurement range? The Electric Fence Voltage Tester 12KV Portable Fault Finder measures voltage from 2 kV to 12 kV across fence wires, polyethylene tapes, and grounding systems. To use it, embed the copper probe into the ground and touch the top hook to the wire or tape you’re testing. Eight neon indicator lights display your voltage reading. The compact design fits in your pocket, and the wave-patterned grip provides comfort during extended use. Its rugged ABS shell handles cold climates. Note that this tester isn’t waterproof and doesn’t require batteries, making it reliable for repeated fence maintenance and fault detection.
- Maximum Voltage Range:12 kV (2-12 kV)
- Display Type:Neon indicator lights (8 LEDs)
- Fault Detection Method:Neon light indicators corresponding to voltage levels
- Power Source:No batteries required
- Portability & Design:Pocket-sized, wave-pattern grip, frosted shell
- Operation Method:Embed probe in ground; hook touches wire
- Additional Feature:8 neon indicator lights
- Additional Feature:No batteries required
- Additional Feature:Pocket-sized portable design
Allsun Digital Electric Fence Voltage Tester and Fault Finder
The Allsun Digital Electric Fence Voltage Tester and Fault Finder works best for you if you need a straightforward, battery-powered device that locates breaks and weak spots in your electric fence while measuring actual voltage from 300V to 9.9kV. To use it, probe the soil or ground wire with one end while hooking the other to your test point. The LCD display shows readings in kilovolts, helping you assess fence performance quickly. Smart Power technology activates the device when it detects a pulse, then shuts down after four seconds of inactivity, consuming only 0.03W. The rugged design includes an insulated probe and finger guard for farm use, weighs 228 grams, and arrives with a carrying bag and English manual.
- Maximum Voltage Range:9.9 kV (300V-9.9 kV)
- Display Type:LCD display
- Fault Detection Method:Precise kV reading at test point
- Power Source:Battery powered
- Portability & Design:Compact with zipper bag, 228g
- Operation Method:Probe into soil; hook to test point
- Additional Feature:Smart power wake technology
- Additional Feature:Integrated finger guard protection
- Additional Feature:Includes zipper carrying bag
Electric Fence Tester and Voltage Finder (15KV Digital)
If you’re managing livestock or maintaining perimeter security fences across large properties, you’ll benefit from MINGYA’s 15KV Digital Electric Fence Tester, which detects voltage levels from 200 to 15,000 volts and identifies faults quickly. The device features an LCD backlit display showing voltage, current, and current direction. You’ll operate it using a 9V battery and locate faults by pressing the button and touching the metal top contact to your fence line. It works on steel wire, aluminum wire, polyethylene wire, rope, tape, and braid. The back buckle lets you hang it on your waist for convenient access. With its compact 0.22-kilogram design and straightforward operation, you’ll efficiently diagnose electrical problems and maintain proper fence functionality across various wire types.
- Maximum Voltage Range:15 kV (200V-15,000V)
- Display Type:LCD display with backlight
- Fault Detection Method:Quick fault location via button press and metal contact
- Power Source:9V battery included
- Portability & Design:Back buckle for waist-hanging, 220g
- Operation Method:Press button and metal top contact to wire
- Additional Feature:Measures voltage and amperes
- Additional Feature:Shows current direction display
- Additional Feature:Waist-hanging back buckle
FenceMate Digital Volt Meter for Electric Fence
FenceMate’s Digital Volt Meter works best for ranchers and property managers who need to measure voltage across electric fence systems quickly and accurately. The device measures output from pulse-type fence chargers, lines, and earth systems up to 15,000 volts. Its large LCD display lets you read measurements easily outdoors. The engineering-grade polymer housing provides durability and ergonomic grip comfort. Reverse connection protection prevents damage from incorrect probe placement. The included 9V battery powers the meter immediately upon use, allowing you to begin testing your fence system without delay.
- Maximum Voltage Range:15 kV (up to 15,000V)
- Display Type:Large LCD display
- Fault Detection Method:Automatic On/Off function
- Power Source:9V battery included
- Portability & Design:Ergonomic, non-slip grip, engineering-grade polymer
- Operation Method:Probe and contact method (specifics not detailed)
- Additional Feature:Engineering-grade polymer housing
- Additional Feature:Reverse connection protection
- Additional Feature:Non-slip ergonomic grip
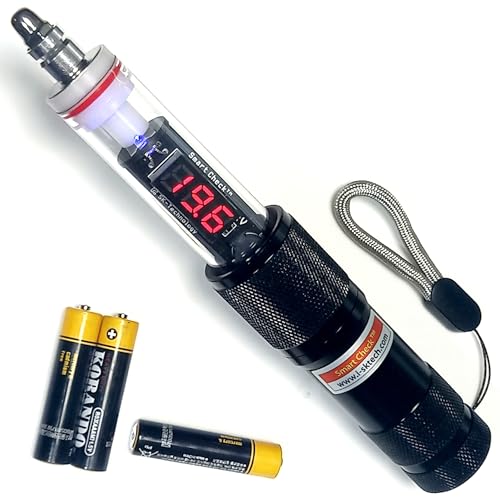
Electric Fence Tester Voltmeter 20,000V – Product of Korea
For anyone who needs hands-free voltage detection without carrying an earth lead, Korea’s Electric Fence Tester Voltmeter 20,000V delivers reliable performance across a wide voltage range of 150 to 20,000 volts. The device features high precision and sensitivity, allowing you to assess fence voltage quickly. When you hold the authentic high-voltage probe near a fence, the beeper activates and the LED flashes to signal voltage presence. Its sunlight-visible LED display lets you read results in bright outdoor conditions. The rugged, waterproof construction protects against weather and impacts. Use the fault-finder function by observing the beeper and LED patterns to locate problem areas. The low electric shock risk makes it safer for regular maintenance checks.
- Maximum Voltage Range:20 kV (150V-20,000V)
- Display Type:LED display with sunlight visibility
- Fault Detection Method:Beeper and flashing LED signals
- Power Source:Not specified
- Portability & Design:Rugged and waterproof construction
- Operation Method:No earth lead required; hands-free detection
- Additional Feature:Beeper and flashing LED
- Additional Feature:Waterproof rugged construction
- Additional Feature:No earth lead required
Factors to Consider When Choosing Electric Fence Voltage Testers

When you’re selecting an electric fence voltage tester, you’ll need to evaluate five key factors: the measurement range and voltage capacity that matches your fence’s specifications, the display type that you can read clearly in various lighting conditions, the power source and battery life that’ll sustain regular use without frequent replacements, the durability and weather resistance required for outdoor environments, and the portability and design features that fit your handling preferences. Start by checking your fence’s maximum voltage output, then match it to a tester’s range—for example, if your fence runs 5,000 volts, you’ll want a tester rated for at least that level. Next, consider whether you prefer a digital LCD display or a simpler analog gauge, verify the battery type and expected runtime, confirm the device’s construction can withstand moisture and temperature changes, and finally assess whether the size and grip feel comfortable for your work conditions.
Measurement Range and Voltage Capacity
Most electric fence voltage testers you’ll encounter cover measurement ranges from several hundred volts up to 15,000–20,000 volts, which allows you to monitor both standard and high-voltage fence systems effectively. You’ll typically see readings displayed in kilovolts (kV), so a reading of 6.0 means 6.0 kV. Check your tester’s minimum operating voltage, which often sits around 200 V—below this threshold, you won’t get reliable readings. Some testers measure peak voltages rather than continuous RMS values, affecting how results relate to fence performance. Select a tester with voltage capacity matching your fence system’s requirements. Higher capacity models frequently include additional safety protections and features, allowing you to detect voltage without needing an earth lead connection.
Display Type and Readability
Once you’ve confirmed your tester covers the right voltage range for your fence system, you’ll need to evaluate how the device displays that information. You’ll encounter two main display types: neon indicator lights or LCD screens. Neon lights show voltage ranges through color changes, offering simplicity but less precision. LCD displays provide exact numeric readings in volts or kilovolts, giving you precise measurements. When selecting an LCD tester, check for backlighting—essential for reading values in bright outdoor conditions. Examine the display size and contrast to ensure legibility from a distance. Verify the viewing angle works at multiple positions. Finally, confirm the tester produces a clear readout at your fence’s minimum voltage, typically 200 volts, so you can quickly detect whether your fence is functioning.
Power Source and Battery Life
How does your tester stay powered during routine fence checks? Most voltage testers use replaceable 9V batteries that power the LCD display and measurement circuits. You’ll find that battery life typically extends several hundred hours, with low power draw around 0.03W in efficient models. When selecting a tester, check whether batteries come included or if you’ll supply your own. Some units feature auto-off functions or wake-on-pulse technology that conserves power when the device isn’t actively measuring. These power-saving features prevent unnecessary drain during downtime, keeping your tester ready for quick voltage checks without frequent battery replacements. Verify battery availability in your area before purchasing, as this affects long-term maintenance costs and field reliability.
Durability and Weather Resistance
Your voltage tester’s longevity depends directly on its physical construction and environmental protection features. Look for models with rugged ABS shells that withstand cold climates and harsh outdoor conditions. Check the waterproof or water-resistant rating to ensure the device functions reliably in rain and wet environments. Select a tester with a textured, non-slip grip and frost-free, matte shell for improved handling in outdoor settings. Verify that integrated finger guards and insulated probes reduce your exposure during use. Confirm the device maintains accuracy across a wide operating temperature range, ideally up to 40°C or beyond. These durability features prevent equipment failure in challenging conditions and protect your investment over extended use in demanding farm or ranch environments.
Portability and Design Features
What makes an electric fence voltage tester truly practical for daily farm work? You need a device that fits easily in your pocket and won’t slow you down during rounds. Look for compact models that weigh under a pound, so you’ll actually carry them consistently. Choose testers with ergonomic grips that feel secure in your hand, even when wearing gloves. Select designs with straightforward probe arrangements—you shouldn’t need both hands to operate the device. Prioritize models with neon or LCD indicators positioned where you can read results without awkward angles. Weather-resistant housings protect your investment from rain, mud, and temperature swings. Battery-free options or long-lasting power sources eliminate the frustration of dead batteries during critical testing moments.
Fault Detection and Functionality
When you’re testing an electric fence, you’ll want a tester that clearly shows you whether voltage is present and where problems exist along the fence line. Look for models that display voltage readings in a specific range, such as 2 kV to 12 kV, so you can assess fence performance accurately. The best testers combine a ground probe with a top fence contact to pinpoint faults quickly. Choose a tester with visual indicators—LEDs, beepers, or LCD screens—that signal voltage presence immediately. Consider operating conditions in your environment; reliable testers function dependably up to 40°C. Finally, select a model with auto-power-off features to extend battery life between farm checks.
Final Thoughts
You’ve now reviewed five reliable electric fence voltage testers that fit different needs and property sizes. Choose based on your fence type, voltage range required, and budget. The 12KV model works well for small properties without batteries. Digital options like the MINGYA 15KV or 20,000V tester suit larger areas and offer quick readings. Purchase one that matches your specific fencing system requirements and test regularly for optimal performance.
Meet Ry, “TechGuru,” a 36-year-old technology enthusiast with a deep passion for tech innovations. With extensive experience, he specializes in gaming hardware and software, and has expertise in gadgets, custom PCs, and audio.
Besides writing about tech and reviewing new products, he enjoys traveling, hiking, and photography. Committed to keeping up with the latest industry trends, he aims to guide readers in making informed tech decisions.