Few game consoles have done more to revolutionize the industry than the Nintendo Switch. This has gone unnoticed by much of the industry, mostly because people take Nintendo’s innovations for granted. After all, this is the company that gave us the Wii and sold over 100 million units! But the Switch has arguably been an even bigger innovation.
The Wii made waves with its motion-sensitive controls. Wii Sports, a game with graphics more than a decade out of date, became one of the top-selling games ever. The potato graphics didn’t even matter. Who needed good graphics when you were having that much fun? But motion sensitive controls are hardly unique to the Wii. For instance, the Sega Activator was a full-body motion sensor released for the Sega Genesis way back in 1993.
On the other hand, the Switch’s biggest innovation isn’t quite as sexy. You can use it as a handheld console, or dock it and use it as a traditional console for better graphics. That just doesn’t sell as many units as the opportunity of playing Wii Bowling with the whole family. But in retrospect, motion sensors may have just been a fad. The Sega Activator flopped in the 90s. The Xbox Kinect, touted as Microsoft’s answer to the Wii, actually turned off prospective Xbox One players. But mobile game systems and standard consoles have been popular for decades. The ability to play both ways with one system is likely to become more popular in the future. For instance, Microsoft is implementing a software version of the same concept with the Xbox Series X’s “Play Anywhere” feature.
That said, even the best hardware can get damaged from time to time. And since the Switch is meant to be portable, it’s understandable that the case can sometimes get cracked. In that case, you’re going to need a replacement. You may also want a cosmetic replacement to personalize your Switch’s appearance. In the past, we’ve reviewed Nintendo Switch charging stations, repair tools, and even replacement thumb sticks, among other accessories. Now, we’re going to take a crack at Nintendo Switch replacement housing shells.
Today, we’re going to look at three different replacement housing shells. First up, we’ll check out the PartEGG Replacement Housing Shell. This is a basic black replacement shell that includes both the front and back plates. Next, we’ll review the eXtremeRate (Including Joy-Con) Multi-Design Replacement Housing. This housing includes only the back plate of the main housing, but also includes Joy-Con housing. It’s mostly decorative, and is available in many patterns. Finally, we’ll look at the eXtremeRate (Console Only) Multi-Color Replacement Housing. This colorful housing is a simple replacement back plate, complete with a matching kickstand. Let’s take a closer look at each!
How to Replace Your Nintendo Switch Housing
Before we begin, let’s talk about the replacement process for Nintendo Switch housing. You’re going to want to be fully prepared before you start. To begin with, this means having Nintendo Switch repair tools. If you’ve never worked on your Switch before, you’re going to need to buy some.
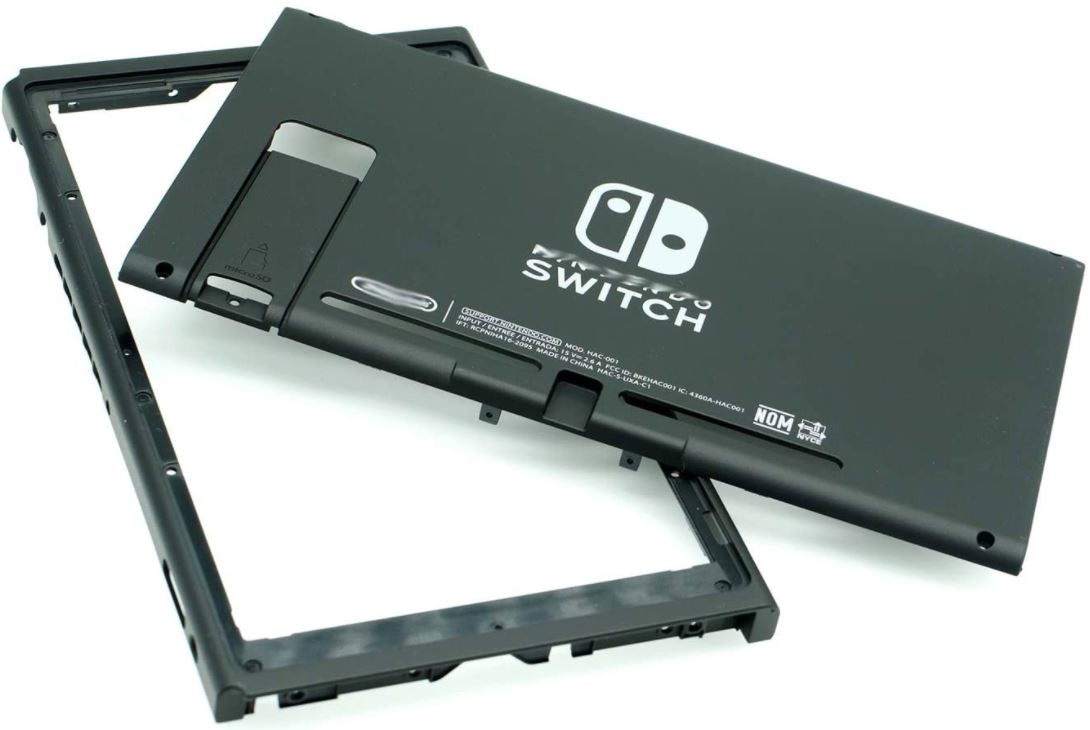
Once you’ve done that, you’re in for some good news. The back plate of the housing is easy to remove and replace! Even if you’ve never worked on a Nintendo Switch, you should have no trouble. This is fortunate, since this is the largest part of the housing, and the likeliest to get damaged.
On the downside, the Joy-Con housing and the front plate for the main unit can pose a challenge. The Joy-Cons need to be more or less completely reassembled, while the front plate is attached with adhesive. Still, replacing either part is quite doable, and is far more affordable than buying a whole new Switch.
Before you do any work, make sure your Switch is powered off and that there’s nothing in the SD card slot. For this job, you shouldn’t need to worry about any power issues, but it’s better to be safe than sorry. You’ll also need to remove any stickers on the housing’s back, since they cover screws you need to access. Finally, be aware that opening the case will void your warranty. If you’re still under warranty, you’re better off calling Nintendo and asking about a warranty repair.
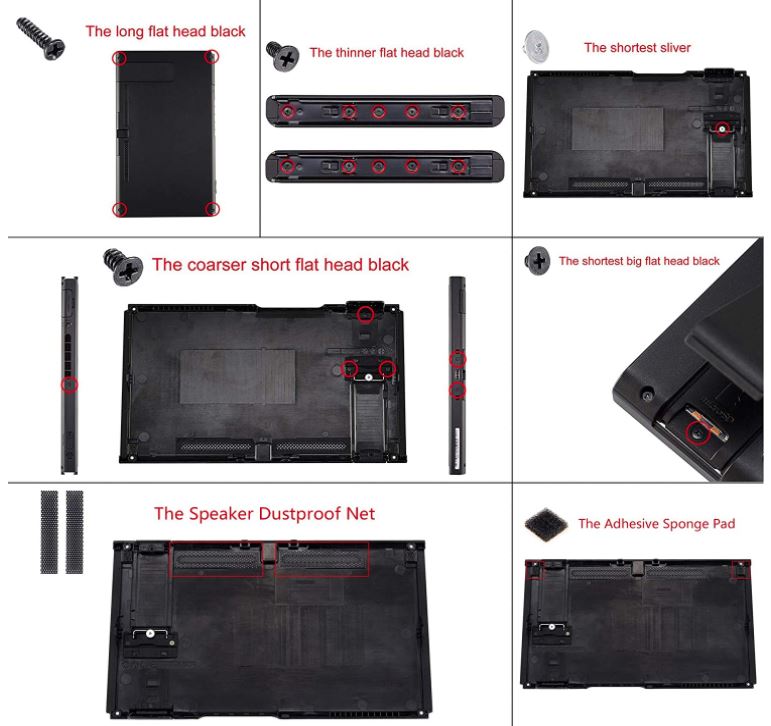
To replace the main housing’s backplate, you’ll need to remove a total of ten screws. Four of these are tri-point, while the remaining six are Phillips #00. To make things worse, not all of them are the same length. It helps if you have some baggies or separate dishes to sort your screws, so you won’t mix them up. Here’s a quick rundown of what you need to remove:
- Four tri-point screws from the corners of the rear panel.
- Three 2.7mm Phillips #00 screws. One of these can be found on the top of your Switch, next to the air vent. The other two can be found on the bottom, on either side of the USB Type-C port.
- One 6.1mm Phillips #00 screw from under the kickstand. It’s tucked along the bottom sedge of your Switch.
- Two 3.8mm Phillips #00 screws from the Joy-Con rails. Remove only the center screw from each Joy-Con rail. The others have nothing to do with this process.
Once all the screws have been removed, simply lift up the backplate to pull it off. From there, you can either replace the backplate or continue to remove the front housing. If you’re going to continue, be aware that the front housing is a bit more challenging to replace. The first part is easy: just remove the four remaining Phillips #00 screws on the Joy-Con rails. So far, so good.
But now comes the hard part. The front lip of the housing is attached to the LED screen with an adhesive. The trick is to remove the adhesive without damaging the screen or smearing adhesive everywhere. The easiest way to remove the adhesive is with heat, but too much heat can damage the screen. Use a hair dryer, and keep it on low or medium heat. Under no circumstances use a heat gun. This will permanently destroy your Switch’s screen. Don’t say we didn’t warn you. Alternatively, you can loosen the adhesive with isopropyl alcohol, but this takes a lot more patience.
Once the adhesive is loosened, the front housing can be easily removed. When you replace it, don’t go cheap and rely on screws alone. That’s a good way to get dirt and dust inside your system. Instead, do things right, and spend a few extra dollars on some double-sided LED screen adhesive tape. Line up the tape carefully, because it’s a pain to remove. Now reassemble the housing. If there’s any residue remaining from your old adhesive, that can be cleaned up easily with alcohol.
How to Replace Your Joy-Con Controller Shell
Replacing your Joy-Con controller housing is a bit more complex than the main Switch housing. The reason for this is that the “guts” of the Switch are all attached to the motherboard. A metal heat shield covers all the internal parts, and the display covers the back of the motherboard. The case basically just screws over it.
The Joy-Cons, on the other hand, are simple controllers. They don’t have big, wide motherboards. Just a few basic components connected together by wires. The parts are mostly held in place by screws, but the configuration can be confusing. To perform the repair, first open the back of the Joy-Con shell by removing the three screws. Once it’s open, take a picture. Otherwise, you won’t know how to correct any mistakes. From there, it’s “only” a matter of transferring all the small parts from one shell to another.
When you’re opening the shell, be very careful about the ZL and ZR buttons. They’re spring-loaded, and the springs can easily go flying. Also, it’s best to get your feet wet with the left Joy-Con, since it’s a bit simpler. The right Joy-Con requires a bit more finesse, since the buttons won’t work if the screw tension isn’t right. You might need to mount and unmount the buttons a few times to get the tension right.
PartEGG Replacement Housing Shell
The Part EGG Replacement Housing Shell is the most basic Nintendo Switch housing on our list. It’s a simple black front and back plate, designed to replace the stock Switch housing. It’s designed for the original version of the Switch, which was manufactured from 2017 through August of 2019. If your Switch was manufactured within the last year, it’s not going to fit properly.
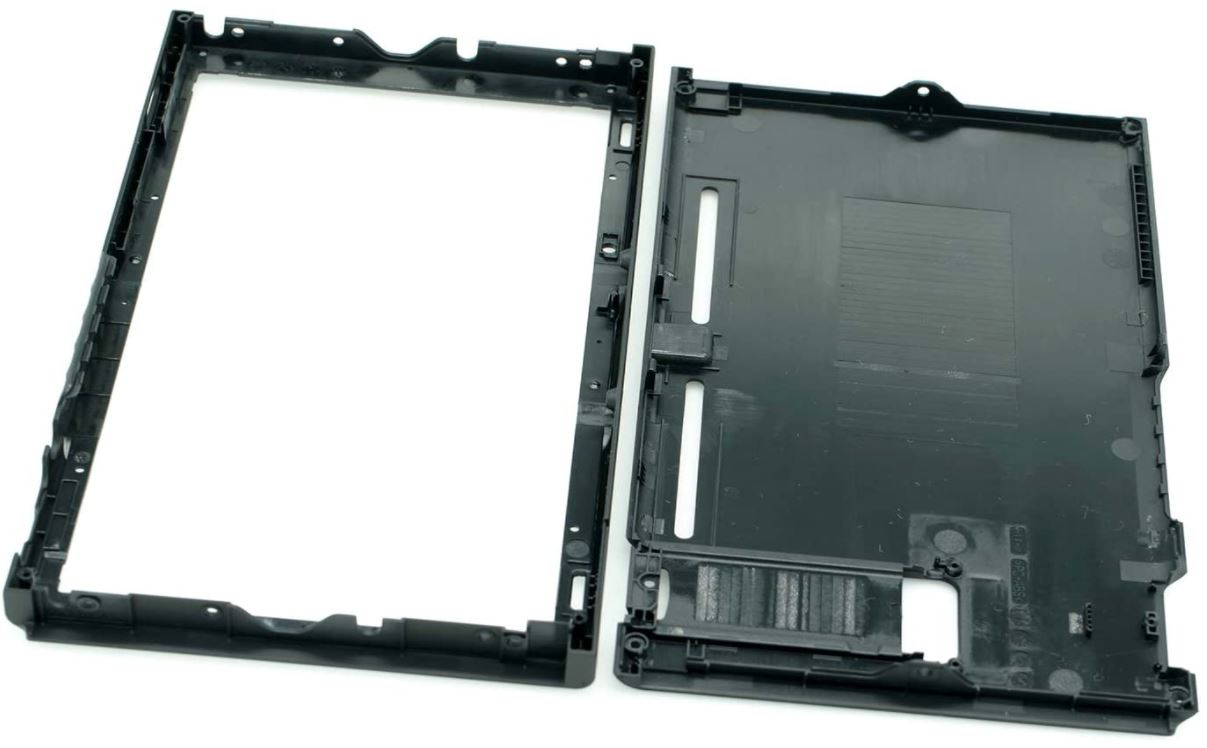
This is a basic replacement housing, with no extra bells or whistles. That said, it’s just as durable as the original, so you don’t have to worry about it breaking easily. The kit includes the housing only, with no tools, screws, or even a kickstand. Just swap over your original, or buy a replacement kickstand if you need to.
eXtremeRate (Including Joy-Con) Multi-Design Replacement Housing
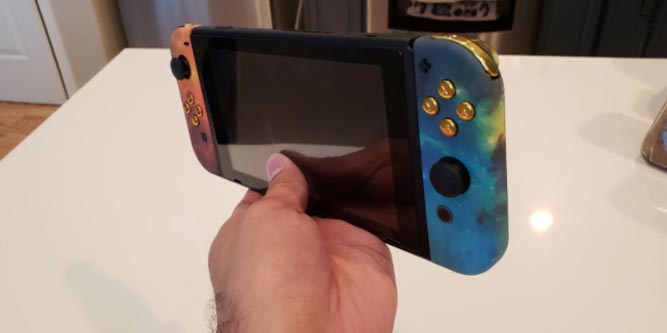
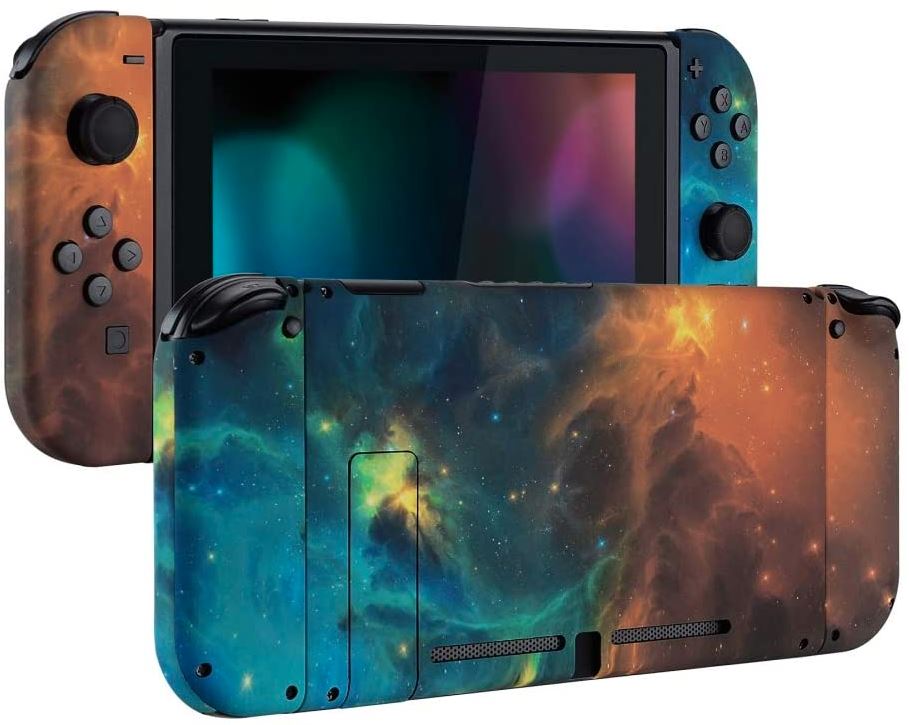
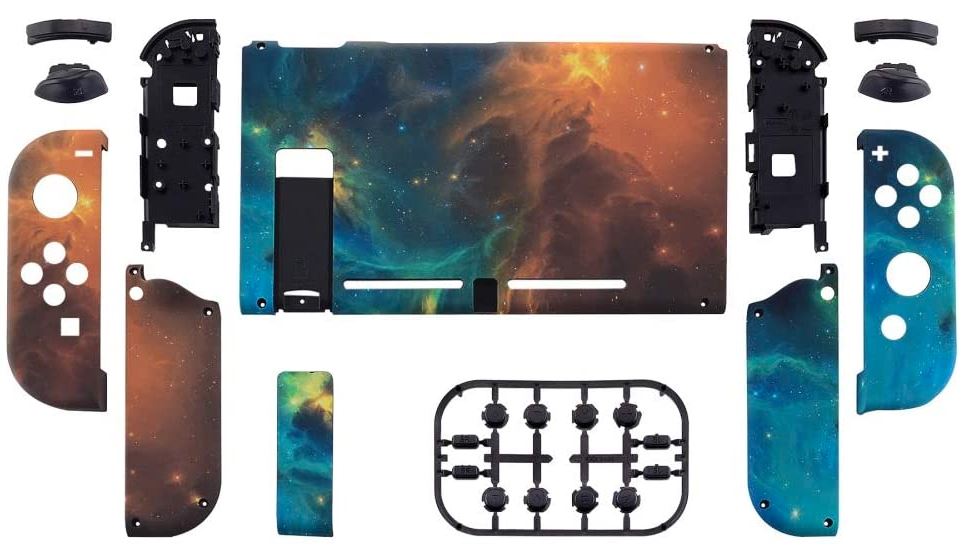
Our first choice was all about function. The eXtremeRate (Including Joy-Con) Multi-Design Replacement Housing is all about style. The kit includes a backplate and a pair of matching Joy-Con shells. This makes it a great choice for a cosmetic replacement, as well as a repair option for your backplate.
What we liked most about this housing is the number of color options, with an impressive total of 39. The main promotional images is an astronomical photo, which looks really impressive with the controllers attached. However, many of the other options are equally appealing. You can choose a skull, a carbon fiber pattern, a killer clown motif, marijuana leaves, or faux metal. You can even dress your Switch up to look like an old-school NES controller. There are also several solid and transparent colors to choose from.

The controller grips are nice and smooth, comfortable to hold even for long periods. They don’t get sticky or slippery when you’re sweaty, which makes them great when you’re gaming all weekend.
Each kit includes matching replacement buttons, triggers, and kickstand. eXtremeRate also throws in a few extra screws, as well as both screwdrivers required for disassembly. This is the priciest kit on our list, but you’re getting a great value for your money.
eXtremeRate (Console Only) Multi-Color Replacement Housing
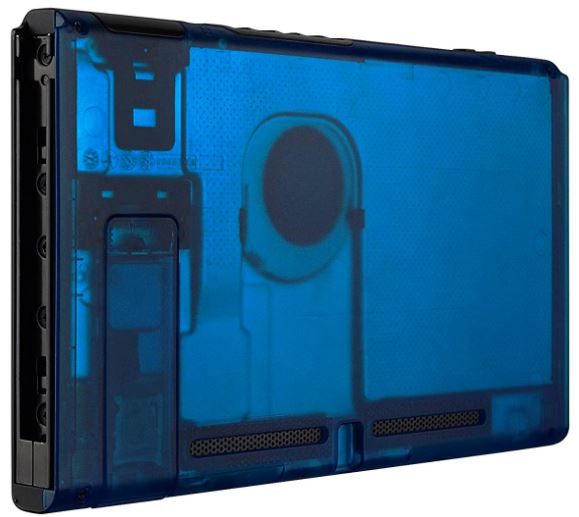
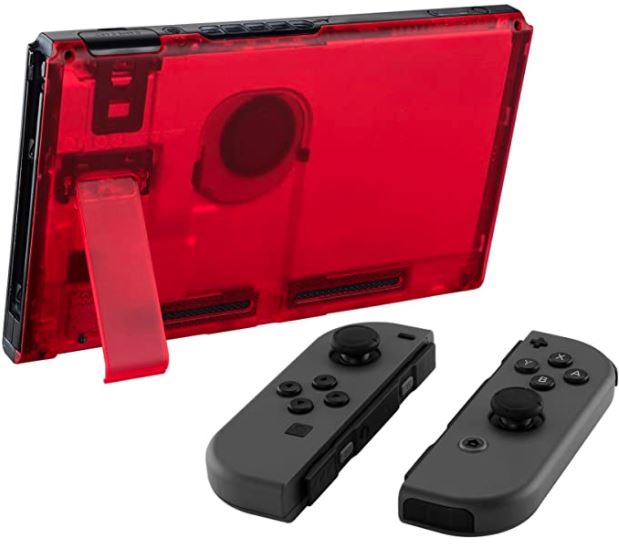
The eXtremeRate (Console Only) Multi-Color Replacement Housing falls somewhere between the last two. It’s moderately-priced, and it can be either functional or cosmetic. It consists of a front and back housing, and is available in nine semi-transparent colors. The only thing you don’t get is new Joy-Con shells. But if you’re using standard black shells, they’re still going to match your main Switch housing.
Along with the front and back plates, you get the tri-point and Philips screwdrivers required for installation. You also get a few extra screws, as well as a kickstand that matches the rest of the housing.
Final Verdict
As you can see, each of these replacement housings is well designed. However, each one serves its own unique purpose. Let’s summarize what we’ve learned. The first housing we looked at was the PartEGG Replacement Housing Shell. This simple black replacement shell isn’t anything fancy. But if you need a functional, affordable replacement, you’re looking at one. It includes both the front and back parts of the housing, so you can replace either or both.
Next, we looked at the eXtremeRate (Including Joy-Con) Multi-Design Replacement Housing. This backplate is considerably pricier than the PartEGG housing. But for that extra money, you get one of the most stylish cases that money can buy. There are 39 different patterns and colors, with kickstands that blend right in when they’re closed. The backplates also include matching Joy-Con shells, which form a seamless extension of the main housing.
Last, we reviewed the eXtremeRate (Console Only) Multi-Color Replacement Housing. This housing comes at a moderate price, and is available in nine colors. It doesn’t include Joy-Con shells, but it does include both the front and back parts of the main housing. You can replace them both, or mix and match them with your stock housing.
Meet Ry, “TechGuru,” a 36-year-old technology enthusiast with a deep passion for tech innovations. With extensive experience, he specializes in gaming hardware and software, and has expertise in gadgets, custom PCs, and audio.
Besides writing about tech and reviewing new products, he enjoys traveling, hiking, and photography. Committed to keeping up with the latest industry trends, he aims to guide readers in making informed tech decisions.