
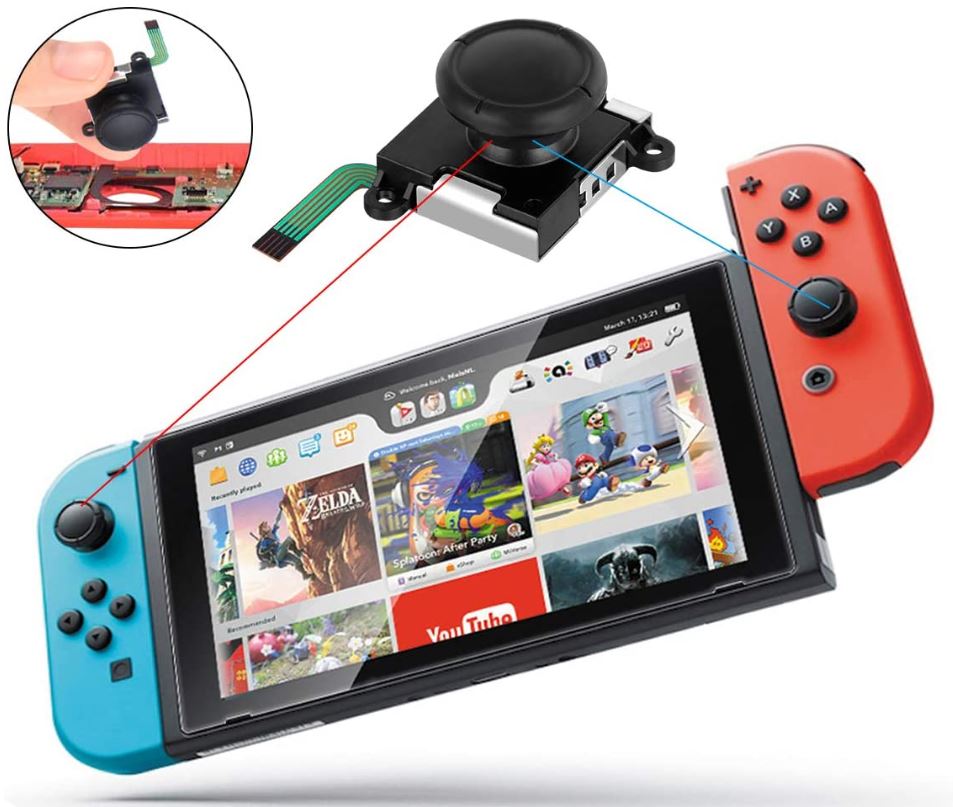
The Nintendo Switch is perhaps the most unique video game console ever created. It can function as both a traditional console and a handheld game system. This makes it easily portable, while still allowing 1080p graphics on your big-screen TV. As a result, it should come as no surprise that it’s sold over 52-million units to date. With sales still going strong, there’s no telling how the Switch will rank in terms of all-time sales. It probably won’t surpass the Wii’s 101-million units, but nonetheless, it’s still performed marvelously.
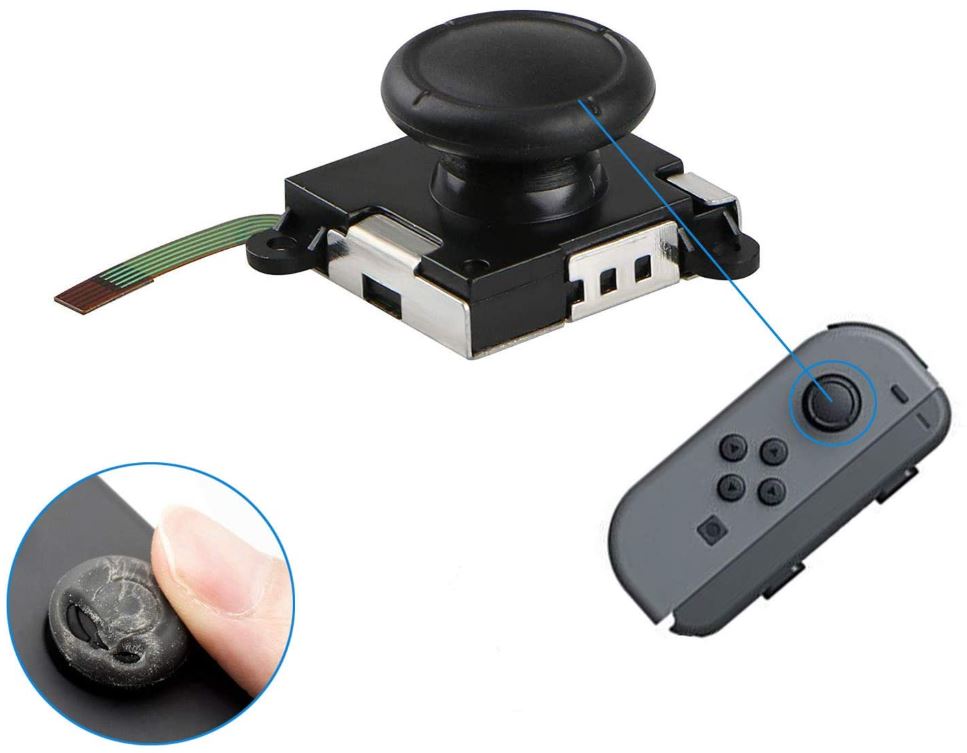
Of course, like every game system, things inevitably break down during use. And one of the most common failures is the thumbsticks. Again, this should not be surprising. You’re constantly handling them and moving them around. Eventually, the padding is going to wear off the top. When this happens, particularly when the wear is uneven, it can be a major problem. In the past, we’ve reviewed several different Switch accessories. These include charging stations to keep your battery full, as long as controller clip mounts for more ergonomic handheld play. We’ve even reviewed car headrest mounts so you can keep the little ones entertained on the road.
Today, we’re going to review three of the best Nintendo Switch replacement thumbsticks available. First, we’ll review the Imncya Replacement Joystick. This is a set of four replacement thumbsticks, with reduced drift and improved calibration. Next, we’ll look at the Veanic 3D Replacement Joystick. This two-pack sports a similar design, along with all necessary installation hardware. Finally, we’ll check out the Wu-Minglu Joystick Replacement Kit. This kit includes metal locking buckles, along with a set of fun decorative stickers. Which one is the best? Let’s take a closer look, and see how well they compare!
How to Replace Nintendo Switch Thumbsticks
So, how does one go about replacing their Nintendo Switch thumbsticks? Before we continue, we should mention that performing a repair yourself will void your warranty. If you’re still under warranty, the best thing to do is file a claim with Nintendo. That said, if your warranty has expired, what have you got to lose? You either replace your thumbsticks, or you buy a brand new set of JoyCons. Here’s how it works.
First, you’ll need to get your hands on a Y00 tri-wing screwdriver. You’ll also want a PH00 Phillips screwdriver. A nylon spudger and plastic pick are also advisable, but not required. They definitely make the job easier, though.
To begin with, you’ll want to remove the four Y00 screws from the back of your JoyCon controller. These screws are very small and easy to lose. As a result, it’s a good idea to use a magnetic dish, or at least a small bowl, to keep them organized. Once the screws are removed, use your pick to open up the seam in the edge of the controller. The best spot for this is on the opposite edge from the L and ZL buttons, where it will pry open easily. You can use a small flathead screwdriver if necessary, but keep in mind that this will mar your plastic.
Slide your pick or screwdriver up the side of the controller to widen the gap. As you go, make sure not to push it too far into the guts of the controller. This can damage wires or other internal electronic components. The back panel should open without a lot of pressure, so take it easy. Once it’s loosened up, the controller should open up like a book. At this time, it’s important that you don’t fully remove the back panel. The front and back panels are still connected by a pair of charging ribbons.
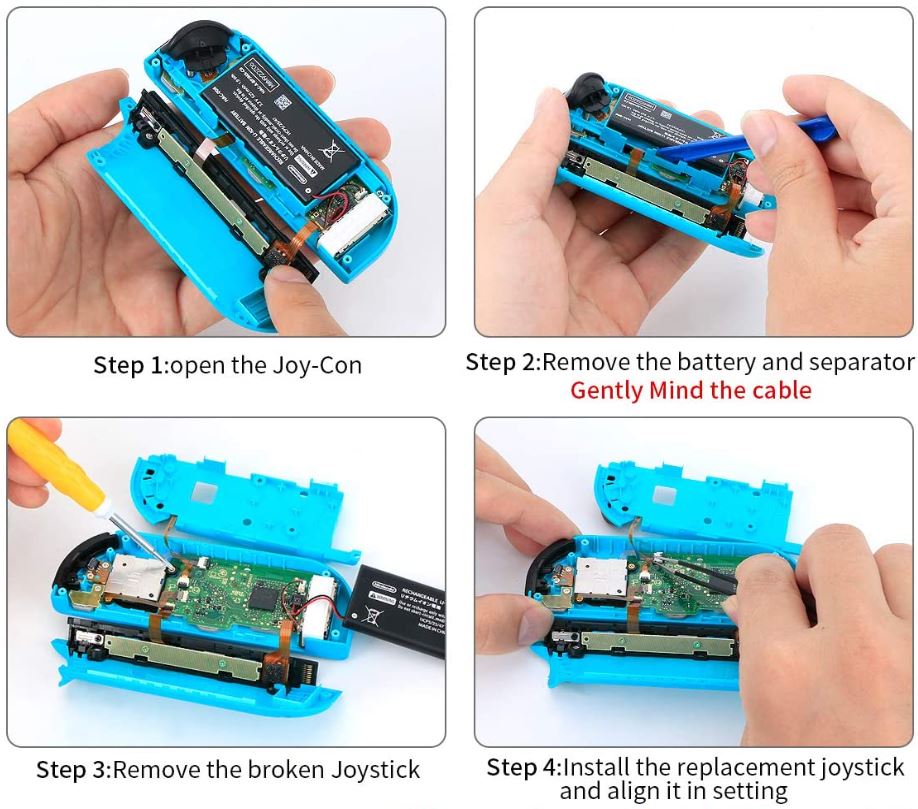
Use a nylon spudger to carefully disconnect the charging ribbons from the battery. A screwdriver will get the job done. However, we should stress, this can cause damage. If you slip, you can easily ruin the ribbons for good. At this point, the front and back panels will easily separate. Use the same spudger to remove the battery’s charging wires from the motherboard. They will pry directly upwards, which will prevent the controller from accidentally powering on. Sometimes, these connectors can be a pit tight. If that’s the case, try rocking the spudger gently from side to side to loosen them up. When you’re reassembling the controller, the connectors should press down easily.
Next, you’ll need to remove the battery. The best way to do this is to carefully insert a plastic pick behind the battery, and gently pry it out. Be very careful when doing this. If you damage the battery housing, it’s going to need to be replaced. There’s a small piece of tape holding the battery in place. If it doesn’t pry loose easily, you’ll need to carefully cut the tape.
Once the battery is removed, you’ll see a middle plastic panel that covers the motherboard and joystick. It’s held in place by three PH00 Phillips screws, which will need to be removed. With the screws out, carefully fold the middle panel open. It has a small power ribbon running through it, which you don’t want to damage in the process. With the motherboard revealed, unplug the power ribbon that connects the panel to the motherboard. You can do this either with a spudger or with a fine pair of tweezers.
Now the motherboard will be unobstructed. However, there will still be a ribbon cable obstructing the back of your thumbstick. Use a spudger to unplug this cable, and you’re ready to change out the actual thumbstick. Pry open the thumbstick’s ribbon connector lock, and remove the cable. Next, you’ll find two PH00 Phillips screws holding the thumbstick in place. Remove these screws, then carefully lift out the thumbstick. The thumbstick is surrounded by a black rubber gasket that helps hold it in place. Try not to damage this gasket while you’re removing the thumbstick.
That about covers it! Drop in your new thumbstick, and reassemble your JoyCon controller. The whole process should only take about half an hour. As repairs go, that’s about as easy as it gets.
Imncya Replacement Joystick
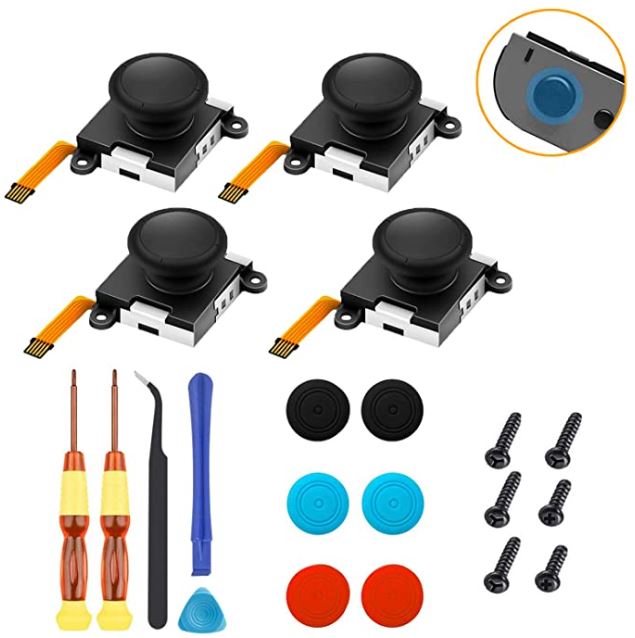
The Imncya Replacement Joystick is a four-pack of joysticks that are virtually identical to the original Switch thumbsticks. With this kit, you can replace the thumbsticks on two sets of JoyCon controllers. They’re easy to install, and the kit includes all necessary hardware. One minor quibble is that the kit only includes six replacement screws. To be fair, if you’re careful, you shouldn’t need any of them. But keep in mind that there are only enough for three thumbsticks, not four.
The thumbsticks themselves are reinforced with metal, which makes them a bit sturdier than the originals. Along with the thumbsticks themselves, you also get all the tools you need for installation. You get a Y00 tri-wing screwdriver for the case. You get a PH00 screwdriver for the internal components. You also get a plastic pick, a spudger, and a pair of tweezers. There are even red and blue thumbstick caps that allow you to add a splash of color.
The Imncya thumbsticks are very well-engineered, and shouldn’t drift at all. However, as with any new thumbsticks, you’ll need to calibrate them after installation. You can do this from your Switch’s menu, and it takes just a few minutes.
Veanic 3D Replacement Joystick
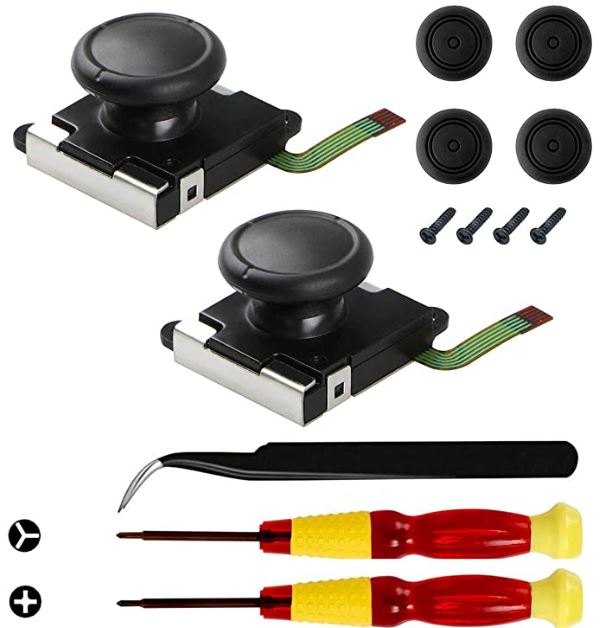
In most respects, the Veanic 3D Replacement Joystick is similar to the IMncya kit. It comes with a single pair of joysticks rather than two pairs, but it’s correspondingly more affordable. You get four screws for installation, along with a pair of screwdrivers, tweezers, a spludger, and a plastic pick. There’s also a pair of alternative thumbstick caps. These caps have a bit more texture, and provide superior grip. This gives you a bit of customization if you want a different feel. And like the Imncya joysticks, these are reinforced with metal, providing better durability and stability.
Wu-Minglu Joystick Replacement Kit
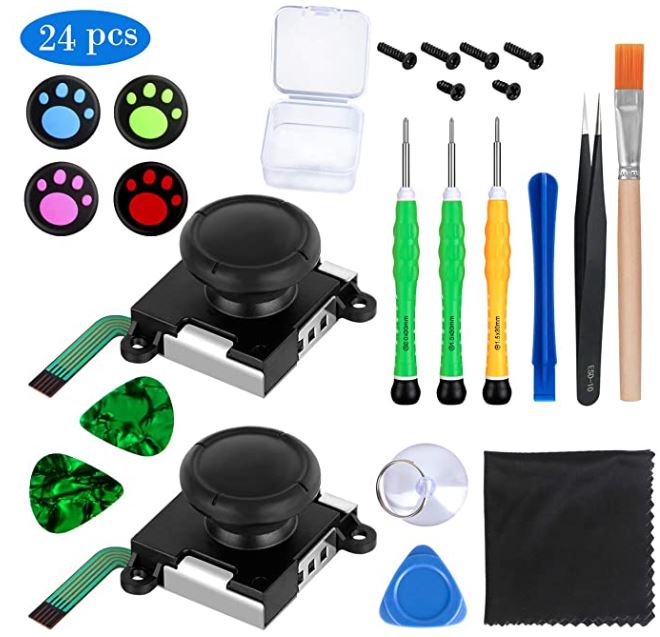
The Wu-Minglu Joystick Replacement is a pair of thumbsticks, suitable for repairing a single JoyCon controller. Both joysticks are very well-engineered. They’re metal-reinforced, which provides more durability than the originals. However, the metal reinforcement isn’t limited to the joysticks themselves. The locking buckles are also constructed from metal. This won’t matter much during use, but it makes a big difference during installation. Because the buckles are so strong, they won’t get damaged while you’re plugging them in. Not only that, but the kit includes 24 colorful, patterned stickers for decorating your thumbsticks. The stickers will wear off in time, but they do add a fun touch to an otherwise mundane part.
The kit includes parts not just for installing a new thumbstick, but for servicing your entire Switch. You get a Y00 and Y02 driver, along with a PH00 Phillips driver. The drivers are well-constructed, with textured barrels that sport a curved profile. This makes them ergonomic and easy to grip. Moreover, the backs of the handles rotate freely, which makes operation very easy. You get a plastic pick, a nylon spludger, and tweezers for assembly. There’s also a small brush for dusting your controller, and a small screen wipe for eliminating finger smudges. Finally, you get a suction cup, two extra plastic picks, and even a small plastic case for your screws. If you want everything you need in a single package, you’re looking at an excellent kit.
All of this comes with Wu-Minglu’s 90-day money-back guarantee. If there are any issues during installation, simply return them for a full refund.
Final Verdict
Each of these Nintendo Switch replacement thumbsticks brings a lot to the table. To begin with, the Imncya Replacement Joystick is an ideal choice for repairing more than one controller. In addition, the thumbsticks are very well constructed, so you won’t have issues with durability. The Veanic 3D Replacement Joystick is similar in most respects. However, the alternative caps provide for better grip if you prefer a stickier stick. Finally, we looked at the Wu-Minglu Joystick Replacement Kit. This kit comes with extra hardware for working on your main Switch unit. It also sports metal locking buckles, so it’s less likely to get damaged during installation.
Meet Ry, “TechGuru,” a 36-year-old technology enthusiast with a deep passion for tech innovations. With extensive experience, he specializes in gaming hardware and software, and has expertise in gadgets, custom PCs, and audio.
Besides writing about tech and reviewing new products, he enjoys traveling, hiking, and photography. Committed to keeping up with the latest industry trends, he aims to guide readers in making informed tech decisions.