The Xbox One is one of the biggest consoles in history, as well as one of the most innovative. The Xbox Series X/S is famous for the Xbox GamePass subscription service. But GamePass actually got started on the Xbox One, where it first launched back in 2017.
And thanks to GamePass, the Xbox One is set to remain a viable console for years to come. You can play all your favorite games from the last generation. Better yet, there are so many indie games that there will be new Xbox One games for a while yet. All of this content, old and new, is available without the need to invest in a new system.
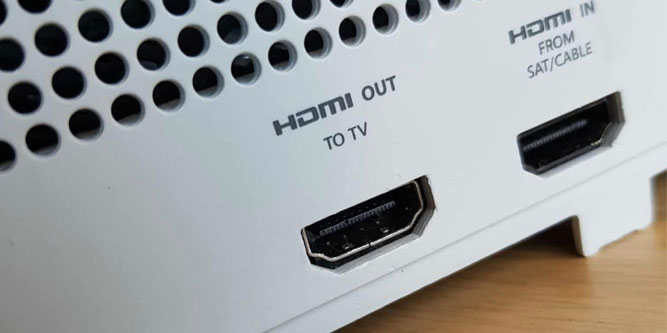
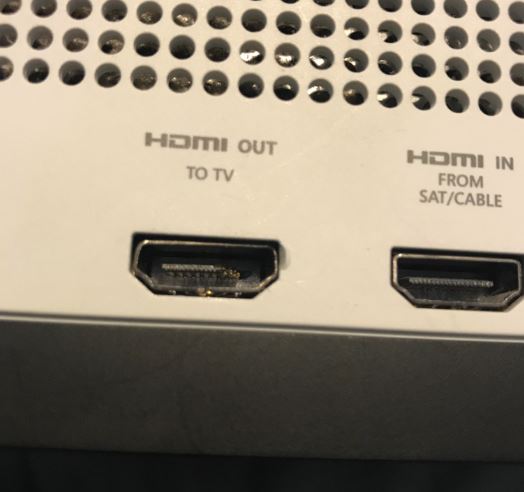
The Xbox One is also great if you’re outfitting a second or third TV. It’s just as good as ever at running “set top box” type apps like Netflix and Disney+. But like any kind of hardware, it doesn’t last forever. Eventually, individual components are bound to fail. When that happens, you have one of two choices: replace the part, or replace the entire system.
Some part replacements are easier than others. For example, swapping out the hard drive is a relatively trivial exercise. In other cases, you have to do a lot of work to get the job done. Replacing the HDMI port is one of those cases.
The reason for this is that you need to do a lot of precision soldering. If you’re not 100% comfortable with this, you’ll want to have the work done professionally. That said, if you’ve got the necessary skills, you’ll save money by doing the job yourself.
Choosing the Best Replacement Xbox One HDMI Port
Today, we’re going to review the best replacement Xbox One HDMI ports available. In most cases, we’d make a comparison between different similar ports. But in this case, we needed to account for different versions of the Xbox One console. Each has its own hardware requirements, and the same parts are not going to be cross-compatible.
This meant looking for the best replacement ports for the Xbox One, Xbox One S, and Xbox One X. Here, we’ll take a look at all three options, and why it’s the best for that particular box. At the end, we’ll talk about how the installation is performed, before we sum up what we’ve learned. Let’s take a closer look!
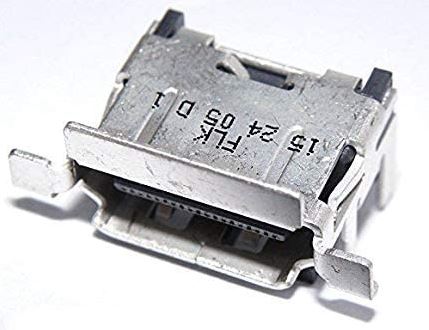
Wogame Xbox One Replacement HDMI Port
The Wogame Xbox One Replacement HDMI Port is made for the original Xbox One console. That’s the big, blocky black console that came out back in 2013. If you’re using one of the later variants, skip ahead to the next section.
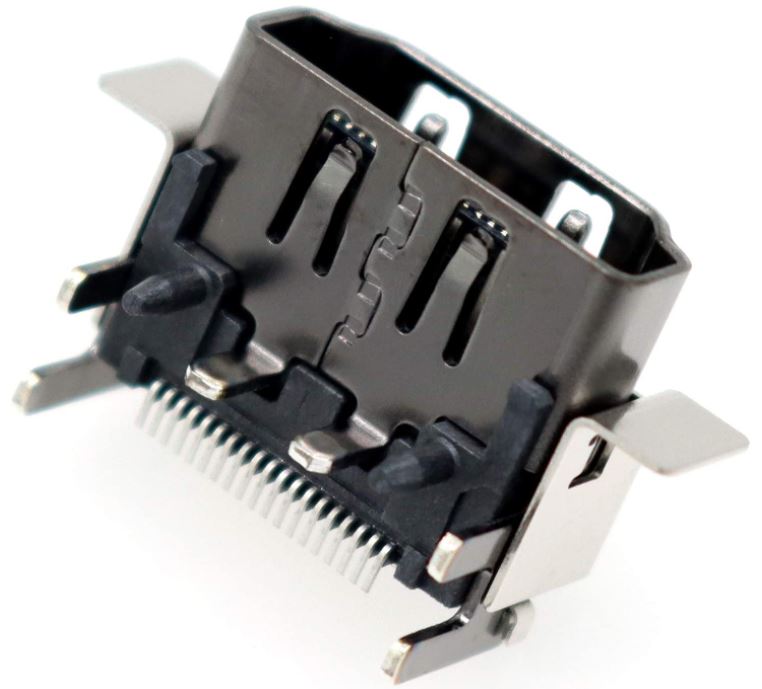
This is a well-designed aftermarket port that looks and feels the same as the original. It’s made from sturdy aluminum, with a plastic spacer at the front above the pins. The front end sports a set of flanges, so it conforms exactly to the housing. If you want a one-for-one replacement for the original port, accept no substitute.
Deal4GO Xbox One S Replacement HDMI Port
Deal4GO is a well-known manufacturer of aftermarket game console parts. A while back, we reviewed their replacement housing for the Nintendo Switch Lite. We were impressed with what we saw, so we’re always on the lookout for their parts.
The Deal4GO Xbox One S Replacement HDMI port is compatible only with the Xbox One S. This is the slimmer, white version of the Xbox One that was manufactured from 2016 to 2020. Most have disc drives, although the all-digital version does not. The One S is not to be confused with the Xbox Series S. The Series S is also slim and white, and like the all-digital One S, it has no optical drive. But it’s the lightweight version of Microsoft’s current Series X/S console family.
To fit the smaller housing of the Series S, this replacement port is built with a 90-degree angle. Other than that, it functions and performs the same as an ordinary Xbox One HDMI port. The only difference is the form factor.
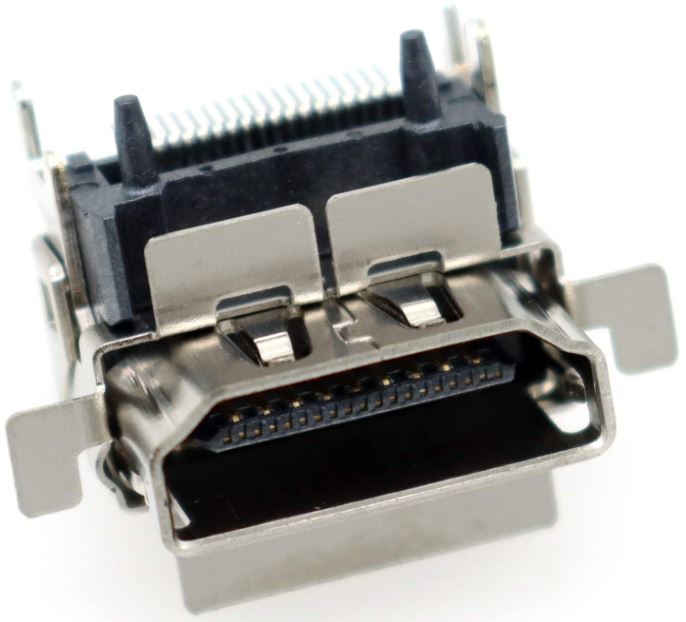
Deal4GO Xbox One X Replacement HDMI Port
The Deal4GO Xbox One X Replacement HDMI Port is made for the Xbox One X. This is the last version of the Xbox One, made from 2017 to 2020. It’s black, like the original, but with a slimmer profile and a slightly smaller base. This is not the same as the new Series X, which is a tall, tower-style machine.
This HDMI port is different from that on the original Xbox One because of its construction. The flanges on the side are slightly backset, and also protrude downwards. This allows you to easily install it in the Xbox One X housing.
How to Change Your Xbox One HDMI Port
Provided you’re comfortable with soldering small electrical parts, changing the HDMI port is pretty simple. If you’re not comfortable, it’s unwise to try. Either way, you’re going to need a few essentials, including the following:
- Plastic spudger (preferably 2)
- Tweezers
- T8 Torx screwdriver
- T9 Torx screwdriver
- T10 Torx screwdriver
- #1 Philips screwdriver
- Soldering iron
- Solder
Opening the Xbox One first requires you to remove the tamper-evident tape on the back. Then, you’ll need to remove the vent panel on the side. This is easy to pry out – just start at the back and use a spudger to pop open one tab at a time. Underneath the vent, there’s a black tab near the front corner. Slide this towards the back, and you’ll be able to take it right out.
Keep in mind that the specifics will be different for different Xbox One variants. But all the internal parts are similar, even if they’re sometimes configured differently.

Crack Open the Case
The top and bottom halves of the Xbox One housing are held in place by a set of plastic clips. These clips are located inside the housing, so it can be tough to get the first few open. The best approach is to start at one corner with a plastic spudger. Once you’ve gotten the first clip loose, slip the spudger into the gap in the housing. You can keep moving forward with a second spudger. But if you lose the case and the top snaps down, the first tab won’t be able to close. At least you won’t have to start over at step one.
The front of the housing is one single panel, so start at the front corner of one side. Move your way towards the back, then then across to the other side. By that time, you should be able to pull the last side free all at once. If you can’t, take your time and work a few more tabs loose. If even that doesn’t work, sweep a spudger back and forth through the gap. More than likely, one of the previous tabs has snapped shut.
Be careful, and don’t yank up on the lid; it’s still connected to the front panel by a ribbon cable. Use your tweezers to open the loop that secures the connector to the board. Use a spudger to push the tab open, and the cable should come right out. Then, you can remove the top of the case.
Extract the Motherboard
Now comes the fun part; freeing up the motherboard. Start by disconnecting the power and SATA cables that connect the hard drive and optical drive. Remove them both. Now, lift the assembly out of the lower case – the motherboard will still be attached to the inner metal housing. Unscrew the front panel board, and set it aside.
There will be a set of black clip supports and white ferrules around the outside. Remove the clips by pinching the arms and pulling on them, and unscrew the ferrules. Pull all of these little parts out and set them aside. Now, flip the assembly over so it sits on top of the fan. There will be a set of four T10 Torx screws and four T9 Torx screws. Remove them all. It helps if you have a magnetic dish to keep them organized.
Turn the assembly back over. You’ll notice two rubber plugs that could get in the way of removing your motherboard. One of these is near the side USB port, while the other is beneath the AC power port. Push these plugs inside the metal case so they can’t get stuck. Now, you can simply lift out the motherboard. For our purposes, you can leave the heat sink assembly attached.
Install Your New HDMI Port
Now you’ve got to remove your old HDMI port. Carefully de-solder each of the large pins one at a time, and wiggle them loose. Next, de-solder the 19 small pins at the back of the port. Be very careful about this; it’s easy to accidentally leave one or two attached. Then, when you pull up the port, you end up yanking off the tiny pins on the motherboard itself. At that point, it’s “game over” for your console. So take your time, and make sure every pin is free and clear.

To install your new port, start by aligning the small pins as best as possible. Then, solder the larger pins in place. This will keep the port stable while you solder in the smaller pins. Because of how tiny they are, it can be helpful to use a magnifying glass. The job is simply too fine for most people to perform without magnification. Once everything’s correct, all that remains is to reassemble your Xbox.
Final Verdict
As we mentioned at the outset, these ports are all designed for a specific version of the Xbox One. For this reason, the best choice in your case will be the one that corresponds to your particular console:
- For the original Xbox One: Wogame Xbox One Replacement HDMI Port
- For the Xbox One S: Deal4GO Xbox One S Replacement HDMI Port
- For the Xbox One X: Deal4GO Xbox One X Replacement HDMI Port
By using the right port for your console, you’ll be assured that it will install correctly in that system. After that, all you have to do is make the replacement or hire a pro to do it for you.
Meet Ry, “TechGuru,” a 36-year-old technology enthusiast with a deep passion for tech innovations. With extensive experience, he specializes in gaming hardware and software, and has expertise in gadgets, custom PCs, and audio.
Besides writing about tech and reviewing new products, he enjoys traveling, hiking, and photography. Committed to keeping up with the latest industry trends, he aims to guide readers in making informed tech decisions.