Sometimes your home entertainment gear is only as good as the accessories that you choose. Whether it’s a speaker that you need to mount for optimal sound performance or a high-definition television that needs to be mounted on a wall, accessories are incredibly important when it comes to getting the most out of your equipment. Many pieces of home entertainment gear don’t come with convenient ways to set them up to maximize performance, but there are a variety of third-party items available that can help you take things to the next level.
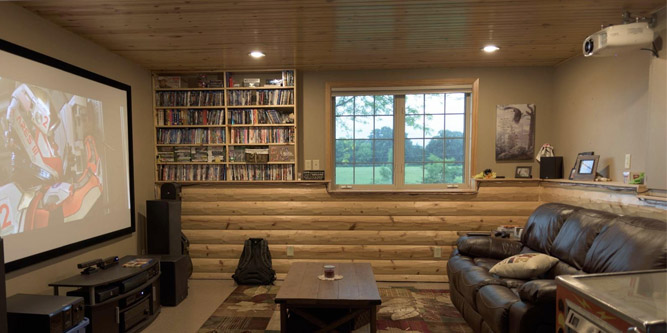
Mounts, brackets and stands are available for a number of media platforms and, most recently, have been released for in-home projectors. These mounts move, swivel and rotate so you can effectively watch your content on any surface in the room. Customizing the position of a projector is a huge advantage when it comes to home entertainment because it allows you to find the perfect angle and position for your image.
When it comes to projector mounts, there are three on the market right now that are definitely among the best of the best. They each have unique designs, varying installation requirements as well as some really versatile features that make them incredibly useful in their own way. That being said, we took a look at each one to see which one is really at the top when it comes to convenience and performance.
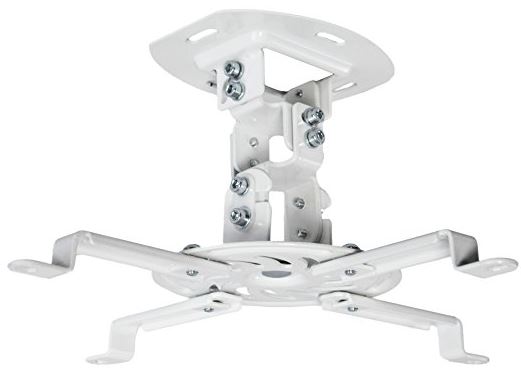
Vivo Universal Adjustable White Ceiling Projector Mount
The Vivo Universal Adjustable Ceiling Projector Mount has an extremely simple design and seemed very intuitive. It is made of high-grade steel and comes in either white or black. It measures at 9 x 5.3 x 4.2 inches and weighs only 2.6 pounds. On the top you’ll find a mounting plate with four holes for installing into your ceiling.
Attached to the plate you’ll also find an arm that is fully adjustable. It allows you to adjust the swivel, the tilt as well as the rotation of the projector and is held together by a series of sturdy, pre-installed bolts. The bottom bracket has four more holes that are designed for fastening to your projector. While the overall design was simple, we did have a small problem with the bottom mounting component.
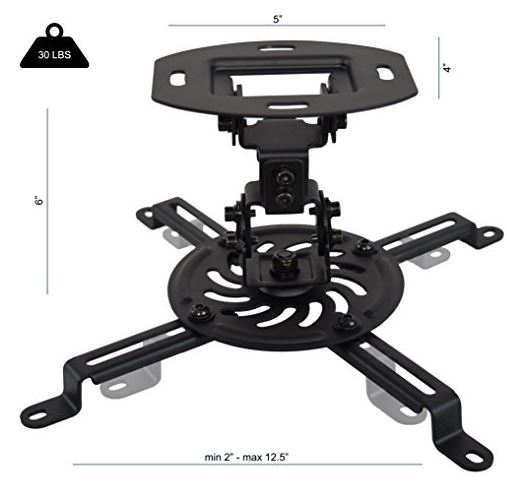
The only way that it can fasten to a projector is if the projector already has holes that are compatible with the included screws. The bottom mounting component is adjustable up to 12.5 inches, but it was still a bit limiting for those with projectors that might be lacking built-in holes.
Ease Of Installation
The Vivo Universal Projector Mount comes in two pieces and is incredibly easy to install, but does require some modification to your living space. In order to fasten it tightly, you’ll have to screw new holes into your ceiling. It isn’t ideal, considering that if you ever want to remove the mount, you’ll be left with holes in the wood or cement, but it seemed like a necessary drawback for an accessory like this.
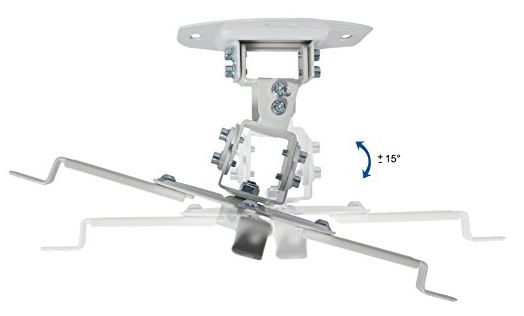
While creating new holes isn’t ideal, it does ensure a ton of stability and had us thinking that once the projector was mounted, it would be steady and secure. There are also quick-release hooks that, at first, seemed a little flimsy but once we tightened the bolts the bracketed section stayed secure. However, you’ll need to loosen the bolts to adjust the mount, and during this process, there is some risk of the projector falling.
Versatility
The mount is adjustable and can be positioned in almost any direction. It can be tilted forward or backward up to 15 degrees, swiveled left or right an additional 15 degrees, and can be rotated a total of 360 degrees. For most rooms, this is more than enough to find the perfect viewing angle. Also the bolts can be tightened to your liking to keep the projector in place once you find the right position.
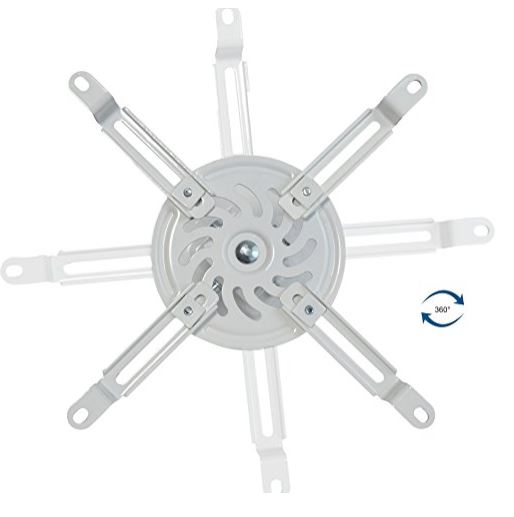
You’ll have to use the included hex tool, but we felt pretty confident that the mount would be suitable for just about any situation. Our only criticism of the positioning options was that the mount couldn’t be adjusted by hand. It would have been nice for the adjustable sections to be self-locking so that using the included tool wouldn’t be necessary every time you want to change the mount’s angle.
Drawbacks
For the most part we found the Vivo Projector Mount to be a really easy to use option for mounting projectors with only a few minor flaws. As mentioned, we were a little concerned by the fact that it had to be installed by screwing it into a ceiling, but ultimately reasoned that it couldn’t be avoided. We also found that its mode of fastening to projectors could be limiting.
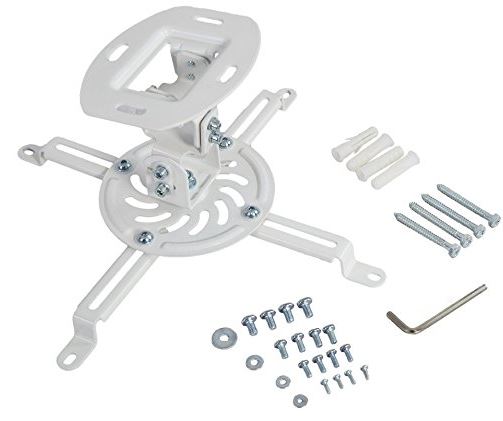
If your existing projector doesn’t have compatible holes that can take screws, you’re out of luck. We felt that there should have been another, equally safe way of keeping projectors in the mount during use that could have been more universal. Lastly, we would have liked to see a self-locking mechanism when it came to adjustability.
While the points of articulation of the mount are impressive, you’ll be required to use a tool every time you want to change the viewing angle, making some type of automatic mechanism seem like it would have been useful.
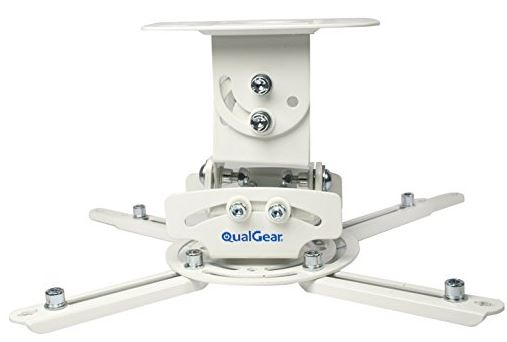
QualGear PRB-717 Universal Ceiling Mount
While we felt that the QualGear PRB-717 Ceiling Mount was well-built and sturdy, we weren’t totally sold on the look of it. It does come in white or black, but had a very industrial, almost mechanical appearance that didn’t exactly strike us as being the most stylish accessory for the home. Granted, versatility is more important than aesthetics for a projector mount, but we didn’t see why there couldn’t be a more seamless integration of the two.
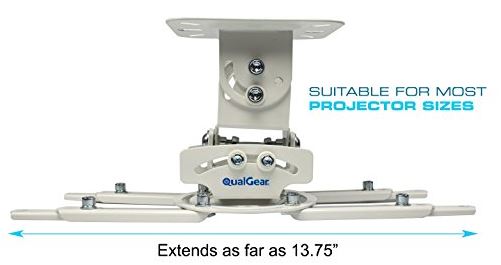
The mount measures at 6.5 x 5 x 5.5 inches and weighs in at 2 pounds, making it lightweight, despite having such a robust design. On the plus side, it did seem to be fairly easy to install. It wasn’t pre-assembled, but the mounting plate, the swivel, as well as the brackets were certainly easy to identify.
Ease Of Installation
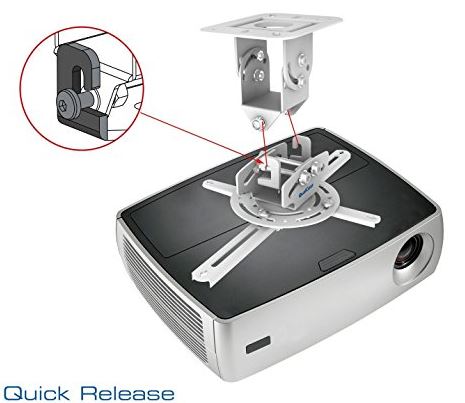
While it wasn’t pre-assembled, we still found that the QualGear mount was very easy to install. It comes in two parts: the ceiling mount and the bracket mount. All you’ll have to do to get it set up is install the ceiling mount, install the brackets onto your projector and then connect each piece via two hooks on the bracket portion.
Hooking up each piece was simple, but you’ll want to be sure to tighten the bolts around each hook for some extra safety. Simply hanging the bracket didn’t feel very secure, and had us worried about the projector possibly falling out of the ceiling portion. The brackets themselves are adjustable and the mount does come with extensions for each one so you’ll be able to fit them on a number of different-sized projectors.
Versatility
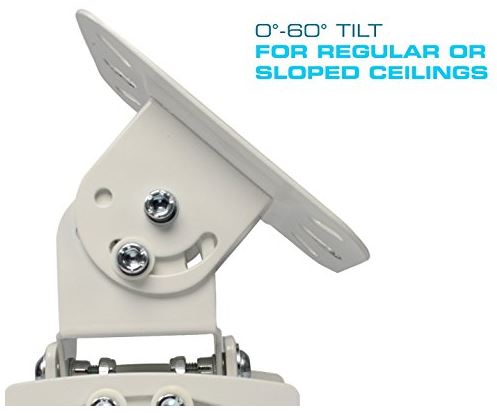
The QualGear mount was capable of achieving a ton of different angles. It can be tiled from 0 to 60 degrees and swiveled a full 360 degrees. It also has a roll of +/-20 degrees as well as a pitch of +/-30 degrees. This made it extremely useful when it came to finding a very specific projection surface.
In general, it seems best suited for holding a projector that would generate an image directly forward, but its ability to be manipulated in many different directions enables you to find the right wall in your home entertainment room without necessarily having to make a large amount of adjustments to your projector itself. Also, the snap-on snap-off design of the hooks made it incredibly easy to remove the projector even after the brackets had been installed.
Drawbacks
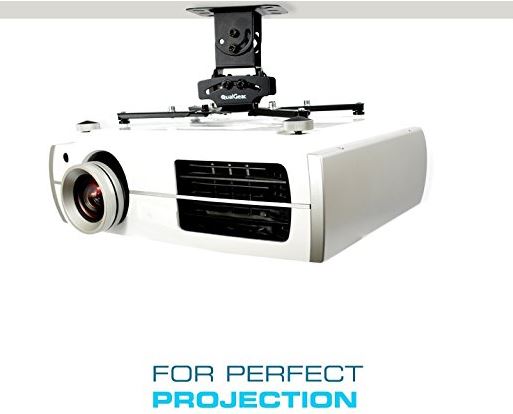
Overall we really liked the QualGear Ceiling Mount, but still found it to have a few minor issues. Firstly, we didn’t love the design. It just didn’t have the look of a mount that someone might want to put in their living room or home theatre. The construction was bulky, too metallic and didn’t seem like it would mesh very well in a living space. It seemed more like the kind of projector mount that would have a place in an office or classroom. The look of it just felt a bit limiting, and took away from its functionality.
We also weren’t thrilled with hooks that were part of the brackets. While the bolts could be fastened to ensure extra stability, the method of attaching the bracket to the ceiling mount with a hook just didn’t feel all that secure. The snap-on hook design does enable you to move the mount in a variety of ways to take advantage of its adjustability, but we felt that it wasn’t worth the risk of the projector falling out of the mount.
Aside from that, we found the mount to be very well-made. It just could have been a bit more stylish, and we would have preferred a better mechanism for the keeping the actual projector in place.
Vantage Point CGUPM 12-S Universal Front Projector Mount
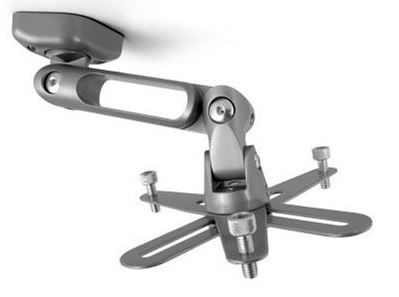
The Vantage Point CGUPM 12-S Universal Front Projector Mount has a really excellent blend of style and functionality. It is made of steel and die-cast aluminum and has a sleek, futuristic appearance that we felt could fit in just about any room. It measures at 11.7 x 8.5 x 3.2 inches and weighs about 4.15 pounds.
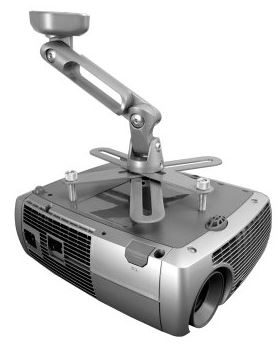
It’s a little on the bigger side, and weighed a bit more than the other mounts on our list, but we were willing to forgive its size because of the stylish aesthetic. Each part, from the ceiling mount to the brackets, was smooth, streamlined and consistent with the overall look of the unit, giving the entire mount a high-quality appearance. It also comes in both silver and black so you can match it to your space with ease.
Ease Of Installation
Despite its sleek design, that Vantage Point GCUPM 12-S is easily the most complicated to assemble on our list. Not only does it require the use of a drill to install the ceiling mount, but each component comes disassembled. You’ll have to use the included bolts to attach each section to the next; this includes the ceiling mount, the included arms as well as the bracket. Each section also comes separated into a number of parts that require assembly.
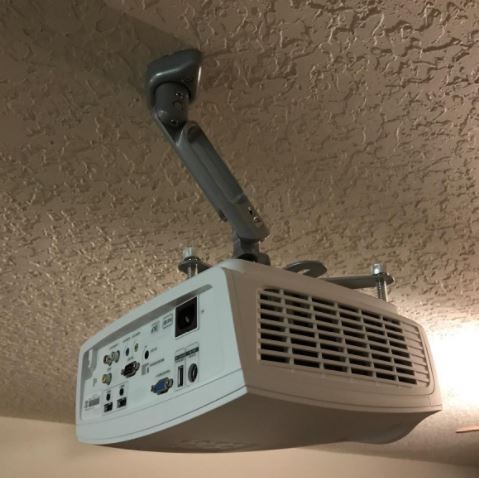
For example, the bracket is not one unit. It comes in five different parts that need to be fastened together with bolts, screws and washers. Some of the tools you’ll need are included like the hex key, but the instruction manual also calls for a 5/32” drill bit to install the ceiling mount. However, the manual itself was relatively easy to follow, even though there were a ton of steps. We just would have preferred for there to be less assembly involved and for more of the components to be single parts, rather than several smaller ones.
Versatility
It may have been the most complicated to install, but the Vantage Point Mount is easily the most versatile and has the most applications. It can be installed on either flat or vaulted ceilings and can be rotated, tilted or swiveled in just about any direction.
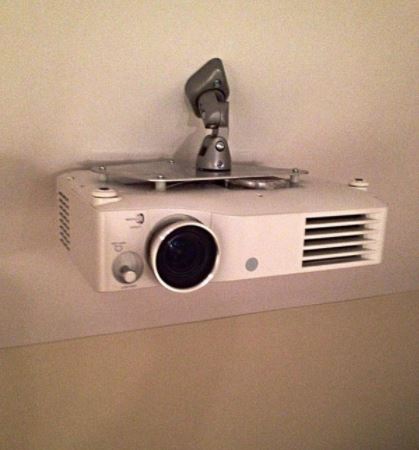
This was a big improvement over the other two mounts on our list, mainly because the others had limits to their tilt, roll and swivel. The brackets are also pretty easy to adjust, making them compatible with a large number of projectors. You’ll need to use the included hex key in order to find the perfect angle for the mount, but the total options for positioning were still very impressive.
Drawbacks
The biggest drawback to the Vantage Point Mount was its installation. It took too long, involved too many parts and, overall, could have been a lot simpler. Considering that the other two mounts were significantly easier to install, only taking a few minutes each, we found this one to be tedious and unnecessarily difficult to work with. Each part came disassembled and had to be put together before the entire unit could be used.
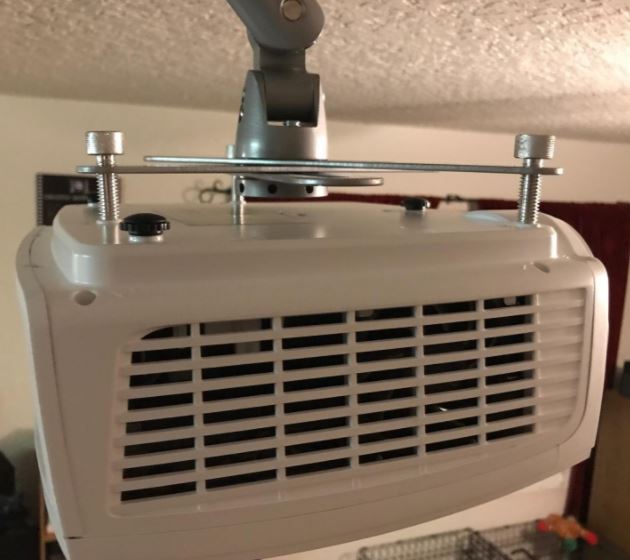
Also, the fact that it required a drill as well as a particular bit to install, was a huge downside. We felt this would turn users off who may not have these kinds of tools readily available. Granted, the difficult setup was somewhat justified by its incredible versatility and omni-directional capabilities, but for someone who wants something ready to go right out of the box, this mount may not be the right choice.
The Winner
After careful consideration, it was pretty clear that the Vivo Mount was the best on our list. It had the best blend of style, ease of use and versatility. While it did lack some of the versatility of the Vantage Point mount, it was still more convenient due to its easy installation. It also felt the most secure, while requiring the least modification to ceilings or walls.
The Vantage Point and QualGear Mounts each had their own unique features that made them useful, but also had some pretty serious downsides that made it hard for us to give either of them the number one spot. The Vantage Point mount, despite having the best range of articulation, was just too difficult to install, and the QualGear mount had too strange of a look for us, as well as a design that didn’t feel very secure. They are both decent mounts that can get the job done, but if you’re looking for the best, you may want to take a good look at the Vivo model – the first one we reviewed.
Meet Ry, “TechGuru,” a 36-year-old technology enthusiast with a deep passion for tech innovations. With extensive experience, he specializes in gaming hardware and software, and has expertise in gadgets, custom PCs, and audio.
Besides writing about tech and reviewing new products, he enjoys traveling, hiking, and photography. Committed to keeping up with the latest industry trends, he aims to guide readers in making informed tech decisions.

