
When uploading photos or videos to Instagram, you might have noticed that some content changes when you see it displayed on your profile. In fact, Instagram will resize, convert and/or compresses your digital files by default.
Although Instagram will upload your content with decent quality, there’s actually a way to improve them by restricting any sort of changes from ever occurring.
Enabling High Quality Photo & Video Uploads in Instagram
While Instagram seems to try-hard to hide this feature by default, there’s a simple way to enable high quality uploads. Deep within the settings menu in your Instagram app is a simple way to change your upload preferences.
By enabling this setting, your photos and videos won’t experience any change in quality when you upload them. It’s possible to change this setting on Android or iOS; the instructions for each are similar but slightly different. See below.
Enabling High Quality Instagram Uploads on iOS
iPhone or iPad users will need to follow these instructions to enable high quality uploads:
1. Tap the Instagram icon on your Home Screen to launch the app.
2. Tap your profile icon in the bottom right corner so you’re viewing your own profile.
3. Tap on the three dashes in the upper right corner. This will pop-up a list of more options.
4. Tap “Settings” at the very top of the list.

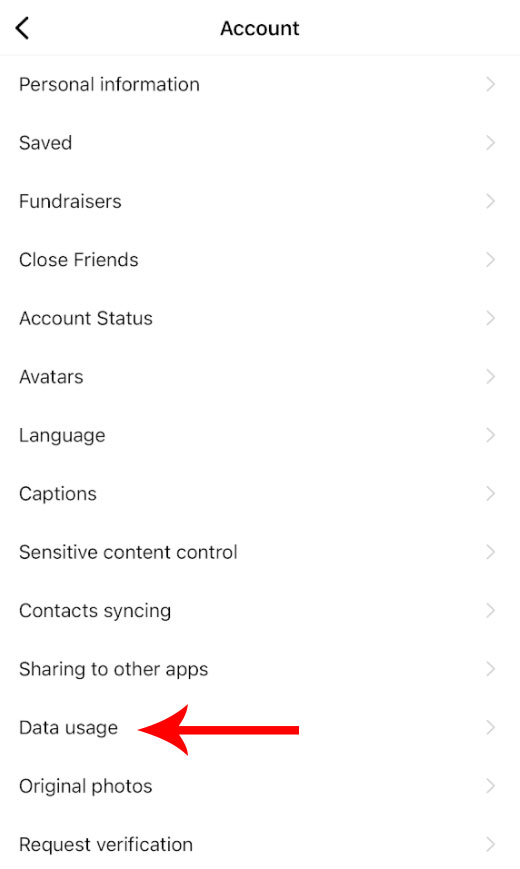
5. Tap “Account” and then “Data Usage”. Alternatively, you can simply search for “Data Usage”.
6. Now, you will see two options. Click the toggle button next to “High Quality Uploads” so the button turns blue upon activation. That’s it. Now your uploads will be higher quality regardless if you’re using cellular or WiFi connectivity.

Enabling High Quality Instagram Uploads on Android
The process is quite similar but not exactly the same for Android users. Follow these instructions to enable this setting on the Instagram app for Android:
1. Tap the Instagram icon on your Home Screen to launch the app.
2. Tap your profile icon in the bottom right corner so you’re viewing your own profile.
3. Tap on the three dashes in the upper right corner. This will pop-up a list of more options.
4. Tap “Settings” at the very top of the list.
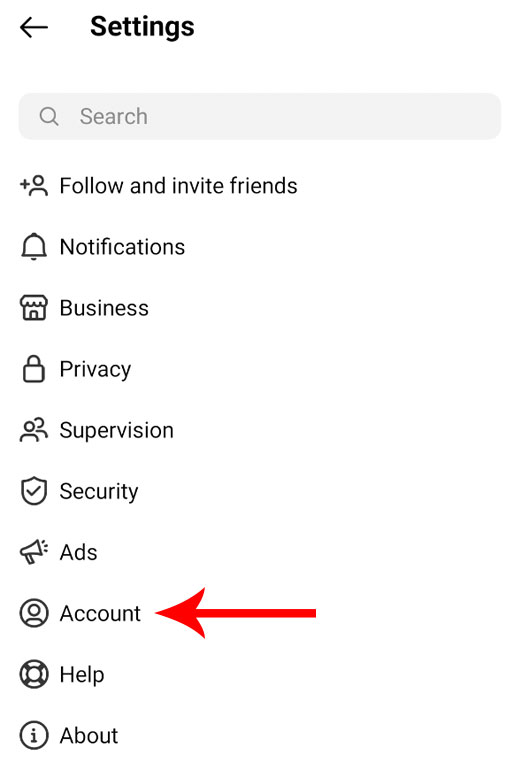
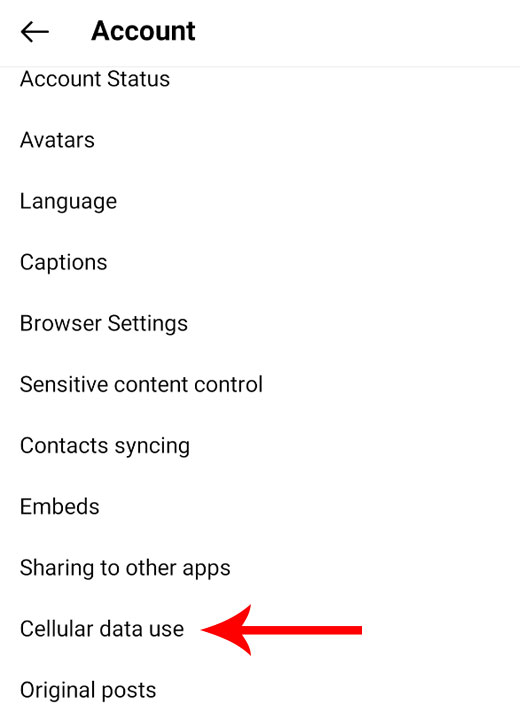
5. Tap “Account” and then “Cellular Data Use” towards the bottom of the list. Alternatively, you can simply search for “Cellular Data Use” back in the Settings menu.
6. Now, you will need to activate the toggle button next to “Data Saver” to unblur the “High Resolution Media” setting directly below. Once you do that, it will let you choose from three options: never, WiFi only or Cellular + WiFi.
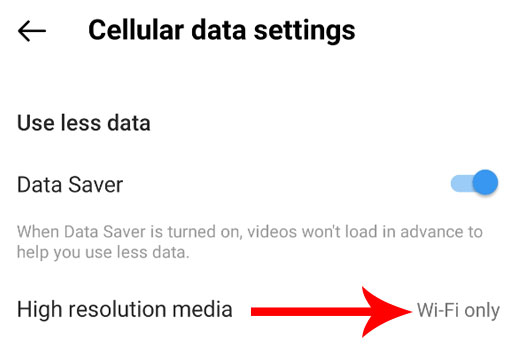
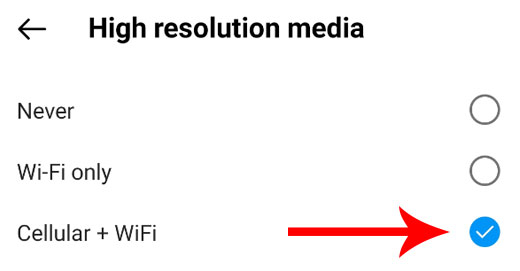
Choose “Cellular + WiFi” and now, regardless if you’re connected through your cell service or WiFi, the Instagram app won’t change your uploads or even attempt to compress or distort any of the content you view.
Turning-On High Quality Uploads on Instagram
As you can see, regardless of the type of device you’re using, enabling high quality uploads without any restrictions is actually quite easy. Keep in mind, however, that regularly uploading high resolution photos or videos can quickly use a lot of data. In fact, it can easily diminish any data usage you may have through your cell phone or Internet provider. Even browsing around with these settings activated can make a huge difference in your data usage. By enabling, you’re basically telling Instagram to give you the highest quality content without any regard for the amount of bandwidth you’re using.
To be honest, most users won’t find a huge difference by activating high quality uploads on Instagram. Given how advanced Instagram’s default compression algorithm works, the changes they make to your photos and videos are hardly noticeable. But if you have a large following or you’ve got a knack for providing the highest possible quality, it’s a setting that you’ll probably want to keep activated. Either way, trying it out for yourself is the best option.
If you try these settings activated for a few days and you don’t notice a big difference, we recommend leaving the default settings activated. Ultimately, you’ll end up saving a lot of data usage and it may be for the best. After all, load times will likely increase with high quality uploads enabled, which could ultimately put a damper on your overall Instagram experience.
Regardless, learning new things with Instagram is fun and can be quite useful. Whether you’re a personal account user or a manager of a big brand, learning the ins-and-outs of Instagram is a great skill to achieve. Interested in learning more? Be sure to check out our other tutorials such as how to see a list of people you’ve requested to follow on Instagram or how to remove other users likes on your Instagram photos and videos. Enjoy!
Meet Ry, “TechGuru,” a 36-year-old technology enthusiast with a deep passion for tech innovations. With extensive experience, he specializes in gaming hardware and software, and has expertise in gadgets, custom PCs, and audio.
Besides writing about tech and reviewing new products, he enjoys traveling, hiking, and photography. Committed to keeping up with the latest industry trends, he aims to guide readers in making informed tech decisions.