
The PlayStation 4 is perhaps the most powerful console of its generation. When compared to the Nintendo Switch, it offers more powerful processing and better graphics. And when compared to the Xbox One, it has a slight edge. Moreover, it has a superior library of exclusive games, with more options than other consoles. But even so, this doesn’t mean that the PlayStation 4 is perfect. At the end of the day, it’s just a specialized computer. And like any computer, it can potentially fail from time to time. For example, the CD drives have been known to fail prematurely, and randomly eject discs.
To say the least, a failed game console can be frustrating. One potentially crippling failure is a fan failure. Without a working fan, your PlayStation 4 will quickly overheat. Ideally, this will simply cause your system to automatically shut down due to temperature. Under the worst circumstances, it can cause your processor to overheat and fail. But let’s assume your system properly detected the temperature reading and shut down. In that case, it’s still just an expensive doorstop until you’ve repaired it. We’ve reviewed several PlayStation 4 accessories, including charging stations.
Today, we’re going to review three different replacement fans for the PlayStation 4. First off, we’ll review the YEECHUN Replacement Internal Cooling Fan. This fan is virtually identical to the original PlayStation 4 fan, including the small foam bumper on the top. Next, we’ll be looking at the Li-SUN CPU Cooling Fan. This is a more affordable fan that comes with a complete kit, including thermal paste. Finally, we’ll review the S-Union New Replacement Internal Cooling Fan. This is a similar affordable unit, complete with thermal paste. So, which one is the best option? Let’s take a closer look, and see what they have to offer!
How to Replace Your PlayStation 4 Fan
Before we go on, a quick tutorial is in order. Most of the fans you see online tell you to visit YouTube for a tutorial. Admittedly, there are plenty of good video tutorials online. But there’s no reason to go in completely blind. So, here’s a quick guide to replacing your PlayStation 4 fan.
To begin with, flip your PlayStation 4 over so it’s upside-down. Now, look at the back of the machine. You’ll see four stickers that say “warranty/void” on them, along with some other writing. You’ll need to remove these stickers to access the screws to open the case. Take the warranty warning seriously. If the stickers are removed, it’s going to void your warranty. So if you’re still covered, you’re better off just filing a claim. That said, if your console is out of warranty, there’s really no reason not to proceed.
Now that the stickers are gone, remove the four Torx screws and lift the bottom of the case. It should lift off cleanly and easily, without any effort. If it won’t, just jiggle it a little bit to loosen it up. Set the bottom of the case aside for now; you won’t need it until you reassemble your PlayStation. Also, make sure to keep good track of the screws. You don’t want to lose any.
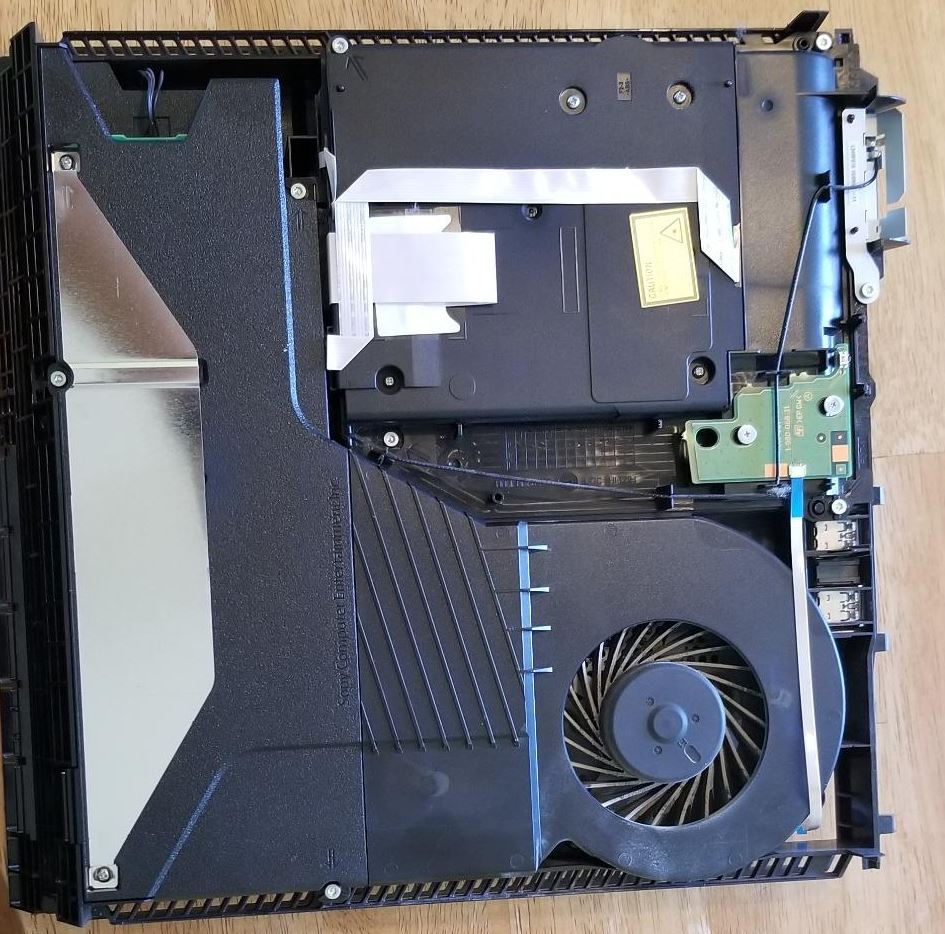
At this point, you’ll be able to see the fan, but you’ll still need to remove a few more parts to access it. First off, unscrew the large power supply unit at the back of the case. This means removing three Torx screws, as well as a pair of Phillips screws. Now, unplug the power connector from the side of the power supply. This cable has five wires, and should pull free easily. Once it’s out, remove the power supply and set it aside with the bottom of the case.
Next, you’ll need to remove your PlayStation’s optical drive. Look at the green circuit board on the right side of the drive. There should be a white ribbon cable connected into it. Press down on the metal release tab, and pull the wire gently. If it doesn’t release with moderate force, check the release tab. It should come out without much effort. Disconnect the other end of this same ribbon from the motherboard. Again, this should only require a small amount of force. There’s a second cable connecting the optical drive to the motherboard. You’ll need to pinch the connector to safely remove it. This is much easier if you use a pair of tweezers.
Now you’ll have to remove the WiFi antenna, which is a silver-grey bracket at the front of the PlayStation. Disconnect the cord from the motherboard. Do this very carefully so as not to damage it. Remove the four Torx screws and one Phillips screw, and lift out the WiFi antenna. At this point, you can safely remove the optical drive as well.
Flip over your PlayStation, and remove the top back panel. Simply slide it backwards and lift it, and it will come out easily. You’ll see a steel panel covering the hard drive. Unscrew the Torx and Phillips screws, and the hard drive should slide out from the side. After this, you can remove the front top panel the same way you removed the back top panel. Underneath, you’ll see the rest of the steel panel. Remove the rest of the screws. There should be 12 Torx screws and two Phillips screws in all. Remove the support bracket held in by the Phillips screws, and you can take off the entire metal cover.
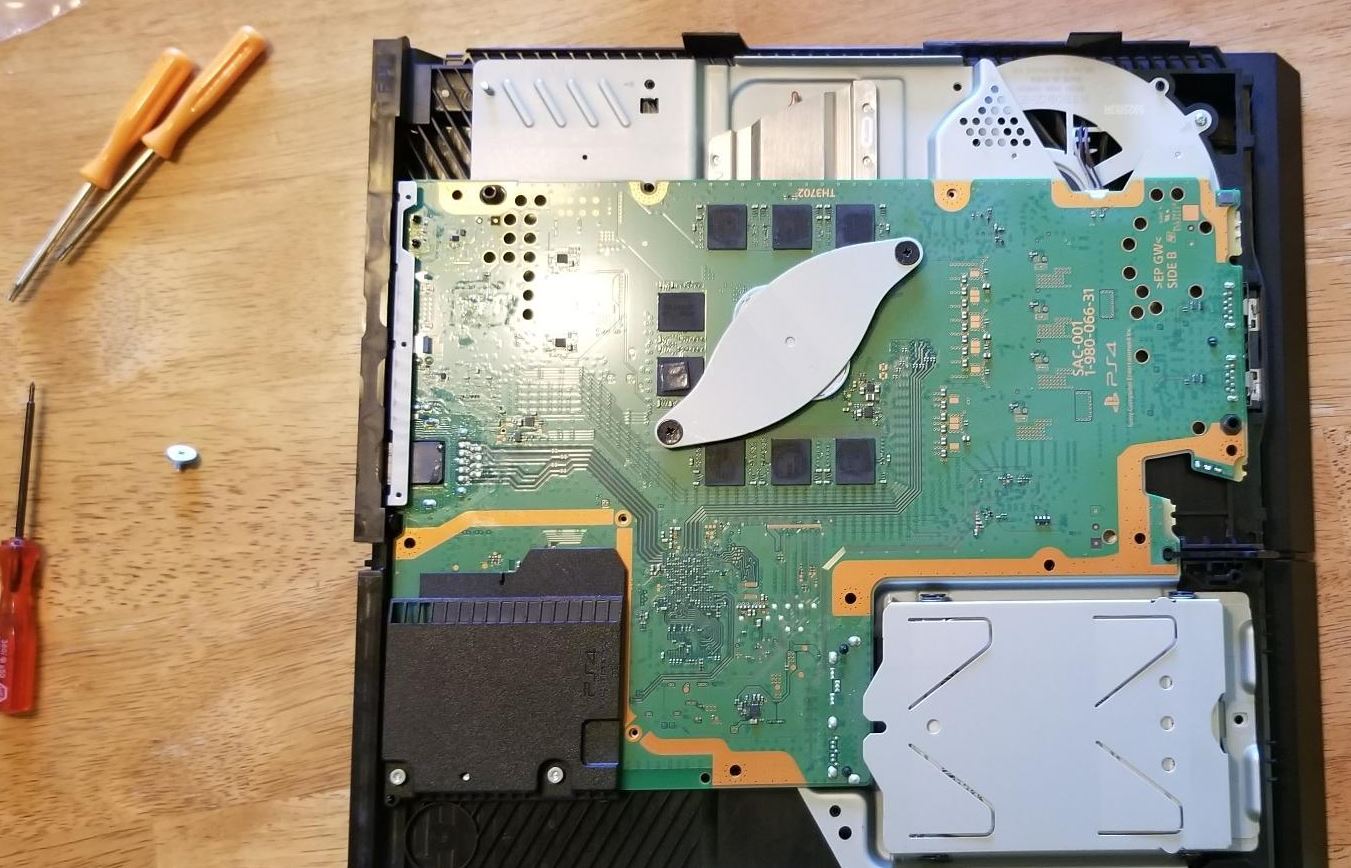
Finally, you’ll see the three-wire plug that connects the fan to the motherboard. Use tweezers to disconnect it, and remove the motherboard. Be very careful not to scratch any of the circuitry. Also, be aware that you’re separating the original thermal paste that protects the processor. Make note of where this paste is. You’ll want to clean it off with alcohol, and apply new thermal paste during reassembly.
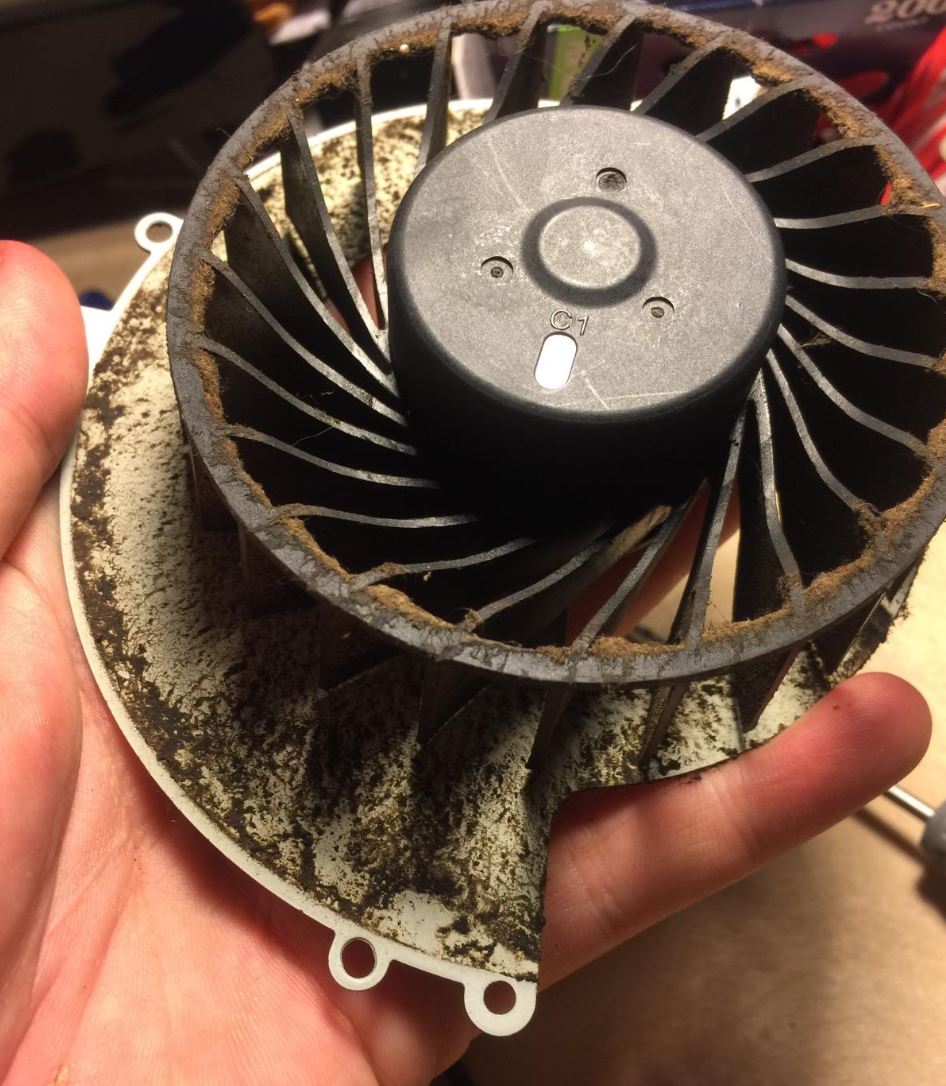
You’ll see another metal plate. Remove the three Phillips head screws, and lift up on the plate. Now you can remove the two Phillips screws that secure the fan in place. Some PlayStation models will also have a third screw. Remove the old fan, replace it, and reassemble your system. Remember to reapply the thermal paste in the process! If you’ve done everything right, you should be good to go.
YEECHUN Replacement Internal Cooling Fan
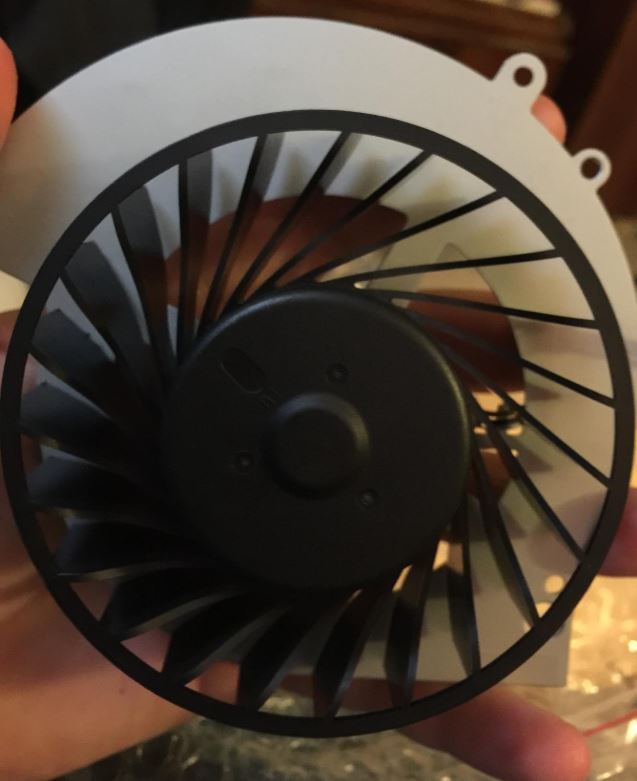
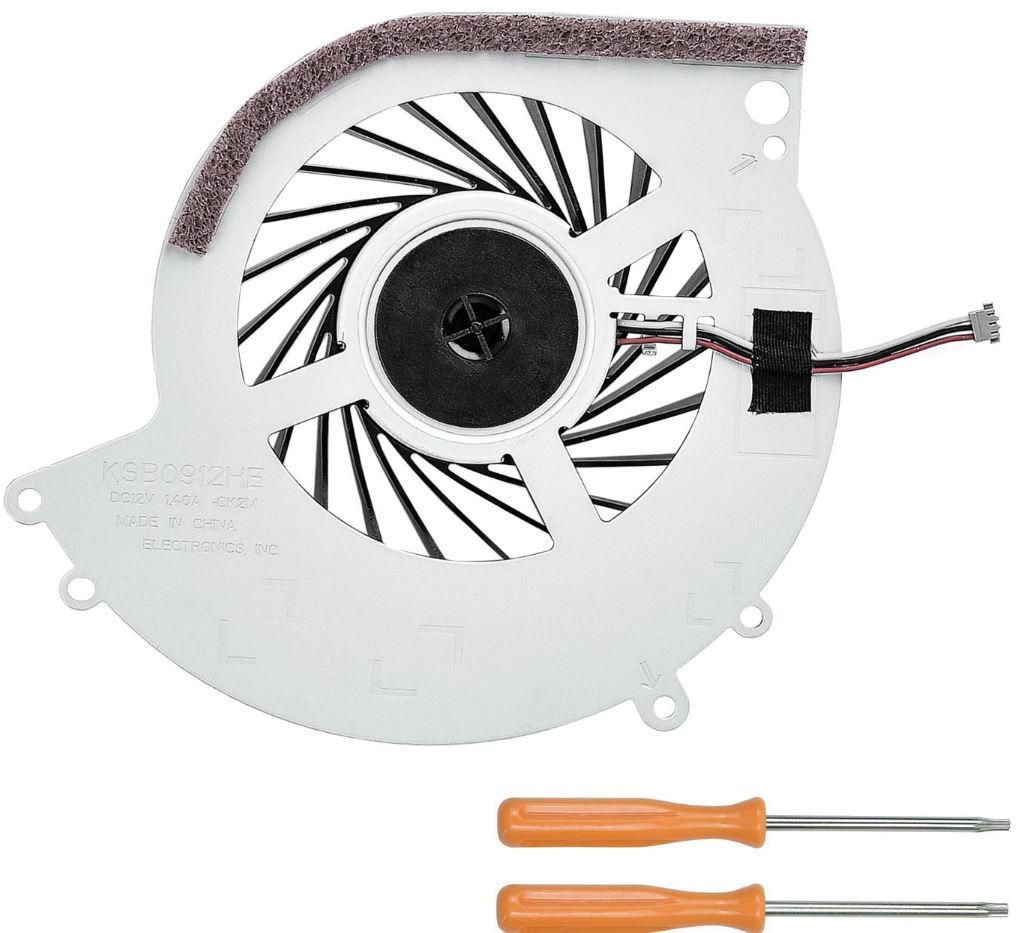
The YEECHUN Replacement Internal Cooling Fan is almost identical to the original PlayStation 4 fan. It’s sold as a one for one replacement. As such, it’s suitable for any standard model PlayStation 4. Like the other fans on our list, this means it’s suitable for CUH-10XXA and CUH-11XXA models. If you own a slim CUH-12XX model, it’s not going to work for your system. The fan sports a foam bumper along one edge, which helps reduce vibration. This makes for exceptionally long life, even if you use your system for hours every day.
In addition to the fan itself, the YEECHUN kit includes T8 and T10 Torx drivers for performing the repair. The drivers are fairly pedestrian, with small orange handles. They still provide a reasonable grip, though, and they’re well-constructed enough for their purpose. As a result, you’re not going to need to buy any tools to get the job done. That said, there’s no thermal paste in the kit. You should definitely buy your own, in order to prevent permanent damage to your PlayStation 4.

Li-SUN CPU Cooling Fan
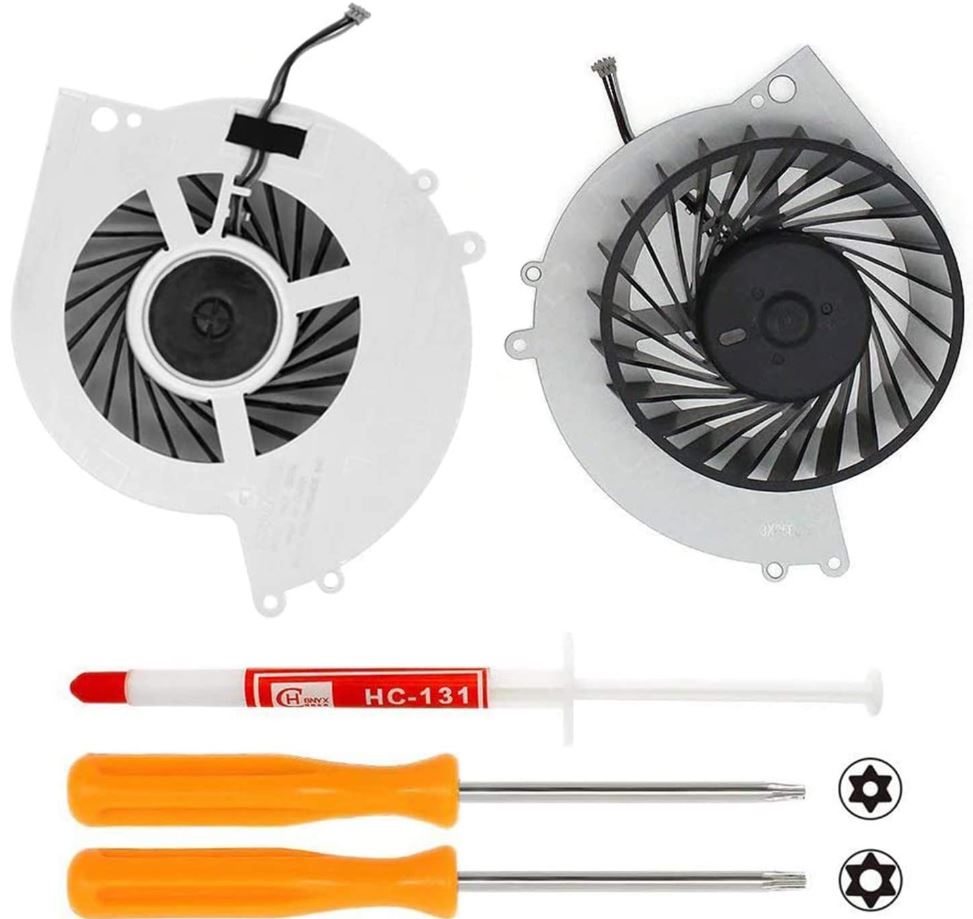
The Li-SUN CPU Cooling Fan isn’t strictly identical to the original. The main difference is that it doesn’t have the same foam strip on the side. If you want vibration resistance, you’ll need to install your own strip. You can either repurpose the strip from your old fan, or fabricate your own. Then again, the package also comes with thermal paste. The paste comes in a syringe-style tube, which makes it very easy to apply.
The T8 and T10 drivers that come with the fan are virtually identical to those that come in the YEECHUN kit. They’re not exactly masterpieces of toolmaking, but they’re more than good enough for a single repair. This means you’ve got everything you need to perform the repair. You don’t need any extra parts or secondary purchases. In addition, the Li-SUN kit comes with a one-year manufacturer’s warranty. If you’re not satisfied for any reason, Li-SUN will issue your choice of a replacement or a full refund.
S-Union New Replacement Internal Cooling Fan
The S-Union New Replacement Internal Cooling Fan is similar in most respects to the Li-SUN fan. It has the same spiral profile as the original PlayStation 4 fan, but comes at a more affordable price. Like the Li-SUN fan, it comes with everything you need for installation. It includes well-designed T8 and T10 Torx drivers, which are sufficient for the task. It also includes a syringe of thermal paste, so you can keep all your components cool.
Moreover, the S-Union New Replacement Internal Cooling Fan comes with a 9-month manufacturer’s warranty. You’re protected from any defects in materials or workmanship for the duration of this period.
Final Verdict
As you can see, these are all suitable replacement fans for your PlayStation 4. They’re all designed for the standard, original PlayStation 4 design. And they all sport a 3-pin fan connection that’s suitable for plug-and-play operation. Drop any one of them into your console, and you’re looking at a functional cooling unit.
That said, there are some differences. Which one is the best? To begin with, the YEECHUN Replacement Internal Cooling Fan is virtually identical to the original. It even has the same anti-vibration foam strip, which makes it more long-lasting. However, it comes at a steeper price tag than the other two. It also doesn’t include thermal paste. This means you’ll have to shell out a few extra dollars for your own paste to complete the repair. Regardless, you’re looking at a very high-quality fan to replace your original.
The Li-SUN CPU Cooling Fan and the S-Union New Replacement Internal Cooling Fan are more or less identical. They’re aftermarket fans designed to work as much as possible like the original. They even come with thermal paste to make installation quick and painless. Which one of these is the best? Take your pick! Check the pricing at your time of purchase, and buy whichever one is most affordable. The only real difference is the longer warranty on the Li-SUN fan. But even there, you’re looking at 12 months versus 9 months; not exactly an earth-shattering difference. Other than that, there’s really no reason to choose one over the other.
Meet Ry, “TechGuru,” a 36-year-old technology enthusiast with a deep passion for tech innovations. With extensive experience, he specializes in gaming hardware and software, and has expertise in gadgets, custom PCs, and audio.
Besides writing about tech and reviewing new products, he enjoys traveling, hiking, and photography. Committed to keeping up with the latest industry trends, he aims to guide readers in making informed tech decisions.
I was just wondering how do I tell what fan I need for my ps4 as I’m replacing the fan.
Any of these options will work.