We’ve all been there – you go to upload photos to Instagram, and one or more of them end up being cropped. It’s annoying, and you can inadvertently crop out friends and family. So why does this happen, and how do you make it stop?
By default, Instagram will crop all photos to a square aspect ratio. However, you can override this by selecting the “original” option when you make the post. In this case, your photo will retain its original aspect ratio. But when you upload multiple photos at once, any photos with a different aspect ratio will be cropped to match the first one.
Instagram Aspect Ratio Basics
Instagram has different requirements for uploading images to Stories, Posts, and Reels. In general, it will accept images between 320p and 1080p. Anything smaller than that will be blown up. Anything larger will be downscaled to 1080p.
In other words, you can upload pretty much any image size you want It will come out either in full quality, or in the best quality that Instagram can provide.
Video is a little bit trickier. In theory, it will come out in full quality – at least up to 1080p. But in practice, video will often be compressed further than necessary in order to save data. In that case, it helps to switch to high-quality uploads.
That said, while image resolutions are pretty straightforward, Instagram image aspect ratios are another matter entirely. Here’s what you need to know.
Instagram Posts
In the past, all Instagram posts had to use a 1:1 aspect ratio. If you had a larger image, you had to crop it down to size. This often meant accepting a reduction in picture quality. For example, a wide, narrow image would be cropped and then blown up to fit the space, creating pixelation.
Thankfully, Instagram has improved. Nowadays, you can upload portrait and landscape photos as well as square ones. Possible aspect ratios include 1:1, 1.91:1, and 4:5. Each one works a bit differently, so let’s talk a little more about each one.
1:1
1:1 images are Instagram’s old-school square pictures that everybody knows and loves. These are the easiest to upload, since Instagram’s auto-cropping function does the work for you.
Not only that, but many modern devices are now capable of taking 1:1 photos. These include the latest iPhone models as well as higher-end Android phones. If you take 1:1 pictures to begin with, you won’t have to worry about cropping them later.
1.91:1
1.91:1 is a horizontal aspect ratio, and it’s a little bit of an oddball. Most standard smartphone cameras take landscape photos in a 16:9 aspect ratio. 16:9 is standard for TVs and monitors, and it’s a ratio you’ll be familiar with. But when you post a 16:9 photo on Instagram, there will be vertical black stripes on the sides.
Whether or not this is a problem will depend on your needs. Most people don’t care one way or another. If it’s an issue for you, you can crop your original 16:9 image before you upload it.
4:5
A 4:5 aspect ratio is the most common format for portrait-style photos. Most mobile selfie cameras will already take pictures in this format, so they should be easy to upload. As before, you can always pre-crop your photos to fit if your camera uses a different format.
Instagram Stories
Instagram Stories are designed to support 9:16 photos, with a maximum resolution of 1,920 x 1,080 pixels. This is the ideal format for mobile uploads, since your camera almost certainly already takes 16:9 pictures. That said, Instagram Stories also allows you to upload photos with different aspect ratios. Upload anything from 1.91:6 to 9:16, and it will automatically add a black border on the top or sides.
Keep in mind that stories are meant to be viewed vertically. If you upload landscape-style photos, they’ll have enormous black and white bars. Meanwhile, the image itself will be too small for convenient viewing on a smartphone screen. If at all possible, it’s best to upload only portrait-style images, in as close to 16:9 as possible. That way, you’ll get optimal picture quality.
Instagram Stories also allow you to upload videos. Just like the pictures, videos posted on your Story should be in a portrait orientation. In general, it’s best to keep Story videos short – a minute or two at most. Then again, you can technically upload videos up to an hour in length. The size limit of 3.6GB allows for very good video quality.
Instagram Reels
An Instagram Reel is a lot like a YouTube reel. Instead of one long video, it’s a series of shorter clips that are between 30 and 90 seconds long. The idea is to hook people into your Instagram channel with bite-sized videos that tell a continuous story.
You can upload a series of short videos to create a reel, or start with a longer video and chop it up later. That’s what most people do, since it simplifies the original recording and editing process. But what many people don’t realize is that you can upload photos to a reel as well as images. You can even combine photos and images into a single reel.
How Does an Instagram Carousel Work?
An Instagram Carousel allows you to post up to ten photos simultaneously. These photos will then appear as a single tile. You choose one image to serve as the cover photo, and other people can swipe to view the other images. As with Instagram Reels, you can also include videos in a Carousel.
In order for this to work, set the first photo to full view so it doesn’t get automatically cropped. Then everything else you upload will also default to full view. That said, there’s a caveat. Everything you upload will have to be the same aspect ratio. Otherwise, it will be cropped. For example, if your first photo is in portrait orientation, other vertical photos will show up normally. Horizontal pictures, on the other hand, will end up being automatically cropped.
Carousels are great when you want to display a bunch of photos to commemorate the same event. Snap a bunch of pictures at your cousin’s wedding, and you can upload them all to a Carousel. Here’s how it works:
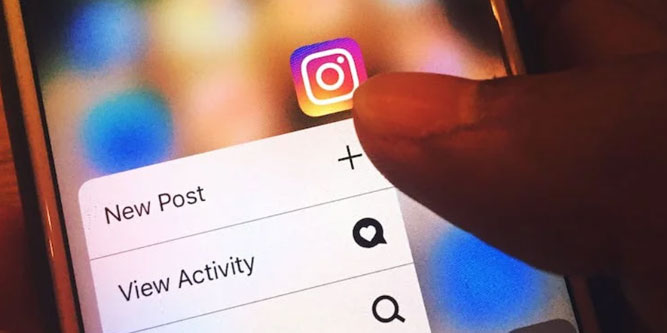
- Touch the “+” button at the top of your home screen, and choose “Posts.” This will bring up your phone gallery.
- Tap “Select Multiple,” and choose up to 10 photos and videos.
- Click “Next” to bring up the editing interface, and crop your photos if you want to.
- When you’re done, click “Next,” again. Then click the “Post” button or the checkmark icon to create your new Carousel.
In the editing interface, you’ll be able to choose the order of your photos and videos. Just drag and drop them in the timeline until you’re happy with the order they’re displaying in. You can tag people individually in each photo to include all of your friends. You can even add your location and caption. There can only be one location and one caption, and they apply to the entire Carousel.
The same will be true for any likes and comments you receive. Instead of applying to a single picture or video, there’s a shared comment list for the entire Carousel. Take your time on the editing screen. Once you create the post, you won’t be able to make any edits, except for the tags and caption. You also won’t be able to delete individual photos – just the entire Carousel.

How to Crop Instagram Photos in the App
If you want to crop your own photos instead of accepting the default crop, here’s how to do it:
- Upload your photo.
- Tap the “Edit” button, then choose “Adjust.”
- Move the photo around and zoom in or out until the frame is where you want it to be.
- Tap “Done,” then review your final preview image. You can either post it, or tap “Cancel” to reset the image and make further edits.
How to Crop Instagram Photos on Your Desktop
You can also crop Instagram photos from your desktop by visiting the website. Here’s how it’s done:
- On the left-hand menu, click the “Create” button.
- Click the appropriate button to upload your picture. Alternatively, you can drag and drop a photo directly from a folder.
- In the next screen, there will be a frame that shows the cropped image size. Drag your photo around and use the magnifying glasses to zoom in or out. Alternatively, you can click the crop icon to switch between the three standard aspect ratios: 1:1, 4:5, and 16:9.
- Click “Next,” then post the image.
Final Thoughts
For now, Instagram seems to have settled on their current system of cropping photos. When you’re uploading multiple photos, the best solution is to upload only photos with the same aspect ratio. This will prevent cropping and preserve your original images.
Regardless, you’ll need to select the “original” option when uploading your pictures. Otherwise, they’ll all be cropped to square by default.
Meet Ry, “TechGuru,” a 36-year-old technology enthusiast with a deep passion for tech innovations. With extensive experience, he specializes in gaming hardware and software, and has expertise in gadgets, custom PCs, and audio.
Besides writing about tech and reviewing new products, he enjoys traveling, hiking, and photography. Committed to keeping up with the latest industry trends, he aims to guide readers in making informed tech decisions.