The Xbox One is one of the most popular consoles on the market. Despite a rocky start caused by the unpopular, mandatory Kinect module, it’s now sold over 50 million units. Of course, the Xbox One has been on the market for seven years now. If you’ve got one of those older units, some parts might be showing their age. This is particularly true for cooling fans. Fans have mechanical bearings, which eventually wear out and fail. As bearings age, they start to make noise. This is your warning sign that it’s time to take action.
Thankfully, replacing the Xbox One fan is a fairly simple matter. We’ll go over the whole process. Then, we’ll look at three Xbox One replacement fans. First, we’ll review the Gam3Gear Replacement Internal Cooling Fan. Next, we’ll check out the Eathtek Replacement Internal Cooling Fan. Finally, we’ll examine the Wadoy Internal Cooling Fan. After looking at all three options, we’ll be able to render a final verdict.
Before we continue, we should stress that these fans are for the original Xbox One, the black version. If you own a newer Xbox One S (the white version), these fans won’t fit. The One S has a slimmer case, and uses a different, low-profile fan. We’ve seen horror stories of people trying to cram a regular Xbox One fan into a One S case. If you own a One S, do yourself a favor and buy a fan that’s appropriate for that console variant.
How to Replace an Xbox One Cooling Fan
Before you attempt any Xbox One repair, it’s important to have the correct tools. In total, you’ll need a kit like this that includes T8, T9, and T10 Torx drivers, a nylon spudger, and an Xbox One pry tool. A small flathead screwdriver can substitute for the spudger and pry tool. However, if you’re going to go that route, you’ll need to be extremely careful. Alternatively, you can just buy an Xbox One screwdriver set, and be done with it.
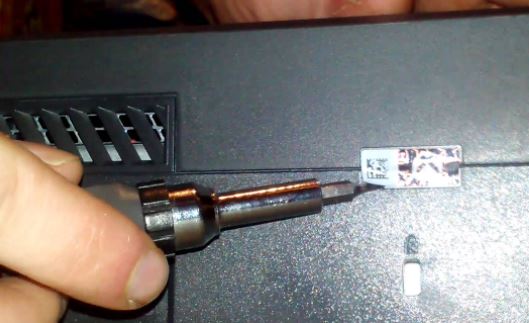
With your tools in hand, the first thing you need to do is remove or cut the tamper-evident tape on the back. Be aware that this can void your warranty. On the other hand, if you’re replacing an old fan, your unit is probably out of warranty already anyway. Next, you’ll need to remove the vent cover from the left side of the console. The cover itself is actually flexible, and pulls out easily once you’ve gotten it started. Start by prying the back of the vent up with your nylon spudger. Pull it out, and set it to the side. Underneath, towards the front of the Xbox, there’s a plastic reinforcement tab. Slide this tab back, and it will drop right out.
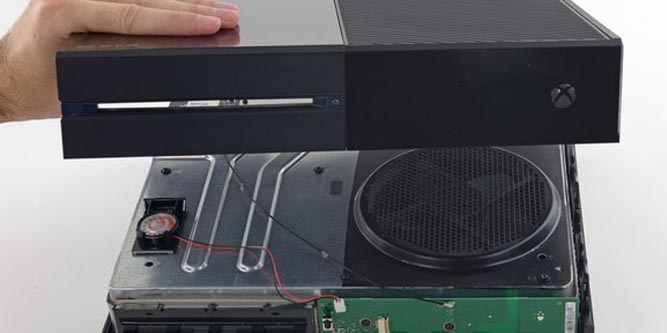
Now comes the fun part. The top and bottom halves of the Xbox One case are secured together with a set of strong plastic clips. The clips need to be carefully pried open with a spudger or screwdriver. Worse, the case halves really, really want to stay in place. As you go along, previously-opened clips can easily snap back into place. To avoid this, it’s a good idea to leave the spudger inserted in the gap as you move along. This will minimize the risk of the clips snapping back together.
Start near the USB ports, and work your way around the back of the Xbox. Work your way all the way back around to the front, and the two halves should be ready to come apart. Don’t lift the upper case yet. It’s still connected to the bottom via the front panel ribbon cable. To fully open the Xbox One, you’ll need to free up this cable. Lift the upper case just enough to see where the cable meets the front panel board.
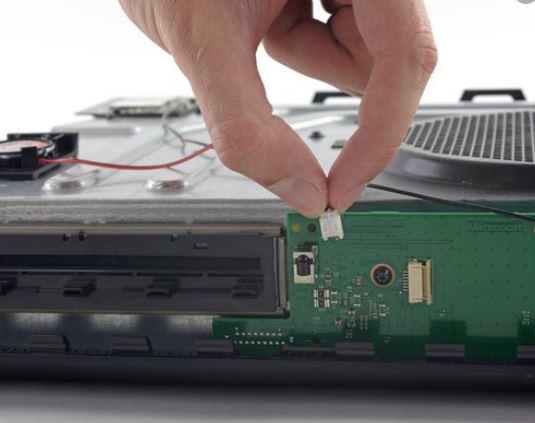
The connector here is a bit finicky, and is easy to break if you try to brute force it. Instead, use a pair of tweezers to gently lift the plastic retaining loop that secures the connector in place. With the retaining loop raised, you can slide the locking tab open with the tip of a nylon spudger. This will unlatch the cable, which can then be gently pulled out. At this point, you can safely remove the top of the case and set it aside.
With the outer case removed, you’ll see an aluminum internal case, with a small circuit board at the front. To access the fan, you’ll need to remove this aluminum case. Step one is disconnecting it from the circuit board. You’ll see a small black speaker cable running into a plastic connector on the front. Disconnect this carefully, without pulling on the connector that’s attached to the board. There’s also an antenna cable connected towards the right of the front panel. This is a simple snap-on connection that can be pried open with a nylon spudger.
Next, you’ll need to remove the black WiFi board from the back corner of the Xbox. It’s held in place with a pair of T9 Torx screws. Once the screws are removed, lift the board carefully and set it aside. Be careful not to pull the antenna cable loose from the case. That can remain attached. With the WiFi board removed, you’ll see a screw labeled “C3”. Remove this T10 Torx screw, and the seven others just like it. Once the screws are removed, you’ll be able to lift the case. Do so, but don’t fully remove it — the WiFi board is still connected to the Motherboard. Unplug that connector and set the aluminum case aside.
Now, you should be able to see all your Xbox One’s internal components. You’ll need to remove two more parts to get to the fan: the hard drive and the optical drive. Both drives are connected to the motherboard by two cables, a power cable and a SATA cable. Once disconnected, both drives will easily lift out of the housing.
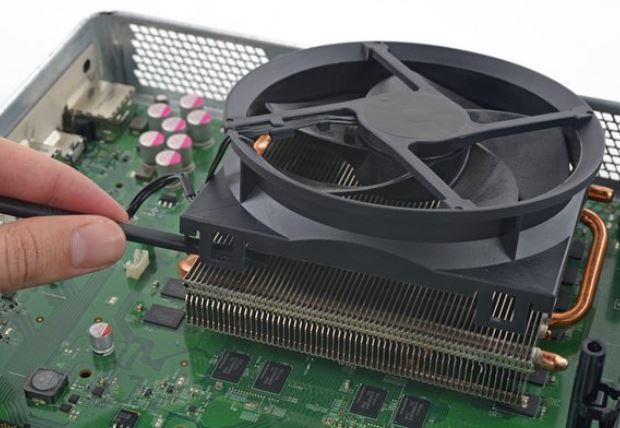
The fan itself is secured onto the heat sink with four plastic clips. To release it, you’ll need to pry open two tabs on one side. Then, the fan can simply be tilted and removed. The issue here is that you’re prying on something that’s attached to your heat sink. Be careful and take your time. Pressing down too hard can damage the motherboard. Pulling up too hard can cause the heat sink to become partially unseated. In other words, this is something you really, really don’t want to rush. That said, at the end of the day, the clips pop out easily. If you have two spudgers, it’s a good idea to leave one blocking the first clip while you’re opening the second. This will keep the first clip from snapping back in while you’re working on its brother. With both the left and the right clips removed, the fan will come off with almost zero effort. Unplug it from the motherboard, and you’re almost done.
The new fan should clip easily into place without much resistance. Plug it into the motherboard, and reassemble the rest of your Xbox One. Fire it up to verify that everything works, and you’re good to go!
Gam3Gear Replacement Internal Cooling Fan
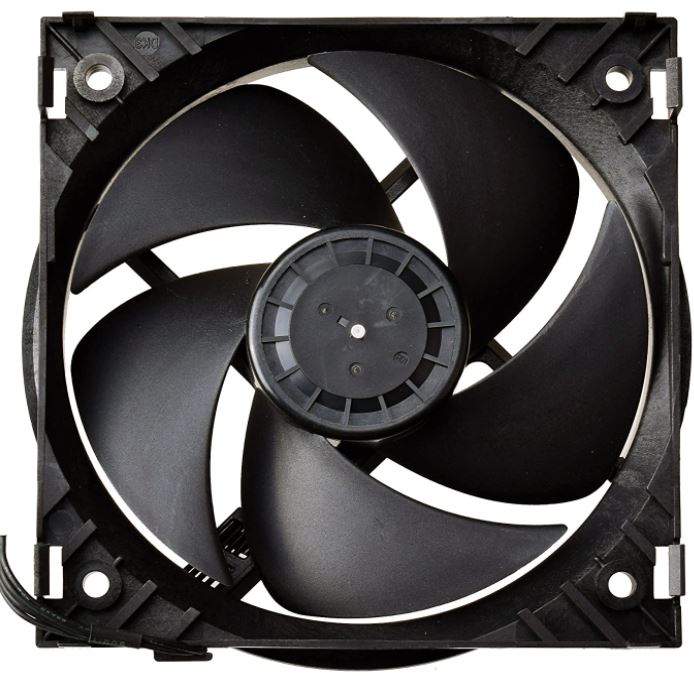
The Gam3Gear Replacement Internal Cooling Fan is a simple, third-party replacement fan for the Xbox One. It has a similar design to the OEM version, with four struts supporting the center fan bearing. The cable is routed along one of these struts, where it can then wrap down the side of the fan. The Gam3Gear fan comes factory-tested, and installs and operates easily. It’s a solid choice if you’re looking for a near-identical replacement.
Eathtek Replacement Internal Cooling Fan
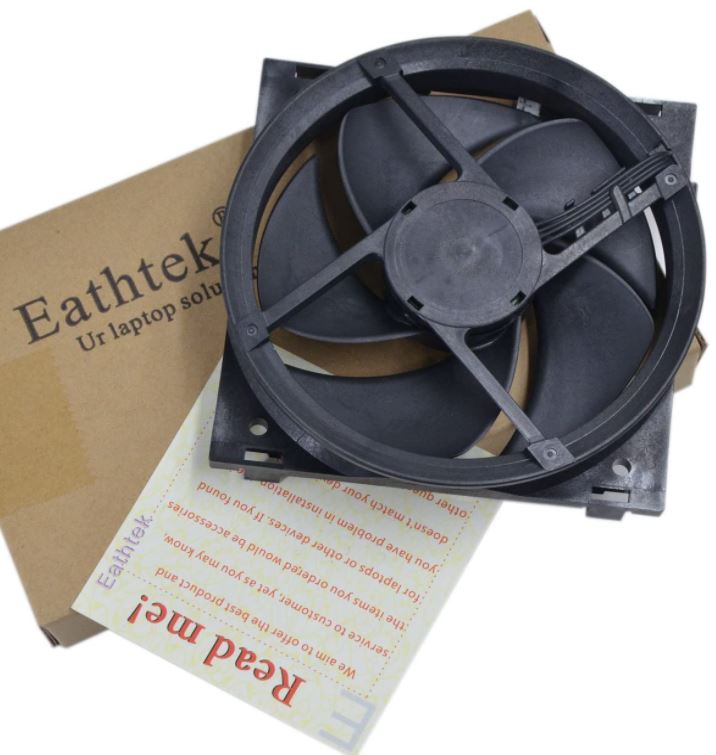
The Eathtek Replacement Internal Cooling Fan is nearly identical to the Gam3Gear fan at first glance. It has the same four-strut design, and near-identical cable routing. If you put the two of them next to each other in a lineup, it would be virtually impossible to tell them apart. Sounds like they’re basically the same, right?
Unfortunately, there’s one difference you’ll spot if you look closely. It’s on the sticker. The OEM Xbox One fan draws 0.8 amps of power. This one, on the other hand, only draws 0.5 amps. As a result, you’ll get slower RPMs and less air movement in general. For ordinary gameplay, this isn’t really an issue. Unfortunately, it means your fan won’t have any extra power when it’s badly needed. In that case, your Xbox will automatically shut down to avoid damage. This low power makes the Eathtek fan a relatively poor choice.
Wadoy Internal Cooling Fan
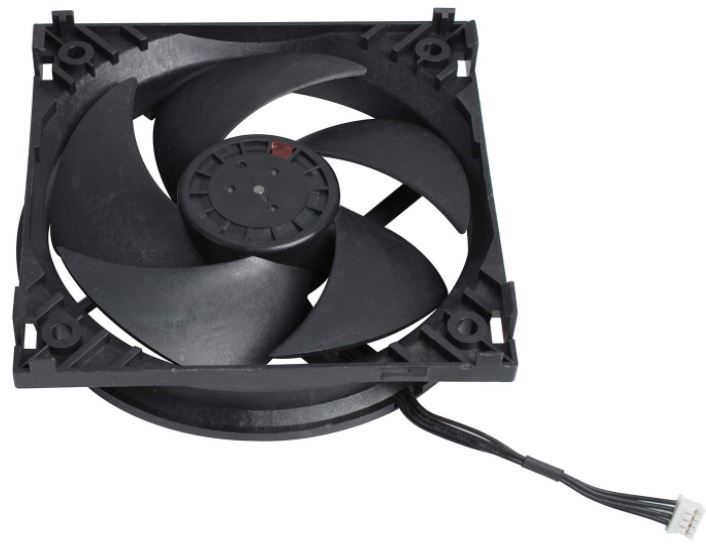
The Wadoy Internal Cooling Fan is a bit different from the last two. The housing has the same four-strut design and overall profile. But that’s to be expected. It has to fit in a particular space and snap onto a particular heat sink. The difference is in the fan blades. Instead of four broad, fat blades, there are five more slender, sweeping blades. In theory, this should push more air through your system. Did we notice any massive difference? Not really. But if you regularly play games that cause your fan to speed up, it certainly can’t hurt.
Final Verdict
So, which one of these Xbox One replacement fans is the best? The Gam3Gear Replacement Internal Cooling Fan is our top choice for a simple replacement. It’s not an OEM fan, but it’s as close to OEM as you’ll get without buying from Microsoft. This makes it painless to swap in for your old fan.
The Eathtek Replacement Internal Cooling Fan has a virtually identical physical design. Unfortunately, the motor is a full 0.3 amps weaker. This makes it a non-starter if you want a high-performance fan.
The Wadoy Internal Cooling Fan is the odd choice of the group. Its unique, sweeping fins allow it to move more air than other fans — at least in theory. On the one hand, it’s radically different from the OEM fan, which might make some people nervous. On the other hand, it’s well-engineered and seems to work quite well. Unless you’re a stickler for staying close to the original, there’s a lot to like here!
Meet Ry, “TechGuru,” a 36-year-old technology enthusiast with a deep passion for tech innovations. With extensive experience, he specializes in gaming hardware and software, and has expertise in gadgets, custom PCs, and audio.
Besides writing about tech and reviewing new products, he enjoys traveling, hiking, and photography. Committed to keeping up with the latest industry trends, he aims to guide readers in making informed tech decisions.