More than a year after its release, the PlayStation 5 remains an elusive find for many gamers. Thanks to supply chain shortages and higher-than-expected demand, the console is sold out almost everywhere. But if you’re one of the people who’s been lucky enough to get their hands on a PS5, you’re just getting started. Now is a great time to outfit your console with the extra gear you need to take your game to the next level. And there are few better places to start than with your DualSense controller. After all, the controller is your direct connection to your console. If you’re not able to perform all the functions you need, you’re not going to be playing your best game.
There are many great things about the PS5’s controllers. They’re ergonomic, they’re easy to use, and they’re familiar to existing PlayStation players. That said, like any console controller, they have inherent limitations. One of these is the button layout. If your game doesn’t let you remap your controls, you can get stuck with a clunky control scheme. Professional gamers use control remap kits to circumvent this. With a remap kit, you get additional ways to enter the same commands. This can give you a huge edge, since you’ll have your own customized control scheme. But isn’t this a bit complicated for the average person?
We’re about to review the eXtremeRate RISE Remap Kit for PS5. This is a (mostly) no-solder PS5 remap kit that’s easier to install than most. It provides you with two paddles on the bottom of your controller, which can be mapped to easy button. But how well does it actually work, and can it actually help improve your game? To answer those questions, we’ll have to take a much closer look at the RISE, starting with the physical design. We’ll talk about the ergonomics and ease of use, and how the install process works. Then, we’ll discuss the remapping function, how it works, and how easy it is to use. After all of that, we’ll have enough information to render a fair verdict. Let’s get started!
Overall Design
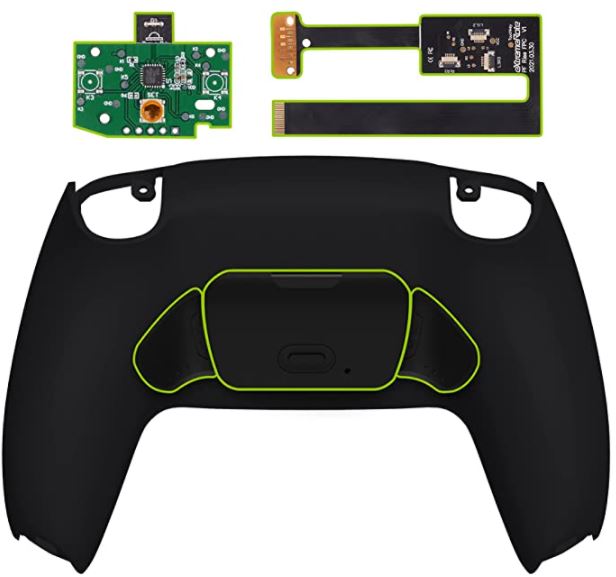
The eXtremeRate RISE Remap Kit for PS5 consists of two main components. First, there’s the external wrap and buttons. Next, there’s the internal installation kit. First, let’s talk about the outer portion, which is what you see. This takes the form of a complete controller wrap, which is available in 13 colors and patterns. Basic options include black, white, and blue. There are also speckled, textured options, and even a wood grain option. This gives you plenty of cosmetic choices, no matter what kind of look you’re going for. Our only complaint about the material is that the finish is ever so slightly tacky. As a result, it tends to attract dust and fingerprints; you’ll find yourself cleaning it often.
Because it’s designed as a wrap, the RISE hugs tight to your housing, and doesn’t obstruct your ports or your existing buttons. It’s so unobtrusive that it even works with some other aftermarket modifications, such as aftermarket PS5 thumb grips. You won’t be able to use some modifications, like oversized triggers, which could get in the way. But for the most part, you’re free to continue altering your controller as you see fit.
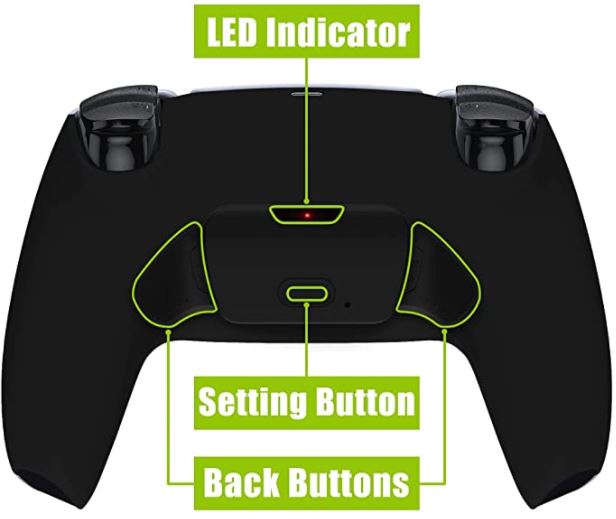
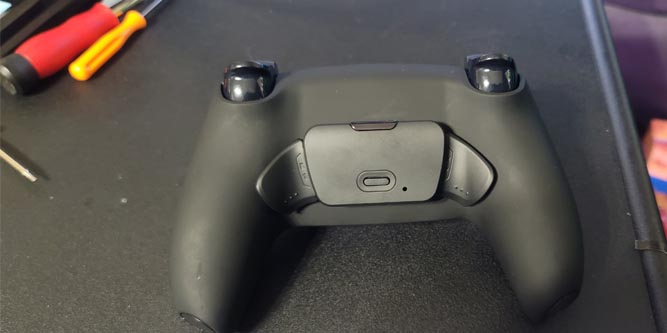
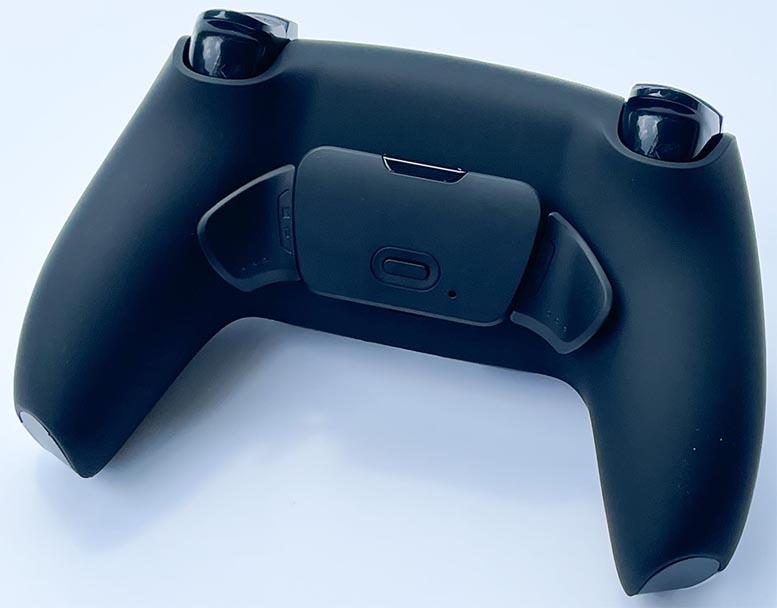
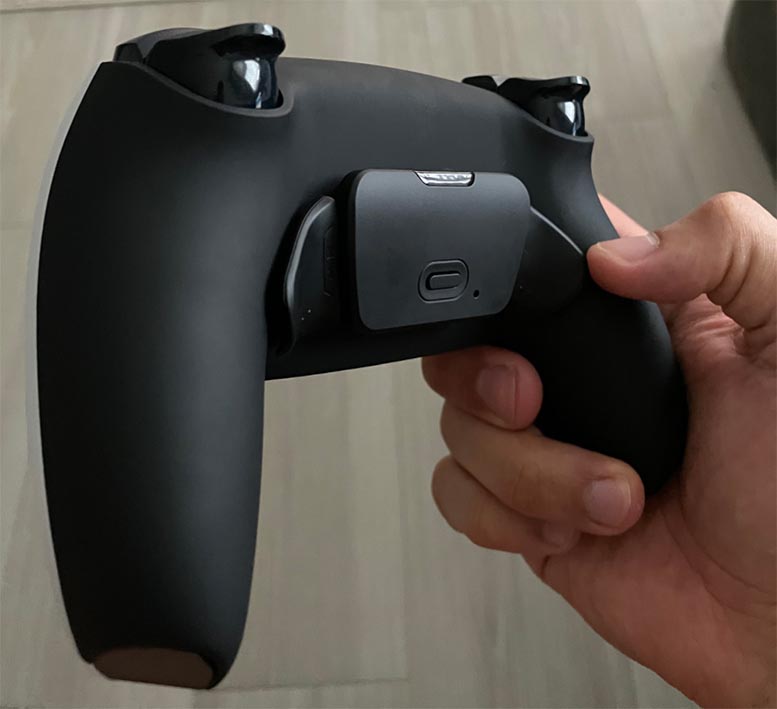
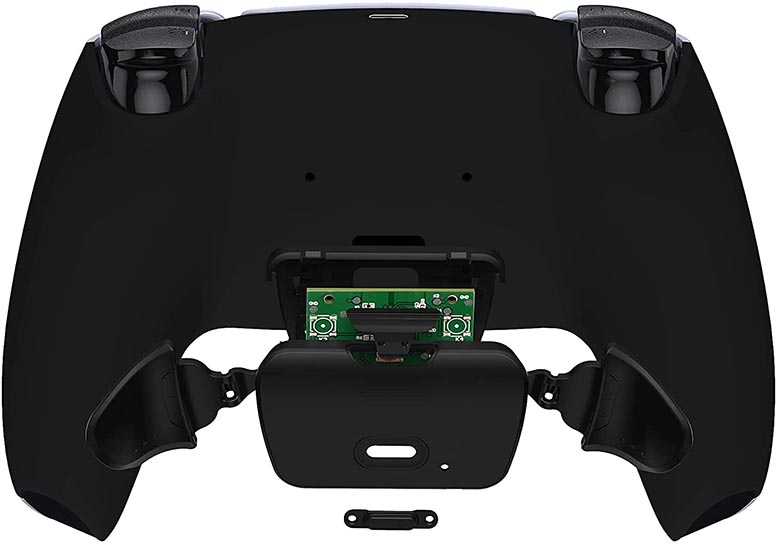
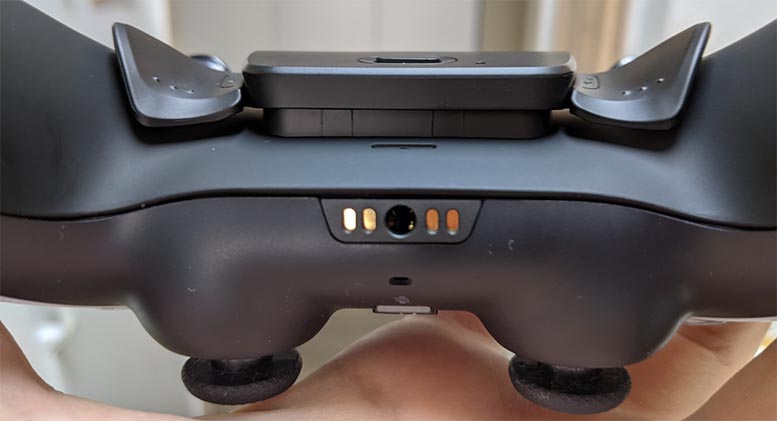
The bottom side of the RISE is where the real magic happens. Here, there’s a small rectangular control module that sits directly in the center. There’s an LED indicator on the front edge, and a button in the middle bottom surface. This is the programming button, which we’ll discuss momentarily. To either side of the module, there’s a pair of wide paddles that you operate with your first and second fingers. The paddles and module actually come separately from the wrap itself. They easily click into place during the assembly process, which is pretty simple.
Since the module and paddles protrude from the back of the housing, it won’t work with an aftermarket charging station. The profile will be too big, and your controller’s contacts won’t touch the contacts on the charger. This means you’ll need to charge via USB Type-C. So when you buy the rise, it’s also smart to invest in a quality PS5 Controller USB Type-C charging cable.
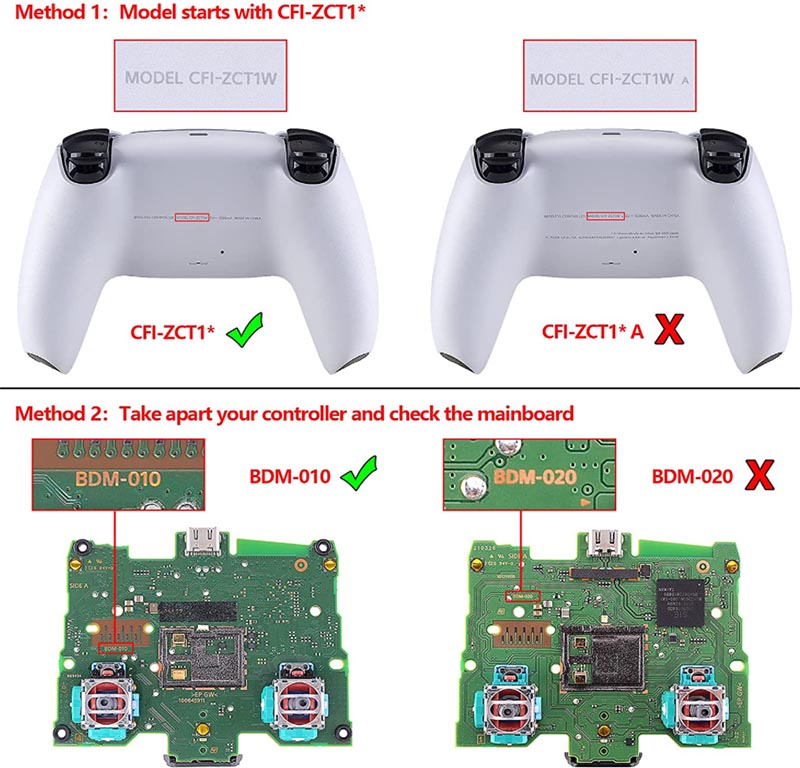
The one thing you’ll have to make sure of before you buy is whether or not the RISE is compatible with your controller. Believe it or not, there are currently two models of PS5 controller: the BDM-010, and the BDM-020. Both have an identical appearance and form factor, but a different mother board. This remap kit is designed specifically to work with the BDM-010. So, how do you know which controller you have? Thankfully, you don’t have to open it up to find out. On the back, in small letters, you’ll see either “CFI-ZCT1*” or “CFI-ZCT1*A”. If there’s an “A” at the end, the RISE won’t work with your controller. If there’s not, you’re good to go.
Remember that this is a full remap kit, not just a wrap. If you just need a wrap, any wrap will work with any PS5 controller. There are plenty of options available, from the rugged and durable to the purely cosmetic.
Installation
As we mentioned, the outer wrap and controls are only half the package. The rest of the RISE kit includes a host of cables and a handful of circuit boards. There’s also a mini screwdriver, plastic spudger, and 17 extra screws. These screws are necessary to replace your existing controller screws. Basically, they’re a tad longer, enough to compensate for the added thickness. The tools are low-quality, but they’re not intended to last you for a lifetime. They’re meant to open and close the controller once, and perform the installation. For that purpose, they’re more than sufficient for the task.
Exactly how complex installation is will depend on what controls you intend on remapping. Unlike a lot of remap kits, the RISE kit is mostly solder-free. You can use simple in-line connections to connect to the X, O, triangle, square, L1, R1, L2, and R2 buttons. You can also map the four D-pad directions without using any soldering. Connecting these buttons requires some disassembly and basic installation. It’s time-consuming, but it’s nothing you can’t handle if you’ve worked with electronics before. To make things easier, eXtremeRate recommends following the steps in this video. The video is timestamped, so you can skip back and forth as needed to get to a particular step.
With all of that being said, if you want to get full functionality, you need to do a little bit of soldering. Specifically, the contacts for the touchpad, L3, and R3 buttons need to be soldered into place. This is completely optional, so there’s no pressure if you don’t know what you’re doing. How difficult the job is will most come down to your level of experienced. If you’ve never soldered before, we’d recommend skipping these contacts, or having a friend do the job. Making a mistake could damage your controller, which is clearly not worth the risk.
On the other hand, if you’re already experienced with soldering, a full installation shouldn’t be too tough. It’s just three wires that need to get soldered into place on top of the ordinary connections. The instructions for soldering are in the same video we linked for the regular installation instructions. To know whether you’ve done everything correctly, you can connect the control module to the bottom. Assuming everything is wired correctly and the controller is powered on, the LED indicator will light up. This indicates that the remap kit has been wired, and is communicating with the controller’s motherboard.

Performance
So far, we’ve talked a ton about design and installation. Those are important considerations. But even the best designed remap kit is going to fall flat if the buttons don’t work, or are tough to use. In that regard, we were very pleased with the RISE’s performance. Let’s start with the basics. To map one of the paddles, you first need to turn on your controller. Next, press and hold the programming button on the bottom of the control module. After three seconds, you’ll see the LED blink, and you’ll have entered programming mode. Press the button you want to map, then press the paddle you want to map it to. If the LED stops blinking, you know you’ve been successful.
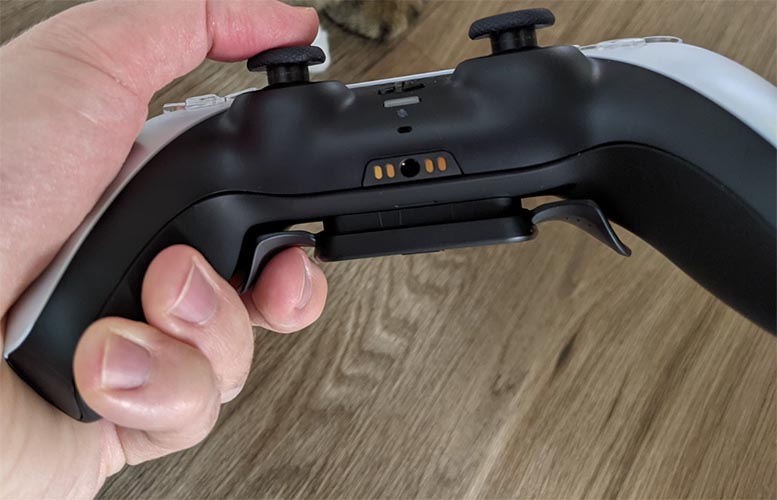
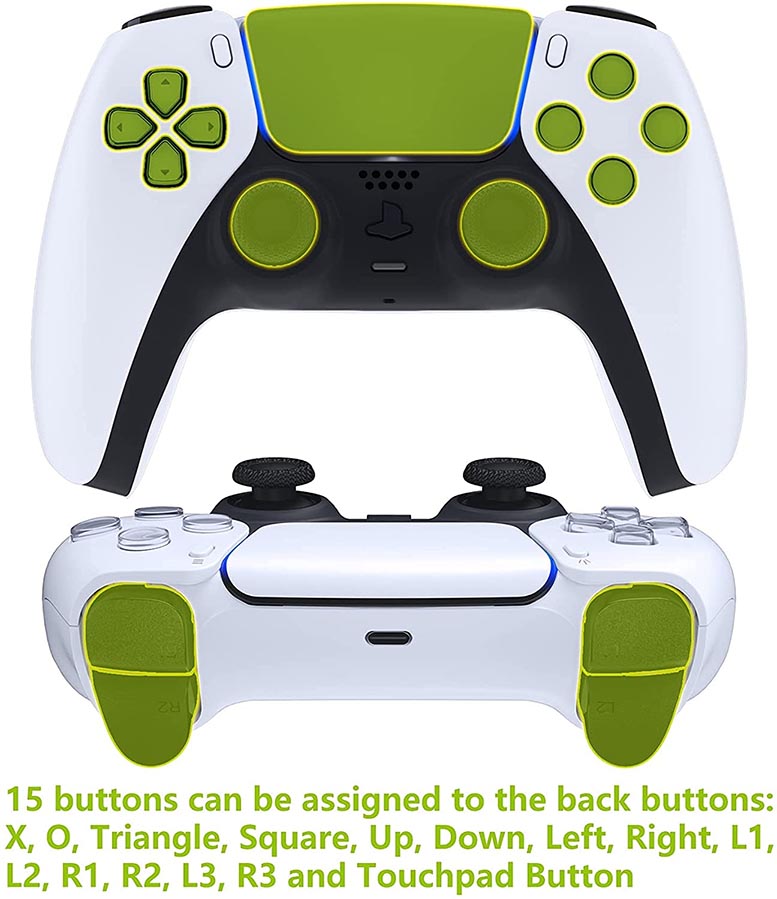
Buttons can be remapped during gameplay as needed. Keep in mind that going into programming mode won’t pause your game. So it’s best to hit pause, or open a menu before you change your controls. That way, you won’t end up getting your character killed. You can map any of your controller’s 15 standard buttons to either of the paddles. These include the X, O, Triangle, Square, Up, Down, Left, Right, L1, L2, R1, R2, L3, R3 and Touchpad Buttons. Keeping in mind that the last three require soldering, you still have 12 solder-free options to choose from. This gives you plenty of flexibility for adjusting your control scheme.
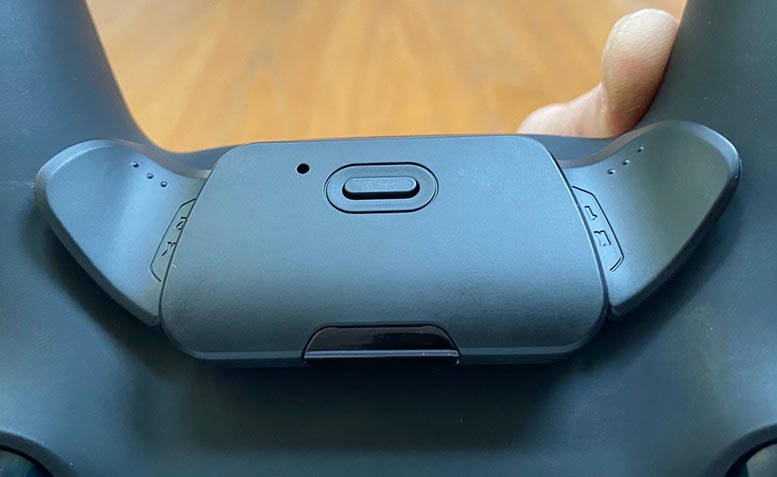
The paddles themselves feel great under your fingers. They’re nice and clicky, which provides excellent tactile response. At the same time, they’re not excessively loud. If you’re playing on a headset, your teammates won’t get distracted by your controller noises. The size, positioning, and shape are all ergonomic, and conform well to the controller’s existing profile. In terms of the actual physical controls, we had zero complaints.
Final Verdict
As you can see, the eXtremeRate RISE Remap Kit for PS5 is a very powerful remap kit. Without the need for any soldering, you can map up to 12 controls. And with a little extra effort, you can map three more. The design is ergonomic and well put together, and there are plenty of color options. We would have preferred a finish that didn’t attract dust, but all in all, that’s a minor complaint.
Meet Ry, “TechGuru,” a 36-year-old technology enthusiast with a deep passion for tech innovations. With extensive experience, he specializes in gaming hardware and software, and has expertise in gadgets, custom PCs, and audio.
Besides writing about tech and reviewing new products, he enjoys traveling, hiking, and photography. Committed to keeping up with the latest industry trends, he aims to guide readers in making informed tech decisions.

