Whether you already own Starlink or plan on getting it in the near future, you may be wondering how or where to buy accessories. With the one-time hardware cost of $599 + tax and shipping, you get the square dish, a standing mount, router, power cord and a 75′ proprietary dish/Ethernet cable. Anything extra, you’ll need to order separately.
But how (and where) can you buy all of the extra accessories that you may need? Ordering from the official Starlink Shop is typically ideal. However, there’s one stipulation; you must have an active Starlink account and be logged in to order or even browse their shop. While this may not be a big deal for existing customers, it’s a bit frustrating if you currently don’t have an active account but plan on purchasing Starlink in the future.
That said, today we’re going to showcase and discuss all of the official (and some unofficial) Starlink accessories and upgrades currently available. We’ll go over each one in detail and offer any aftermarket alternatives to each one.
Starlink Pivot Mount
As a popular option for roof mounting, the Starlink Pivot Mount is ideal for those wanting to place their dish on an angled surface. Although it’s not ideal (or recommended) for use on tile, slate or clay roofs, it works perfectly for a wide range of scenarios. Once installed, it provides a base to attach the dish to which can then be pivoted upward. Starlink recommends that it should be adjusted as vertically as possible for best results.
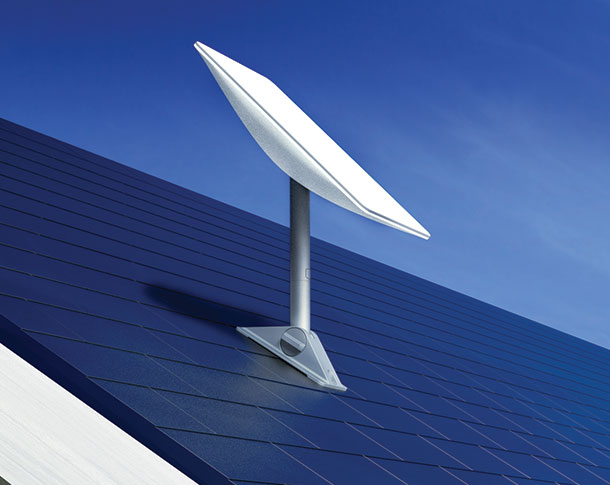
Including with the Pivot Mount is a lightweight, temporary carrying bag for the dish, sealing tape strips, sealing tape squares, two lag screws and forty wall clips for attaching and routing the cable. Although a stud finder, socket wrench, drill and 5/32″ drill bit are required, installation isn’t too complicated. Installation instructions are readily available. However, if you’re trying to install it on a shingled roof, you’ll also want to pickup the Flashing Mount as seen below.
As an alternative to the pivot mount, opting for a Non-Penetrating Roof Mount may be worth looking into. Rather than requiring any sort of drilling or permanent attachment, it rests sturdily on the ridge of your roof. This way, you can freely move it around or simply not commit to such a permanent install. Check out some other ways to mount your Starlink dish.
Starlink Flashing Mount
For permanently installing the Starlink dish to your shingled roof, the Flashing Mount is ideal. However, as a requirement, you must also purchase the Pivot Mount to be used in conjunction with the Flashing Mount.
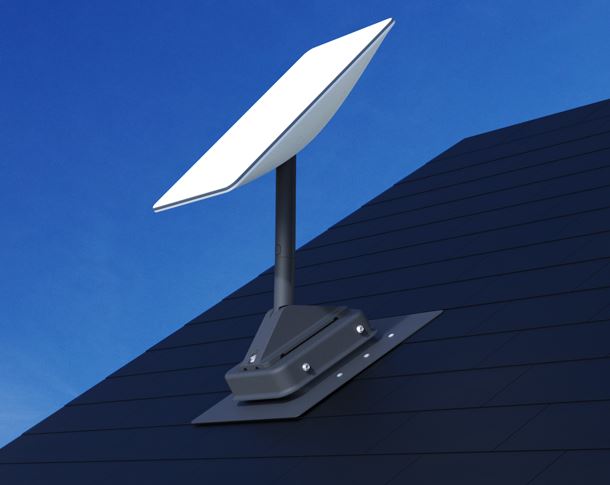
Designed to provide a water-tight seal, the Flashing Mount has a broad, flat base that fits cleanly underneath existing shingles or siding. It even allows you to put any extra cable within the base for a clean look. The kit comes included with a mount base, lid and foam gasket. In addition, you get a tracing tool, three 1/4″ screws, three lock nuts, five tek screws, eight truss head screws and three sealing washers.
Installation can be a bit cumbersome as several tools are required (and not included). You’ll need a power drill, philips drill bit, 5/16″ and 7/16″ socket wrenches and a standard 7/16″ wrench. In addition, you’ll also need a utility knife, pry bar, roof cement, measuring tape, stud finder and a pencil. A full installation guide is available to look over before you purchase it or if you have trouble with getting it setup.
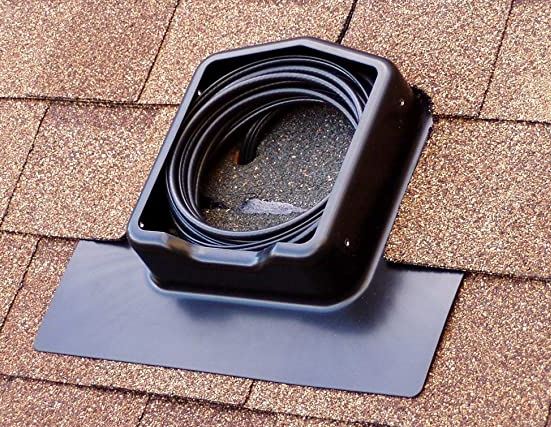
As an alternative, you could opt for the Commdeck Satellite Dish Mounting System (as seen above). It’s a bit more expensive, but readily available as an aftermarket option. However, as with the Starlink Flashing Mount, it must be paired with a standard dish mount such as the Winegard DS200A.
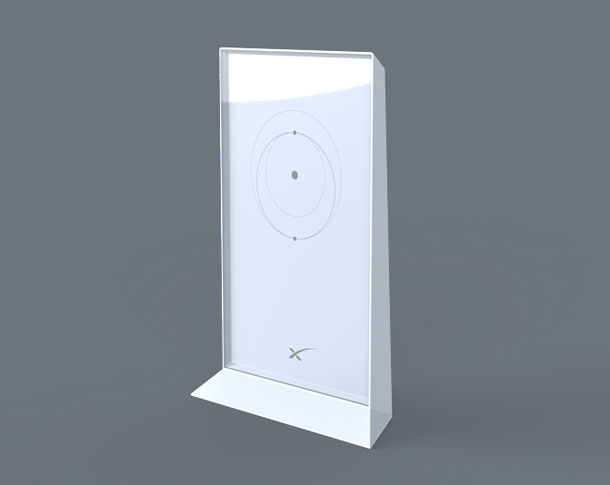
Starlink Mesh WiFi Router
Although most users feel that the included router offers plenty of speed and coverage, the Starlink Mesh WiFi Router can be added to improve dead zones in your home. Wherever extra coverage may be needed, you can plug-in one of their mesh routers to expand your Starlink system’s existing WiFi signal. Although it looks identical to the router, it’s a mesh node that can be placed anywhere indoors.
Setting up and configuring the Starlink Mesh WiFi Router is very straightforward. First, make sure your Starlink system is up and running and that you’re actively connected to it. Next, simply plug-in the mesh node into a power outlet. After this, wait a couple of minutes and then open up the Starlink app. At this time, you should see “PAIR NEW MESH NODE” appear. Click “PAIR” and the node will begin connecting to your network. Once paired, the mesh node will be visible on the Network screen within the app. If you have any trouble, refer to the mesh node installation guide.
Adding additional Starlink Mesh WiFi Routers to your network is simple. However, they don’t offer many advanced features such as parental controls, guest access or extra security. For these kind of features, you may want to consider an aftermarket alternative such as the TP-Link Deco AXE5400.
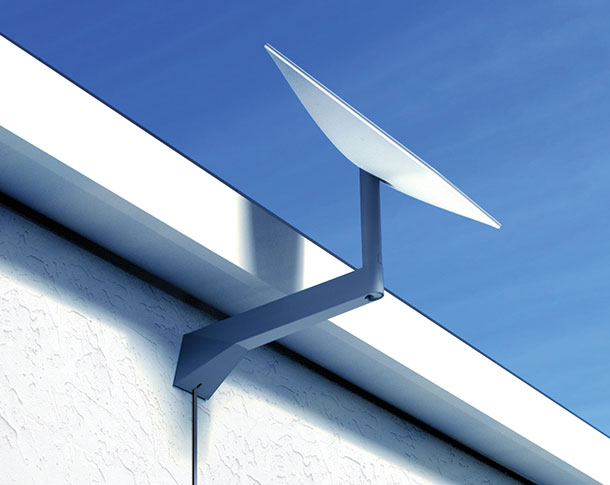
Starlink Long Wall Mount
If you don’t want to install the dish on top of your roof, you may opt for Starlink’s Long Wall Mount. Rather than being placed on your actual roof, it’s ideal for installation on an exterior wall near the top of the gable. The long “neck” on this mount offers ample clearance for eves and overhangs that may otherwise get in the way.
With the Long Wall Mount, you get two lag screws, silicone sealant, a temporary carrying bag, mounting template and forty wall clips. You’ll also need some additional items for a proper install. These include a power drill, socket wrench, level, stud finder, pencil 5/32″ drill bit and a 0.5″ x 2.5″ socket. Basically, you’re going to need to locate a stud, drill a couple pilot holes and seal it off with some silicone. Refer to the installation guide for further and/or more detailed instructions.
Starlink Short Wall Mount
Similar to the long wall mount, Starlink’s Short Wall Mount offers the same ability but with a shorter reach. For those with overhangs or gables that don’t extend that far, it’s better than having a wall mount that’s much too long for the location.

Just like the Long Wall Mount, there’s a few accessories included in the package. These include two lag screws, silicone sealant, forty wall clips and a temporary carrying bag for the dish. The detailed instruction manual also lists additional required items. You’ll also need a power drill, stud finder, socket wrench, level, pencil, 5/32″ drill bit and a 0.5″ x 2.5″ socket. The installation process is near-identical to the aforementioned, so make sure you’re comfortable with a bit of DIY drilling and mounting before fully attempting.
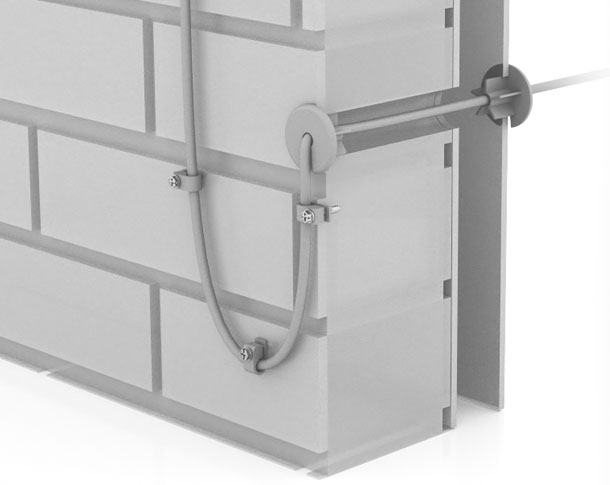
Masonry Routing Kit
If the building you’re installing Starlink within is made of brick, concrete, stucco or any other form of masonry, you may want the Masonry Routing Kit. Designed specifically for installations where drilling through a solid wall is required, it offers a clean and effective way to route the cable.
Starlink strictly recommends this kit only for those with prior experience. Needless to say, masonry isn’t very forgiving; you’ll definitely want to measure twice and drill once. Included within the kit is a 3/4″ spade bit, 3/4″ and 1/4″ drill bits, a cable routing tool, silicone sealant, five anchors, two grommets and ten wall clips. In addition to this, other required tools that you’ll need are a hammer drill, hammer, phillips head drill bit, stud finder and a decent set of goggles, glove and a face mask. See the instruction manual for further info.
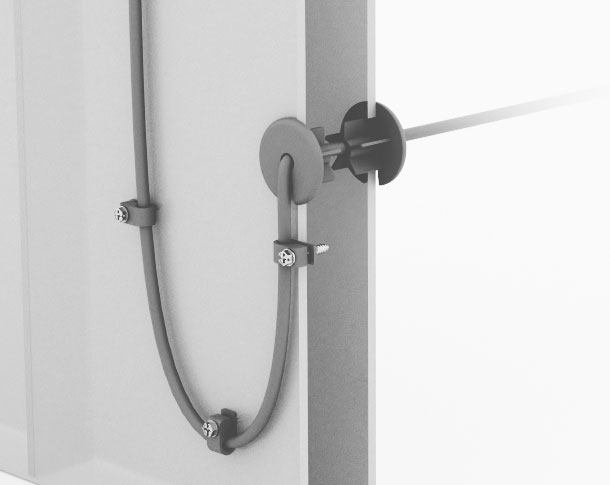
Cable Routing Kit
The standard Cable Routing Kit is designed for use with most walls. Offering a clean and tidy way to route the cable through most walls, it’s ideal for most scenarios where you won’t encounter any masonry.
Similar to the aforementioned Masonry Routing Kit, it comes included with almost everything you need for the job. Contained within the kit is a spade bit, cable routing tool, drill bit, silicone sealant, two grommets and ten wall clips. Although you’ll also need a power drill and stud finder, the installation instructions are a bit easier to follow than the masonry kit. However, Starlink highly recommends that you have prior experience before attempting to use the cable routing kit.
Starlink Ground Pole Mount
If mounting to your roof or another high vantage point isn’t an option, you may opt for the Starlink Ground Pole Mount. It’s a two-piece pole that measures 88.9″ tall or nearly 7.5 feet. While it may not offer a huge reach into the sky, it gets it up off of the ground without much guesswork. One end is to be attached to the dish while the other end must be dug 2 feet into the ground and hardened into a concrete foundation.
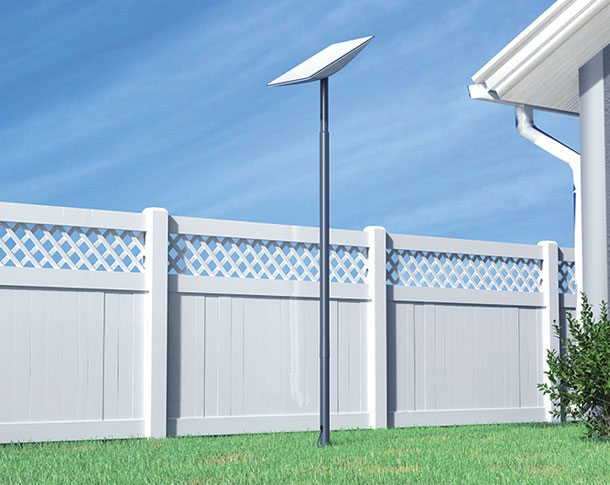
It goes without saying, you’ll want to be comfortable with digging a hole and mixing concrete. To obtain a clean install, you’ll need a multitude of accessories for the job. These include but are not limited to a mixing trough, concrete mix, shovel, gloves and a level. Detailed instructions are available so you can familiarize yourself with the installation before you tackle the job.
Alternatively, in our opinion, the Rohn 25 Series 40′ Tower is a much better alternative. It extends the dish as high as 40 feet above ground and contains a three-pole, triangular structure for plenty of integrity. However, the price is quite steep and installation is best to do with a helping hand (or two).
Starlink Replacement Cables
The cable that connects the dish to the router is a specialized piece of equipment. However, it’s actually just a fancy Ethernet cable with proprietary connectors (plugs) on each end. Regardless, the only place you can purchase them is directly through Starlink’s official shop.
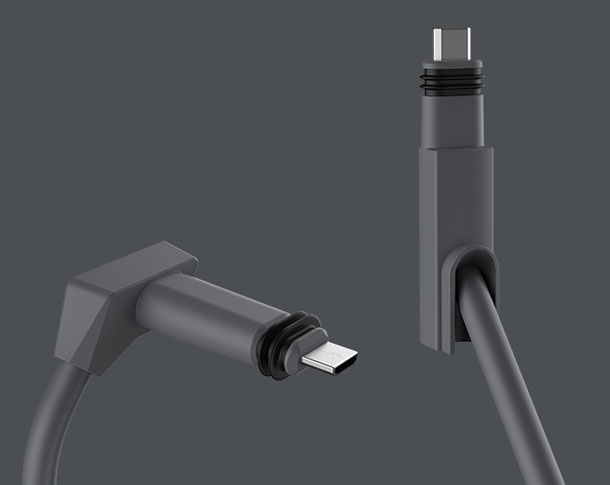
Available in both 75 foot and 150 foot lengths, it’s a good idea to pick up an extra cable in case you may ever need it. Especially if you travel with your Starlink and regularly setup and take down the equipment. While the cable itself seems thick and strong, the ends are equipped with metal tips that can easily bend or get clogged with debris and ultimately fail unexpectedly.
Starlink Pipe Adapter
The Starlink Pipe Adapter offers a simple way to attach the dish to any pole with a maximum diameter of 2.5″. This way, you can attach the dish to any existing pole you may already have setup, or simply make your own mount and use the pipe adapter at the end of it.
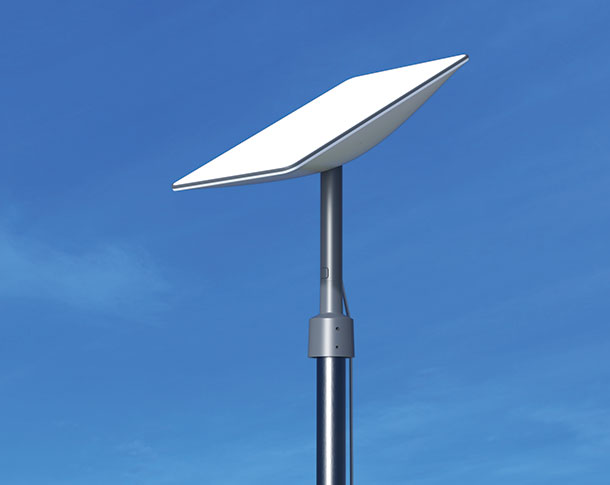
While the instruction manual for the pipe adapter isn’t very detailed, installation is easy. Simply fit the adapter onto one end of the pipe and use the four supplied screws to drill into the pole. This will securely attach it to the end so that there’s no wiggle room and sturdy points of connection in multiple spots. Many users have utilized this adapter for their own DIY installations and have found it very helpful.
When used in conjunction with a chimney mount such as the Winegard CM2012, you can extend the dish to an incredibly high spot without permanently attaching anything to the your home or structure.
Starlink Ethernet Adapter
If you aren’t already aware, the Starlink router does not have any Ethernet ports. Simply put, it only supports a wireless connection. If you require a hard-wired connection, you’ll definitely need the Starlink Ethernet Adapter.
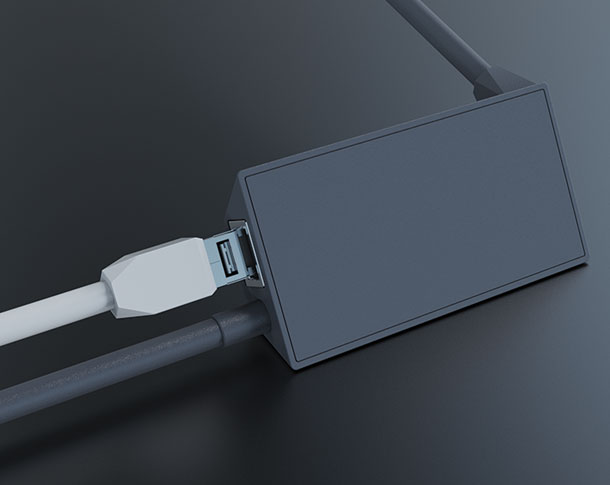
Installation is as easy as can be. Simply plug-in the dongle to the bottom of the router and connect the dish cable into the port on the opposite side. This will enable a single Ethernet port for plugging in your own device such as a switch, access point or other network accessory. As you can see in the instruction manual, there isn’t a whole lot to it. Just like setting up the dish for the first time, just plug it in and you’re good to go.
Starlink Travel Case
Although there are several Starlink Storage Cases currently available, the official Starlink Travel Case was recently released. It’s been under development for several months, ever since portability was announced earlier this year. Originally only available through a special invite, users are now able to order it directly. However, it’s often backordered and/or delayed so keep that in mind.
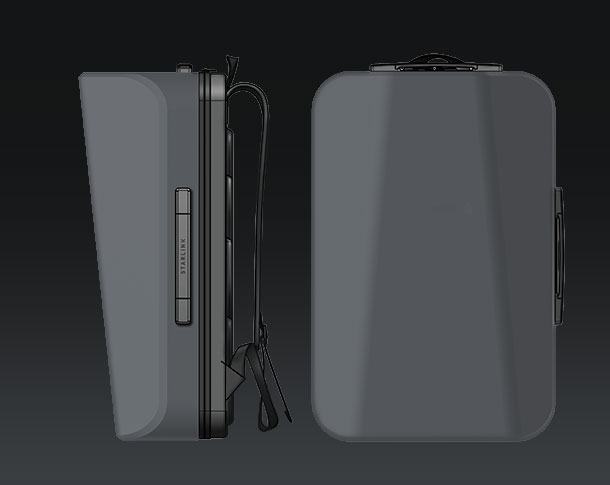
This official travel case boasts a hard-shell exterior with a tough zippered enclosure. Inside, there’s a molded foam insert that perfectly cradles all of the required accessories in the Starlink kit. There’s even two soft carrying pouches that house the router and power cable. The stand, dish, router and cables all rest perfectly inside with a very snug fit. On the outside, there’s a carrying handle and even straps for carrying it around like a backpack. While we can’t imagine you’d actually need to use it as a literal backpack, the straps are permanently fixed and cannot be removed.
For an even stronger and more secure alternative to the official travel case, look no further than the Pelican 1610 case with foam. It’s water-tight and much more impact resistant than anything else. Sure, it may be a little bit bulkier, but it provides unmatched protection for Starlink and additional accessories.
Final Thoughts on Starlink Accessories
Keep in mind that none of the official accessories for Starlink are available for you to order unless you have an existing account with an active membership. Accessing the Starlink Shop is easy, simply go to the following URL: https://shop.starlink.com. Take note that you must be actively logged in to view it. Thankfully, Starlink is usually pretty good about shipping accessories on-time and as quickly as possible.
We’ve showcased the entirety of Starlink’s accessories that are currently available as of September 2022. In total, there are 13 items in their shop if you include both lengths of replacement cables as one item. We’ll be on the lookout for any new, upcoming or updated accessories and update this article accordingly.
Meet Ry, “TechGuru,” a 36-year-old technology enthusiast with a deep passion for tech innovations. With extensive experience, he specializes in gaming hardware and software, and has expertise in gadgets, custom PCs, and audio.
Besides writing about tech and reviewing new products, he enjoys traveling, hiking, and photography. Committed to keeping up with the latest industry trends, he aims to guide readers in making informed tech decisions.
I am a Starlink original home version user as well as a newer RV version user. My question is, yes the cable plugs are special but what type is the metal connector that protrudes from the special formed ends. Is that piece custom as well. I find it hard to believe that someone does not make this connector which is leading to everyone having to hack up extra cables just to install old school cable ends. How brilliant engineers at Starlink failed to provide a device option to actually connect through the exterior for an RV unit is mind boggling. It’s like training an engineer how to have sex. They know the theory but it’s the real-world execution that confused them.
I recently discovered that a squirrel chewed the cable of my Starlink home dish (first version – permanent cable.) Any hope or help? I just moved and was hoping to sell it (I’ve got broadband now), but it’s junk unless I can fix/replace the cable.
You can terminate the two ends where the cable was eaten with RJ45 plugs and a male-to-male RJ45 adapter (two female 8-pin sockets back to back).
I have damaged the face of my dish can I buy a replacement dish only?????
I don’t think so, but try contacting Starlink customer support and they may help you out.