If you’ve been gaming for a long time, you’ve probably built up a collection of old consoles. And along with these consoles, you’ll have some treasured old games. But modern HD and 4K TVs aren’t always ideal for playing lower-resolution games. Now, you might be thinking this is obvious. Of course old, low-res games aren’t going to look as sharp as the latest and greatest. That’s part of the charm!
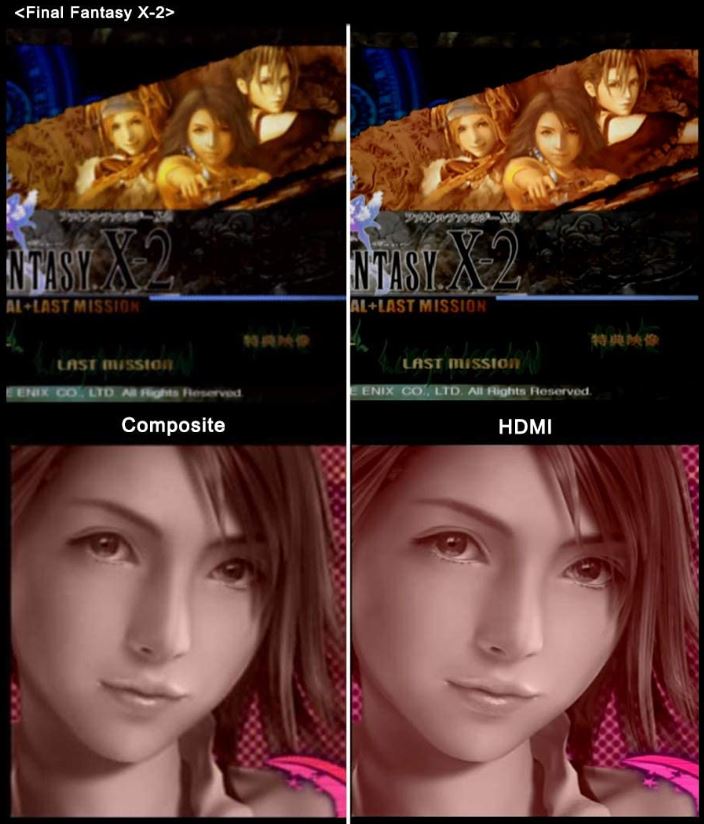
This much is true. The problem is that low-res games were designed to be played on low-res displays. When you take that same image and display it on a bigger screen with smaller, sharper pixels, it looks bad. Minor flaws in the graphics are accentuated. Edges that appeared soft now appear jagged. And backgrounds can become cluttered with motion artifacts. As a result, your games lose their charm. Depending on your TV, they can look objectively terrible. And that’s assuming your new TV even accepts an RGB or VGA input.
To play on an older console like a PlayStation 1 or PlayStation 2, you’ll want a converter that also upscales. In fact, even though PlayStation 3 consoles use an HD output, most PS3 games only play in 720p. So a 1080p upscaler can even be helpful for PS3 players. An upscaler takes the original video and converts it to a higher resolution for your TV. So instead of your PS1 game being sent to your TV in 480p, it gets sent in 720p or 1080p. Depending on the upscaler, they may even process the video further for better playback.
In the past, we’ve reviewed several upscalers and converters, including some for Sega Genesis and Sega Saturn. Now, we’re going to review the best PlayStation 1, 2, and 3 to HDMI upscaler/converters. We’ll begin with the Kaico OSSC. This is a SCART converter that converts a 21-pin PS1 or PS2 signal to HDMI. Next, we’ll look at the mClassic. This compact HDMI to HDMI converter is ideal for PS3 players who want better graphics on newer TVs. After that, we’ll move on to the RetroTINK 2X. This is a simple, inline SCART to HDMI adapter for earlier PlayStation consoles. Finally, we’ll look at the RAD2x. This is another PS1 and PS2 adapter, but with a pigtail design. Let’s look a bit closer, and see how each of these converters performs!
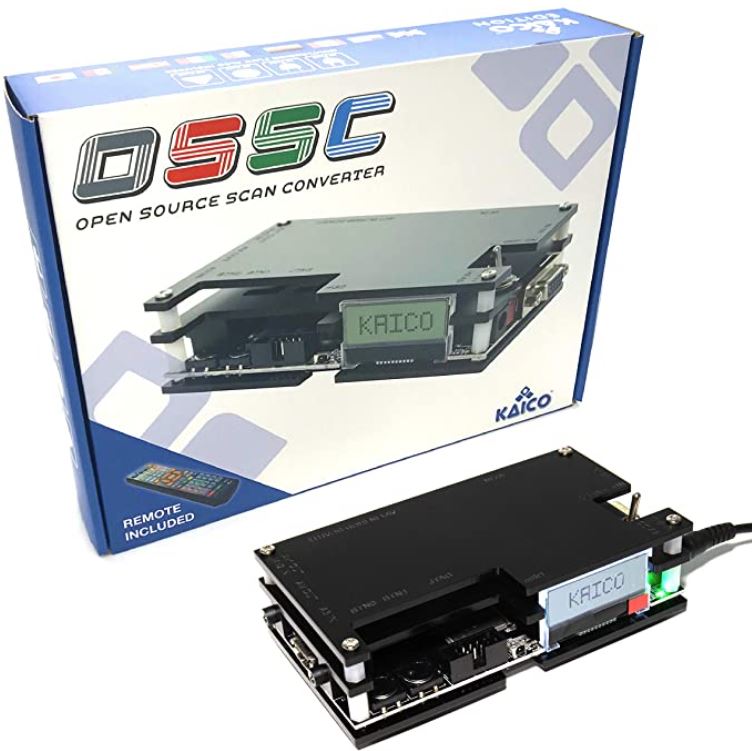
Kaico OSSC
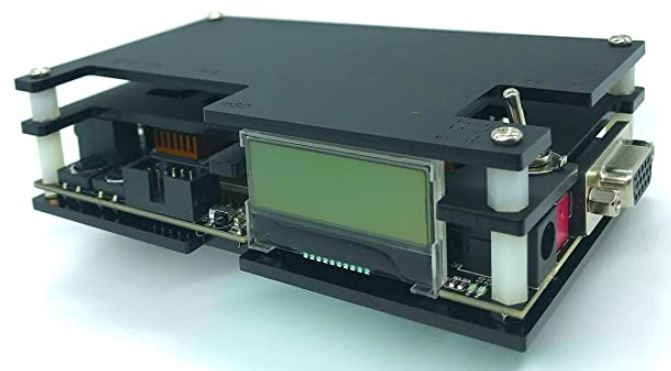
The Kaico OSSC is perhaps the most full-featured HDMI upscaler on our list. It’s a bit larger than a deck of cards, with a boxy design and an attractive, backlit LCD display. This display shows when the unit is powered on, and also lets you know the input and output status. Through a simple menu system, you can choose different output resolutions and adjust other settings. This is done with a handheld infrared remote, which is included in the package.
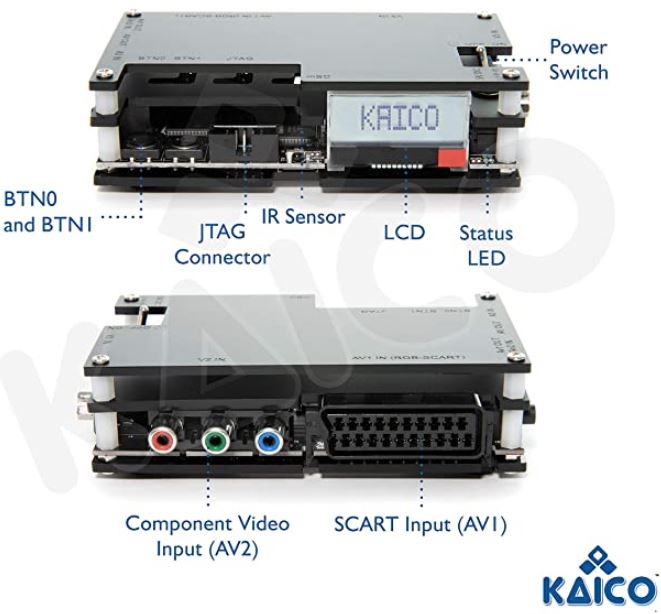
This upscaler is designed to accept signals from a SCART cable or an HD component cable. If you’ve never heard of SCART, don’t be too intimidated. It’s just the official name for the rectangular 21-pin connection on the back of the PlayStation 1 and 2. In the original PS1 and 2, the connecting cable splits from SCART on the console end to RGB on the TV end. The Kaico adapter will not work with these original cables. Instead, it comes with its own SCART to SCART cable for an easier connection. This doesn’t just work with early Sony consoles, either. It’s compatible with a number of older systems, including Amiga, Super Nintendo, Sega Saturn, and Sega Genesis. It can even be used for Gamecube consoles sold in the PAL region.

Next to the SCART input, you’ll notice a set of red, green, and blue component inputs. These can be used for HD component video only. They won’t fit an old RGB cable, and you shouldn’t try. That said, they can be used for connecting a PlayStation 3 that has a component adapter.
Either way, your HDMI output port is on the right side of the adapter. There’s an HDMI cable included in the kit for your convenience. Here’s where things get a little bit weird. There’s also a component port in this area. It can serve either as an input or an output depending on your mode. When converting from a SCART connection, it works as a bypass for sending audio to a soundbar or other speaker. When converting from a component connection, it serves as the audio input. In this case, you won’t have a separate audio out port. You’ll need a TV that’s compatible with ARC or eARC to use a separate soundbar.
Video quality on the Kaico is quite good. It accepts 240p, 288p, 480i, and 576i inputs. These will be deinterlaced which reduces artifacts and creates a smoother image. You can also input higher-resolution 720p and even 1080i inputs. 720p can be upscaled to 1080i if desired, but it won’t receive any special treatment like anti-aliasing.
mClassic
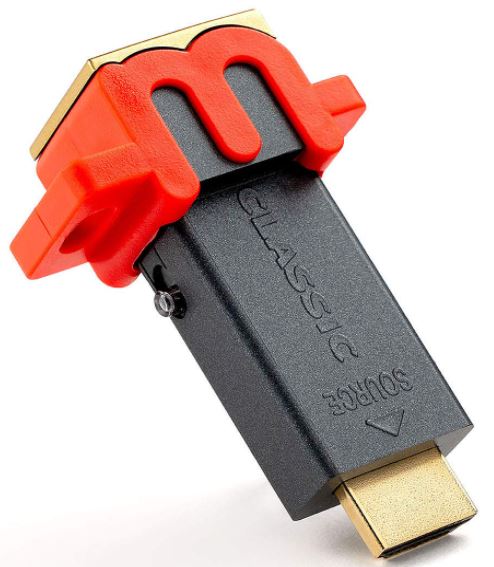
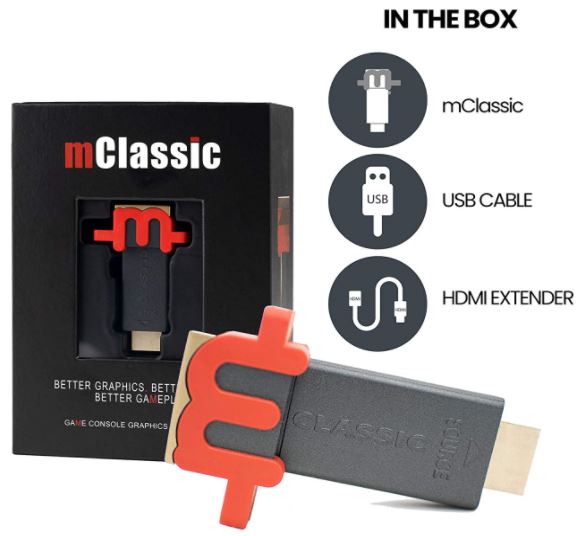
The mClassic is different from our other selections in that it’s a simple HDMI upscaler/converter. This makes it perfect for the PS3, which already has an HDMI output. The mClassic allows you to upscale this video without the need for any adapter. It’s a mid-sized fob, a little over six inches long, and plugs into the back of your console. There’s even an oversized red grip on the housing that makes it easy to remove. On the very back, there’s an HDMI output port, where you can connect the cable that goes to your TV. In this same end of the unit, there’s also a Micro USB port. This is for providing power, and will need to be plugged in. Unless you’re using a ton of other USB accessories, you can just plug it into the back of your PS3.
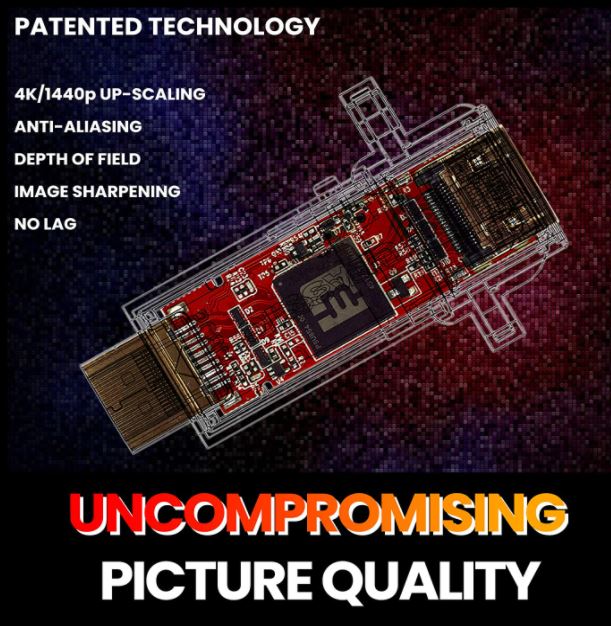
This upscaler is capable of 1080p or 1440p output. 1440p is equivalent to 2K, so you can actually upscale your PS3 games for newer, better-than-HD displays. Admittedly, it’s not 4K quality. But it’s twice the vertical pixels — and four times the total pixels — of the PS3’s native 720p resolution. Moreover, you actually do get 4K upscaling for movies. Your PS3’s DVD player will now look as crisp as a Blu-Ray player.
Admittedly, the mClassic only has a niche use as a PS1 or PS2 upscaler. Since it only accepts an HDMI input, you’ll already need a separate adapter just to plug it in. In most cases, you’ll be better off with a SCART upscaler or even an ordinary RGB upscaler. But if you watch a ton of DVDs, it could be with your while to take advantage of the 4K DVD upscaling. It could also be a valid choice if you’re already using an HDMI adapter that doesn’t upscale.
The mClassic’s best feature is its anti-aliasing capability. When curves and diagonals are drawn on a display, they actually look like a jagged, stepped line at the per-pixel level. They simply appear smooth because the pixels are too small. When these images are then displayed on a higher-resolution screen, each pixel is converted into a block of pixels. Suddenly, smooth curves develop an irregular, sawtooth edge that looks horrendous. Anti-aliasing technology smooths these jagged edges, so the upscaled curves and diagonals are crisp and clean.
RetroTINK 2X
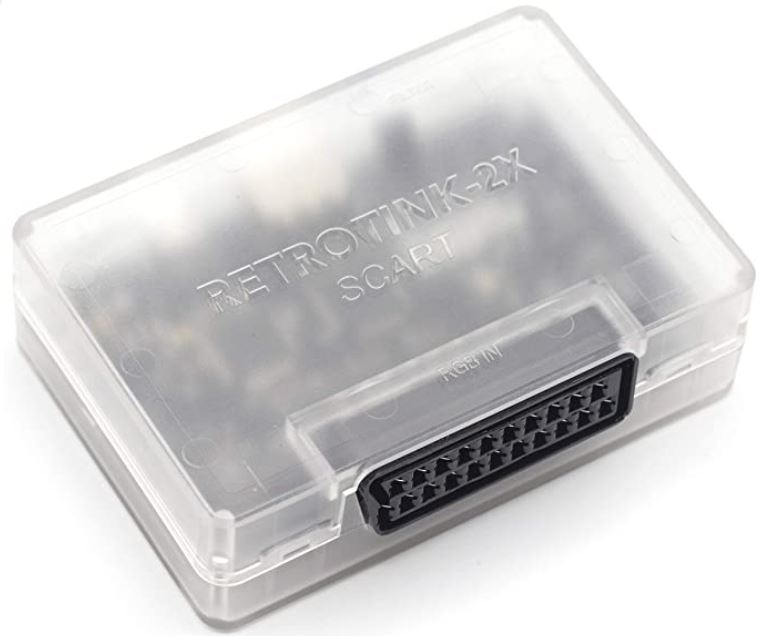
The RetroTINK 2X is a more scaled-down upscaler, the smallest on our list. It’s designed for in-line use, and to be as unobtrusive as possible. It’s compact and rectangular, with a semi-transparent white housing. On one end, you’ll find a 21-pin SCART input. This is the one and only way to connect your PlayStation. As a result, the RetroTINK won’t work with the PlayStation 3. It can only be used with the PlayStation 1 or 2. Unfortunately, there’s no SCART to SCART cable in the kit. So you’ll need to buy one separately in order to even hook up your console.
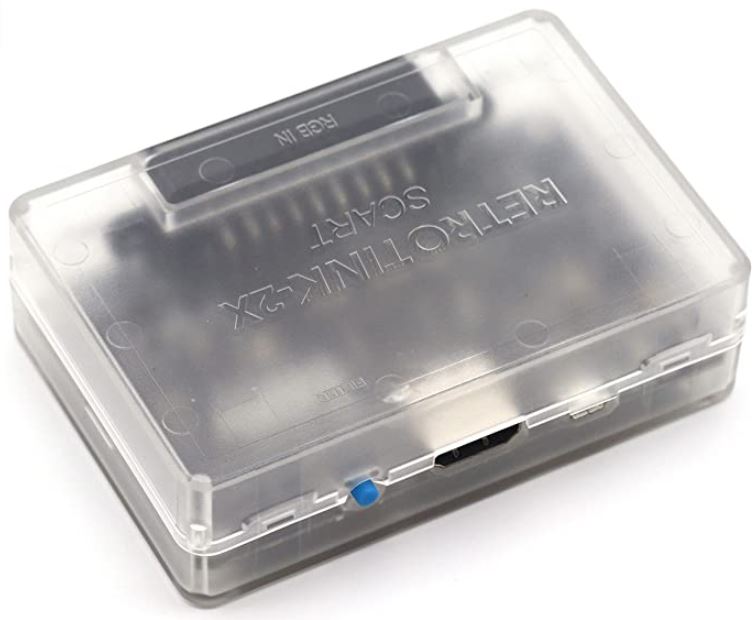
The other end of the housing plays host to the HDMI output port. This is self-explanatory, and located smack in the center of the housing to make it easy to find. Next to the HDMI port, you’ll also notice a Micro USB port. This is used to supply power, and needs to be plugged into a powered USB port or an AC adapter. A USB cord is included in the kit, so you’re well-equipped in this regard.
As its name implies, the RetroTINK is built specifically for older game consoles. As such, there’s no support for higher input resolutions. It will accept 240p, 288p, 480i, and 576i, and that’s all. On the other hand, that’s all you really need, since it’s the highest resolution you’ll get from a PS2. Depending on the input resolution, the output will be different. 240p and 480i inputs will be converted to 480p. 288p and 576i inputs will be converted to 576p.
This isn’t quite as useful as 1080p upscaling, but it still serves a purpose. First, the video will be a progressive scan format, not interlaced. This means less motion blur and smoother playback in general. Second, it brings the video into a range that your TV is more likely to support. In addition, the RetroTINK passes your video through a handful of filters. These help to reduce blockiness and smooth images, so your video is surprisingly clear.
RAD2x
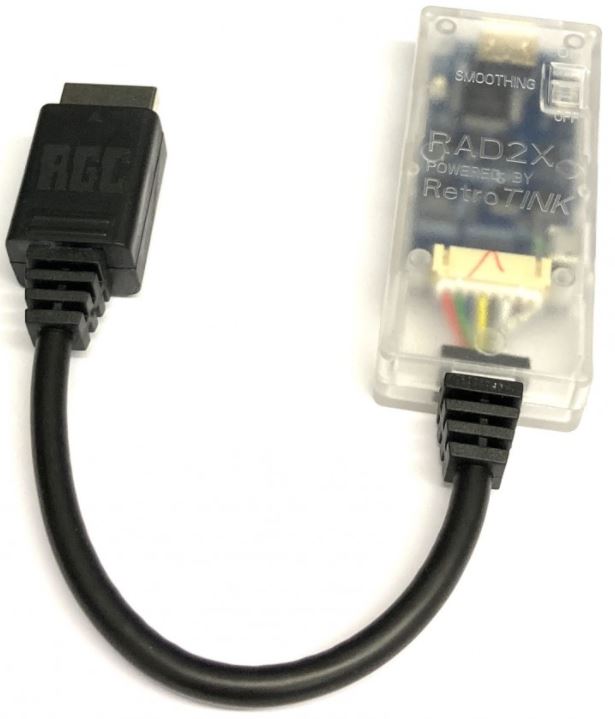
The RAD2x is a pigtail-style adapter and upscaler that was designed for the PS1. It’s a simple six-inch pigtail cable that plugs into your SCART output port. While it was designed for the PS1, it’s also compatible with both the slimmed-down PSOne and the PlayStation 2. However, the RAD2X will only accept 240i, 240p, and 480i signals. Therefore, the PlayStation 2 needs to be set to RGB mode. In Y Cb/Pb Cr/Pr mode, some games will be in higher resolutions, and your screen will go black.
At the other end of the pigtail, there’s a semi-transparent white plastic block with a mini C HDMI port. This was an unusual choice, since you can’t connect it to your TV with an ordinary HDMI cable. You’ll need a mini C HDMI to HDMI cable, and there’s none in the package. Another thing that’s not included is a Micro USB cable, which will be required to power the upscaler.
Output quality is reasonably good, at either 480p or 576p. Much like the RetroTINK, it deinterlaces and doubles the line count. It also has built-in anti-aliasing technology, and a switch to turn that function on and off. This makes it a solid choice for shooters, where anti-aliasing can actually obscure the hit box.
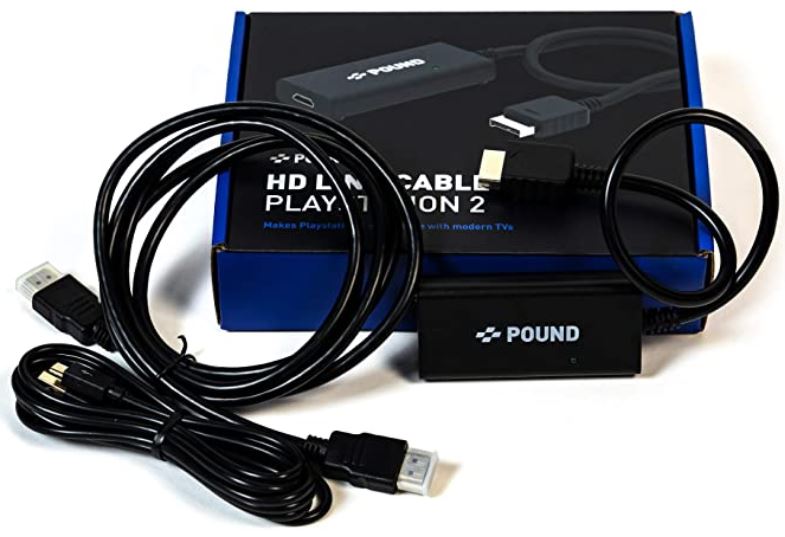
POUND HDMI HD Link Cable for PlayStation
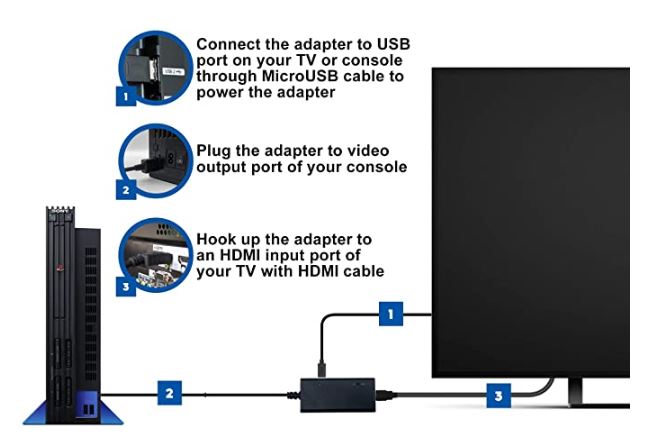
The POUND HDMI HD Link Cable for PlayStation is one of the most affordable on our list. It’s designed to attach easily to the back of your PlayStation, with a short, six-inch cable. There’s also a six-foot HDMI cable included, to attach to your television. Finally, there’s a short Micro USB cable for power. This cable is supposed to be plugged into one of the USB ports on your PlayStation.
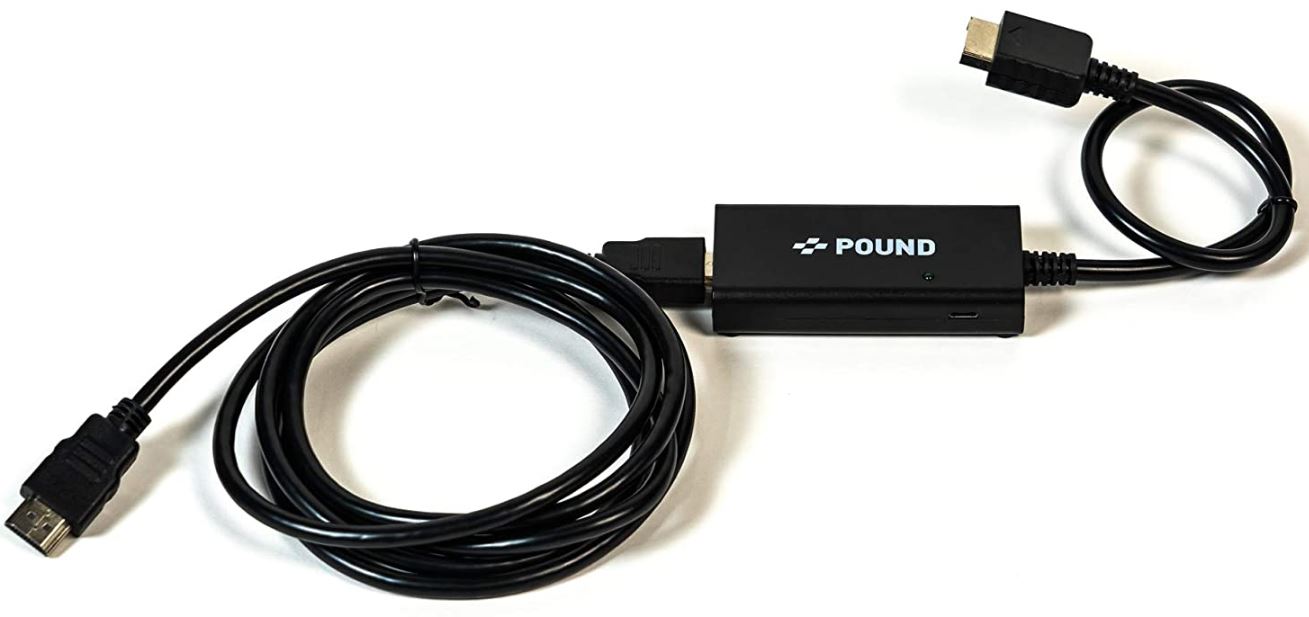
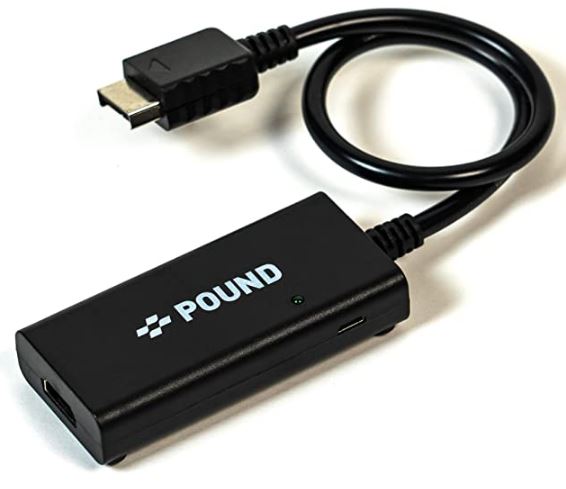
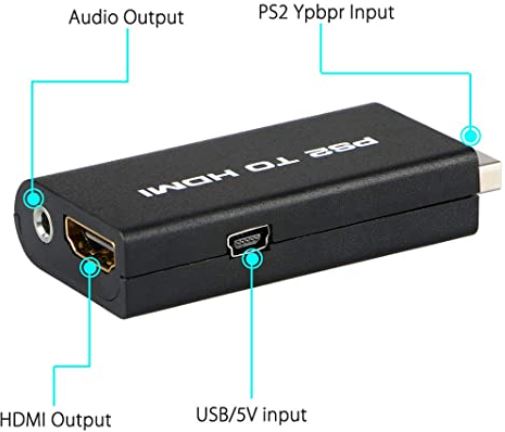
The converter itself is very well constructed. It has a slick aluminum shell, with a black anodized finish that’s easy to dust off. On one end, you’ll see the PlayStation display cable we already mentioned. On the other, there’s an HDMI port for connecting to your TV. Next to the HDMI port, there’s also a 3.5mm aux jack. This makes it easy to plug in a pair of headphones if your TV doesn’t have a headphone port. On the top, there’s an attractive “Pound” logo, printed in white text. Next to the logo, there’s a small LED light that lights up when the unit is powered. The Micro USB power port is located on the front. And on the bottom, there are four small rubber skids that will keep it from sliding off a shelf.
Along with the converter and the cables, you get a one-year manufacturer’s warranty. Most electronics fail in the first year if they’re going to fail at all. As a result, this one-year warranty is more than good enough. In addition, Pound provides 24/7 customer service.
Conversion and Compatibility
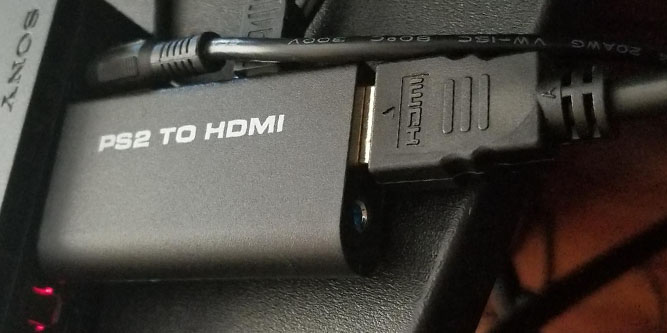
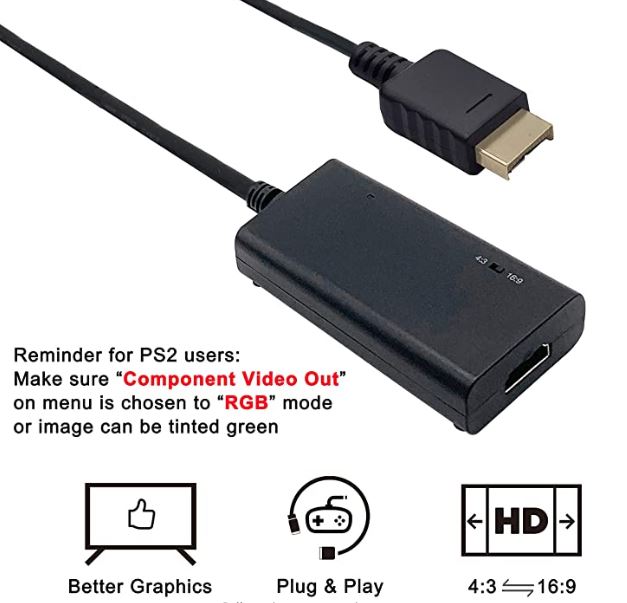
Because the POUND HDMI HD Link Cable has a built-in PlayStation cable, it’s not suitable for other older game systems. Instead, you’ll need to use an adapter that’s designed for that system. That said, you’ll get decent fidelity to the original PlayStation graphics. If you’re using a PlayStation 2, you’ll need to set the graphics to Y Pb Pr or Y Cb Cr. If you use CVBS, you’re going to see weird random color schemes that look nothing like the original games.
Another issue you may run into is that your HDTV must support 480p resolution. Many HDTVs only support 720p and up, which can create issues. As a result, you’ll want to check your TV’s specs before you buy. That said, because the PlayStation 2 outputs at 480p, you won’t have to worry about any artifacts due to upscaling. With the PlayStation 1, the native resolution is 240p, so you might see some small artifacts. But overall, the quality is still excellent. Best of all, the output is automatically in a 4:3 aspect ratio. You won’t have to worry about the image stretching and distorting the original graphics. Again, this will depend on your TV, since some TVs will automatically stretch 4:3 inputs to fit the screen. But if you’ve got the right TV, you’re looking at an excellent converter.
LevelHike HDMI Cable for PS1 & PS2
The LevelHike HDMI Cable for PS1 & PS2 is another cheaper option. The PlayStation connection cable is attached to one side of the converter, and measures one foot in length. This makes placement relatively easy, whether behind your PlayStation or next to it on the shelf. You also get a six-foot HDMI cable and a six-foot Micro USB cable. In theory, you could just draw power from your PlayStation. But the six-foot cable gives you the option of plugging into your TV or an AC adapter.
Like the Pound converter, the LevelHike HDMI Cable is constructed from anodized aluminum. This makes it very sturdy, so it won’t break easily from an accidental drop. The HDMI port is located on the opposite side from the PlayStation cable, which makes cable management a snap. There’s a small LED indicator on the top to let you know when the converter is powered. And the Micro USB port is located conveniently in the side. On the bottom of the unit, there are four rubber skids to ensure the converter stays in place. On top, you’ll see a small selector switch, which can change between 4:3 and 16:9 aspect ratios. Finally, you get a one-year warranty, which covers you for any defects in materials or workmanship.
Conversion and Compatibility
The LevelHike HDMI Cable automatically upscales your PlayStation’s video to 720p. This has a couple of advantages. First, it can help smooth out the edges on games with jagged graphics. Second, it makes the converter compatible with any modern HDTV. On the downside, if you prefer an older, more retro look, you may not like this feature. It all depends on what you want. Regardless, the colors will be true to the original without the need to mess around with your PlayStation’s settings. So you won’t have to worry about your classic games looking “off”.
The ability to change the aspect ratio is also a great feature. The reason for this is that different models of TV handle aspect ratio in different ways. Some TVs will automatically stretch 4:3 inputs to fit the screen, regardless of settings. Others will cut the edges off of 16:9 inputs when the TV is set to 4:3. By giving you both options, the LevelHike ensures that their converter is compatible with any TV. Moreover, the converter has another trick up its sleeve: it supports PAL playback. So if you want to play some European games in the US, you won’t have any compatibility issues. The LevelHike converter will automatically convert it to NTSC.
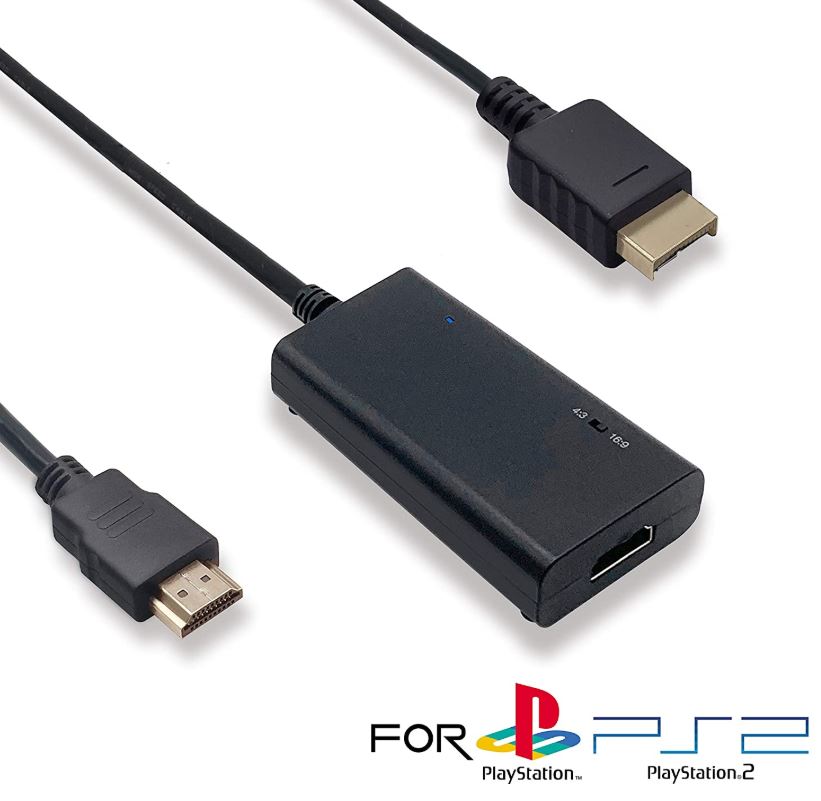
Farenow PS2 to HDMI Converter
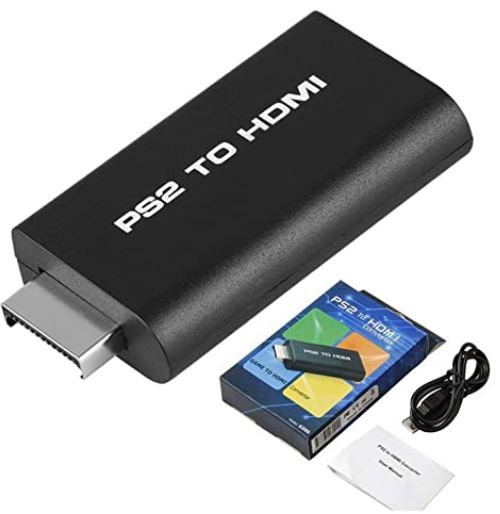
The Farenow PS2 to HDMI Converter works a bit differently than the last two cheaper options we looked at. Instead of connecting to your PlayStation with a cable, it plugs directly into the back. This means you won’t have to dedicate shelf space to an adapter. On the other hand, it’s going to protrude out the back of your PlayStation. So you’re going to need plenty of clearance around the back of your PlayStation to make it work. Then again, if your console is on a modern, backless shelf, clearance is not going to be a concern.
To accommodate this design, the Farenow converter is a bit lighter than the last one. It’s constructed from ABS plastic, rather than aluminum, but it still has a matte finish. Keeping your console shelf dust-free is not going to be a problem. The Micro USB power port is oriented towards the right, which makes it easy to plug in. To accommodate this, there’s a one-foot Micro USB cable included in the kit. On the back of the converter, you’ll find the HDMI port. There’s also a six-foot HDMI cable included in the box, so you can connect to your TV in any configuration.
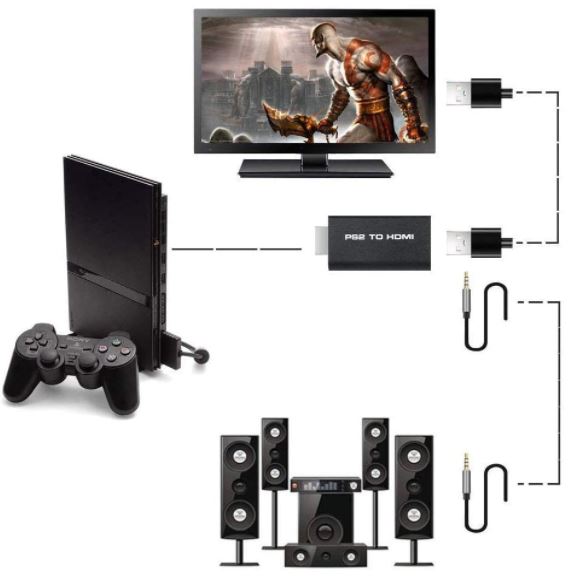
One major advantage of the Farenow converter’s design is that the lack of an input cable means lower latency. This means you’ll have finer control over your game. In addition, there’s a 3.5mm aux jack next to the HDMI port. So if you’re gaming while your family is sleeping, you can connect a pair of headphones directly to your PlayStation.
Conversion and Compatibility
Like the LevelHike converter, the Farenow converter upscales the PlayStation’s native resolution up to 720p. As a result, you don’t have to worry about compatibility with any modern HD television. The upscaling doesn’t produce many artifacts, so your video quality will be excellent. RPG players will very much appreciate the clarity of text, which is very easy to read. Better yet, you don’t have to worry about color fidelity. The Farenow converter remains completely true to your PlayStation’s original colors, regardless of settings.
The one drawback of the Farenow converter is that it only outputs in 16:9, with the image stretched. In theory, your TV should be able to fix this by switching to a 4:3 aspect ratio. Unfortunately, not all TVs handle this switch in the same way. If your TV compresses the image, it’s going to look perfect. On the other hand, if your TV cuts off the edges, you won’t be able to see the entire image. The best way to test this is to change the settings while watching any BluRay or DVD. If the image gets squished, your TV will work with the Farenow converter. If the edges are cut off, it won’t.
Final Verdict
So, which one of these PlayStation to HDMI upscaler/converters is the best choice for you? If you don’t mind a larger adapter, the Kaico OSSC is the best choice for PS1 and PS2 owners. With its SCART to HDMI interface, it’s easy to use, and it even includes an audio bypass for soundbars. The video quality and upscaling are generally excellent, too, so picture quality is no issue. There’s less benefit here for PS3 owners although the Kaico will work with a component HD connection.
The mClassic is a little bit different. With only an HDMI to HDMI connection, your options are a bit more limited. That said, it provides 2K upscaling for gaming and 4K upscaling for ordinary videos. For PS3 players, or other PlayStation players with an HDMI adapter, it’s an obvious choice.
The RetroTINK 2X takes a more minimalist approach. It’s theoretically a solid choice for travel, but the lack of a SCART cable was disappointing. If you want to take advantage of the compact form factor, you’ll need to buy your own cable. That said, the anti-aliasing and deinterlacing work quite well, and the upscaled video looks as good as the original.
The RAD2x does everything the RetroTINK does, but it has a pigtail-style design. This means it plugs right into your console, with no need for a patch cable. On the other hand, it requires a mini C HDMI cable to connect to your TV. But the benefit of an anti-aliasing toggle switch is well worth the added expense of another cable.
The POUND HDMI HD Link Cable for PlayStation is the most affordable of the bunch. It doesn’t upscale the video, so you won’t have to worry about any artifacts. That said, you’ll need to adjust your PlayStation’s color settings. And if your TV won’t accept a 480p input, you’re out of luck.
The LevelHike HDMI Cable for PS1 & PS2 provides decent compatibility. It will work with almost any TV, since it upscales to 720p and lets you change the aspect ratio. On the other hand, it’s a bit large and bulky. But you can play PAL games, so you do get some added value.
The Farenow PS2 to HDMI Converter provides better performance than the LevelHike. Unfortunately, it outputs the game in a stretched 16:9 format. Depending on your TV, this may or may not be fixable.
Meet Ry, “TechGuru,” a 36-year-old technology enthusiast with a deep passion for tech innovations. With extensive experience, he specializes in gaming hardware and software, and has expertise in gadgets, custom PCs, and audio.
Besides writing about tech and reviewing new products, he enjoys traveling, hiking, and photography. Committed to keeping up with the latest industry trends, he aims to guide readers in making informed tech decisions.
Hi,
Nice article! Could i ask a couple of questions?
Basically my son wants to play the original Tomb Raiders (ps1 games) on our 46inch hd tv with a ps2 and last time he tried this the games picture was awful. It basically looked like the games pixels were stretched to 50mm square each. Will these products sort that out, so that the gales looks as smooth as it did back inthe old days on a smaller crt. Tv!
Also ive tead on Amazon that the Eeekit doesnt play ps1 games is thatbright!?
Thanks
I just bought and meticilously tested out the LevelHike against the EEEKit. My results varied a bit from what was in the review, so these results may be of some value to somebody looking to shop for these. I tested these on a 1080p 42 inch TV on both a Fat and a Slim PS2 (both systems output identically). I believe that my TV has either no internal upscaling, or a rather poor algorythm for upscaling, because if the image is not upscaled prior to getting to my TV’s inputs, it looks quite unacceptable usually. Testing on Mega Man Anniversary Collection (for PS2) I found the EEEKit’s upscaling to be not as smoothed-out as the LevlelHike, as seen playing the 1st level on Mega Man 8. I almost thought there was no upscaling on the EEEKit adapter. However, the colors were genuinly correct on the EEEKit, whereas the colors and black/white level were a bit muted on the LevelHike, which I was mostly able to fix by adjusting my contract, brightness, and color saturation up (contrast & brightness from 53 to 91, and color from 56 to 70-ish). The level I was testing was so muted that I actually lost background detail and it was necessary to readjust my blacks/whites to get it back. I like the picture much better on the LevelHike, but the color issue would be a bummer if I weren’t able to fix it manually. The EEEKit was playable for sure, and has the perfect colors going for it (and 1/3 the price of LevelHike’s), but when manually forcing the image back to 4:3 on my TV’s settings, the TV over-compresses the image so everything is a tiny bit skinnier/taller-looking than it should be, which is a let down for compatibility with this TV set. I will be following-up with both manufacturers to get an explanation (LevelHike on their color; EEEKit on their upscaling). I would like to rule out having defective adapters. Pretty happy overall with both for the price I paid for each, but at this point, I would say the LevelHike is a clear winner for my 1080p 42″ TV set, since graphical representation (smooth images with no artifacts, and proper proportions) take priority over color/black & white level fidelity, especially when the latter can be readjusted manually to get rid of the issue.
Looks like the EEEKit has no upscaler…It is locked at Enhanced Defintition resolutions (480 i/p, 576i). I can see on the product packaging that it does not give the output resolution, just dances around the topic by saying “Outputs pure digital HDMI video/audio signals”. Also, a quick search under the questions section of the Amazon listing I purchased from shows everybody confirming that there is not upscaling in this unit. The upscaling mentioned in the main article above may have been from the TV itself (instead of coming from the adapter), or it may have been a misprint/mistake.
I think the best option for you will be the next one:
You can connect the hdmi video output of a good laptop to your TV, basically playing the PS1 game on an emulator (ex. ePSXe). The emulator allows you to pre-render the output picture with a lot of enhancements like anisotropic filtering, stretching, smoothing, internal resolution scaling.
In this manner, you will get on your TV a picture which is a lot better comparing to that one as if you were playing on an original PSX.