
The Xbox One and PlayStation 4 have dominated the home console market for the past decade. And even as gamers gear up with the newer Xbox and Sony consoles, they’re hardly obsolete. At present, the PS5 and Xbox Series X/S have only a handful of exclusive titles. Of all the titles in Microsoft Game Pass, for example, only four are currently next-gen exclusive. The fact is that many people haven’t been able to buy a next-gen system yet, even at this late date. Supply chain shortages have made the new systems scarce, so even many serious gamers are still using last-gen consoles. As a result, many publishers have pushed back their next-gen exclusives until 2022 or even further.
All of this means that your PS4 or Xbox One still has years of useful life ahead of it. If you’re dealing with controller issues, you don’t want to have to suffer for the next several years. Thankfully, there are other options besides buying a new controller. There are plenty of aftermarket parts that you can use to revitalize your existing controller. We’ve looked at a number of these, such as analog thumb stick grips for Xbox One and PS4. But some aftermarket parts can be a little more involved than others. For example, what if you need to replace the entire analog stick, not just the grip?
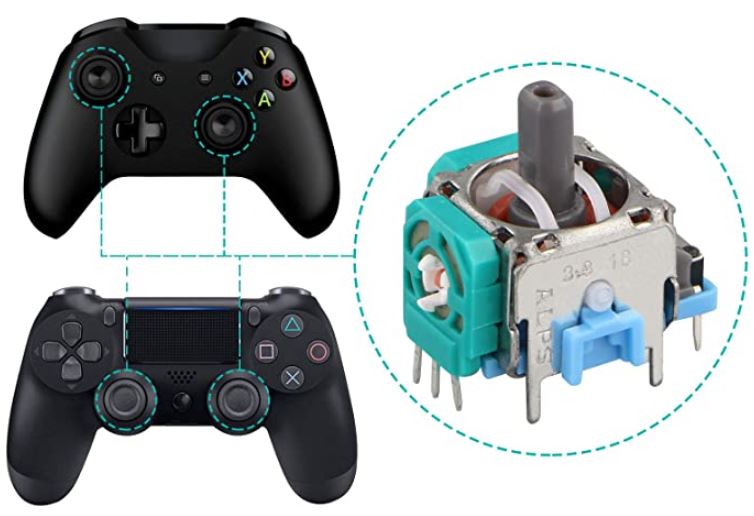
Believe it or not, there are multiple options for you to do just that. With a little ingenuity – and elbow grease – you can easily replace the thumb sticks in any controller. Today, we’ll be looking at three different options. We’ll begin by reviewing the EEEKit 3D Replacement Analog Stick. This is a replacement for original PS4 DualShock and all Xbox One controllers, and comes in a six-pack. Next, we’ll check out the ElecGear Replacement Analog Joystick. This is a replacement for later-gen PS4 controllers, although the 3-prong side sensor is universal. Finally, we’ll examine the RGEEK 3D Analog Stick. This is a more affordable option for original PS4 DualShock and all Xbox One controllers. Which one is right for you? Let’s look a little closer, and see what we learn!
Joystick Replacement Basics
Before we look at individual analog sticks, let’s talk about the nuts and bolts of joystick replacement. This is a more complicated task than many controller modifications, and you’ll need the right tools. You’re going to want a soldering iron, as well as good quality flux core solder. If you have an Xbox controller, you’ll need a Torx T8 screwdriver. For the PlayStation 4 controller, you’ll need a Philips #000 instead. A plastic spudger is a good idea for either controller, but it isn’t strictly necessary.
The first step is to unscrew the bottom half of the controller. On the Xbox, you’ll first need to remove the battery and expose the battery compartment. Take out all the screws, and set them somewhere where they’re not likely to get lost. A magnetic dish is a great choice for this task. With the screws removed, pry the top and bottom halves apart. It helps to apply pressure from both sides. Squeeze as hard as you need to. Unless you’re Andre the Giant, you’re not going to damage the controller housing with hand pressure alone. This is where the plastic spudger comes in handy. You can use it to pry apart the two halves without gouging the plastic.
With the back of the controller removed, you’ll need to take out the motherboard. You’ll also have to remove the internal battery pack on the PlayStation 4 controller. Be careful with the connecting ribbons. The small clips are very delicate, and it’s easy to damage them if you’re not as gentle as you need to be. Flip the board over, and you’ll see the top half, with the joysticks attached. Now, you’ll have to remove the thumbstick caps to get at the actuator bases. Don’t throw the caps away! Set them aside with your screws, since the actual joystick bases won’t include any.
Now, you’ll see the old actuator bases. There’s some disagreement in the community about how to proceed. Unless the connections are completely worn down, you’ll probably need to de-solder the old joystick. Use a low temperature on your soldering iron, and slowly increase it if necessary. Some people will say you don’t have to resolder the new joystick in place. This is technically true. As long as it remains perfectly positioned on the contacts, it can work without being soldered.
The problem is that this isn’t reliable. Sooner or later, your analog stick is liable to start cutting out mid-game. Take the time to solder your joysticks properly, and you won’t have this issue. If you’re not confident, take it to a repair shop, or consider buying a new controller.
Other than that, there’s not much to the process. With the soldering complete, replace the thumb sticks and reverse the disassembly process. You’ll be ready to start gaming as soon as your case is screwed back together.
EEEKit 3D Replacement Analog Stick
EEEKit is an aftermarket game accessory manufacturer we’ve reviewed in the past. They also make accessories like HDMI upscalers to help keep older consoles current. Given their track record, we thought it would be worthwhile to give their replacement analog sticks a try.
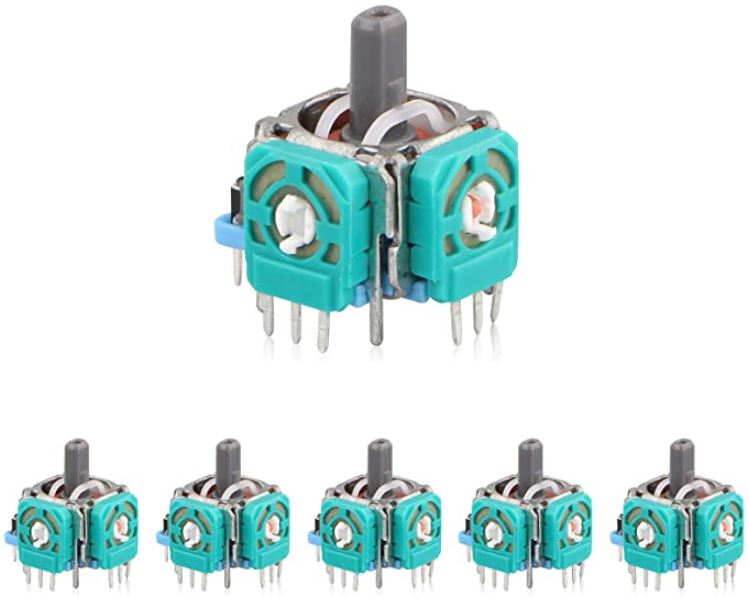
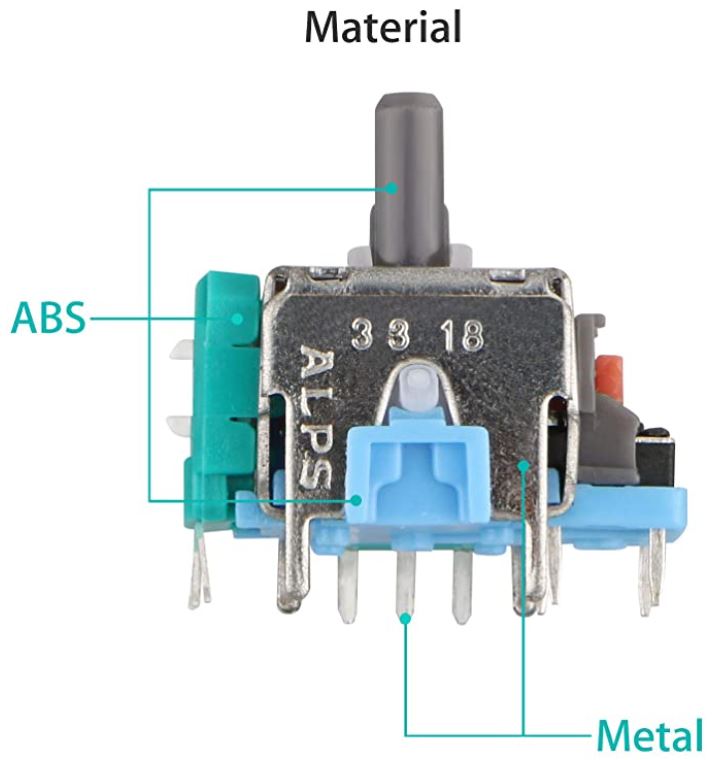
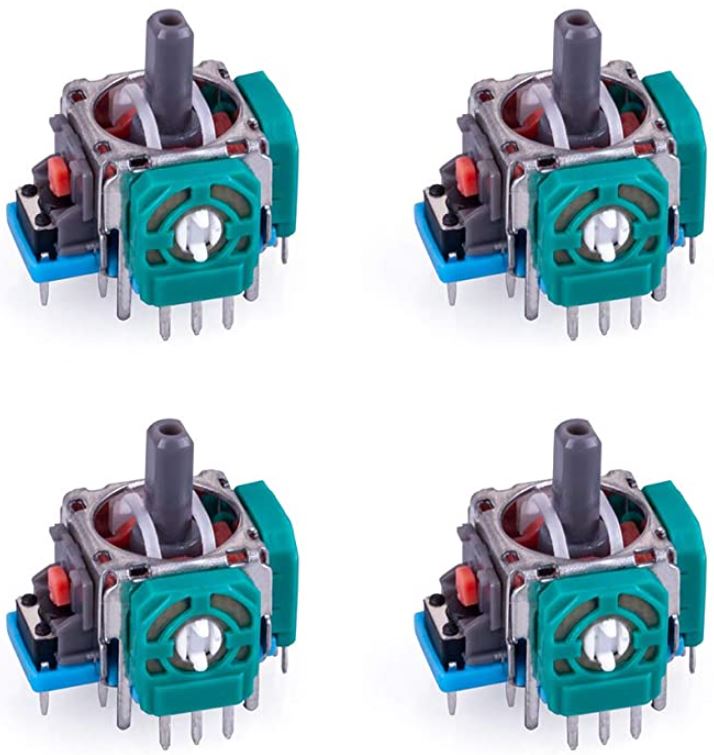
These analog sticks come in a six-pack, which provides a good value. You can fix up to three controllers, assuming you don’t accidentally damage one of the joysticks. They’re mostly constructed from an aluminum frame, although many parts are mint green plastic. The contacts themselves are made of a more conductive metal. The plastic parts are made of ABS, which provides good heat resistance as well as resistance to cracking. They’re compatible with any Xbox One controller, including the Elite, as well as most PS4 controllers. The only PS4 controllers they won’t work with are the last-gen DualShock 4 controllers with orange analog stick bases.
There’s a bit of confusion about these particular analog sticks that we need to clear up. If you read some comment threads about them online, some people claim that you can use just the side sensors. Others will swear up and down that they tried this, and it didn’t fix their problem. Switching the side sensors is much easier, and requires no soldering, so it’s an attractive option. But will it actually work?
In fact, both groups of users are right. Replacing the side sensors will work if those are the parts of the original thumb stick that failed. This is easy to diagnose if only one sensor is broken. In that case, your thumb stick will work fine in one direction, but not in the other. If you’re experiencing that kind of issue, it’s worth trying to replace just the sensors. That said, if the main thumb stick base unit is broken, replacing just the sensors won’t work. You’ll have to replace the whole thing.
ElecGear Replacement Analog Joystick
ElecGear is another experienced manufacturer whose products we’ve reviewed in the past. Among other offerings, we very much liked their PS4 external cooling fan. Given their breadth and depth of experience, it made sense to take a look at their analog joystick replacement.
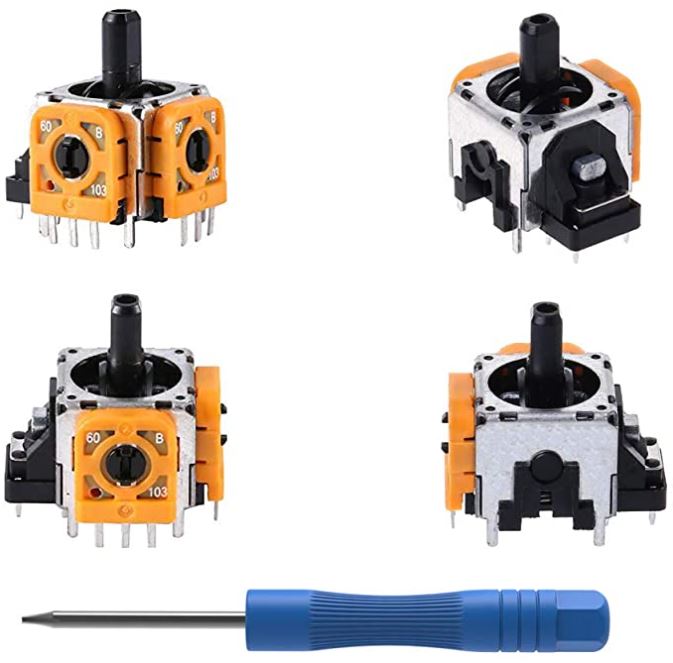
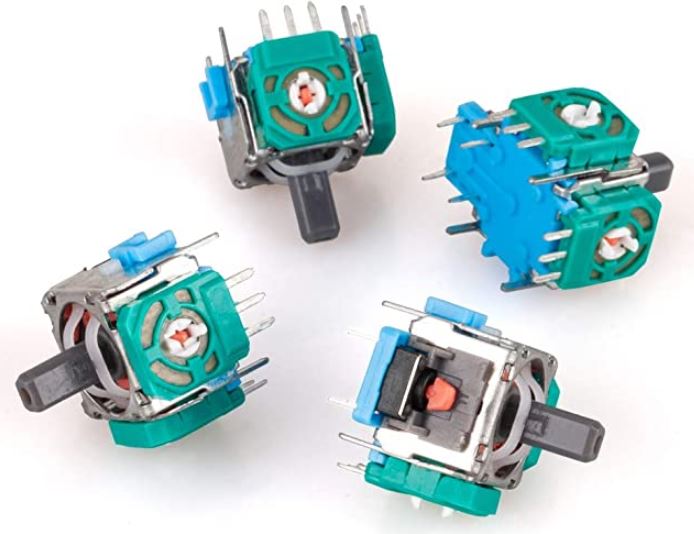
In terms of construction, it looks a lot like the EEEKit joystick. This isn’t really surprising, since they’re meant for the same job. There’s a primary aluminum frame, with ABS plastic sensors, and conductive metal pins. However, you may notice that the side sensors are bright orange instead of toothpaste-colored. This is because they’re a more sensitive version of sensor.

These sensors are only found on the latest DualShock 4 controllers that ship with the PS4 Pro. The entire joystick will work just fine with any PS4 or Xbox controller. As we said, the overall shape and size is identical. You just won’t get the benefit of the more sensitive sensors unless you’re using the right controller. You also won’t be able to swap out the side sensors with any other controller type. They electronics in the older-style joysticks aren’t compatible with them.
One last note about this replacement joystick is that it includes a #000 Philips screwdriver. If you don’t already have one of these little tiny drivers laying around, you won’t need to buy one. The driver itself is nothing special, just a cheap little hand tool. But it’s a nice added touch if you’re repairing a PS4 controller.
RGEEK 3D Analog Stick
The RGEEK 3D Analog Stick is similar to the EEEKit stick in that it’s universally compatible. With the exception of the PS4 Pro controllers, it will work with anything. These are affordable, and come in a four-pack so you can control two controllers with them. Their sensors are of the more basic type, with a green housing.
What makes these sticks unique is that they’re not plug-and-play. They’ve never been calibrated, so you need to calibrate them yourself. This can be complicated, and it’s a headache most people don’t want to deal with. That said, it can be beneficial for advanced users. By calibrating your thumb stick yourself, you can fine-tune it in ways most people never realize is possible.
Final Verdict
As you can see, which one of these analog sticks to use will depend on your application. For most controllers, the EEEKit 3D Replacement Analog Stick is going to be ideal. Because of its wide compatibility, it will work with any Xbox One and most PS4 controllers. It’s also reliable, although you still need to know what you’re doing to install it.
If you own a late-generation PS4, you’ll want to use the ElecGear Replacement Analog Joystick instead. This is optimized for controllers with the orange sensors. It also has an easy-to-remove side sensor, which can make minor repairs easier with the right controller. Last, we looked at the RGEEK 3D Analog Stick. This stick is just as versatile as the EEEKit, and works anywhere the EEEKit will work. But the need for calibration makes it a poor choice for most people. It’s only a good choice for super users who are willing to spend time fine-tuning their whole gaming setup.
Meet Ry, “TechGuru,” a 36-year-old technology enthusiast with a deep passion for tech innovations. With extensive experience, he specializes in gaming hardware and software, and has expertise in gadgets, custom PCs, and audio.
Besides writing about tech and reviewing new products, he enjoys traveling, hiking, and photography. Committed to keeping up with the latest industry trends, he aims to guide readers in making informed tech decisions.