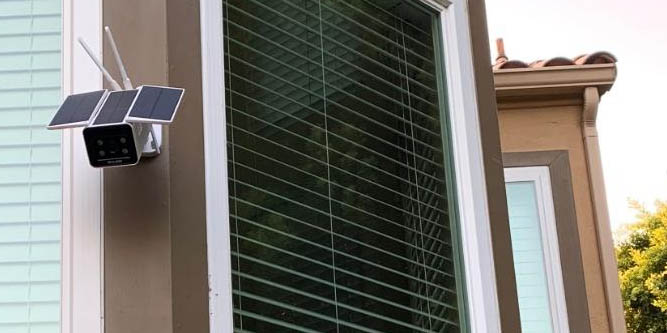
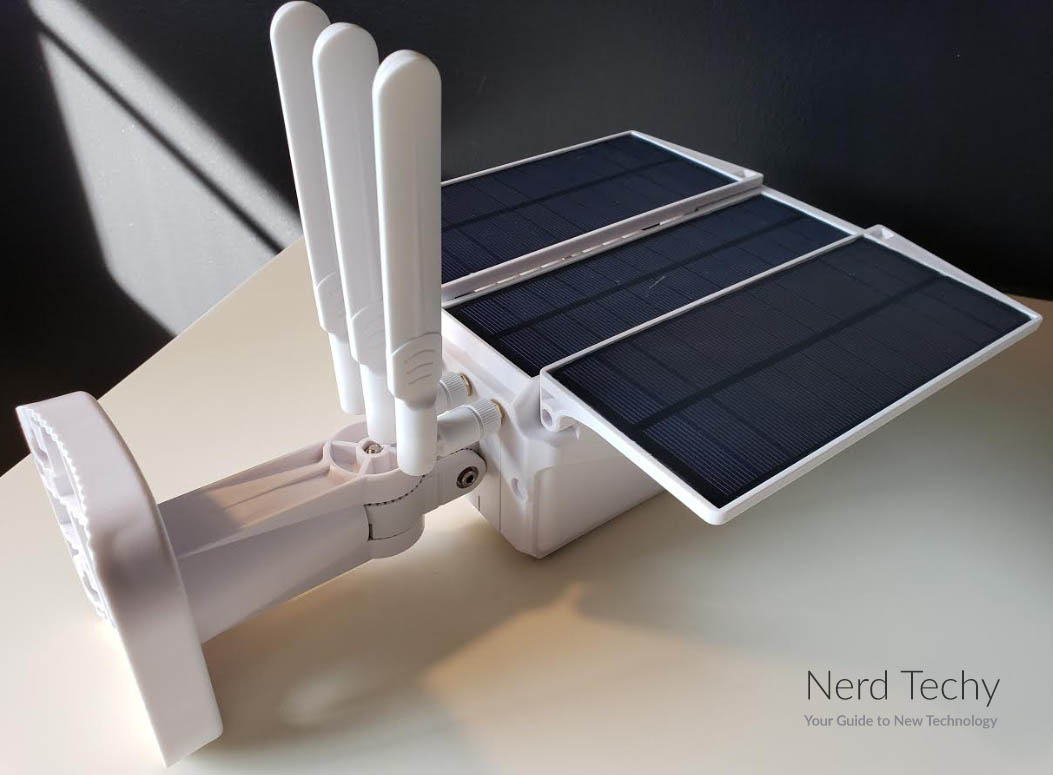
A few months ago, we reviewed the Soliom Bird S60, a quality outdoor WiFi camera that’s very popular. This camera gets its name from the solar panels that extend from both sides like a pair of wings. This is an innovative feature, since it allows you to operate an IP camera without the need to run wires or change batteries. This camera sports a 2,000 mAh battery, which is enough to get you through the night.
The S60 is a quality camera, with a full-featured app and good picture quality. But many users complained that the battery would fail if there were a couple of cloudy days in a row. To alleviate this problem, Soliom released the upgraded S90 Pro, which has a much larger 10,000 mAh battery that can last through several cloudy days in a row.
But how good is it otherwise? We’re about to take a deep dive and tell you everything we know about the S90 Pro.
What’s in the Box?
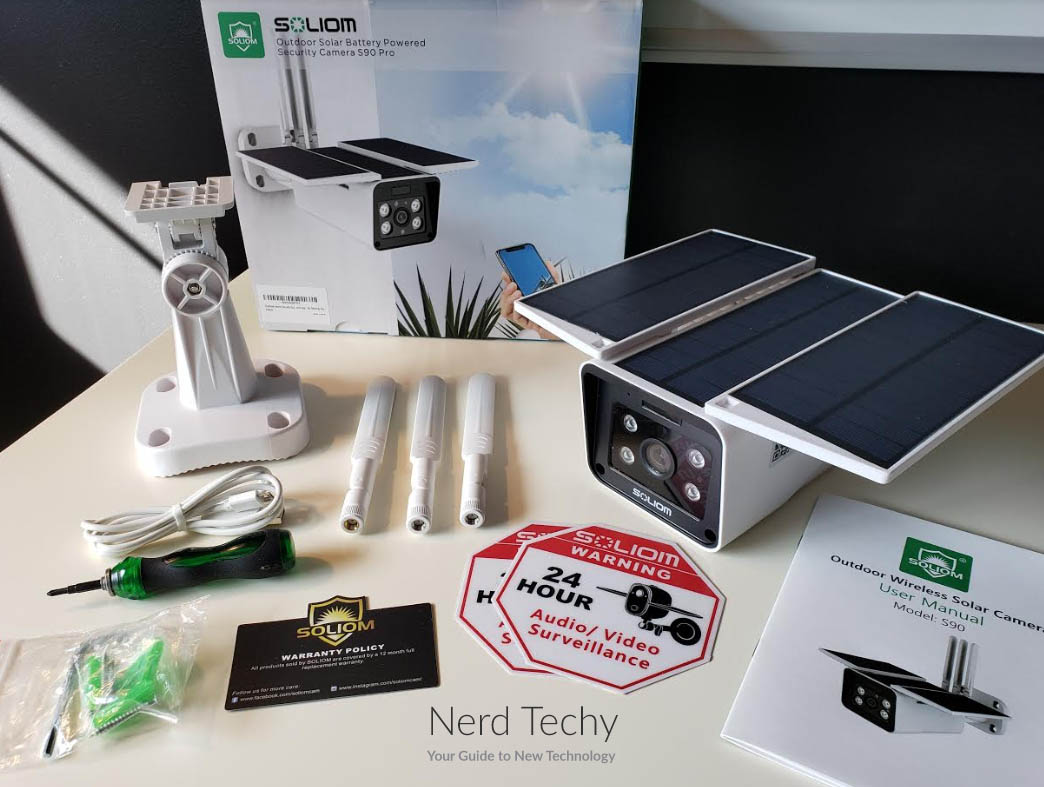
Before we proceed further, here’s a quick look at what you’ll see when you first open the box. After that, we’ll go through the features and explain how to use it.
- Soliom S90 Pro camera
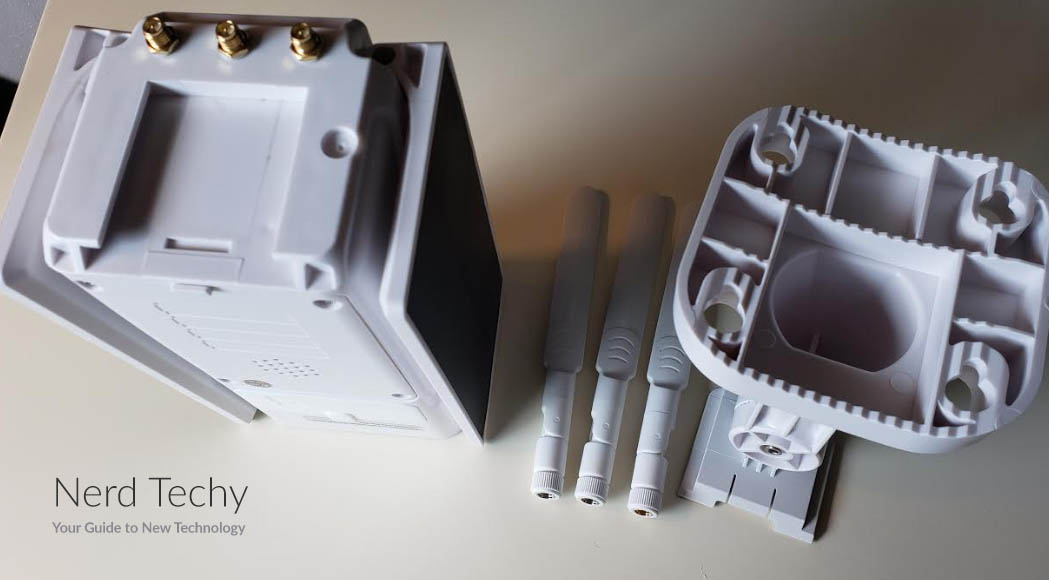
- Three blade antennas
- USB charging cord
- Philips screwdriver
- Mounting bracket
- Mounting hardware
- Instruction manual
- Thank-you card with Soliom decal
What Does it Do?
As we’ve already discussed, the Soliom S90 Pro is a solar-powered IP camera. In theory, it can operate entirely on solar power, although in practice, this depends on how much sunlight you get. The solar panels require four days of sunlight to fully charge the battery; a day, in this case, meaning four hours of direct sunlight, although some combination of direct and indirect sunlight will also be effective.
Similarly, the 10,000 mAh battery is powerful enough to keep the camera going through up to four days with no sunlight at all. This makes the S90 Pro well-suited for a variety of climates, although you’ll need to consider how much sunlight you get before making a decision.
This camera is constructed from a special, weather-resistant plastic that’s tough enough to stand up to any temperature conditions from -4 degrees to 140 degrees Fahrenheit. This can be problematic if you live very far north, but then again if you live that far north you won’t get enough winter sunshine to operate the S90 Pro to begin with.
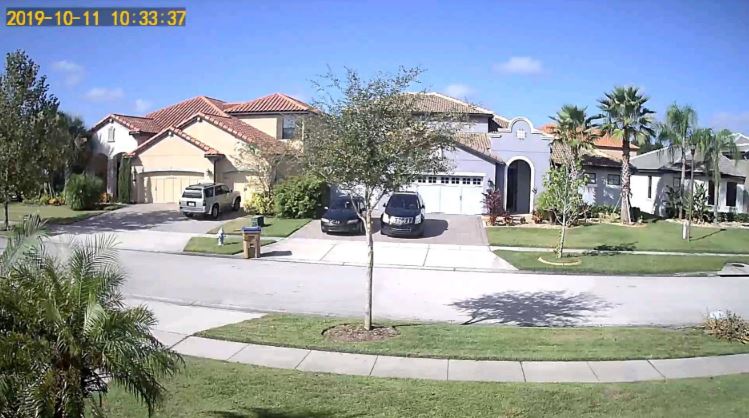
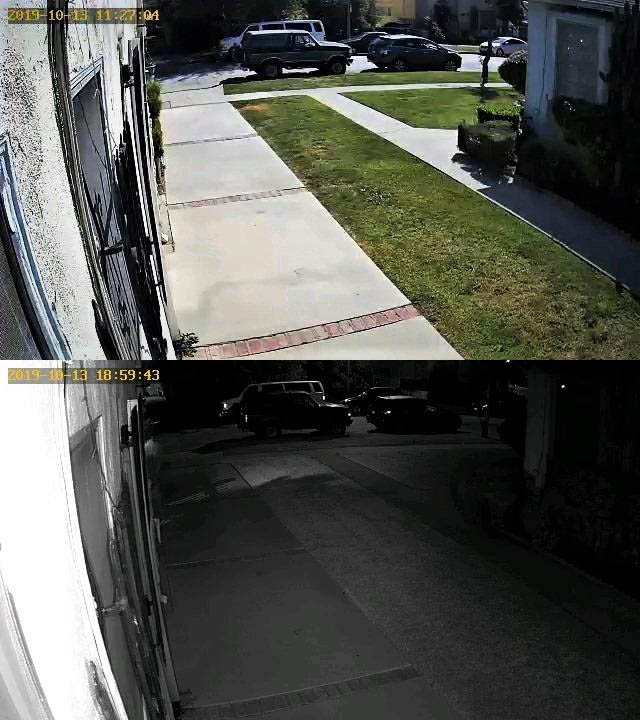
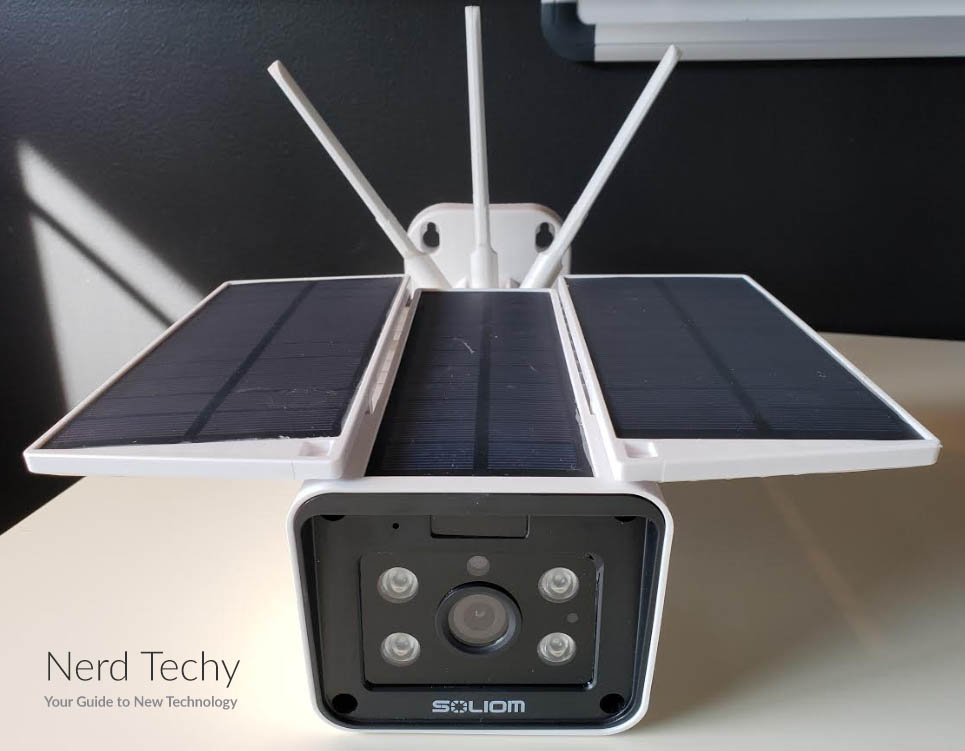
Soliom’s latest camera records in full 1080p, and provides a crystal clear image thanks to the 5 layered glass lenses. It records audio as well as video, and also has a built-in speaker for two-way communication. It even records well at night, with night-vision LEDs that will illuminate objects up to 32 feet (10 meters) away. And it automatically switches to night vision and back as needed.

The S90 Pro features a built-in PIR and radar scanner, which is a fancy way of saying that it will trigger when anything moves in front of it, whether during the day or at night. This saves a lot of memory, since it means you’ll only be recording when there’s actually something to see.
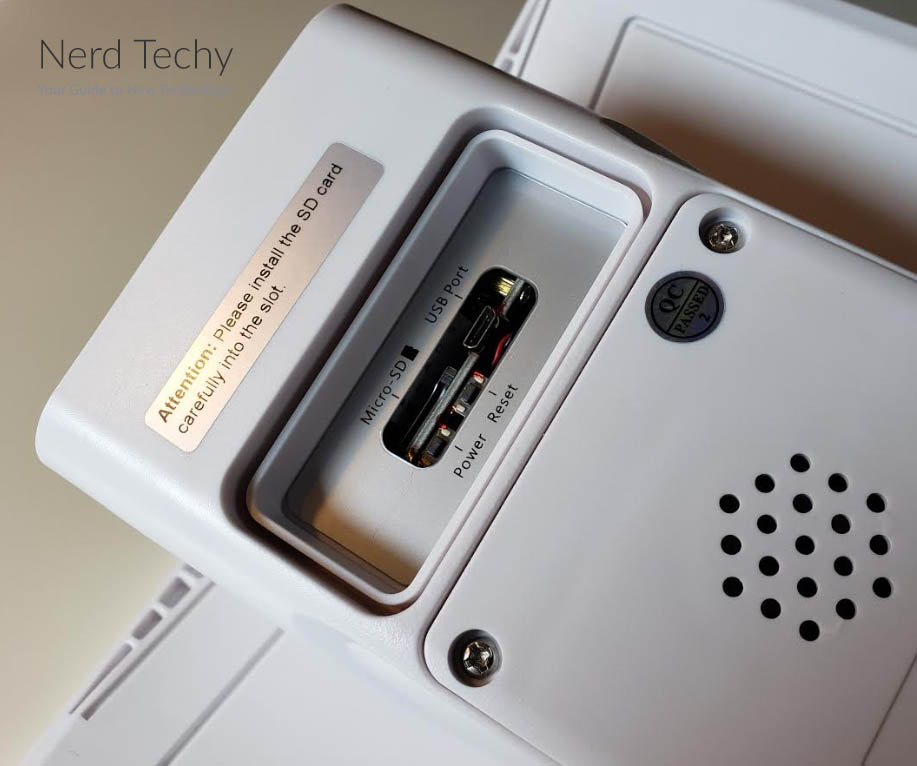
Speaking of memory, this camera records your data to a standard SD card. It accepts any standard card up to 64GB. The card must be formatted for FAT32 storage, which is standard for all Windows SD cards. If you own or buy an SD card that’s formatted for Mac, the Soliom app includes a tool for reformatting it as FAT32.
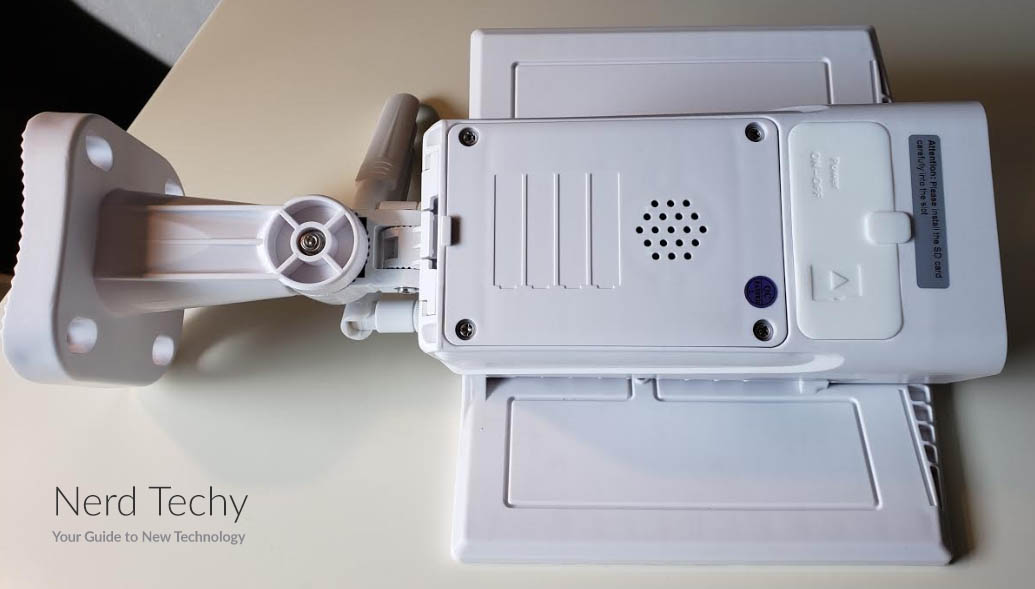
In addition to the SD card slot, the camera also has a USB port for charging, as well as power and reset buttons. All of these components are located in a recessed cutout in the bottom of the camera. While the camera is in use, the cutout is covered by a well-fitted weatherproof rubber plug.
That said, because the S90 Pro slides on and off its bracket, it’s vulnerable to theft. If theft is a concern and you’re looking for a sturdier camera, the Reolink Go is a great choice. This camera is exceptionally rugged, and also runs on solar power. That said, it’s harder to install than the S90 Pro, because the solar panel and camera must be mounted separately. Because of this design, it also has an exposed USB cable, which makes it vulnerable to damage from fog and moisture over time.
How to Install It
Before you do anything else, Soliom recommends using the USB charging cord to fully charge the battery. This will ensure that you start off with a full charge before powering up, which will significantly extend your battery life, allowing your camera to better manage when there’s a long string of cloudy days.
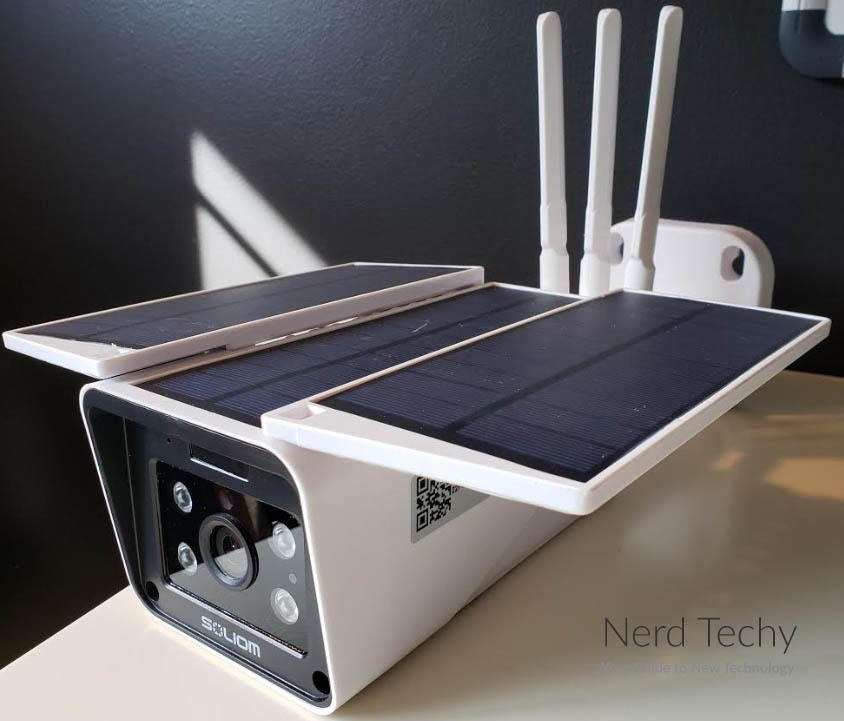
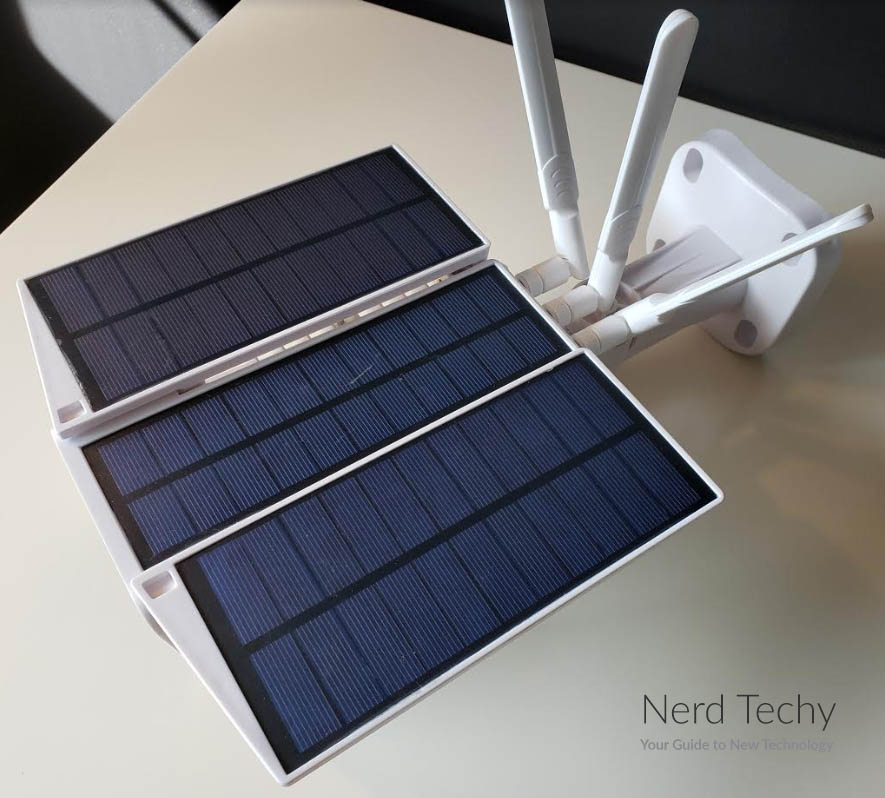
The next thing you’ll want to do is to open the S90s solar panels. When it arrives in the box, the panels are folded down to the side. You’ll find that they flop around easily, and you’ll need to tighten the tension screws once they’re opened. If you look at the back of the unit, there’s a small hole in the back of each solar panel hinge. Put your screwdriver into the hole, and tighten the screw to increase the tension. There’s no need to go crazy – you might damage the unit – just tighten the screw enough that the solar panel stays extended on its own. Do the same on the other side, and you’re ready to proceed.
Of course, the solar panels may be more effective if they’re angled to the side. Since this is something you may need to experiment with, make sure you can easily move the panels by hand after you’ve tensioned them. This will make future adjustments much easier.
If you want to install an SD card in your camera, now is the time. Just remember not to turn the camera on before the SD card is installed, or it won’t recognize that there’s a card inserted.
Next, it’s time to attach the antennas. Just screw them into the three threaded holes on the back. The antennas can be rotated and swiveled at any time, so there’s no need to worry about having them in a particular position from the get-go.
Before you mount your camera, it’s important to turn it on and pair it with your app. This is easier to do when it’s on the ground, especially if something goes wrong and you need to use the reset button. To do this, you’re going to need to download Soliom’s free app. Once you’ve done that, turn your camera on, and make sure that your phone is connected to your home’s WiFi network and has Bluetooth turned on. Wait until the S90 Pro to confirm that it’s ready to begin pairing. It will let you know this with an audible alert; it will actually say “now ready to begin pairing”.
Inside your app, click “add a device”, then click “setup device”. If for some reason the app doesn’t see the camera, try resetting the S90 Pro by holding down the reset button until you hear the audible alert. Select the camera in the app’s menu, and you’ll need to enter your WiFi network’s name and password so that the camera can connect to the internet. After that, choose a device name and password, and you’ll be good to go.
Now it’s time to choose a location to mount your camera. Soliom recommends mounting the S90 about eight feet over the ground, which will give it a wide area to scan for movement, while still keeping the camera relatively close to anything you’re trying to record. When the camera is mounted up high, it’s also more likely to trigger from tree branches blowing in the wind, which can lead to a lot of false alarms.
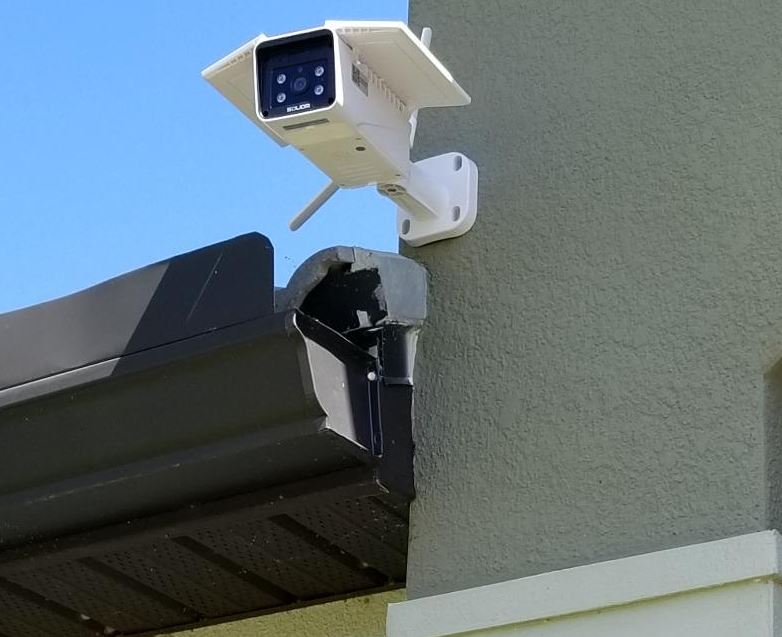
As you’ll notice, the mounting bracket is constructed from the same high-quality plastic as the camera itself. Follow the manufacturer’s instructions for mounting it, including using the anchors if you’re mounting on brick or stone work. Once the bracket is screwed in, slide the block on the end of the bracket into the slot on the back of the camera, and you’re ready to go!
How to Use It
The S90 Pro can be operated exclusively by the Soliom app. The app is available for free download on both Android and Apple devices, and takes just a minute to install. When you first open the app, you’ll immediately see a display of any connected cameras. There will also be a large green circle in the top right. This circle is a toggle button for the camera’s optional alert system.
When lit, your S90 Pro will call your phone whenever motion is detected. If you don’t need this feature, you can turn it out by tapping the circle. When disabled, the circle will appear gray.
You can also use the app to select settings for each individual camera. For example, you can choose whether you want your camera to record video or simply save a snapshot when the motion sensor is activated. In addition, the app allows you to manually take pictures or video, so you’re in full control of your camera even if you’re a thousand miles from home.
Finally, you can choose whether to save pictures and video to your SD drive or to upload it to the cloud. You can do either, both, or neither, depending on your privacy needs.
Final Verdict
So, should you buy the Soliom S90 Pro? If you’re looking for plenty of battery life, its hard to see why not. In addition, this camera is exceptionally rugged, and can be used in just about any climate where there’s sufficient sunshine. It’s easy to install, easy to sync, and easy to use. Not to mention, it records audio as well as video, which is a definite plus for any security system.
Of course, we understand that not every wireless solar camera is perfect for everybody. If that were the case, there would only be one on the market! If you need a good solar-powered camera but the S90 Pro isn’t up your alley, there are other options available. For more information, check out our guide on the best solar wireless IP cameras. At least one of them is guaranteed to pique your interest.
Meet Ry, “TechGuru,” a 36-year-old technology enthusiast with a deep passion for tech innovations. With extensive experience, he specializes in gaming hardware and software, and has expertise in gadgets, custom PCs, and audio.
Besides writing about tech and reviewing new products, he enjoys traveling, hiking, and photography. Committed to keeping up with the latest industry trends, he aims to guide readers in making informed tech decisions.