When you look at a modern LCD TV, it’s easy to forget how far we’ve come in terms of aesthetics. But TVs back in the 60s and 70s were a work of art. A lot of TVs were built as an entire piece of furniture, with ornately-carved wooden housings. As CRTs evolved and VCRs came into the picture, people’s TVs moved into entertainment centers. Your TV, VCR, stereo system, and other equipment all sat on their own shelves. This solution wasn’t quite as attractive, but it was practical. And your cords stayed out of sight behind the entertainment center.
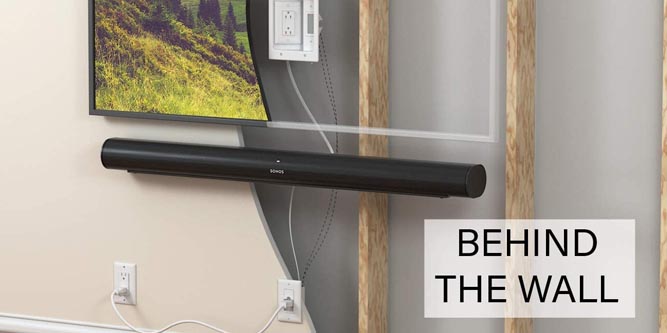
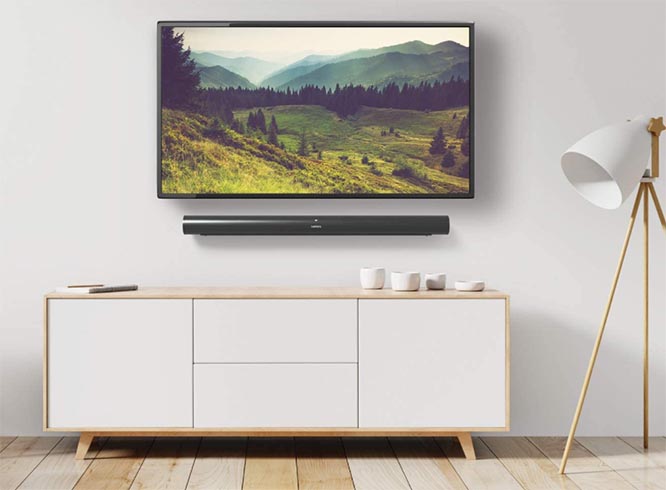
Nowadays, we tend to favor a cleaner aesthetic. You’ve got a TV, a game console or set top box, and maybe a separate soundbar. With your TV mounted on the wall and the rest on a shelf, everything is nice and spare. Except for one thing, you’ve got power cords and an HDMI cable or two hanging in front of your wall. This mars the clean look, and can make even a very neat room look less than perfectly-organized. If you’re one of those people who needs every last detail squared away, consider an in-wall cable management kit. That way, you can hide all your cables, and still get all the connectivity you need.
Today, we’re going to review three of the best in-wall cable management kits we could find. First, we’ll examine the ECHOGEAR in-Wall Cable Management Kit. This is a 6-foot cable management kit with round wall sockets and one 3-prong power outlet. Next, we’ll check out the PowerBridge Recessed In-Wall Cable Management System. This is a 6-foot cable management kit with square wall sockets and three power outlets. Finally, we’ll evaluate the SANUS Ultimate in-Wall Cable Management Kit. This is a longer, 8-foot cable management kit, with three spread-out power outlets. But which is the ideal choice? To answer that question, we’ll need to look at the installation process, as well as other features. Let’s take a closer look, and see how they compare!
Other Ways to Manage Your Cables
Before we go any further, let’s talk about cable management in general. After all, an in-wall kit is fairly specific, and has a fairly specific application. There are a number of different cable management techniques, which work in different situations. So, what are some of the other ways you might secure your cables? Here are some thoughts.
First off, you might have a tangle of wires coming out of a power strip. No matter how much you mess with those things, the cables always end up getting crossed over. This is less a matter of hiding the cables, per se, than it is of keeping them properly organized. If that’s what you’re dealing with, a cable management box is an excellent solution. These are simple enclosures with gaps in the sides for you to route your cables in different directions.
That’s all well and good. But what about wires that are dangling, or running from place to place? If you’ve got multiple wires in an area, you can always just zip tie them together. For a long time, this was the method of choice in IT circles, since it’s quick and easy. Not only that, but zip ties are cheap and easy to use. That said, there’s a good reason not to use a zip tie: they need to be cut off. Even if you know what you’re doing, your knife might slip. You could cut yourself, or accidentally nick a cable.
A better alternative for these scenarios is to use a velcro cable strap. They come in many colors, and because they’re velcro, they’re easy to adjust. They can even be repurposed as many times as you need. Similar to these, you could buy a flexible tie. These are like enormous, bulky twist ties, with a wire coated in a rubber finish. You can wrap them around bundles, unwrap them, and reposition them with ease. A spiral cord wrap is a pricier, but more thorough solution. Spiral wraps run the full length of a wire bundle, and go around it again and again. They’re a bit much for most home applications, but they’re perfect for large wire bundles.
ECHOGEAR in-Wall Cable Management Kit
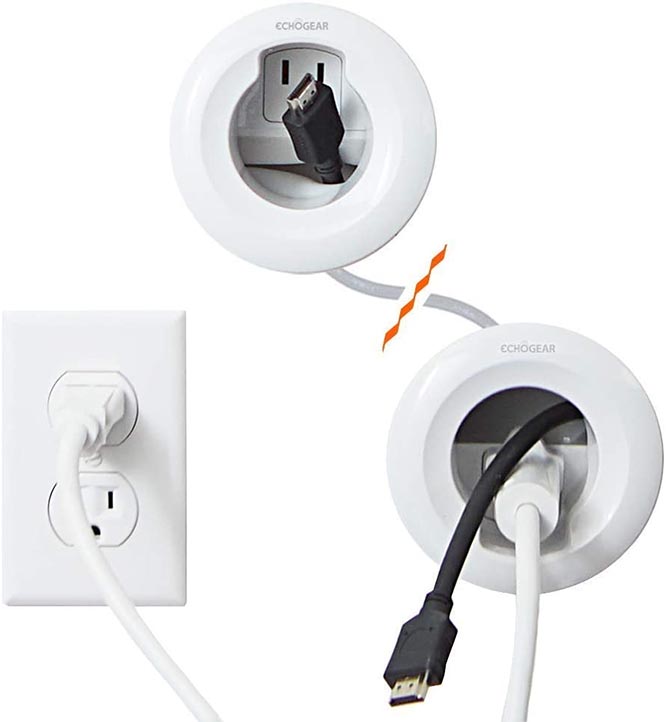
ECHOGEAR manufactures a variety of accessories for TV and your related equipment. In the past, we reviewed their full-range motion TV mount, and we very much liked it. The ECHOGEAR in-Wall Cable Management Kit has a similarly well-engineered design.
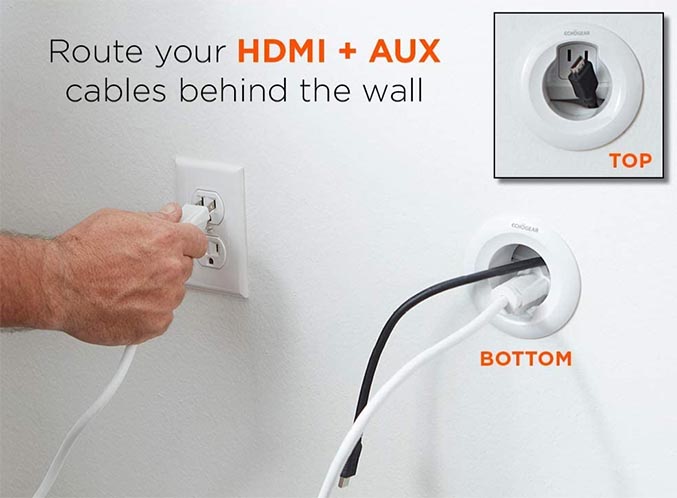
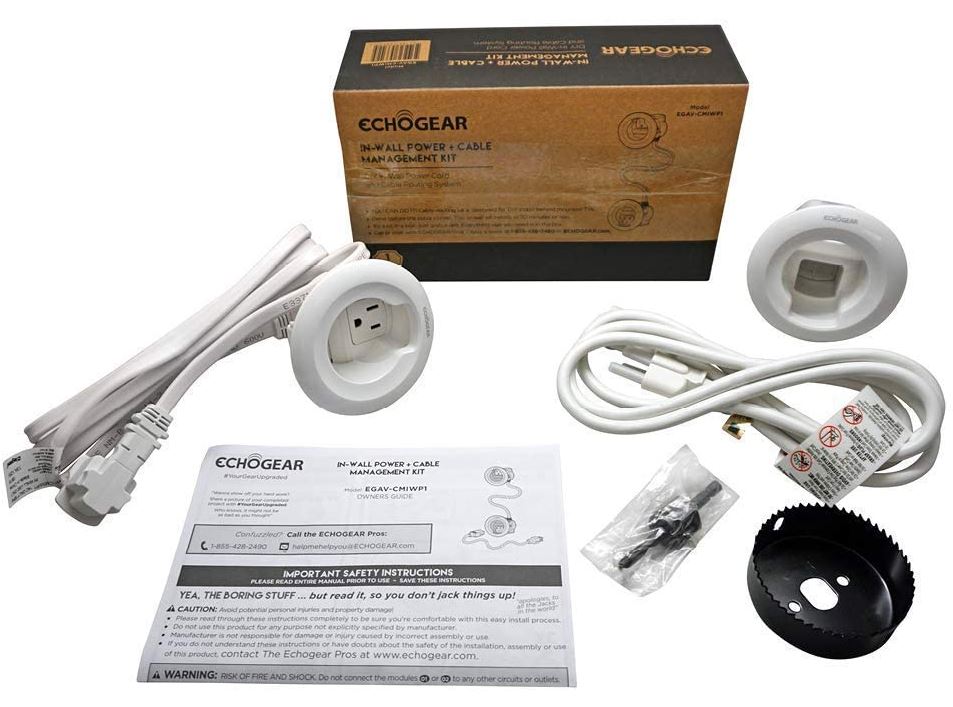
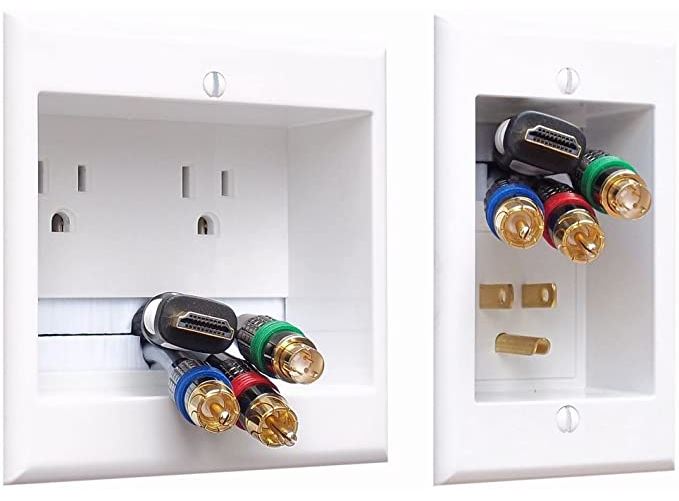
Compared to some other kits, this one is relatively straightforward. It consists of two recessed plastic ports that you install in your wall. Both are constructed from white plastic, with a low-profile design that will fit behind your TV or shelving. The top one has a 3-prong AC outlet in the top half of the opening. In the bottom half, there’s a pair of rubber flaps with a horizontal gap between them. This opening is for running your HDMI, Ethernet, audio, and other cables. The bottom port has a 3-prong male outlet in the bottom half, with a similar pair of rubber flaps. The two ports are connected by a wire, with a breakaway plug in the middle.
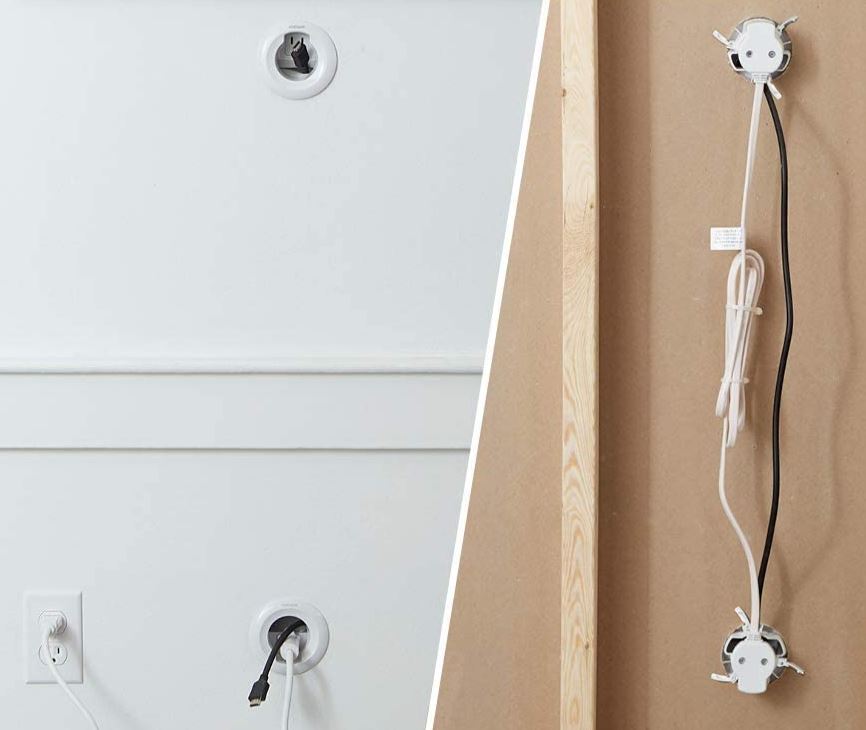
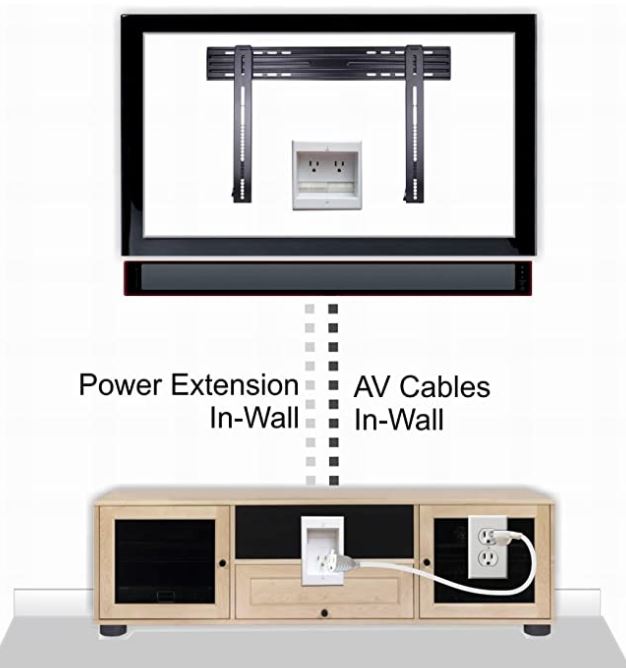
The point of the power outlets is as follows. You plug your TV into the top outlet. Then, you connect the bottom male outlet to a nearby wall outlet. The kit includes a six-foot extension cord, which makes it easy to plug in. That way, if you have any loose wires, they’re near your baseboard, not dangling from your TV. The pass-through rubber slots have a width of 1.75 inches. This is sufficient for up to four large HDMI cables to pass through easily. That should be plenty for any ancillary cables, as well.
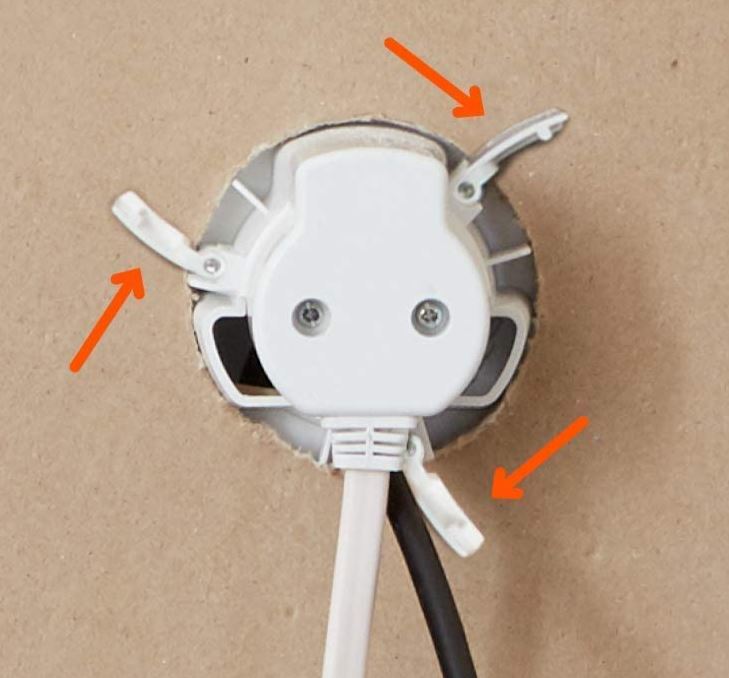
To install the kit, first decide where you want the two ports to go. They can be positioned up to five feet apart, so make sure to measure and not overstretch yourself. The package includes a hole saw attachment for your drill. Mark where your ports will go, drill the two holes, and insert the top port into place. Put any cables through the rubber flaps, and let them run down until the tips are visible behind the second hole. Then, pull them through the flaps on the bottom port, and make sure you can reach all your devices. Now, connect the power cord between the two ports, and push the bottom port into space.
This management kit will work with a drywall thickness of between ½-inch and a full inch. This includes most standard modern drywall, but not older 3/8-inch drywall. As you might have guessed, the two ports have to be located inside the same stud bay. Otherwise, you won’t be able to run your cables from the top to the bottom.
PowerBridge Recessed In-Wall Cable Management System
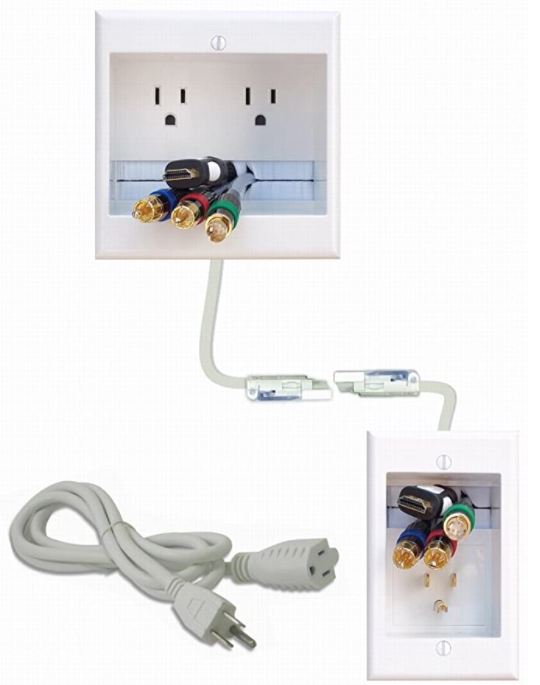
The PowerBridge Recessed In-Wall Cable Management System is designed for people who need to plug in a TV and soundbar. In the broad sense, it has the same general design as the ECHOGEAR. There’s a top port and a bottom port, and both are made of white plastic. Both ports are also recessed into your wall, with a flat profile. That said, the top port is large and square, with not one, but two three-prong outlets. That way, you can plug in both your TV and your soundbar without any dangling wires. The bottom port is a narrower rectangle, with a three-prong male plug inside.
The cable openings in the top halves of both ports are generously wide. They’re also brushed instead of rubber, so you can fit fatter cable heads through. Even if you’re connecting several devices to your TV, you’ll have plenty of room for your cables. The maximum distance between the top and the bottom port is six feet. This gives you a little bit more flexibility than the ECHOGEAR system, at least in terms of placement. The included extension cord has a similar six-foot design, and can easily be plugged into a nearby wall outlet.
The kit does not include any kind of installation tools. You’ll need to provide your own drywall saw or utility knife to cut your openings. That said, there’s a template included in the kit so you know what size holes to cut. Decide where you want to install, then trace out your outlines in pencil, using the templates. Cut your holes, and proceed with installation. As before, you’ll want to install the top portion first. When you do, make sure to un-bundle the power cable ribbon. That way, it will drop down to the bottom hole. Otherwise, you’ll have to take the port out mid-installation to let the cable drop.
SANUS Ultimate in-Wall Cable Management Kit
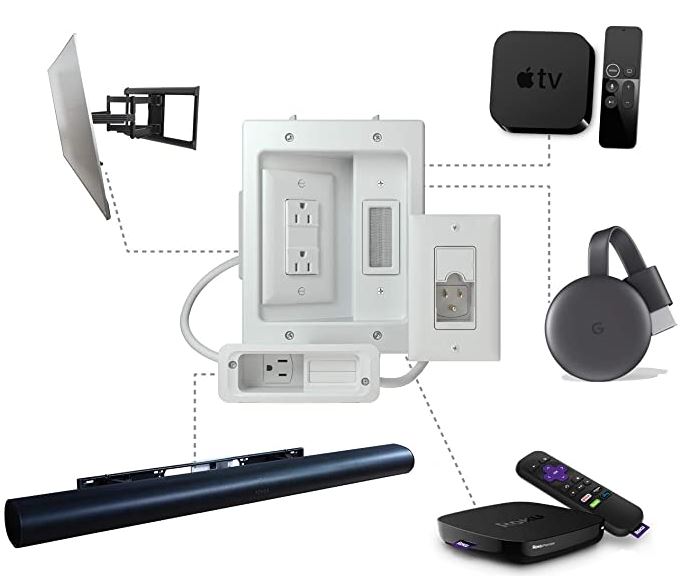
The SANUS Ultimate in-Wall Cable Management Kit provides the most robust connectivity of the three. To begin with, it has not one, not two, but three AC outlet. That way, you can plug in a TV, soundbar, and a set top box, game console, or Blu-Ray player. There are also three separate ports to manage.
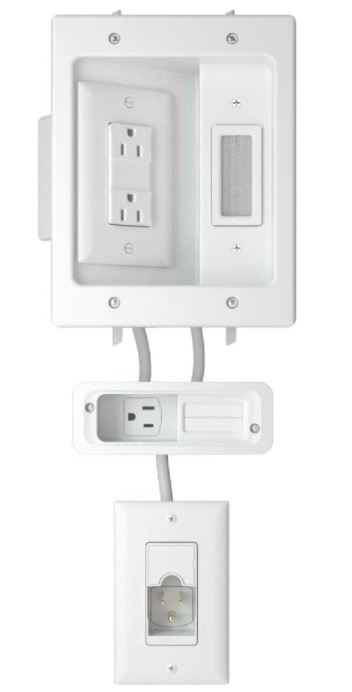
The top port is the largest. It’s big and rectangular, with a duplex outlet inside. This outlet is angled, flush with the wall on the left, and recessed to the right. This allows for easy flush mounting, and you can still connect a 90-degree plug. To the right of the outlet, there’s a large brushed opening for running your cables. The middle port is a recessed horizontal rectangle with a single power outlet in the left side. In the left side, there’s a smaller brushed cable routing slot. The bottom port has a male three-prong plug in the bottom half. Above it, there’s a brushed cable slot, with an optional plastic cap that can be used to cover it.
The maximum cable slot opening is 1.75 inches, which is enough for four heavy-duty HDMI cables. You can also fit Ethernet and other similar cables. The installation process is similar to the other kits we’ve looked at, but it’s a bit more complicated. You start with the top port, then work your way down from the middle to the bottom. The maximum distance from the duplex outlet to the single outlet is 3 ½ feet. The maximum difference from the single outlet to the male plug is 4 ½ feet, for a total of 8 feet. Like the other kits, this one includes a 6-foot extension cord for connecting to your wall outlet.
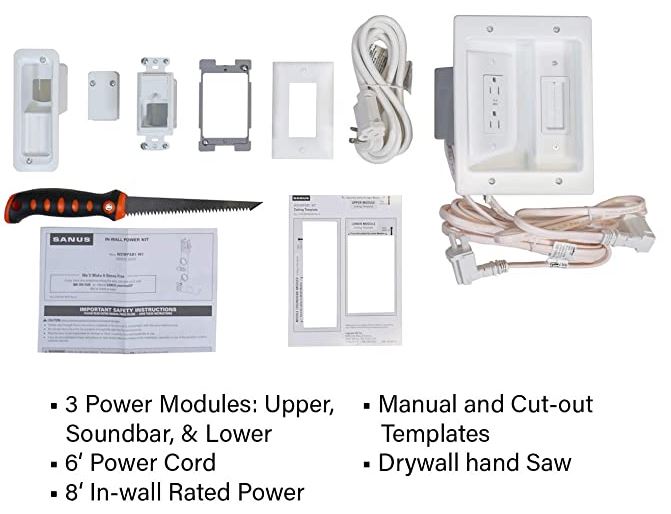
The SANUS kit includes everything you need for installation, except for a flathead screwdriver. There’s a template for marking out where all three ports will go. There’s also a little drywall saw for cutting your holes. The supported drywall thickness is between ½ and 1 inch. As before, you won’t be able to use this kit with thin, 3/8-inch sheetrock, but it works with anything else.
Final Verdict
There are two main things that separate these three cable kits: capacity and versatility. In other words, how many power outlets do you get, and where are they located? The ECHOGEAR in-Wall Cable Management Kit is the most basic of the bunch. It’s designed for connecting your TV to the wall power. For HDMI, it has plenty of capacity, but you’ll only be able to run those cables between two locations. Even so, this is a great solution if you don’t have a ton of devices to connect.
The PowerBridge Recessed In-Wall Cable Management System is a bit more robust. Because there are two power outlets, you can plug in both your TV and your soundbar. You can also run the necessary audio cables, and the inner power cable is very easy to work with.
The SANUS Ultimate in-Wall Cable Management Kit gives you the most flexibility. Not only are there three power outlets, but you get three locations for pass-through cables. This is clutch if you have a more complex setup. We also appreciated the angled design of the duplex outlet. This makes the SANUS kit the only choice if your TV has a 90-degree plug, like some newer Samsung models.
Meet Ry, “TechGuru,” a 36-year-old technology enthusiast with a deep passion for tech innovations. With extensive experience, he specializes in gaming hardware and software, and has expertise in gadgets, custom PCs, and audio.
Besides writing about tech and reviewing new products, he enjoys traveling, hiking, and photography. Committed to keeping up with the latest industry trends, he aims to guide readers in making informed tech decisions.