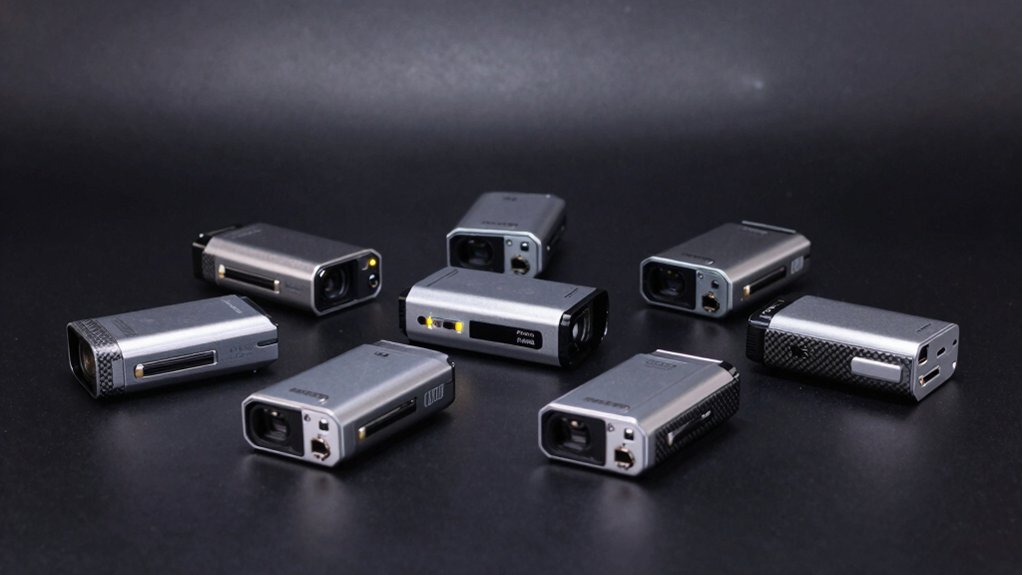
You’ll compare seven mini DV converters by capability and setup. Start with Portta models offering on‑device previews, remote inputs, and 1080p capture using USB or SD storage, then consider USB video capture cards for PC/Mac that are plug‑and‑play with RCA/S‑Video, no power brick required. Add Mac/PC‑specific options with universal compatibility and software like OBS or QuickTime. Evaluate built‑in screens, media handling, and warranty, then plan power and storage for long transfers; more specifics follow.
| Portta VHS to Digital Converter with Remote |

| Best All-In-One | Input Type: AV/RCA (CVBS+R/L), S-Video, AUX 3.5mm | Output Type: MP4 video, MP3 audio; LPCM | Recording/Storage medium: USB/SD Card storage (no capacity limit specified) | VIEW LATEST PRICE | Read Our Analysis |
| USB Video Capture Card for VHS/VCR to Digital (PC/Mac) |

| PC/Mac Compatible | Input Type: RCA composite, S-Video | Output Type: USB capture to PC/Mac (HD 720P) with audio | Recording/Storage medium: USB capture to PC/Mac (no local long-term storage) | VIEW LATEST PRICE | Read Our Analysis |
| VHS to Digital Converter for Mac/PC |

| Mac/PC Ready | Input Type: RCA, S-Video | Output Type: USB output (HD 720P) | Recording/Storage medium: USB output to PC/Mac (no built-in storage) | VIEW LATEST PRICE | Read Our Analysis |
| Portta VHS to Digital Converter with Screen |

| Built-In Screen | Input Type: AV (CVBS), Component (YPbPr) | Output Type: MP4 | Recording/Storage medium: USB flash drives, TF cards, portable HDD/SSD | VIEW LATEST PRICE | Read Our Analysis |
| Portta VHS to Digital Converter with 128GB USB Drive |

| Bundle Value | Input Type: AV/RCA, S-Video, AUX | Output Type: MP4 (on USB 3.0 drive) | Recording/Storage medium: USB 3.0 128GB flash drive included | VIEW LATEST PRICE | Read Our Analysis |
| VHS to Digital Converter with 4″ HD Screen |

| Portable Preview | Input Type: AV (CVBS), S-Video | Output Type: Recorded digital video files (HD 1080P) | Recording/Storage medium: USB drives/TF cards (up to 512GB supported) | VIEW LATEST PRICE | Read Our Analysis |
| Video Tape Transfer Service to Digital MP4 |

| Transfer-Only Service | Input Type: Not a hardware converter (service) – N/A | Output Type: MP4 file delivery | Recording/Storage medium: Cloud-delivered MP4 (not local storage) | VIEW LATEST PRICE | Read Our Analysis |
More Details on Our Top Picks
Portta VHS to Digital Converter with Remote
The Portta VHS to Digital Converter with Remote stands out for its plug‑and‑play simplicity and broad compatibility. You connect analog video and audio sources using AV/RCA, S-Video, or AUX 3.5mm, then choose outputs as MP4 video, MP3 audio, or LPCM. You can record up to 1080P 30Hz and view without a PC. Use USB or SD Card storage with the built‑in LCD preview and speaker; playback is direct on the device. Ensure proper wiring, unmute Video‑IN and AUX‑IN in Settings, and power the unit as needed for high‑capacity USB drives. Contact support for two‑year warranty details.
- Input Type:AV/RCA (CVBS+R/L), S-Video, AUX 3.5mm
- Output Type:MP4 video, MP3 audio; LPCM
- Recording/Storage medium:USB/SD Card storage (no capacity limit specified)
- Power/Driver Requirement:Plug and play; no PC/software/driver
- Software/Setup Needs:No software; Settings on device
- Target Formats/Standards:NTSC/PAL formats; 1080P30; LPCM
- Additional Feature:Remote control included
- Additional Feature:LCD preview on device
- Additional Feature:Built-in speaker
USB Video Capture Card for VHS/VCR to Digital (PC/Mac)
A USB Video Capture Card for VHS/VCR to Digital (PC/Mac) stands out for its plug-and-play simplicity and cross-platform compatibility, making it the best choice if you need a straightforward path to digitize analog tapes without extra software hassle. You connect the device to USB, plug in RCA or S-Video cables, and power is unnecessary. It converts analog input to USB with HD 720P output and audio. Install drivers automatically, then choose OBS Studio or PotPlayer on Windows, or QuickTime on Mac. Open the software, set NTSC or PAL, adjust brightness, contrast, hue, and saturation, and start capture.
- Input Type:RCA composite, S-Video
- Output Type:USB capture to PC/Mac (HD 720P) with audio
- Recording/Storage medium:USB capture to PC/Mac (no local long-term storage)
- Power/Driver Requirement:No external power; plug and play
- Software/Setup Needs:Acquisition software required (OBS/PotPlayer)
- Target Formats/Standards:NTSC/PAL; 720P; USB for PC/Mac
- Additional Feature:Plug-and-play USB just works
- Additional Feature:NTSC/PAL format support
- Additional Feature:Built-in color controls (brightness/contrast/hue/saturation)
VHS to Digital Converter for Mac/PC
For those checking VHS to digital conversion on Mac or PC, this option stands out by offering universal compatibility and plug‑and‑play setup. You connect a VHS, VCR, Hi8, or DV tape device via RCA or S‑Video, then plug the USB output to your computer. It supports NTSC and PAL and outputs HD 720P through the RCA input. Use the included acquisition software, such as OBS Studio or PotPlayer on Windows, or QuickTime on Mac. No power adapter is required; the device is recognized automatically. Adjust brightness, contrast, hue, and saturation as needed, and save the file to your chosen folder.
- Input Type:RCA, S-Video
- Output Type:USB output (HD 720P)
- Recording/Storage medium:USB output to PC/Mac (no built-in storage)
- Power/Driver Requirement:Plug and play; no power required
- Software/Setup Needs:Acquisition software required (OBS/PotPlayer or QuickTime)
- Target Formats/Standards:NTSC/PAL; 720P; RCA to USB
- Additional Feature:Mac/Windows compatibility
- Additional Feature:Plug&Play USB capture
- Additional Feature:NTSC/PAL format support
Portta VHS to Digital Converter with Screen
Portta VD22P stands out for its built-in 5-inch HD screen, which lets you preview and verify your digitized footage in real time. You connect a VHS or other analog device, then use the built-in screen to monitor during recording. It converts VHS, Hi8, Mini DV, DVD, camcorders, and retro consoles to MP4 with Full HD 1080p at 60fps. Use the adjustable brightness, contrast, and saturation to improve images before saving. Save files directly to USB drives, TF cards, portable HDDs, or SSDs. It supports AV and Component inputs, PAL/NTSC/SECAM, and stereo audio for easy transfers. Tape players aren’t included.
- Input Type:AV (CVBS), Component (YPbPr)
- Output Type:MP4
- Recording/Storage medium:USB flash drives, TF cards, portable HDD/SSD
- Power/Driver Requirement:External power not specified (implied)
- Software/Setup Needs:Noted as device with preview screen; software not required
- Target Formats/Standards:PAL/NTSC/SECAM; 1080p60; AV/Component
- Additional Feature:5″ HD preview screen
- Additional Feature:Real-time playback during recording
- Additional Feature:AV and Component inputs
Portta VHS to Digital Converter with 128GB USB Drive
Portta’s VHS to Digital Converter with a 128GB USB drive is ideal if you need a self-contained, plug-and-play solution that digitizes analog video without a PC. You connect AV or S-Video sources to the converter, power it, and insert the USB drive. Choose MP4 for video and MP3 for audio, then set output up to 1080P/30Hz. Use NTSC or PAL formats as appropriate. Record by pressing the capture button, then review on the built-in LCD and speaker. Transfer files to your computer later, or view directly from the USB drive. Make sure the included 128GB USB 3.0 drive remains connected during capture.
- Input Type:AV/RCA, S-Video, AUX
- Output Type:MP4 (on USB 3.0 drive)
- Recording/Storage medium:USB 3.0 128GB flash drive included
- Power/Driver Requirement:External power provided via included adapter
- Software/Setup Needs:Software not required; plug and play
- Target Formats/Standards:NTSC/PAL; MP4/MP3; 1080P30
- Additional Feature:Includes 128GB USB drive
- Additional Feature:USB 3.0 flash storage included
- Additional Feature:Remote, AV, and 3.5mm cables bundled
VHS to Digital Converter with 4″ HD Screen
The VHS to Digital Converter with a 4″ HD Screen stands out for users who want an all-in-one conversion solution without a computer. You connect your VHS or mini DV device, then choose 1080P or auto-detect NTSC/PAL. Use the 4″ LCD to preview, and rely on built-in speakers for quick checks. Insert a USB drive or TF card up to 512G to store recordings, with auto-split options by length or size. Use independent video and audio recording modes, S-Video/CVBS, or AUX input as needed. HDMI outputs let you view on a TV, while a 5V power supply keeps it ready.
- Input Type:AV (CVBS), S-Video
- Output Type:Recorded digital video files (HD 1080P)
- Recording/Storage medium:USB drives/TF cards (up to 512GB supported)
- Power/Driver Requirement:No PC/software required; power not specified
- Software/Setup Needs:Acquisition software recommended; driver not required
- Target Formats/Standards:NTSC/PAL; 1080P; 4″/HDMI output
- Additional Feature:4″ preview LCD
- Additional Feature:HDMI output to TV/monitor
- Additional Feature:Auto-split recording by length/size
Video Tape Transfer Service to Digital MP4
If you’re transferring analog tapes to MP4, this service stands out for its broad format support and reliable delivery to mobile and computer devices. You mail your tapes to Time To Remember, and you choose from formats like VHS, VHS-C, 8mm, Video-8, Hi-8, Digital 8, and MiniDV. The result is an MP4 file accessible on phones, tablets, and PCs. Turnaround is within 10 business days after receipt. Each tape includes 30 days cloud delivery via Google Drive. You get one tape per transfer, plus free media recycling. Instructions arrive within hours of purchase, clarifying steps and delivery specifics.
- Input Type:Not a hardware converter (service) – N/A
- Output Type:MP4 file delivery
- Recording/Storage medium:Cloud-delivered MP4 (not local storage)
- Power/Driver Requirement:N/A (service)
- Software/Setup Needs:Input instructions; cloud delivery only
- Target Formats/Standards:Standard MP4 delivery at 640×480
- Additional Feature:Cloud delivery included
- Additional Feature:10-business-day turnaround
- Additional Feature:Free media recycling
Factors to Consider When Choosing Mini DV Digital Converter
Start by checking Format Compatibility to ensure the converter supports Mini DV, then review Connection Options to confirm USB, HDMI, or FireWire inputs meet your setup. Next, verify Power Requirements and whether you need an external power supply or battery, and compare Recording Quality and Storage Capacity to match your desired resolution, bitrate, and file sizes. Finally, match these factors to your workflow by listing the steps to test each option with your source tape, computer, and preferred storage method.
Format Compatibility
Format compatibility matters most when choosing a Mini DV digital converter. Ensure the device supports RCA (CVBS) and S-Video inputs, and outputs via USB or SD card for Mini DV and other analog formats. Verify it handles NTSC and PAL formats, including NTSC-M/J 3.58 and PAL B/G/H/I/D, to cover common tapes. Check recording output formats; select MP4 with AAC/MP3 audio or LPCM 2-channel audio for broad playback. Confirm the unit can output to USB drives or TF cards with no practical capacity limit, noting larger storage may need external power. Look for built-in HDMI or USB-C only if you require direct digital transfer to displays or editors; otherwise rely on PC/Mac capture workflows. Follow these steps to compare models and confirm compatibility.
Connection Options
Consider your connection needs and choose a converter with the right input and output ports. Start by identifying display or computer connections you will use. If you plan to view on a TV or monitor, look for HDMI output or built-in HDMI pass-through. For computer capture, check HDMI, USB-C, or USB-A options that enable direct transfer or recording. Analog users should verify RCA composite (CVBS) or S-Video inputs, and note whether an AUX audio input is included for stereo sound. Some models include a built-in USB output, enabling direct PC or Mac recording without adapters. USB-powered units save space, while external power adapters support continuous recording. Assess compatibility with your devices, then choose a converter that matches your most frequent workflow and port availability.
Power Requirements
Power draw matters for reliable capture. Most mini DV digital converters are single-device units that need a dedicated 5V power supply or USB power, not from the DV tapes. Check if the model includes an AC adapter or a USB-C/USB-A cable, or if it’s USB-powered and may require an external power bank for longer use. If you use tape decks with limited USB or DC output, verify the converter’s power draw in watts and ensure your supply can provide that amount to avoid dropouts. Some converters offer pass-through recording with a built-in battery or optional external power accessory for mobile setups, affecting portability and duration. Insufficient or unstable power causes glitches, corrupted files, or incomplete captures. Use a stable, adequately rated power source.
Recording Quality
Recording quality hinges on how well the converter handles both video and audio. You start by checking video resolution support, aiming for up to 1080P 30Hz when possible, and confirm that your source matches that target. Next, evaluate analog-to-digital conversion for audio, ensuring the device samples at 48 kHz with 2-channel LPCM output for clear sound. If available, enable real-time preview to verify framing and exposure before recording, reducing post-production fixes. Look at recording behavior: some units auto-split by length or size, which can affect continuity and compression decisions later. Verify input formats (CVBS, S-Video, AUX) and unmuted volume to preserve full color and detail. Finally, test outputs in MP4 for video and MP3 for audio to confirm fidelity.
Storage Capacity
Storage capacity directly affects how long you can record before swapping media. You should look for converters that support large USB drives or SD cards, which extend recording time without swapping. Consider devices that handle 512GB or more to maximize total footage at 1080p/30fps. Understand how built-in previews help; use them to review clips without transferring files, preserving capacity by avoiding interim dumps. Plan your setup with an external power supply for high-capacity storage to prevent drive power issues and ensure stable long recordings. Choose file formats like MP4 for video and MP3 for audio to balance compression and quality, maximizing usable footage per storage unit. Verify media compatibility, portability, and reliability before purchase. Implement a storage strategy that matches your recording sessions.
Editing Software
When selecting editing software to pair with your Mini DV converter, start by confirming you have acquisition software that can import both video and audio streams from the capture device into your computer. Acquisition software is required to use most DV capture devices, enabling playback and editing workflows. On Windows, consider OBS Studio or PotPlayer as options; on Mac, QuickTime Player is common. Install the driver automatically after connecting the device, or prepare for manual installation if needed. Check compatibility with your OS version, noting older systems may have limited support. Use editing software that lets you adjust brightness, contrast, hue, and saturation before or during editing. Ensure the software supports importing DV files and exporting to your preferred formats for archival or sharing.
Display And Control
To choose a Mini DV converter with solid display and control, start by verifying on-device monitoring and controls. Look for a clear built-in display or reference screen to monitor real-time playback and recording status. Ensure on-device controls exist for start/stop recording, input source selection (S-Video, AV/CVBS, or AUX), and basic image adjustments like brightness, contrast, and saturation. Check that HDMI or USB output options are included for live viewing on a TV or computer and for file transfer. Prefer a preview LCD or screen in the 4–5 inch range for convenient on-the-spot monitoring. Confirm built-in speakers or reliable audio monitoring via the R/L or AUX inputs to maintain audio sync and quality during transfer.
Durability And Warranty
Durability and warranty should be evaluated before you buy. Start by checking a minimum 2-year warranty to cover hardware and internal components. Confirm if the warranty includes lifetime technical support for setup questions and troubleshooting. Assess connector durability (AV, USB, HDMI) and the housing build quality to withstand repeated plug‑in and unplug cycles. Look for terms that specify coverage for parts and labor, and note whether accidental damage or misuse is included or excluded. Verify the warranty’s claim process and required steps for service. Ensure the terms mention whether you’ll receive prompt replacements or repairs. Check for responsive customer service with documented response times, so you know how quickly you’ll get help if issues arise. Choose the model that aligns with long-term support and sturdy construction.
Final Thoughts
To wrap up, choose your path based on needs and budget. If you want simple, plug‑and‑play, pick a Portta converter with a built‑in screen or 128GB USB drive for quick transfer. For PC or Mac control, use the USB capture card and follow its software setup steps. If you need professional results, consider a transfer service and compare costs. Verify outputs, test a short clip, then proceed with full transfers in logical, repeatable steps.
Meet Ry, “TechGuru,” a 36-year-old technology enthusiast with a deep passion for tech innovations. With extensive experience, he specializes in gaming hardware and software, and has expertise in gadgets, custom PCs, and audio.
Besides writing about tech and reviewing new products, he enjoys traveling, hiking, and photography. Committed to keeping up with the latest industry trends, he aims to guide readers in making informed tech decisions.