PNG is short for Portable Network Graphic. This is a popular image format, used primarily by the Apple iPhone, but also by other platforms. PNG files utilize a form of lossless data compression, which provides a good balance between size and quality.
That said, they can be confusing to some people. Since PNG is relatively new, not everyone is as familiar with it as they are with the popular JPG format. So it can be frustrating when you go to open a file, only to find that it’s in PNG format.
Whenever you take an iPhone screen capture, the image is automatically saved to the Camera Roll in PNG format. You can then open it on your phone and view it without the need for any third-party software.
No, that was not a misprint. The iPhone supports the PNG format right out of the box. So get out of the app store, and get ready to vies your PNG image. We’re about to walk you through the entire process. Along the way, we’ll also learn a little bit more about the PNG format, as well as some alternatives. We’ll even talk about how to use a PNG on an Android.

How to Display a PNG on an iPhone
So, how do you display a PNG file on your iPhone? To begin with, you need to have a PNG file to open. This can be a screen capture, saved on your Camera Roll. However, it could also be a file you’ve downloaded, or a picture sent from a friend. If the file hasn’t already been added to your Camera Roll, the first step is to add it. Touch and hold on the image, and wait for the menu to pop up. Select the “Save Image” option.
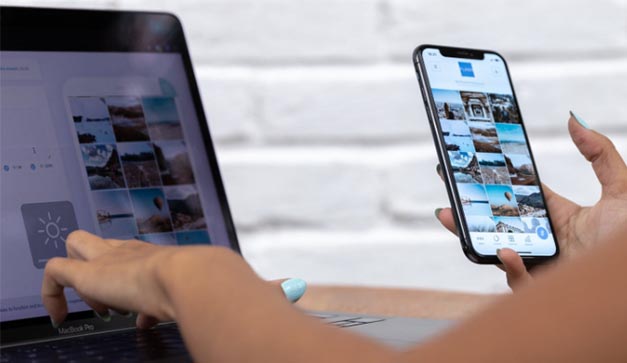
Once the image is saved to your Camera Roll, it’s time to open it up. To do that, open your Camera app, and tap the Camera Roll button. Now, it’s time to find the file you want. If you just saved it, it should be immediately visible. If it’s not, swipe left until you see the image you were looking for. This view will include all your files, not just PNG files. So if you’ve got a lot of photos, it can take a minute to find the one you want.
When you find the picture, tap the picture of an arrow in a box. This will bring up a number of options of things you can do with your photo. You’ll have a number of choices, including sharing with family and friends. You can also assign the image to one of your contacts as their personal photo. Finally, it can be set as your background image on your Home or Lock screen. Basically, anything you can do with other types of picture, you can also do with a PNG image.

How to Display a PNG on an Android Phone
Just like iPhones, modern Android devices already provide native support for PNG files. You don’t have to download any third-party apps or pay any money. All you have to do is open the image in your Gallery. To access your Gallery, click the Apps icon on your home screen. This will bring up a list of all your Android apps. Look for the icon for the Gallery app, and click that one.
Inside of your gallery, you’ll see that your images have been sorted into albums. These albums are based entirely on where your image has been stored. Because of the diverse nature of Android apps and distributions, it’s hard to say where your image will be. That said, if it’s just been downloaded, it will usually be in the Downloads or Pictures folder. If it’s one you edited and saved yourself, you’ll need to do a little poking around. When you open an album, you’ll see a series of thumbnail previews of all the pictures inside. Use these to find the one you need.
To open your file, just tap on the thumbnail for the image you want to view. From there, you can send it to friends, or set it as your background image. If you want to perform any edits, you can click on the pencil icon. This lets you do basic things like crop and resize your image, but not much else. You can even print directly from your phone, if you’ve got a small mobile printer.

PNG vs JPG vs GIF vs BMP
So, what separates the PNG file format from other, similar image formats? Let’s look at the most popular alternatives: JPG, GIF, and BMP. Here’s where each one stands out, and where they fall short.
PNG is a lossless compression file format, which means two things. First, it’s lossless. There’s no loss of information or quality from a similar, uncompressed image. Second, it’s compressed. This makes it smaller than that same uncompressed image. This gives you the best of both worlds: a high-quality image that takes up as little space as possible In addition, it also allows for transparency. As a result, it’s often used by visual artists who need to combine multiple images.
JPG, on the other hand, is a lossy compressed file format. “Lossy” means that there’s a loss of quality from the original, uncompressed image. That said, JPG files can be compressed far more than a PNG. This makes them popular for web use, since they’re fast to download and don’t take up much data. If you look at almost any image on most websites, it’s going to be a JPG. Because of the loss in quality, most people don’t edit with JPGs. They use higher-quality formats, and export a JPG version of the final product if necessary.
The GIF format is another popular choice for web use. It’s a lossless compression format, which would theoretically make it highly accurate. However, it’s an older format, and it only uses 256 colors. As a result, despite being “lossless,” images have noticeably less quality than equivalent PNG images. On the other hand, much like JPGs, GIFs take up very little space. If you have a simple image like a line drawing or a logo, a GIF can make sense. For these kinds of basic images, GIFs can get you PNG quality at a much smaller file size. Finally, GIFs can incorporate motion, which PNGs cannot.
BMP files are uncompressed and lossless. Much like PNG files, the image quality is going to be as good as possible. However, since BMP files are uncompressed, they also take up a lot more space than PNGs. They also don’t support transparency, which PNGs do. The only real reason to use a BMP file is for compatibility reasons.
Final Verdict
A PNG file is a great choice for any type of digital art. You can easily manipulate them in your favorite editing program, whether on your phone or on a drawing pad. To be fair, the format is far from perfect. PNG files are not as small as JPG files, nor do they have the same richness as BMPs for photo editing. At the same time, the lossless compression provides a near 1-to-1 copy of the original, at a smaller size. Not only that, but you get support for transparency. And with both iPhone and Android compatibility, the model of your smartphone won’t be a concern.
Meet Ry, “TechGuru,” a 36-year-old technology enthusiast with a deep passion for tech innovations. With extensive experience, he specializes in gaming hardware and software, and has expertise in gadgets, custom PCs, and audio.
Besides writing about tech and reviewing new products, he enjoys traveling, hiking, and photography. Committed to keeping up with the latest industry trends, he aims to guide readers in making informed tech decisions.

