The Nintendo Switch is the fifth best-selling video game console of all time. It’s also the best-selling console – so far – of the current generation.
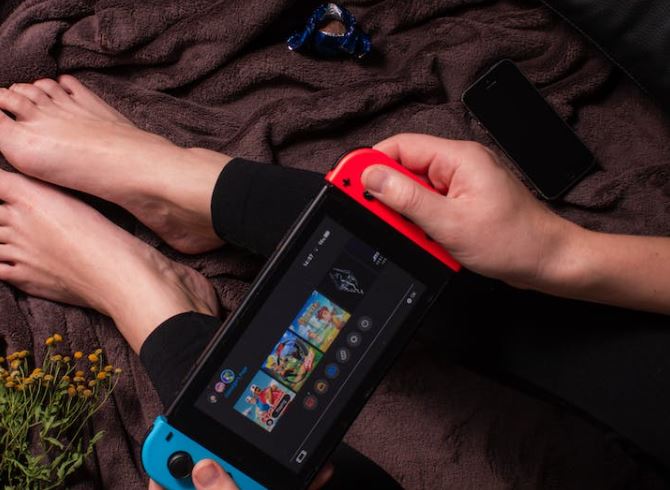
A quick glance is enough to reveal why. Nintendo has perfectly bridged the gap between handheld and console gaming. You can dock the console and play on your TV in 1080p. Or you can take it on the road and enjoy the built-in 720p display. It’s all up to you.
That said, the Switch is starting to show its age, especially the original model, which debuted in 2017. That’s not to say it’s going to be obsolete any time soon.
New AAA games continue to see Switch releases, and will continue to do so for the next several years. But as your system ages, it experiences wear and tear.
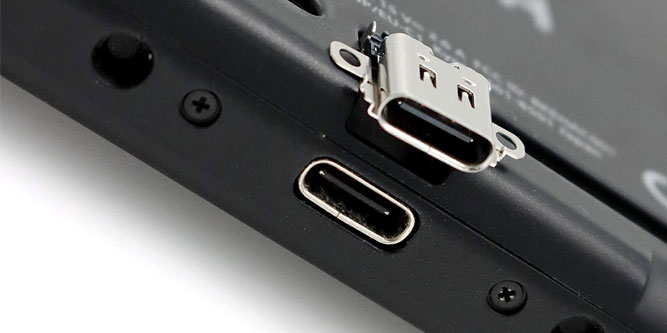
Perhaps no part is more subject to wear than the USB Type-C port. It gets used every time you dock or undock, or plug directly in for charging.
Thankfully, USB Type-C ports are way cheaper than buying a new console.
We’re about to review three of the best replacement Nintendo Switch USB-C charging ports we could find. Specifically, we found one each for the Nintendo Switch, Switch Lite, and Switch OLED. Let’s take a look at all three!
Deal4GO Nintendo Switch Original Type-C Charging Port Replacement
Deal4GO is known for making high-quality replacement ports for consoles and computers. Not long ago, we reviewed their replacement Xbox One HDMI port, and we liked what we saw. So when we saw that they manufacture USB Type-C ports for the Nintendo Switch, we wanted to check them out.
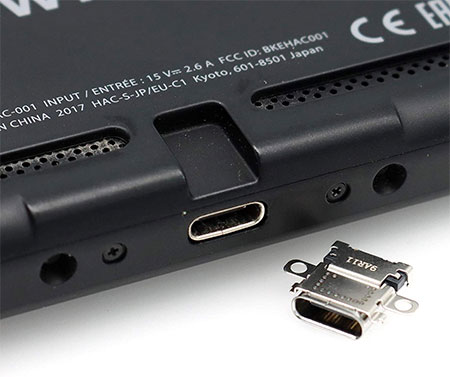
The Deal4GO Nintendo Switch Original Type-C Charging Port Replacement is a basic female USB Type-C port. It has a sturdy aluminum frame that can stand up to years of daily use.
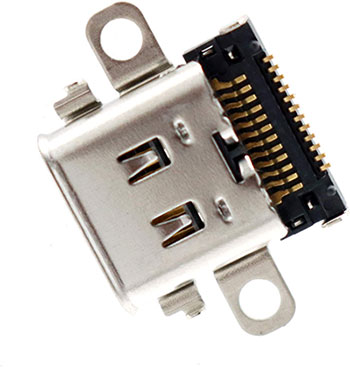
It’s also built specifically for the Nintendo Switch. There are flanges to either side that are designed to solder to the mounting points on the motherboard. On the back, there’s a row of metal pin connectors that fit perfectly with their opposite numbers.
One thing to keep in mind is that this port is designed for the original Nintendo Switch only. You can jury rig it into the Switch Lite or Switch OLED if you have to, but it’s less than ideal. The port won’t fit correctly in the housing, and it will be awkward to plug in. It will also be susceptible to damage. So you should really stick with a port that’s designed for your Switch model.
Another thing we should point out is that replacing any Switch USB-C port requires a hot air soldering station. Unless you have one – and the skills to use it – you’ll need to have the port replaced by a professional.
Deal4GO Nintendo Switch OLED Type-C Charging Port Replacement
The Deal4GO Nintendo Switch OLED Type-C Charging Port Replacement is superficially similar to their original Switch port. It’s mad entirely from aluminum, with a rugged, durable design, and a set of contact pins at the back.
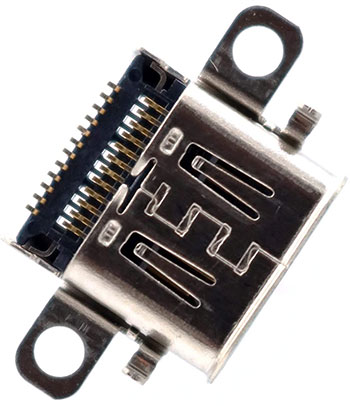
That said, the form factor is subtly different. That’s because it’s engineered to fit perfectly in the Nintendo Switch OLED console. As before, you could theoretically use it with other Switch models, but you’d run into issues.
Most people buy a Switch OLED because of it’s gorgeous display – it’s in the name! If you want to keep your screen safe from scratches, consider a Nintendo Switch OLED screen protector. Applying a screen protector is way cheaper and easier than replacing a scratched-up display.
IKPEK Nintendo Switch Lite Type-C Charging Port Replacement
The IKPEK Nintendo Switch Lite Type-C Charging Port Replacement is another female USB Type-C port. While it comes from a different manufacturer, it’s hard to tell apart from the other two ports at close glance. The only difference is some minor changes to the form factor.

Once again, the reason for the change in shape is that the port is being used in a different console. This port is designed for the Nintendo Switch Lite, and will work poorly on other Switch versions.
If your Switch’s USB port has worn out, there’s a good chance the case is also starting to show some wear. To give your console a makeover, check out our list of the best replacement housing for Nintendo Switch Lite. At least one of them should be a good choice for you.
How to Change Your Nintendo Switch USB-C Port
Before you start taking apart your Nintendo Switch, you should know what you’re getting into. Unlike a lot of parts replacements, the Switch USB-C port isn’t a drop-in part. It needs to be soldered in, and the pins are very tiny.
No matter how skilled you are, you won’t be able to do the job without a hot-air soldering station. If you don’t own one – or don’t know how to use it – you’re better off going to a professional.
But let’s say you have the equipment and you’re confident in the skills. In that case, you’ll also need the following tools:
- Philips #000 screwdriver
- Nintendo Y-shaped screwdriver
- Tweezers
- Plastic spudger
Make sure your Switch is powered off, and remove your Joy-Con controllers. Then you’ll be ready to start.
Accessing the Case
Remove the two small Philips screws on either side of the USB-C port. Then work your way around the edge of the case, removing all the screws as you go. Next, remove the screws on the back of the case. Don’t forget the one under the kickstand! At that point, the back of the case should easily pop off. If it’s sticking, double-check that you didn’t miss any screws.
Inside the case, you’ll see a large aluminum plate, with a tiny Micro SD card reader near one corner. Remove the screw that’s holding it in place. Then use your tweezers to lift the reader directly up and set it aside.
When you reassemble the Switch, you’ll have to press down hard to make sure the reader is seated. There’s a piece of foam cushion that needs to be firmly compressed to properly seat the plug. Some guides recommend removing this foam during reassembly.
Now, unscrew the six screw holding the aluminum shield in place. Stick your spudger under the edge of the shield, and pry upwards. When you do this, it’s normal to feel some resistance. That’s the layer of thermal paste between the shield and the heat sink.
Keep in mind that this disruption will ruin the integrity of the paste. During reassembly, you’ll need to clean the heat sink and shield and apply a new layer of thermal paste.
Removing the Motherboard
Now you’ll see all the Switch’s internal components. To complete the repair, you’ll have to remove the motherboard, which is large and green. Unfortunately, there are several components blocking the motherboard, and you’ll need to get them out of the way first.
To begin with, use your spudger to pry the batter cable out of the socket on the motherboard. This is important, since it de-energizes the electronics and reduces the risk of shock.
Now remove the three screws that are holding the heat sink in place, but don’t remove it yet. Instead, find the two foam pieces that cover parts of the fan, and peel them back. Don’t peel them out all the way, or they’ll be a pain to put back in.
Just peel enough that you can remove the fan. You may need a spudger to pry the heat sink loose. There’s a layer of thermal paste on the bottom which, once again, will need to be reapplied during reassembly.
Next, find the cable that runs from the game card reader to the digitizer. The game card reader is the smaller green board in front of the motherboard. At the end of the cable is a slide connector. Carefully unfasten it with your tweezers. Then, use your spudger to pry loose the connector between the game card reader and the motherboard.
Unscrew the game card reader; there are three screws. Then use your tweezers to remove the bracket that secures the headphone jack. At that point, you can pull the game card reader out of the system. The audio jack will come along with it.
At this point, you’ll still need to remove a number of connectors that tie the motherboard into other components. Once that’s done, you can unscrew the board and lift it out.
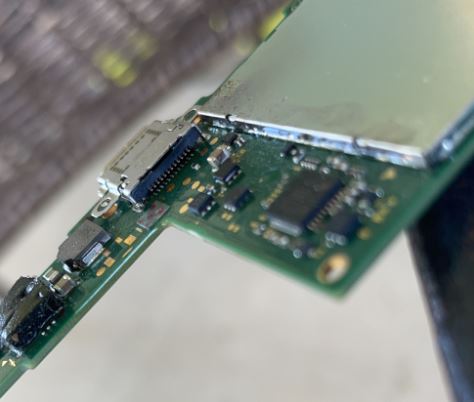
Replacing the Port
You’re finally ready to replace the USB Type-C port. Use flux and your air soldering tool to loosen the old connection points and pin connections. Be careful! You don’t want your board to warp or bubble.
As soon as the solder is soft, pull out the old USB port and let the board cool. Then check the bottom pins and make sure each one has sufficient solder on it. Apply more if needed. Then heat up the board again until the solder becomes shiny. Use your tweezers to carefully position the new port while your solder is still molten.
Wait for the solder to dry, flip over the board, and make sure your pin connections are good. You can use a magnifying glass, then press the pins with a tweezer. As long as they don’t move, they’re secure. Now all you have to do is reassemble the Switch!
Final Verdict
In most cases, delivering a final verdict means comparing different features, benefits, and drawbacks. In this case, there’s only one deciding factor: which model Nintendo Switch do you own?
- If you own an original Nintendo Switch, you need the Deal4GO Nintendo Switch Original Type-C Charging Port Replacement.
- If you own a Switch OLED, the Deal4GO Nintendo Switch OLED Type-C Charging Port Replacement is the best choice.
- If you own a Switch Lite, look no further than the IKPEK Nintendo Switch Lite Type-C Charging Port Replacement.
That’s all there is to it! Provided you can perform the repair – or pay a professional to do it – you’ll be gaming again in no time.
Meet Ry, “TechGuru,” a 36-year-old technology enthusiast with a deep passion for tech innovations. With extensive experience, he specializes in gaming hardware and software, and has expertise in gadgets, custom PCs, and audio.
Besides writing about tech and reviewing new products, he enjoys traveling, hiking, and photography. Committed to keeping up with the latest industry trends, he aims to guide readers in making informed tech decisions.